Dynex DX-PDVD9 User Manual (English)
Dynex DX-PDVD9 - DVD Player - 9 Manual
 |
View all Dynex DX-PDVD9 manuals
Add to My Manuals
Save this manual to your list of manuals |
Dynex DX-PDVD9 manual content summary:
- Dynex DX-PDVD9 | User Manual (English) - Page 1
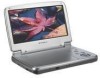
9" Portable DVD Player Lecteur de DVD portatif de 9 pouces Reproductor de DVD portátil de 9" DX-PDVD9 USER GUIDE GUID E DE L' UTI LISAT EU R • GUÍ A DE L USUA RIO - Dynex DX-PDVD9 | User Manual (English) - Page 2
- Dynex DX-PDVD9 | User Manual (English) - Page 3
of this high-quality Dynex product. Your DX-PDVD9 represents the state of the art in portable DVD player design, features a 9" wide screen (16:9 aspect ratio) LCD, and is designed for reliable and trouble-free performance. Contents Safety precautions 3 DVD player components 6 Setting up your - Dynex DX-PDVD9 | User Manual (English) - Page 4
exposure near rain or water • Power sources-This player operates on an AC power adapter, car adapter, or rechargeable battery. • Make sure that the input voltage of the AC power adapter is compatible with the local voltage. Otherwise, the AC power adapter and the player may be damaged. Warning: To - Dynex DX-PDVD9 | User Manual (English) - Page 5
: • When the power supply cord or plug is damaged • If liquid has been spilled or objects have fallen into the player • If the player has been exposed to rain or water • If the player does not operate normally by following the operating instructions, adjust only those controls that are covered by - Dynex DX-PDVD9 | User Manual (English) - Page 6
switch (next) button (previous) button (stop) button Function or control Lights green when the power is on. Receives signals from the remote control. Opens the disc tray. Connects to the AC power adapter. Lights red when the battery is charging. Connects to an external A/V device, such as a monitor - Dynex DX-PDVD9 | User Manual (English) - Page 7
DVD player components 7 Item Name 14 Menu 15 Wide button 16 (Direction buttons) and (play/pause) button Remote control Function or control Accesses the DVD menu. Switches the LCD screen between 16:9 and 4:3 screen display. Navigates on-screen menus. The (play/pause) button plays or pauses - Dynex DX-PDVD9 | User Manual (English) - Page 8
the DVD to play. The player is coded for Region 1. Only DVDs that are coded for Region 1 play in this player. Setting up your DVD player Box contents Make sure that the box contains the following items: • DVD player • A/V cable • Remote control with battery (CR2025) • User Guide • AC power adapter - Dynex DX-PDVD9 | User Manual (English) - Page 9
making connections: - Turn off the DVD player and other equipment. - Fully insert the plug. - Hold the plug while unplugging the cord. Do not pull the cord. Connecting to the AC power adapter To connect the AC power adapter: 1 Make sure that the supplied AC power adapter is correct for your local - Dynex DX-PDVD9 | User Manual (English) - Page 10
extended period of time. Tip: Generally, batteries last for about one year. Replace the batteries if the remote control does not work. Playing video and audio discs Turning on the player To turn on the player: 1 Open the LCD screen. 2 Turn on the player. The power LED lights green and the LCD screen - Dynex DX-PDVD9 | User Manual (English) - Page 11
player or remote control. Pausing discs To pause a disc: 1 When playing a disc, press (play/pause) to pause playback. 2 Press (play/pause) again to resume playback. Removing discs from the player To remove a disc from the player to the AV OUT jack on the DVD player. • Connect the yellow plug to the - Dynex DX-PDVD9 | User Manual (English) - Page 12
Connect black mini-plug to the AV OUT jack on the DVD player. • Connect the yellow plug to the VIDEO IN jack on menu: 1 With no disc in the player, press SETUP on the remote control or MENU on the player. The General Setup Page of player is connected to a normal TV. Wide-screen images are shown - Dynex DX-PDVD9 | User Manual (English) - Page 13
image is frozen for about five minutes. On-Enables the screen saver. Off-Disables the screen saver. Last Memory On-The player returns to the last position on the disc. Off-The player does not return to the last position on the disc. Note: The last position memory function is only activated when the - Dynex DX-PDVD9 | User Manual (English) - Page 14
14 Advanced setup Setting video quality To change video quality settings: 1 Access the Setup menu as described in "To access the setup menu:" on page 12. 2 Press or to highlight the Video icon and select Video Quality Setup, then press ENTER. The Video Quality Setup page opens. .. Video Quality - Dynex DX-PDVD9 | User Manual (English) - Page 15
Enter the old (or default) password using the number buttons on the remote, then enter the new password in the spaces provided. Note: The default Options include: • Audio (language) • Subtitle (language) • Disc Menu (language) • Parental (control) • Default 4 Press to enter the selected sub-menu. 5 - Dynex DX-PDVD9 | User Manual (English) - Page 16
available on each DVD. If you select a language that is not available, the player plays and displays on the screen in the original recorded language contained on the disc. Audio (language) Subtitle (language) Disc menu (language) Parental (control) - Available control levels include: • 1 - Kid - Dynex DX-PDVD9 | User Manual (English) - Page 17
chapter • Chapter Remain-The remaining time of the chapter • Display Off-The DVD's time Information turns off To change the viewing angle: 1 During disc playback, press ANGLE to show the available angles for discs containing multiple angles. The current angle number and the total number of angles - Dynex DX-PDVD9 | User Manual (English) - Page 18
disappears automatically if the AUDIO button is not pressed again within three seconds. Note: Some DVDs only allow access to this feature through the DVD menu. To select a different zoom multiple: 1 During disc playback, press ZOOM to select the zoom multiple you want. Pressing ZOOM once enlarges - Dynex DX-PDVD9 | User Manual (English) - Page 19
the program gets to the ending point (B). The player plays the segment between point A and point B repeatedly. AB 3 To cancel A-B Repeat and resume normal playback, press A-B again. To use Repeat to repeat part or all of the DVD: 1 During disc playback, press 1/ALL REPEAT to repeat a portion of - Dynex DX-PDVD9 | User Manual (English) - Page 20
on the CD • Display off-Turns off the display. To repeat all or part of the CD: 1 During CD playback, press 1/ALL REPEAT to repeat a audio quality, while taking up much less disc space. CD-R /RW discs that have been encoded in MP3 format are compatible with this player. 02:13.04:10 Root Track 1 - Dynex DX-PDVD9 | User Manual (English) - Page 21
all or part of the MP3 disc: 1 During MP3 playback, press 1/REPEAT to repeat a portion of the MP3 disc. 2 Dynex's policy of constant improvement and technical refinement, Dynex reserves the right to change or alter software. Maintaining Handling and cleaning discs Handling discs • To keep a disc - Dynex DX-PDVD9 | User Manual (English) - Page 22
region. If the region codes do not match, the disc cannot be played. This player is coded for Region 1 discs. Remote control does not work • Remove obstructions between the remote control and the player. • Point the remote control at the remote control sensor of the player. • Replace the batteries - Dynex DX-PDVD9 | User Manual (English) - Page 23
of the DVD player. • Make sure that the battery is fully charged. • Make sure that the battery and AC power adapter are not both plugged in. If so, disconnect the AC power adapter. Specifications Laser Video system Compatible discs Frequency response Signal/noise ratio Dynamic range Power supply - Dynex DX-PDVD9 | User Manual (English) - Page 24
in the instruction manual.The user player. Laser safety Location: Inside, near the deck mechanism. This unit employs a laser. Only a qualified service person should remove the cover or attempt to service Use of controls or Dynex. Dynex and the Dynex logo are trademarks of Best Buy Enterprise Services - Dynex DX-PDVD9 | User Manual (English) - Page 25
Dynex Products ("Dynex") warrants to you, the original purchaser of this new DX-PDVD9 9" Personal DVD player ("Product"), that the Product shall be free parts. Products and parts replaced under this warranty become the property of Dynex and are not returned to you. If service of Products and parts - Dynex DX-PDVD9 | User Manual (English) - Page 26
STATE TO STATE OR PROVINCE TO PROVINCE. Contact Dynex: For customer service please call 1-800-305-2204 www.dynexproducts.com DYNEX® is a registered trademark of Best Buy Enterprise Services, Inc. Distributed by Best Buy Purchasing, LLC. Dynex, 7601 Penn Avenue South, Richfield, Minnesota, U.S.A. - Dynex DX-PDVD9 | User Manual (English) - Page 27
acheté ce produit Dynex de haute qualité. Le modèle DX-PDVD9 est la dernière avancée technologique dans la conception de lecteur de DVD portatif; il offre équilatéral prévient l'utilisateur de la présence d'instructions importantes dans le manuel de l'utilisateur livré avec l'appareil concernant - Dynex DX-PDVD9 | User Manual (English) - Page 28
lecteur et dans les instructions de sécurité et fonctionnement. • Suivre les instructions-Toutes les instructions de sécurité et fectueux. • Accessoires - L'utilisation d'accessoires non recommandés par Dynex peut être source de dangers. • Utilisation d'un casque ou une batterie rechargeable. - Dynex DX-PDVD9 | User Manual (English) - Page 29
prise murale ou enlever les batteries rechargeables, quand le lecteur la prise. Si la fiche ne s'adapte toujours pas à la prise murale, secteur et utiliser les services d'un technicien qualifié dans instructions de fonctionnement, ne régler que les commandes indiquées dans le manuel d'instructions - Dynex DX-PDVD9 | User Manual (English) - Page 30
30 Composants du lecteur de DVD • Si le lecteur est tombé ou sil est endommagé de quelque fa pas le fonctionnement. Composants du lecteur de DVD Lecteur de DVD 10 Vue avant Vue d'en haut (avec écran ouvert) PREV NEXT STOP WIDE MENU 11 12 13 14 15 16 POWER OPEN 12 3 Vue latérale DC 9V - Dynex DX-PDVD9 | User Manual (English) - Page 31
Composants du lecteur de DVD 31 Élément Nom Fonction ou commande 4 Prise d'entrée CC Pour la connexion à l'adaptateur d'alimentation CA 5 Témoin de charge à DEL S'allume quand la batterie se recharge. 6 Prise de sortie A/V Pour la connexion à un périphérique A/V, tel qu'un moniteur ou - Dynex DX-PDVD9 | User Manual (English) - Page 32
Touche (précédent) Pour revenir au chapitre ou à la scène précédente d'un DVD ou à la piste précédente d'un CD. 4 Touche (vers le Appuyer sur Touche (lecture/ Permet de commencer la lecture. Lors de la lecture d'un DVD, permet pause) d'arrêter momentanément la lecture. Appuyer de nouveau - Dynex DX-PDVD9 | User Manual (English) - Page 33
(selon modèle). Codage régional et compatibilité L'appareil et les disques DVD comportent un code régional. Ces codes régionaux doivent correspondre pour permettre la lecture du DVD. Ce lecteur est codé pour la Région 1. Seuls les disques DVD codés pour cette même Région 1 peuvent être lus sur ce - Dynex DX-PDVD9 | User Manual (English) - Page 34
cautions à prendre pour les connexions : - Mettre le lecteur de DVD et autres périphériques hors tension. - Introduire la fiche à sur une prise secteur CA. Le témoin de charge à DEL devient rouge quand la batterie est sous charge. L'indicateur s'éteint lorsque la charge est complète. 3 Débrancher l' - Dynex DX-PDVD9 | User Manual (English) - Page 35
ère fois, retirer la pellicule en plastique du bas de la batterie pour activer la télécommande. CR2025 Ouvrir Appuyer 2 Utiliser la télé pendant une période de temps prolongée. Conseil : En général, la durée de service d'une pile est d'environ un an. Remplacer les piles si la télécommande ne - Dynex DX-PDVD9 | User Manual (English) - Page 36
36 Configuration avancée 3 Appuyer sur OPEN pour fermer le plateau à disque. L'appareil commence la lecture du disque. 4 Tourner le bouton du VOLUME pour régler le volume (y compris lors de l'utilisation d'un casque d'écoute). Régler le volume sur le périphérique connecté lorsque le lecteur est - Dynex DX-PDVD9 | User Manual (English) - Page 37
connecter le lecteur à un téléviseur et un amplificateur : • Brancher la mini fiche noire sur la prise de sortie audio-vidéo AV OUT du lecteur de DVD. • Brancher la fiche jaune sur la prise d'entrée vidéo VIDEO IN du téléviseur. • Brancher la fiche rouge sur la prise d'entrée droite AUDIO IN R de - Dynex DX-PDVD9 | User Manual (English) - Page 38
38 Configuration avancée Modification des options de configuration Normal/PS (normal/recadrage plein écran) - Sélectionner cette option lorsque le lecteur est connecté à un téléviseur normal. L'écran est compatible avec des images panoramiques mais elles sont rognées automatiquement. Normal/LB ( - Dynex DX-PDVD9 | User Manual (English) - Page 39
Configuration avancée 39 Last Memory (Dernière position mémorisée) On (Activé) - Le lecteur retourne à la dernière position sur le disque. Off(Désactivé) - Le lecteur ne retourne pas à la position antérieure sur le disque. Remarque : La fonction de dernière mise en mémoire n'est activée qu'après - Dynex DX-PDVD9 | User Manual (English) - Page 40
40 Configuration avancée Configuration ou modification du mot de passe Pour configurer ou modifier le mot de passe : 1 Accéder au menu Setup (Configuration) tel que décrit à la rubrique "Pour accéder au menu de configuration :" voir page 37. 2 Appuyer sur ou pour mettre l'icône du cadenas (Lock) - Dynex DX-PDVD9 | User Manual (English) - Page 41
Page). Les options incluent : • Langue de l'audio • Langue des sous-titres • Disc Menu (langue du menu du disque) • Parental (contrôle) • Default (Par dé : Les langues disponibles sont fonctions des langues disponibles sur chaque DVD. Si la langue sélectionnée n'est pas disponible, le lecteur - Dynex DX-PDVD9 | User Manual (English) - Page 42
un endroit non accessible aux enfants. - Le contrôle parental peut ne pas être disponible sur tous les DVD. Options de lecture des DVD Pour accéder au menu racine du DVD : • Appuyer sur MENU pendant la lecture. Un DVD est divisé en sections appelées titres et chapitres. Lors de la lecture d'un - Dynex DX-PDVD9 | User Manual (English) - Page 43
(Durée restante d'un chapitre) - La durée restante du chapitre. • Display Off (Affichage désactivé) - Désactive l'affichage de l'information sur la durée du DVD. Pour changer l'angle de prise de vues : 1 Pendant la lecture d'un disque, appuyer sur ANGLE pour afficher les angles disponibles, si le - Dynex DX-PDVD9 | User Manual (English) - Page 44
si la touche SUBTITLE (Sous-titres) n'est pas appuyée de nouveau dans les trois secondes. Remarque: Certains DVD ne permettent l'accès à cette fonctionnalité que par l'intermédiaire du menu du DVD. Pour sélectionner une langue audio différente : 1 Pendant la lecture du disque, appuyer sur AUDIO pour - Dynex DX-PDVD9 | User Manual (English) - Page 45
d'agrandissement (2×, 3×, 4× et normal). Pour répéter une partie d'un DVD à l'aide de la fonction A-B Repeat (touche Répétition A-B) : 1 Pendant la lecture du disque, appuyer sur A-B pour fixer le point de départ (point A). A 2 Appuyer de nouveau sur A-B lorsque le programme arrive au point final - Dynex DX-PDVD9 | User Manual (English) - Page 46
de la fonction Repeat (Répétition) : 1 Pendant la lecture d'un disque, appuyer sur 1/ALL REPEAT (Répéter 1/Tout ) pour répéter une partie d'un DVD. Chapter 2 Appuyer plusieurs fois sur 1/ALL REPEAT pour faire défiler les paramètres disponibles. • Chapter (Chapitre) - Pour répéter le chapitre en - Dynex DX-PDVD9 | User Manual (English) - Page 47
Configuration avancée 47 2 Appuyer plusieurs fois sur 1/ALL REPEAT pour faire défiler les paramètres disponibles. • Track (Piste) - Pour répéter la piste en cours. • All (Tout) - Permet de répéter tout le CD • Repeat off (Désactivation de la fonction Répétition) - Désactive la fonction Répétition - Dynex DX-PDVD9 | User Manual (English) - Page 48
En raison de la politique de Dynex de sans cesse tenir compte des derniers développements technologique, Dynex se réserve le droit de remplacer • Veiller à utiliser le téléviseur ou l'amplificateur selon les instructions. Pas d'image • Vérifier que le lecteur est correctement branché. • Veiller - Dynex DX-PDVD9 | User Manual (English) - Page 49
le haut). • Vérifier que le type de disque est correct (disques vidéo numériques, CD audio ou MP3). • Le lecteur de DVD et les disques comportent un code régional. Si les codes ne correspondent pas, le disque ne peut pas être lu. Ce lecteur est codé pour la lecture de disques portant le - Dynex DX-PDVD9 | User Manual (English) - Page 50
semi-conducteur Longueur d'onde 650~795 nm NTSC DVD/DVD+R/DVD+RW/DVD-R/DVD-RW/CD/ CD-R/CD-RW/MP3 20 Hz à 20 kHz > 60 dB > 85 dB 9 V CC Batterie Ni-Mh rechargeable 5 à 35 °C (41 soient expressément approuvées dans le manuel d'instruction. L'utilisateur pourrait perdre le droit de faire fonctionner - Dynex DX-PDVD9 | User Manual (English) - Page 51
de dispositif de verrouillage défectueux. Ne pas regarder directement le rayonnement laser. Droits d'auteurs ©2007 Dynex. Dynex et le logo de Dynex sont des marques de commerce de Best Buy Enterprise Services, Inc. Les autres noms de marques et de produits mentionnés sont des marques de commerce ou - Dynex DX-PDVD9 | User Manual (English) - Page 52
52 Droits d'auteurs - Dynex DX-PDVD9 | User Manual (English) - Page 53
53 Garantie limitée de 90 jours Dynex Products ("Dynex") garantit au premier acheteur de ce DX-PDVD9 neuf ("Produit"), qu'il est exempt uvre d'origine est détecté sur le Produit par un service de réparation agréé par Dynex ou le personnel du magasin, Dynex (à sa seule discrétion) : (1) réparera le - Dynex DX-PDVD9 | User Manual (English) - Page 54
UNE PROVINCE À L'AUTRE. Pour contacter Dynex : Pour le service à la clientèle, appeler le 1-800-305-2204 www.dynexproducts.com DYNEXMD est une marque de commerce déposée de Best Buy Enterprise Services, Inc. Distribué par Best Buy Purchasing, LLC. Dynex, 7601 Penn Avenue South, Richfield, Minnesota - Dynex DX-PDVD9 | User Manual (English) - Page 55
Introducción 55 Introducción Felicitaciones por su compra de este producto de alta calidad de Dynex. Su DX-PDVD9 representa el diseño más moderno de reproductor de DVD portátil, cuenta con una pantalla panorámica de 9" (relación de aspecto de 16:9) y está concebido para brindar un rendimiento - Dynex DX-PDVD9 | User Manual (English) - Page 56
Cuidado: Para asegurar el uso apropiado del reproductor, lea este manual cuidadosamente y guárdelo para referencia futura. Si la unidad requiere o un mal funcionamiento. • Aditamentos-El uso de aditamentos no recomendados por Dynex puede causar peligros. • Uso de auriculares • Para evitar un daño al - Dynex DX-PDVD9 | User Manual (English) - Page 57
cubiertos en las instrucciones de operación. El ajuste indebido de otros controles podría ocasionar daños, y con frecuencia necesitará trabajos mayores por parte de un técnico calificado para restaurar el reproductor a su operación normal. • Si el reproductor se ha caído o dañado de cualquier - Dynex DX-PDVD9 | User Manual (English) - Page 58
Reproductor de DVD 10 Vista frontal Vista superior (pantalla abierta) PREV NEXT STOP WIDE MENU 11 12 13 14 15 16 POWER OPEN 12 3 Vista lateral DC 9V CHG AV OUT VOL OFF ON 45 6 7 89 Elemento Nombre 1 Indicador LED de alimentación 2 Sensor del control remoto 3 Interruptor - Dynex DX-PDVD9 | User Manual (English) - Page 59
del reproductor de DVD 59 Elemento Nombre Función o control 6 Toma de salida A/V Se conecta a un equipo de A/V externo, tal cómo un monitor o un amplificador. 7 Toma de auriculares Proporciona señal de salida para los auriculares. Desactiva los altavoces internos. 8 Control del volumen - Dynex DX-PDVD9 | User Manual (English) - Page 60
) 8 Botón (Abajo) 9 Botones numéricos Función o control Presionar para acceder al menú de configuración. Presiónelo para mostrar información (por ejemplo, título, capítulo, pista o tiempo). Presiónelo para regresar al capítulo o escena anterior en un DVD o a la pista anterior en un CD. Permite - Dynex DX-PDVD9 | User Manual (English) - Page 61
(cuando están disponibles) para el DVD. Codificación y compatibilidad regional El reproductor de DVD y los discos están codificados por reproductor de DVD Contenido de la caja Verifique que la caja contiene los siguientes artículos: • Reproductor de DVD • Cable de A/V • Control remoto con - Dynex DX-PDVD9 | User Manual (English) - Page 62
Haciendo las conexiones Nota: Cuando haga las conexiones: - Apague el reproductor de DVD y los otros equipos. - Inserte completamente el enchufe. - Sujete el enchufe mientras desenchufa el cable. No tire del cable. Conexión del adaptador de alimentación CA Para - Dynex DX-PDVD9 | User Manual (English) - Page 63
no se va a usar por un período largo de tiempo. Consejo: Generalmente las baterías duran aproximadamente un año. Reemplace las pilas si el control remoto no funciona. Reproducción de discos de video y audio Encendido del reproductor Para encender el reproductor: 1 Abra la pantalla LCD. 2 Encienda el - Dynex DX-PDVD9 | User Manual (English) - Page 64
un televisor o a un amplificador, ajuste el volumen en el equipo conectado. 5 Detenga la reproducción presionando STOP (Detener) en el reproductor o en el control remoto. Pausa de los discos Para pausar un disco: 1 Cuando se reproduce un disco, presione (Reproducir/Pausar) para pausar la reproducci - Dynex DX-PDVD9 | User Manual (English) - Page 65
el mini conector negro al toma AV OUT (Salida AV) en el reproductor de DVD. • Conecte el conector amarillo al toma VIDEO IN (Entrada de video) en ón: 1 Sin un disco en el reproductor, presione SETUP (Configuración) en el control remoto o MENU (Menú) en el reproductor. La página General Setup Page - Dynex DX-PDVD9 | User Manual (English) - Page 66
opción cuando el reproductor está conectado a un televisor normal. Las imágenes panorámicas se muestran en la pantalla, pero con algunas partes cortadas automáticamente. Normal/LB (Normal/Buzón)-Seleccione esta opción cuando el reproductor esté conectado a un televisor normal. Las imágenes panor - Dynex DX-PDVD9 | User Manual (English) - Page 67
Configuración avanzada 67 Last Memory (Memoria de última posición) On (Activado)-El reproductor regresará a la última posición en el disco. Off (Desactivado)-El reproductor no regresará a la última posición en el disco. Nota: La memoria de última posición sólo se activa cuando la bandeja de discos - Dynex DX-PDVD9 | User Manual (English) - Page 68
Se abrirá la página Password Change (Cambio de contraseña). 4 Ingrese la contraseña antigua (o predefinida) usando los botones numéricos en el control remoto, luego ingrese la contraseña nueva en los espacios proporcionados. Nota: La contraseña predefinida es 3308. 5 Ingrese la contraseña nueva de - Dynex DX-PDVD9 | User Manual (English) - Page 69
Idioma) • Subtitle (Idioma de subtítulos) • Disc Menu (Idioma del menú del disco) • Paternal (Control de los padres) • Default (Valores predefinidos) Nota: Los idiomas disponibles dependen de los idiomas disponibles en cada DVD. Si el idioma seleccionado no está disponible, el reproductor reproducir - Dynex DX-PDVD9 | User Manual (English) - Page 70
le sugerimos que guarde este manual en un lugar fuera del alcance de los niños en su casa. - Puede ser que el control de los padres no esté disponible en todos los DVD. Configuración de las opciones de reproducción de DVD Para acceder al menú principal del DVD: • Presione MENU durante la reproducci - Dynex DX-PDVD9 | User Manual (English) - Page 71
-El tiempo transcurrido del capítulo • Chapter Remain-El tiempo restante del capítulo • Display Off-Se desactiva la información del tiempo del DVD Para cambiar el ángulo de cámara: 1 Durante la reproducción del disco, presione ANGLE (Ángulo) para mostrar los ángulos disponibles en un disco que - Dynex DX-PDVD9 | User Manual (English) - Page 72
desaparecerá automáticamente si no se presiona SUBTITLE (Subtítulos) dentro de tres segundos. Nota: Algunos DVD solamente le permiten acceso a esta función por medio del menú de DVD. Para seleccionar un idioma de audio diferente: 1 Durante la reproducción de disco presione AUDIO para seleccionar - Dynex DX-PDVD9 | User Manual (English) - Page 73
ZOOM repetidamente para seleccionar entre lo múltiplos de aumento (2×, 3×, 4× y Normal). Para usar la repetición A-B para repetir una porción del DVD: 1 Durante la reproducción, presione A-B una vez para establecer el punto de comienzo (A). A 2 Presione A-B de nuevo cuando el programa llegue - Dynex DX-PDVD9 | User Manual (English) - Page 74
74 Configuración avanzada Para usar la repetición para repetir parte o todo del DVD: 1 Durante la reproducción de un disco, presione 1/ALL REPEAT (Repetir 1/Todo) para repetir una porción del DVD. Chapter 2 Presione 1/ALL REPEAT (Repetir 1/Todo) repetidamente para seleccionar entre los ajustes - Dynex DX-PDVD9 | User Manual (English) - Page 75
resaltada. 4 Presione (Siguiente) para moverse a la siguiente pista. - O - Presione (Anterior) para moverse al comienzo de la pista anterior. Para repetir todo o parte de un disco con MP3: 1 Durante la reproducción de MP3, presione 1/REPEAT (Repetir 1) para repetir una porción del disco con MP3 - Dynex DX-PDVD9 | User Manual (English) - Page 76
El icono "MP3" en frente de un elemento indica que ese es un archivo MP3. Nota: Debido a la política de Dynex del mejoramiento y el refinamiento técnico continuo, Dynex se reserva el derecho de cambiar o alterar el software. Mantenimiento Manejo y limpieza de los discos Manejo de los discos • Para - Dynex DX-PDVD9 | User Manual (English) - Page 77
la etiqueta hacia arriba. • Verifique que esté usando el tipo correcto de disco (DVD, CD de audio o con MP3). • El reproductor y el disco están codificados por control remoto no funciona • Retire los obstáculos entre el control remoto y el reproductor. • Apunte el control remoto al sensor de control - Dynex DX-PDVD9 | User Manual (English) - Page 78
por un interruptor). • Si se alimenta con batería: • Asegúrese de que la batería esté firmemente insertada en su lugar en la parte posterior del reproductor de DVD. • Asegúrese de que la batería esté completamente cargada. • Asegúrese de que la batería y el adaptador de alimentación CA no est - Dynex DX-PDVD9 | User Manual (English) - Page 79
Advertencia: El uso de cualquier otro control, ajuste o procedimiento que no se especifique en este manual puede resultar en una exposición peligrosa Derechos de reproducción © 2007 Dynex. Dynex y el logotipo de Dynex son marcas comerciales de Best Buy Enterprise Services, Inc. Otras marcas y nombres - Dynex DX-PDVD9 | User Manual (English) - Page 80
80 Derechos de reproducción - Dynex DX-PDVD9 | User Manual (English) - Page 81
días 81 Garantía limitada de 90 días Dynex Products ("Dynex") le garantiza a usted, el comprador original de este nuevo DX-PDVD9 ("Producto"), que éste se encontrará libre volverán propiedad de Dynex y no se le regresarán a usted. Si se requiere la reparación de Productos y partes después de que - Dynex DX-PDVD9 | User Manual (English) - Page 82
O PROVINCIA A PROVINCIA. Comuníquese con Dynex: Para servicio al cliente favor llamar al 1-800-305-2204 www.dynexproducts.com DYNEX® es una marca de comercio registrada de Best Buy Enterprise Services, Inc. Distribuido por Best Buy Purchasing, LLC. Dynex, 7601 Penn Avenue South, Richfield, Minnesota - Dynex DX-PDVD9 | User Manual (English) - Page 83
Garantía limitada de 90 días 83 - Dynex DX-PDVD9 | User Manual (English) - Page 84
www.dynexproducts.com (800) 305-2204 Distributed by Best Buy Purchasing, LLC 7601 Penn Ave. South, Richfield, MN 55423 U.S.A. Distribué par Best Buy Purchasing, LLC 7601 Penn Ave. South, Richfield, MN 55423 É.-U. Distribuido por Best Buy Purchasing, LLC 7601 Penn Ave. South, Richfield, MN 55423
-
 1
1 -
 2
2 -
 3
3 -
 4
4 -
 5
5 -
 6
6 -
 7
7 -
8
-
9
-
10
-
11
-
12
-
13
-
14
-
15
-
16
-
17
-
18
-
19
-
20
-
21
-
22
-
23
-
24
-
25
-
26
-
27
-
28
-
29
-
30
-
31
-
32
-
33
-
34
-
35
-
36
-
37
-
38
-
39
-
40
-
41
-
42
-
43
-
44
-
45
-
46
-
47
-
48
-
49
-
50
-
51
-
52
-
53
-
54
-
55
-
56
-
57
-
58
-
59
-
60
-
61
-
62
-
63
-
64
-
65
-
66
-
67
-
68
-
69
-
70
-
71
-
72
-
73
-
74
-
75
-
76
-
77
-
78
-
79
-
80
-
81
-
82
-
83
-
84
 |
 |

USER GUIDE
GUIDE DE L’UTILISATEUR • GUÍA DEL USUARIO
9” Portable DVD Player
Lecteur de DVD portatif de 9 pouces
Reproductor de DVD portátil de 9”
DX-PDVD9