EVGA 200-LM-1700-KR Manual
EVGA 200-LM-1700-KR - InterView 1700 - 17" LCD Monitor Manual
 |
UPC - 843368010508
View all EVGA 200-LM-1700-KR manuals
Add to My Manuals
Save this manual to your list of manuals |
EVGA 200-LM-1700-KR manual content summary:
- EVGA 200-LM-1700-KR | Manual - Page 1
- EVGA 200-LM-1700-KR | Manual - Page 2
PREFACE EVGA created the InterView Dual Monitor System in order to make dual monitors an easier solution. InterView allows you to work on multiple documents at once. It even allows video conferencing with the built in webcam. It also allows you to flip either display to show someone on the other - EVGA 200-LM-1700-KR | Manual - Page 3
...20 5.1 System Requirements...20 Operating Systems Supported: ...20 5.2 Installing the Webcam Software ...20 5.3 Using the InterView Camera Application ...24 6. TROUBLESHOOTING ...29 6.1 Self-Test Feature Check ...29 6.2 FAQs...29 7. SERVICE INFORMATION ...31 7.1 Product Registration and Customer - EVGA 200-LM-1700-KR | Manual - Page 4
7.3 Warranty Terms and Conditions...32 8. COMPLIANCE INFORMATION ...33 8.1 FCC Notice...33 9. LEGAL INFORMATION ...34 9.1 Trademark Information ...34 9.2 Software License Agreement...34 9.3 Rights ...34 9.4 Patent Protection ...34 4 - EVGA 200-LM-1700-KR | Manual - Page 5
The following items are included with InterView: InterView Monitor: Dual 17" LCD Displays InterView Control Base DC Power Adapter Dual DVI-I to DMS Cable 2 VGA to DVI-I Adapters 2 DVI-D to DVI-D Adapters Microphone Audio Cable USB Male to Male Cable Visual Guide Software Installation CD 5 - EVGA 200-LM-1700-KR | Manual - Page 6
the panel as injury may take place while rotating or folding the LCD portion of InterView. Unplug the monitor when it is going to be left unused for an extended period of time or before any type of service is performed. Consider keeping the packaging for use in the future when you may - EVGA 200-LM-1700-KR | Manual - Page 7
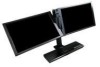
1.3 Product Views Front View 1. InterView Control Base 2. Balance Bar 3. Integrated 3-Port USB 2.0 Hub 4. Integrated Webcam 5. 17" LCD Monitors 5 4 5 1 2 3 7 - EVGA 200-LM-1700-KR | Manual - Page 8
Control Base Top View 1. Power Button 2. Power Light Indicators (Left Display) 3. Power Light Indicators (Right Display) 4. Display Selection Button 5. Brightness Decrease 6. Brightness Increase 7. Auto Adjust 8. Built-in Microphone 1 23 4 567 4 8 8 - EVGA 200-LM-1700-KR | Manual - Page 9
Control Base Rear View 1. USB 2.0 to PC 2. Microphone out to PC Mic-In 3. DMS Port 4. DC Power in Connector 1 2 3 4 9 - EVGA 200-LM-1700-KR | Manual - Page 10
INTERVIEW SPECIFICATIONS 2.1InterView Technical Specifications General Model number LCD Screen type Preset display Bezel Opening Dimension Weight Environmental Operating Temperature Humidity Non-operating Temperature Humidity EVGA InterView 1700 17'' Wide TFT 14.45" 9.03" 31.5 kHz to 81.1 - EVGA 200-LM-1700-KR | Manual - Page 11
Modes. If your display mode is not listed, it is not supported by this monitor; the screen may go blank while the power LED is on. Display Mode VESA, 640x480 the users press a key on the keyboard. It is recommended to turn InterView OFF when it is not needed or when leaving it unattended for long - EVGA 200-LM-1700-KR | Manual - Page 12
3. SETTING UP INTERVIEW Read the safety instructions before setting up the InterView. 3.1Steps to Assemble InterView 1. Place the control base on a solid horizontal surface. Pull the balance bar out from the bottom of the base: 2. Remove the cap from the base: 12 - EVGA 200-LM-1700-KR | Manual - Page 13
3. Remove LCD Displays from packaging and remove the cap: 4. Slowly connect display panels to control base(Front view): 5. Slowly push in the knob and turn it clockwise to secure the base and the panel: 13 - EVGA 200-LM-1700-KR | Manual - Page 14
6. Open up the panel: 7. Push the balance bar back into the base: 14 - EVGA 200-LM-1700-KR | Manual - Page 15
to a PC Before setting up InterView, you must power down your computer(s). 1. Connect the monitor to a computer(s) using the Dual DVI-I to DMS cable. Note: If you see 4 monitors please use the DVI-D adapter. 2. Know your computers display connections: DVI-I: You can plug the DVI-I to DMS cable - EVGA 200-LM-1700-KR | Manual - Page 16
to the electrical outlet using the power cord: 5. Optional: Connect InterView to the computer with the USB cable to enable the webcam and front USB 2.0 HUB located on the monitor base. 6. Optional: Use the audio cable to connect InterView to the MIC or Line-in input of the computer. This is required - EVGA 200-LM-1700-KR | Manual - Page 17
Power on InterView and the computer(s): 3.3Plug and Play Compatibility You can use InterView with any Plug and Play compatible system. The system configures itself and optimizes the display's settings. In most cases, InterView's installation is automatically processed unless the user intervenes. 17 - EVGA 200-LM-1700-KR | Manual - Page 18
4. HOW TO ADJUST INTERVIEW 4.1 Rotating/Folding Each panel can rotate 180 degrees. The display will automatically adjust to the correct orientation. To prevent scratching flip one panel at a time and make sure there are no objects in the way. - EVGA 200-LM-1700-KR | Manual - Page 19
and pixel clock automatically 4.3Brightness Adjustment Users can adjust the monitor brightness levels from the Brightness (Up/Down) buttons. The Users can obtain an optimal display when using the AUTO key function. When the 'AUTO' button is pressed, InterView will optimize the currently selected - EVGA 200-LM-1700-KR | Manual - Page 20
Others: - Microsoft DirectX 9.0C - USB 2.0 port (required for USB Hub and Webcam) - EVGA UV+ USB Display adapter ( if 2nd display output is not available) 5.2Installing the Webcam Software Some functions provided in InterView Application may not work if the driver is not installed properly. (Step - EVGA 200-LM-1700-KR | Manual - Page 21
(Step 2) Processing Installation - Click Webcam software installation to start the installation process - Click Next, select the application you would like to install, then click Next to continue Note: For users who select to install both webcam driver and application, the installation will start - EVGA 200-LM-1700-KR | Manual - Page 22
- Installation in process, the dialogue box will automatically close when the installation completes. Installing the Webcam Driver - Click Install - Click Install 22 - EVGA 200-LM-1700-KR | Manual - Page 23
- Click Finish then select the option to restart your computer after the installation completes. If you wish to restart later select the option to restart later. Note: Depending on each user's PC system and hardware performance, it may take 10 to 15 seconds before entering to the next step, please - EVGA 200-LM-1700-KR | Manual - Page 24
5.3Using the InterView Camera Application Main Panel Layout 4 7 1 2 5 3 6 1. Display screen 2. Record 3. Snapshot 4. Color setting page 5. Snapshot setting page 6. Record setting page 7. Misc setting page 24 - EVGA 200-LM-1700-KR | Manual - Page 25
Color Settings Page This panel allows users to adjust the color settings by dragging the track bars. 1 6 2 7 3 8 4 9 5 1. Brightness adjustment 2. Contrast adjustment 3. Hue adjustment 4. Saturation adjustment 5. Sharpness adjustment 6. White balance adjustment 7. Gamma adjustment 8. Color - EVGA 200-LM-1700-KR | Manual - Page 26
Snapshot Settings Page The InterView webcam application allows users to capture a single photo as well as continuous shooting. In this panel, the application allows users to set snapshot functions, such - EVGA 200-LM-1700-KR | Manual - Page 27
Record Settings Page This panel allows adjustments to the recording function of the webcam. 1 4 2 5 3 6 7 1. Select the audio device to be captured 2. Select the audio recording source. Ex: Microphone 3. Select the audio encoder to encode the audio stream 4. Select the video encoder to encode - EVGA 200-LM-1700-KR | Manual - Page 28
Misc Settings Page Within this panel, users can adjust settings that control different aspects of the image. 1 2 3 4 1. Video Flip: Flips the video horizontally/vertically 2. Exposure control - Low Light: avoid under-exposure in low light environment - High Light: avoid under-exposure in high light - EVGA 200-LM-1700-KR | Manual - Page 29
properly. 6.2 FAQs Symptoms No picture Possible Solutions Ensure power is plugged into monitor Ensure the monitor is plugged into the computer Increase brightness via OSD (ON SCREEN DISPLAY) Perform monitor self-test feature check Check the cable for bent or broken pins Auto - EVGA 200-LM-1700-KR | Manual - Page 30
pins Perform monitor reset on "Display Reset" Auto Adjust via OSD (ON SCREEN DISPLAY) Perform monitor self-test monitor reset on "Factory Reset" Perform monitor self-test feature check to determine if the intermittent problem occurs in self-test mode Picture missing color Perform monitor - EVGA 200-LM-1700-KR | Manual - Page 31
. So don't wait ... register online now! Should you require any assistance with the installation or troubleshooting of the EVGA InterView, please visit the Support section of our website at www.evga.com/support. There you'll be able to download drivers, check out our extensive Knowledge Base, and - EVGA 200-LM-1700-KR | Manual - Page 32
will be chargeable to the customer. o EVGA authorized service center will be chargeable at current applicable hourly rates to the customer if - (a) the technician finds the problem is user related; (b) caused by change in normal settings of the monitor or caused by user computer (software, settings - EVGA 200-LM-1700-KR | Manual - Page 33
if not installed and used in accordance with the manufacturer's instructions, may cause harmful interference to radio communications. However, with the FCC regulations: Product name: Dual Monitor System Model number: EVGA InterViewTM 1700 Company name: EVGA® Corporation 2900 Saturn Street, Suite B - EVGA 200-LM-1700-KR | Manual - Page 34
9. LEGAL INFORMATION 9.1Trademark Information 1) EVGA Corp., EVGA, the EVGA logo and combinations, 2) INTERVIEW and INTERVIEW in lower or cap combinations, thereof are trademarks of EVGA Corp. All brand names, company names, service marks, logos, and trademarks of the company, or its affiliates or - EVGA 200-LM-1700-KR | Manual - Page 35
35
-
 1
1 -
 2
2 -
 3
3 -
 4
4 -
 5
5 -
 6
6 -
 7
7 -
8
-
9
-
10
-
11
-
12
-
13
-
14
-
15
-
16
-
17
-
18
-
19
-
20
-
21
-
22
-
23
-
24
-
25
-
26
-
27
-
28
-
29
-
30
-
31
-
32
-
33
-
34
-
35
 |
 |
