Edimax IC-7110W Manual - Page 38
Edimax IC-7110W Manual
 |
View all Edimax IC-7110W manuals
Add to My Manuals
Save this manual to your list of manuals |
Page 38 highlights
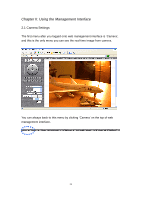
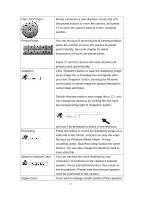
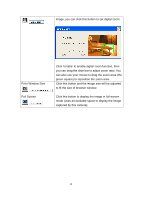
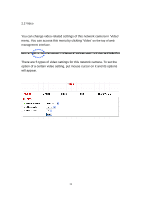
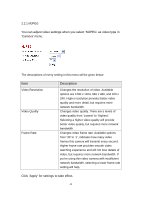
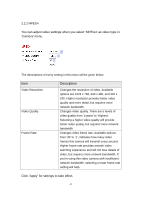
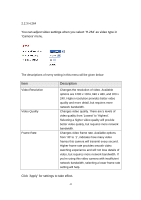
Pan / Tilt Control Preset Points Snapshot Moves camera to a new direction. Press one of 8 directional buttons to move the camera, and press „H‟ to move the camera back to „home‟ (original) position. You can set up to 9 preset points of camera position; press the number to move the camera to preset point instantly. See next chapter for detail instructions of how to set preset points. Press „C‟ and the camera will cruise between all preset points automatically. Click „Snapshot‟ button to save the displaying image as an image file, a message box will appear after you click „Snapshot‟ button, showing the filename and location of saved image file (default filename is current date and time). Default directory used to save image file is „C:\‟, you can change the directory by clicking the text input box located at the right of „Snapshot‟ button: Recording Speak to Network Cam Digital Zoom and you‟ll be prompted to select a new directory. Press this button to record the displaying image as a video file in AVI format, and you can play the video file back by Windows Media Player. To stop recording, press „Stop Recording‟ button (the same button). You can also change the directory used to save video file. You can transmit the voice received by your computer‟s microphone to the camera‟s external speaker. Press and hold this button, then speak to the microphone. Please note that external speaker must be connected to this camera. If you wish to enlarge certain portion of the captured 37
-
 1
1 -
2
-
3
-
4
-
5
-
6
-
7
-
8
-
9
-
10
-
11
-
12
-
13
-
14
-
15
-
16
-
17
-
18
-
19
-
20
-
21
-
22
-
23
-
24
-
25
-
26
-
27
-
28
-
29
-
30
-
31
-
32
-
 33
33 -
 34
34 -
 35
35 -
 36
36 -
 37
37 -
 38
38 -
 39
39 -
 40
40 -
 41
41 -
 42
42 -
 43
43 -
44
-
45
-
46
-
47
-
48
-
49
-
50
-
51
-
52
-
53
-
54
-
55
-
56
-
57
-
58
-
59
-
60
-
61
-
62
-
63
-
64
-
65
-
66
-
67
-
68
-
69
-
70
-
71
-
72
-
73
-
74
-
75
-
76
-
77
-
78
-
79
-
80
-
81
-
82
-
83
-
84
-
85
-
86
-
87
-
88
-
89
-
90
-
91
-
92
-
93
-
94
-
95
-
96
-
97
-
98
-
99
-
100
-
101
-
102
-
103
-
104
-
105
-
106
-
107
-
108
-
109
-
110
-
111
-
112
-
113
-
114
-
115
-
116
-
117
-
118
-
119
-
120
-
121
-
122
-
123
-
124
-
125
-
126
-
127
-
128
-
129
-
130
-
131
-
132
-
133
-
134
-
135
-
136
-
137
-
138
-
139
-
140
-
141
-
142
-
143
-
144
-
145
-
146
-
147
-
148
-
149
-
150
-
151
-
152
-
153
-
154
-
155
-
156
-
157
-
158
-
159
-
160
-
161
-
162
-
163
-
164
-
165
-
166
-
167
-
168
-
169
-
170
-
171
-
172
 |
 |
