Edimax IR-112E User Manual
Edimax IR-112E Manual
 |
View all Edimax IR-112E manuals
Add to My Manuals
Save this manual to your list of manuals |
Edimax IR-112E manual content summary:
- Edimax IR-112E | User Manual - Page 1
IR-112E User Manual 10-2013 / v1.0 - Edimax IR-112E | User Manual - Page 2
, optical, chemical, manual or otherwise, without the prior written permission from Edimax Technology Co., Ltd. Edimax Technology Co., Ltd. cost of all necessary servicing, repair, and any incidental or consequential damages resulting from any defect in the software. Edimax Technology Co., Ltd. - Edimax IR-112E | User Manual - Page 3
CONTENTS - Chapter I Introduction 4 1.1 Highlights of your new Network IP Camera 4 1.2 Safety Instructions 5 1.3 Packaging Contents 6 1.4 Familiar with your new Network IP Camera 7 1.5 Installation of the Network IP Camera 8 Chapter II Using Network IP Camera by Web Interface 10 2.1 - Edimax IR-112E | User Manual - Page 4
3-7-2 Media ...43 3-7-3 Event Server ...44 3-8 Recording to Micro SD Card 48 3-9 SDHC...49 3-10 Log...51 3-11 Device Info...52 3-12 Maintenance...53 3-13 Language...54 Chapter V Troubleshooting 55 Notice According to GNU General Public License Version 2 61 3 - Edimax IR-112E | User Manual - Page 5
IR-cut filter removable. Up to 1080P resolution at 10 FPS. H.264/MPEG4/MJPEG multiple streams output for live monitoring and high resolution recording. Event management by motion detection Built-in SD-card slot for local storage, which can act like a stand-alone DVR. Support mobile - Edimax IR-112E | User Manual - Page 6
using this Network IP Camera, or you would harm this camera and/or yourself! Also, the warranty will become void if you disobey these safety instructions. This Network IP Camera is sophisticated electronic device; do not drop it from high places. This IP Camera is not a toy; keep it out from - Edimax IR-112E | User Manual - Page 7
. If any item is missing, please contact your dealer of purchase for help. Item No. 1 2 3 4 5 Description Network camera Sun shield kit Screw CDROM Quick installation guide 6 Quantity 1 1 1 1 1 - Edimax IR-112E | User Manual - Page 8
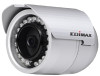
1.4 Familiar with your new Network IP Camera No. Description 1 IR-LED 2 Day/night sensor 3 Lens: Fixed focal length. 4 DC 5Volt/2A input 5 Network, RJ45 connector [Cable ASSIGNMENT] Item Description 1 DC 5Volt/2A input 2 Network, RJ45 - Edimax IR-112E | User Manual - Page 9
1.5 Installation of the Network IP Camera Please follow the instructions below to setup your new IP camera. 1. Connect Ethernet cable to LAN port. 2. Plug DC power adapter to power outlet on the wall. 3. Connect DC - Edimax IR-112E | User Manual - Page 10
6. Remove the front cover to find the Micro-SD card slot. 7. Find the screws in the package, use screwdriver to fix the sun shield on the device's main body. 8. Secure the wall mouting metal bracket on the wall then secure the bullet camera on the bracket. There ae two spots available. 9 - Edimax IR-112E | User Manual - Page 11
use the EdiView Finder utility included in the CD. Note: We recommend that you use Microsoft Windows to install your network camera - Mac is not supported. 1. Insert the CD into your CD-ROM drive. When the wizard appears, click "Setup Utility" to install the "EdiView Finder - Edimax IR-112E | User Manual - Page 12
Note: The contents of the CD-ROM can also be downloaded from the Edimax website: http://www.edimax.com/en/index.php 2. After the installation is complete, double-click the "EdiView_Finder" icon to execute the application. 3. Press 'Discover' button to search for all - Edimax IR-112E | User Manual - Page 13
web browser by entering its IP address in address bar. The use login screen will appear when you get connected: IP Camera's administrator username and password are 'admin' and '1234'(lower case) by default. Click 'OK' button or press 'ENTER' key on your keyboard when you finish entering username and - Edimax IR-112E | User Manual - Page 14
For IE 9: Click 'Install' button located at the bottom of IE to install ActiveX plugin. If you're prompted that: 'Windows Firewall has blocked some features of this program' Click 'Allow access', or IP Camera will not be able to function properly. 13 - Edimax IR-112E | User Manual - Page 15
to see the video stream from camera. NOTE: If this is the first time you use this IP Camera, you can refer to chapter 2.4 for instructions on Setup Wizard, which will guide you to complete the software setup of your new IP Camera. 14 - Edimax IR-112E | User Manual - Page 16
of IP camera, and you can go back to live video view by clicking this button when you're in other page. Stream This camera supports H.264 only. H.264 required less network bandwidth and this will help when network connection is slow. Client Settings Open 'Client Setting' menu. Configuration - Edimax IR-112E | User Manual - Page 17
'Connect' button Start live video view. 'Disconnect' button Stop live video view. 'Snapshot' button 'Start Video Record' button Take a snapshot or camera video and save image file on your computer. When you click this button, a new window will appear: Click 'Save' button when you see the image - Edimax IR-112E | User Manual - Page 18
2.4 Client Settings In 'Client Settings' menu, you configure basic IP camera settings like data transfer protocol and data storage folder. To access 'Client Settings' menu, click 'Client Settings' button on the left. The following screen will appear: 17 - Edimax IR-112E | User Manual - Page 19
Here are the descriptions of every setup item: Item Description RTSP/RTP over TCP Select this option to use RTSP (Real-Time Streaming Protocol) to transfer video data over TCP. *Refer to the application note 'RTSP/RTP over TCP/UDP' for details. RTSP/RTP over UDP Select this option to use RTSP - Edimax IR-112E | User Manual - Page 20
Chapter III Advanced Configuration If you wish to configure IP camera's settings, you can access IP camera's 'Configuration' menu, which provides various kinds of system setting. To access configuration menu, click 'Configuration' button on the left. The 'Configuration' submenu will appear, please - Edimax IR-112E | User Manual - Page 21
3-1 System In this menu, you can configure basic IP camera settings like hostname and time. Here are the descriptions of every setup item: Item Description Host Name Input the IP camera's hostname here, it can be any meaningful words or characters that will help you to identify this IP camera - Edimax IR-112E | User Manual - Page 22
that if this IP camera can't access Internet, you must have a time server on local area network, or set the time manually. Set Manually Set IP camera's date and time manually. Please set current date and time by 'Date' and 'Time' dropdown menu. When you finish with above settings, click 'Apply - Edimax IR-112E | User Manual - Page 23
3-2 Security In this menu, you can configure IP camera's login account. There are three kinds of account: - Administrator (Can view IP camera's video and make changes of camera setting) - User (Can view IP camera's video and see LOG, and change Client Setting and language) - Guest (Can view IP - Edimax IR-112E | User Manual - Page 24
username here. User name must be greater than 1 character and less than 32 characters. User Name Input this user's password in both 'Password' and 'Retype Password' field. Authority To define this user's access privilege, select 'User' or 'Guest' in dropdown menu. When you finish inputting - Edimax IR-112E | User Manual - Page 25
3-3 Network In this menu, you can configure IP camera's network setting. 3-3-1 'General' setup page Setup IP address for this IP camera. This IP camera supports both IPv4 and IPv6 IP address. Here are the descriptions of every setup item: Item Description LAN Select this option to assign an IP - Edimax IR-112E | User Manual - Page 26
manually. If you don't have a DHCP server on your local area network, port mapping. Select this option to use PPPoE to connect to network. You have to input PPPoE username and password assigned by network operator to get connected. Input IP camera's web connection port number here. When this port - Edimax IR-112E | User Manual - Page 27
web configuration interface. Input RTSP port number. When this port number changes, you must change corresponding settings in external network devices (NVR or CMS software) so they can receive this IP camera's video. Input RTP data port number here. When you finish with above settings, click 'Apply - Edimax IR-112E | User Manual - Page 28
can use it to discover this IP camera. Enable QoS to improve the data transfer priority of this IP camera (Your local area network must support QoS). You can select Video / Audio's QoS DSCP value (0 to 63), or both video and audio. DDNS Enable DDNS - Edimax IR-112E | User Manual - Page 29
this IP camera supports Dyndns, TZO and No-IP dynamic IP service. Provider: Select dynamic IP service provider. Host Name: Input the host name you obtained from dynamic IP service provider. User name: Input user name used to login dynamic IP service provider. Password: Input the password used to - Edimax IR-112E | User Manual - Page 30
29 - Edimax IR-112E | User Manual - Page 31
Here are the descriptions of every setup item: Item Description Enable Filter Check this box to enable IP address filter, uncheck this Box to disable this function. Accepted IP list Here lists all IP address that can build connections to this IP camera. If you want to remove a set of IP - Edimax IR-112E | User Manual - Page 32
3-5 Video You can adjust the image of the IP camera in this menu. There are 3 sub-menus in this menu: Image Setting, Video Setting, and Overlay, which can be accessed by tabs on the top: 31 - Edimax IR-112E | User Manual - Page 33
3-5-1 Image Setting You can adjust the image parameters in this page. Here are the descriptions of every setup item: Item Description Brightness / Control the image parameters. Click ' - ' to decrease value, or click Contrast / ' + ' to increase value. You can also input the value in the field - Edimax IR-112E | User Manual - Page 34
In this page, it allows user to define the exposure setting manually. Power Line Frequency Set up the values of exposure value, exposure color temperature environment using. IR-cut (Day/Night) An IR-cut filter is built in this IP camera to reduce the effect of IR lights (which will change the - Edimax IR-112E | User Manual - Page 35
if you should use IR filter, select this option. - Always ON(B/W): IR filter is always on. - Always OFF(Color): IR filter is always off. Day IR-cut filter will only there's sunlight. You can define the starting and ending time when IR-cut filter should be switched on by select 'Schedule' and - Edimax IR-112E | User Manual - Page 36
Here are the descriptions of every setup item: Item Description H.264 Select the compression of main stream: H.264. Video Resolution Select video resolution. - H.264: 1920x1080 (1080p) / 1280x960 (960p) / 1280x720 (720p) 720x480 (D1) / 640x480 (VGA) / 320x240 (QVGA) - MPEG4: 1920x1080 ( - Edimax IR-112E | User Manual - Page 37
. Note: MJPEG options are only available for portable devices like cell phone. The 'Mobile View' is used to enable cell phone monitoring function. Please download APP from iPhone and Android APP store. 36 - Edimax IR-112E | User Manual - Page 38
3-5-3 Overlay Setting You can adjust the video overlay parameters in this page. Here are the descriptions of every setup item: Item Description Enable Time Check this box to enable overlaying time stamp on video. Stamp Remove the Check this box to remove time stamp's background color. You - Edimax IR-112E | User Manual - Page 39
background color may find this will help the readability of text in some cases. of the text (Text) Enable Image Check this box to overlay a specific image on video, so you can Overlay show certain text / picture on the video and help people to identify this IP camera. Click 'Browse' button to - Edimax IR-112E | User Manual - Page 40
Here are the descriptions of every setup item: Item Description Enable Motion Check this box to enable motion detection. Detection Enable Check this box to enable this motion detection window. You can (Window 1 to select window 1 to 3 to enable up to 3 motion detection Window 3) windows. - Edimax IR-112E | User Manual - Page 41
change. Percentage Select the percentage of pixel change that will trigger motion detection alert. Select a lower percentage so you can detect tiny changes in motion detection area. Sensitivity Select the sensitivity level that will trigger motion detection alert. Select a higher sensitivity - Edimax IR-112E | User Manual - Page 42
3. Event Server: Define the details of remote server. Please refer to following sections for detailed instructions. 3-7-1 Settings This page lists all existing events. You can click 'Modify' button to edit an existing event, or 'Remove' to delete an existing event. To - Edimax IR-112E | User Manual - Page 43
To add a new event, click 'New' button and the descriptions of every setup item is listed below: Item Enable Setting Title Motion Detection Enable Schedule Time Enable FTP Enable EMAIL Enable Samba (Net Storage) Enable SD CARD Description Check this box to enable this event. If you just want to - Edimax IR-112E | User Manual - Page 44
3-7-2 Media You can define what kind of media file should be saved on designated media. Here are the descriptions of every setup item: Item Description One Snapshot Save a picture file when event is triggered. Maximum Save a H.264 video clip. You can also select the recording Video File Size - Edimax IR-112E | User Manual - Page 45
), and Samba (File). A Samba server can be any computer running windows operating system with network neighbor function enabled. Many stand-alone network file server also support samba server function. Enable FTP server then it will show the related items of FTP server setting. 44 - Edimax IR-112E | User Manual - Page 46
default value '21'. - User Name: Input FTP server's username. - Password: Input FTP server's password. - File Path Name: Input the path where you want to save file this box, while others don't). - Test FTP: Click this button to test FTP server settings above immediately. - Enable SMTP Server then - Edimax IR-112E | User Manual - Page 47
anti-spam software installed (you can set this Email address to 'White List' in your anti-spam software) - Receiver need to input Email server's username and password in corresponding field. - Requires SSL Encryption: Test SMTP: Click this button to test SMTP server settings above immediately. 46 - Edimax IR-112E | User Manual - Page 48
you can leave this field blank. - User Name: Input Samba server's username. - Password: Input Samba server's password. * Username and password can NOT leave blank.* - Test SMB: Click this button to test Samba server settings above immediately. Tips: Some samba server does not have username and - Edimax IR-112E | User Manual - Page 49
, you can save video files on it. Note: 1. Be sure that the Micro SD Card format should be FAT32. The NTFS format cannot be supported by this camera. 2. Unlink motion detection; this function will record video at specified time period on selected weekday(s). Here are the descriptions of every setup - Edimax IR-112E | User Manual - Page 50
3-9 SDHC The IP camera module has an optional Micro-SD card slot PCBA board. The standard module does not include this board. The UI shows the capacity is 0 MB when the module without Micro-SD card slot and memory card. If you need the function please check the option when you place the order of the - Edimax IR-112E | User Manual - Page 51
page. Set the time range then click "Search" then shows the records like below. 50 - Edimax IR-112E | User Manual - Page 52
3-10 Log You can check the usage log of IP camera here. In this page, you can click: 1. First page / Final page: Jump to first / final page of log. 2. Previous / Next: Jump to previous or next page of log. 3. Remove: Clear log. You'll be prompted for confirmation. 51 - Edimax IR-112E | User Manual - Page 53
3-11 Device Info You can check the information and network settings of this IP camera. The information are very useful when you need to repair or fix the problem of this IP camera. An example of device info page looks like this: 52 - Edimax IR-112E | User Manual - Page 54
when you find IP camera is not working properly. Reset Clear all settings of IP camera and reset to factory default setting. Backup Backup IP camera's setting -SD card. Upgrade Upgrade IP camera's firmware. Click 'Browse' button to select a firmware image file on your computer first, then click - Edimax IR-112E | User Manual - Page 55
3-13 Language You can change the display language of web interface. Click 'Language' button and select one language. More languages may available in latest firmware file. 54 - Edimax IR-112E | User Manual - Page 56
Chapter V Troubleshooting Please don't panic when you found this IP Camera is not working properly. Before you send this IP Camera back to us, you can do some simple checks to save your time: Problem description Can't connect to IP Camera No IP Camera found No image Possible solution(s) 1) Please - Edimax IR-112E | User Manual - Page 57
, if not installed and used in accordance with the instructions, may cause harmful interference to radio communications. However, not authorized. This transmitter is restricted for use with the specific antenna tested in the application for certification. The antenna(s) used for this transmitter - Edimax IR-112E | User Manual - Page 58
EU Countries Intended for Use The ETSI version of this device is intended for home and office use in Austria, Belgium, Bulgaria, Cyprus, Czech, Denmark, Estonia, Finland, France, Germany, Greece, Hungary, Ireland, Italy, Latvia, Lithuania, Luxembourg, Malta, Netherlands, Poland, Portugal, Romania, - Edimax IR-112E | User Manual - Page 59
prevederi relevante ale Directivei 2004/108/EC. Russian 2004/108/EC. Magyar: Ez a berendezés megfelel az alapvető követelményeknek és más vonatkozó irányelveknek 2004/108/EC. Türkçe: Bu cihaz 2004/108/EC direktifleri zorunlu istekler ve diğer hükümlerle ile uyumludur. Ukrainian 2004/108 - Edimax IR-112E | User Manual - Page 60
WEEE Directive & Product Disposal At the end of its serviceable life, this product should not be treated as household or general waste. It should be handed over to the applicable collection point for the recycling of electrical and electronic equipment, or returned to the supplier for disposal. 59 - Edimax IR-112E | User Manual - Page 61
Edimax Technology Co., Ltd., declare under our sole responsibility, that the equipment described below complies with the requirements of the European EMC directive (2004/108/EC). Equipment: Model No.: Report No.: 2M IP CAMERA BULLET IR-112E IEC 61000-4-11: 2004) Edimax Technology Co., Ltd. No. - Edimax IR-112E | User Manual - Page 62
that you have the freedom to distribute copies of free software (and charge for this service if you wish), that you receive source code or can any problems introduced by others will not reflect on the original authors' reputations. Finally, any free program is threatened constantly by software - Edimax IR-112E | User Manual - Page 63
the complete corresponding machine-readable source code, which must be distributed under the terms of Sections 1 and 2 above on a medium customarily used for software interchange; or, b) Accompany it with a written offer, valid for at least three years, to give any third party, for a charge no more - Edimax IR-112E | User Manual - Page 64
in reliance on consistent application of that system; it is up to the author/donor to decide if he or she is willing to distribute software through any other system and a licensee cannot impose that choice. This section is intended to make thoroughly clear what is believed to be a consequence of - Edimax IR-112E | User Manual - Page 65
differ in detail to address new problems or concerns. Each version is software which is copyrighted by the Free Software Foundation, write to the Free Software Foundation; we sometimes make exceptions for this. Our decision will be guided THE COST OF ALL NECESSARY SERVICING, REPAIR OR CORRECTION. 12. - Edimax IR-112E | User Manual - Page 66
65
-
 1
1 -
 2
2 -
 3
3 -
 4
4 -
 5
5 -
 6
6 -
 7
7 -
8
-
9
-
10
-
11
-
12
-
13
-
14
-
15
-
16
-
17
-
18
-
19
-
20
-
21
-
22
-
23
-
24
-
25
-
26
-
27
-
28
-
29
-
30
-
31
-
32
-
33
-
34
-
35
-
36
-
37
-
38
-
39
-
40
-
41
-
42
-
43
-
44
-
45
-
46
-
47
-
48
-
49
-
50
-
51
-
52
-
53
-
54
-
55
-
56
-
57
-
58
-
59
-
60
-
61
-
62
-
63
-
64
-
65
-
66
 |
 |

IR-112E
User Manual
10-2013 / v1.0