Electrolux E30MO65GSS Installation Instructions
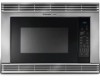
Electrolux E30MO65GSS - 1.5 cu. Ft. Microwave Oven Manual
 |
UPC - 012505558511
View all Electrolux E30MO65GSS manuals
Add to My Manuals
Save this manual to your list of manuals |
Electrolux E30MO65GSS manual content summary:
- Electrolux E30MO65GSS | Installation Instructions - Page 1
beginning, please read these instructions completely and carefully. • Be sure to DISCONNECT THE PLUG of the microwave oven from the electrical outlet before installing the built-in trim kit. Remove the turntable from the oven cavity. • Because the kit includes metal parts, caution should be used - Electrolux E30MO65GSS | Installation Instructions - Page 2
CONVECTION MICROWAVE OVEN INSTALLATION INSTRUCTIONS NOTE: 1. Base must be capable of supporting 200 pounds (90.7 kg). 2. Make sure base is level and front of cabinet is square. If the cabinet base is not level, the oven KW 13 (CSA) Shipping Wt. TRIM KIT DIMENSIONS Height 21 55.0 cm) Width - Electrolux E30MO65GSS | Installation Instructions - Page 3
CONVECTION MICROWAVE OVEN INSTALLATION INSTRUCTIONS EXHAUST DUCT ASSEMBLY 1. Insert the edge of DUCT (B) into the tab of DUCT (C). Secure together by using SCREW (A) provided in the kit. Remove the existing screw (#1) and (#2) at the upper right and left rear of the oven. Secure DUCT (C) with - Electrolux E30MO65GSS | Installation Instructions - Page 4
the trim kit and the microwave. SCREW B 4 Screw trim kit to cabinet using 4 screw (B)'s. SCREW B Model and Serial Number Location Before You Call for Service The serial plate is located on the oven faceplate. Refer to the warranty in your Use & Care Guide for our toll-free When ordering parts
-
 1
1 -
 2
2 -
 3
3 -
 4
4
 |
 |

CONVECTION MICROWAVE OVEN INSTALLATION INSTRUCTIONS
INSTALLATION AND SERVICE MUST BE PERFORMED BY A QUALIFIED INSTALLER.
IMPORTANT: SAVE FOR LOCAL ELECTRICAL INSPECTOR'S USE.
READ AND SAVE THESE INSTRUCTIONS FOR FUTURE REFERENCE.
The electrical requirements for this oven are ±±5-±20 volts AC, ±5 amps or larger.
TINSEB472MRR0
Printed in United States
IMPORTANT - PLEASE READ AND FOLLOW
•
Before beginning, please read these instructions completely and carefully.
•
Be sure to DISCONNECT THE PLUG of the microwave oven from the electrical outlet before installing the built-in trim kit.
Remove the turntable from the oven cavity.
•
Because the kit includes metal parts, caution should be used in handling and installation to avoid the possibility of injury.
•
Do not remove permanently affixed labels, warnings, or plates from the product.
This may void the warranty.
•
Please observe all local and national codes and ordinances.
•
The installer should leave these instructions with the consumer who should retain for local inspector’s use and for
future reference.
PARTS INCLUDED IN THE KITS
1) Front Frame Assembly
QTY 1
2) Bottom Duct Assembly
QTY 1
3) Screw A (
¹
₂
"
length)
QTY 5
4) Screw B (
1
³₄
" length)
QTY 4
5) Screw C (
1
³₁₆
"
length)
QTY 2
6) Duct A
QTY 1
7) Duct B
QTY 1
8) Duct C
QTY 1
9) Duct D
QTY 1