Electrolux E30WV60PPS Complete Owner's Guide (English)
Electrolux E30WV60PPS Manual
 |
View all Electrolux E30WV60PPS manuals
Add to My Manuals
Save this manual to your list of manuals |
Electrolux E30WV60PPS manual content summary:
- Electrolux E30WV60PPS | Complete Owner's Guide (English) - Page 1
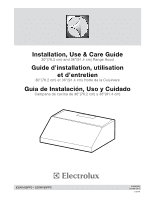
, Use & Care Guide 30"(76.2 cm) and 36"(91.4 cm) Range Hood Guide d'installation, utilisation et d'entretien 30"(76.2 cm) et 36"(91.4 cm) Hotte de la Cuisiniere Guia de Instalación, Uso y Cuidado Campana de cocina de 30"(76.2 cm) y 36"(91.4 cm) E30WV60PPS + E36WV60PPS 316902932 October 2013 LI314A - Electrolux E30WV60PPS | Complete Owner's Guide (English) - Page 2
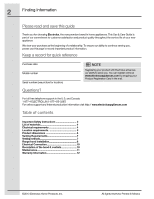
in the mail. For toll-free telephone support in the U.S. and Canada: 1-877-4 ELECTROLUX (1-877-435-3287) For online support and Internet production information visit http:// www.electroluxappliances.com Table of contents Important Safety Instructions 3 List of materials 4 Electrical requirements - Electrolux E30WV60PPS | Complete Owner's Guide (English) - Page 3
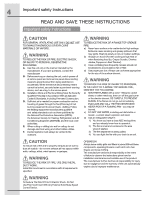
for the Local Electrical Inspector's use. INSTALLER: Please leave these Instructions with this unit for the owner. OWNER: Please retain these instructions for future reference. Safety Warning: Turn off power circuit at service panel and lock out panel, before wiring this appliance. Requirement - Electrolux E30WV60PPS | Complete Owner's Guide (English) - Page 4
, contact the manufacturer B. Before servicing or cleaning the unit, switch power off at service panel and lock service panel disconnecting means to prevent power all responsibility in the event of failure to observe the instructions given here for installation,maintenance and suitable use of the - Electrolux E30WV60PPS | Complete Owner's Guide (English) - Page 5
with blower. •• Lamp already installed. •• Transition (31⁄4" x 10" rectangular) •• Grease filter. •• Hardware bag with: •• Use and Care / Installation Manual •• 3- 4x8 screws (to assemble Transition) •• 6- 4,5x13 screws •• 4- 10x50 screws •• Torx 20 Adapter Remove the protective film covering the - Electrolux E30WV60PPS | Complete Owner's Guide (English) - Page 6
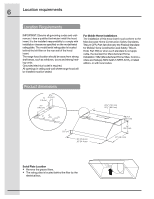
6 Location requirements Location Requirements IMPORTANT: Observe all governing codes and ordinances. Have a qualified technician install the hood insert. It is the installer's responsibility to comply with installation clearances specified on the model/serial rating plate. The model/serial rating - Electrolux E30WV60PPS | Complete Owner's Guide (English) - Page 7
absolutely necessary. If a joist or stud must be cut, then a supporting frame must be constructed. Fittings material is provided to secure the hood surface. Household use, please, read installation manual for specific application. Check your ceiling height and the hood height maximum before you - Electrolux E30WV60PPS | Complete Owner's Guide (English) - Page 8
8 Range Hood Installation Installation Installation - Ducting version After having chosen the vent option, proceed as follows: •• Prepare duct and conduit cut outs as needed. •• If possible, disconnect and move freestanding or slide-in range from cabinet opening to provide easier access to rear - Electrolux E30WV60PPS | Complete Owner's Guide (English) - Page 9
the trim and attach them to the cabinet bottom recess on both sides. 8-1/2" min. opening for ductwork View From Rear Cleats 1" x6" Min. Mounting Support Installation to wall (Horizontal duct- 31⁄4"x 10" Rectangular) •• Use the diagram or the hood as a template and mark the locations on the wall - Electrolux E30WV60PPS | Complete Owner's Guide (English) - Page 10
in 1⁄2" conduit from service panel to junction box. •• Connect black wire from service panel to black or •• Replace the 2 lateral supports. •• Replace filters. •• Check left to the OFF position. Keep your Installation Instructions and Use and Care Guide close to range hood for easy reference. 2. - Electrolux E30WV60PPS | Complete Owner's Guide (English) - Page 11
cause fire risks. Therefore, we recommend oserving these instructions. The manufacturer declines all responsibility for any damage to bulb CAUTION Before replacing the lamps, switch power off at service panel and lock service panel disconnecting means to prevent power from being switched on - Electrolux E30WV60PPS | Complete Owner's Guide (English) - Page 12
is installed, used and maintained in accordance with the provided instructions. Exclusions This warranty does not cover the following: 1. Products warranty. Obligations for service and parts under this warranty must be performed by Electrolux or an authorized service company. Product features
-
 1
1 -
 2
2 -
 3
3 -
 4
4 -
 5
5 -
 6
6 -
 7
7 -
8
-
9
-
10
-
11
-
12
 |
 |

Installation, Use & Care Guide
30”(76.2 cm) and 36”(91.4 cm) Range Hood
Guide d’installation, utilisation
et d’entretien
30”(76.2 cm) et 36”(91.4 cm) Hotte de la Cuisiniere
Guia de Instalación, Uso y Cuidado
Campana de cocina de 30”(76.2 cm) y 36”(91.4 cm)
E30WV60PPS + E36WV60PPS
316902932
October 2013
LI314A