Electrolux EI26SS55GW Complete Owner's Guide (English)
Electrolux EI26SS55GW - 25.9 cu. Ft. Refrigerator Manual
 |
UPC - 012505694844
View all Electrolux EI26SS55GW manuals
Add to My Manuals
Save this manual to your list of manuals |
Electrolux EI26SS55GW manual content summary:
- Electrolux EI26SS55GW | Complete Owner's Guide (English) - Page 1
Use & Care Guide Side-By-Side Refrigerator Guia de Uso y Cuidado Refrigerador de dos puertas Guide d'utilisation et d'entretien Réfrigérateur à compartiments juxtaposés 241868903 December 2008 - Electrolux EI26SS55GW | Complete Owner's Guide (English) - Page 2
Guide is part of our commitment to customer satisfaction and product quality throughout the service life of your new appliance. Keep a record for quick reference Purchase date Electrolux model number Electrolux To Common Problems 36 Questions? For toll-free telephone support in the U.S. - Electrolux EI26SS55GW | Complete Owner's Guide (English) - Page 3
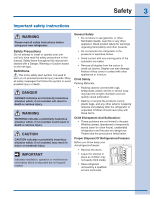
Safety 3 Important safety instructions WARNING Please read all safety instructions before using your new refrigerator. Safety Precautions Do not attempt to install or operate your unit until you have read the safety precautions in this manual. Safety items throughout this manual are labeled with a - Electrolux EI26SS55GW | Complete Owner's Guide (English) - Page 4
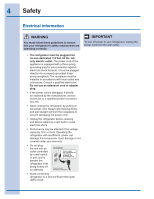
with local codes and ordinances. Consult a qualified electrician. Do not use an extension cord or adapter plug. • If the power cord is damaged, it should be replaced by the manufacturer, service technician or a qualified person to prevent any risk. • Never unplug the refrigerator by pulling - Electrolux EI26SS55GW | Complete Owner's Guide (English) - Page 5
Installation 5 This Use & Care Guide provides general operating instructions for your model. Use the refrigerator only as instructed in this Use & Care Guide. Before starting the refrigerator, follow these important first steps. Location • Choose a place that is near a grounded electrical outlet. - Electrolux EI26SS55GW | Complete Owner's Guide (English) - Page 6
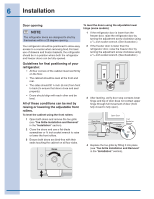
and freezer doors can be fully opened. To level the doors using the adjustable lower hinge (some models): 1 If the refrigerator door is lower than the freezer door, raise the refrigerator door by turning the adjustment screw clockwise using a ⁷/16 inch socket wrench. (See illustration.) 2 If the - Electrolux EI26SS55GW | Complete Owner's Guide (English) - Page 7
the Installation Instructions that came with your appliance). 3 Remove any food from the door shelves. 4 Close the doors. To remove the refrigerator top hinge Fixed Wrench Adjustable Hinge (some models) Non-Adjusting Hinge (some models) To reinstall the refrigerator door, reverse the above steps - Electrolux EI26SS55GW | Complete Owner's Guide (English) - Page 8
are aligned with each other and level (Please see "To level the doors using the lower hinge" for models with adjustable lower hinges or "To level the cabinet using the front rollers" for models with the non-adjustable lower hinges in the "Installation" section.), then replace the top hinge cover. - Electrolux EI26SS55GW | Complete Owner's Guide (English) - Page 9
Handle Mounting Instructions 1 Remove handles from carton and any other protective packaging. 2 Position freezer handle end caps over upper and lower pre-installed shoulder bolts (A) that are fastened into door, ensuring the holes for the set screws are facing towards the refrigerator door. 3 While - Electrolux EI26SS55GW | Complete Owner's Guide (English) - Page 10
. During installation, you (or a service professional) establish this water supply by connecting a copper tube from your household water system to a valve at the rear of the refrigerator. You may have already followed the directions in the Installation Instructions to connect the water supply. This - Electrolux EI26SS55GW | Complete Owner's Guide (English) - Page 11
the water supply, refer to "How to Prime the Water Supply System" for important information about priming an empty water supply system. Your refrigerator's water supply system includes several tubing lines, a water filter, a water valve and a water tank. To ensure that your water dispenser works - Electrolux EI26SS55GW | Complete Owner's Guide (English) - Page 12
12 Feature Overview Understanding features and terms Your Electrolux refrigerator is designed for optimal convenience and storage flexibility. Use the illustration below to familiarize yourself with Rack Crisper Pan and Cover Fixed Door Bin Toe Grille NOTE Features may vary according to model. - Electrolux EI26SS55GW | Complete Owner's Guide (English) - Page 13
Wave-TouchTM Controls 13 IQ-TouchTM - Electrolux EI26SS55GW | Complete Owner's Guide (English) - Page 14
14 Controls Wave-TouchTM (some models) 3rd Level: User Variable Options Your refrigerator is equipped with a Wave-TouchTM Panel is automatically activated during long periods between door openings. Vacation mode is manually activated when the red indicator is lit. Touch to display filter - Electrolux EI26SS55GW | Complete Owner's Guide (English) - Page 15
seconds, the display times out and returns to the basic display. Wave-TouchTM/IQ-TouchTM "Sabbath Mode" (some models) The Sabbath Mode is a feature that disables portions of the refrigerator and its controls for both Wave-TouchTM and IQ-TouchTM, in accordance with observance of the weekly Sabbath - Electrolux EI26SS55GW | Complete Owner's Guide (English) - Page 16
models) factory default on off Resets all refrigerator settings such as temp, temp display and ring tones to their factory default settings. Press and hold for three seconds to turn off the cooling system to clean the refrigerator openings. Vacation mode is manually activated when the red - Electrolux EI26SS55GW | Complete Owner's Guide (English) - Page 17
the mute sounds icon will illuminate until pressed, acknowledging the alarm, at which time the highest temperature reached will be displayed and the refrigerator will resume normal operation. All other modes are turned off until the alarm is acknowledged. In the event of a power failure, the power - Electrolux EI26SS55GW | Complete Owner's Guide (English) - Page 18
NOTE Features may vary according to model. You can easily adjust shelf positions The shelves have mounting brackets which attach to slotted supports at the rear of each compartment. To change the of the compartment. Shelf features Your refrigerator includes SpillSafeTM glass shelves, which are - Electrolux EI26SS55GW | Complete Owner's Guide (English) - Page 19
. Do not use a prying motion as this may damage your crisper. 3 Lift the front slightly and remove the drawer. Meat keeper (some models) Some models are equipped with a meat keeper drawer for short-term storage of bulk meat items. This drawer includes a sliding control for adjusting the temperature - Electrolux EI26SS55GW | Complete Owner's Guide (English) - Page 20
20 Storage Features Perfect Temp Drawer (some models) The Perfect Temp Drawer (PTD) was designed to keep food items at a precise temperature that is cooler, the same, or warmer than the fresh food side of the refrigerator. The PTD is shipped turned OFF. When first turned on or after a power - Electrolux EI26SS55GW | Complete Owner's Guide (English) - Page 21
but prevent any liquid from getting into the connector. 2 Pull the connector out. 3 Lift the front of the shelf assembly up off of the front support pins. - Electrolux EI26SS55GW | Complete Owner's Guide (English) - Page 22
operation at the temp setting that was set before the refrigerator was turned off. To reinstall the Perfect Temp Drawer Shelf Assembly: 1 Position rear of shelf assembly so that the rear support pins on the fridge liner slide into the support grooves in the rear of the shelf assembly. Sabbath Mode - Electrolux EI26SS55GW | Complete Owner's Guide (English) - Page 23
supports until locked in place. Accessories Tall bottle retainer The tall bottle retainer keeps tall containers in the bin from falling forward when opening or closing the refrigerator such as your favorite ice cream. Pizza rack (some models) This rack is attached to the freezer wall beside the - Electrolux EI26SS55GW | Complete Owner's Guide (English) - Page 24
, for short term storage of cheese, spreads, or butter. The dairy compartment, which includes a lift-up cover that may be locked and a dairy divider (some models), is designed to be warmer than the open storage area to accommodate these types of food. Dairy Compartment (some - Electrolux EI26SS55GW | Complete Owner's Guide (English) - Page 25
on at the factory so it can work as soon as you install your refrigerator. If you cannot connect a water supply, turn the ice maker's On/ To gain access to the ice maker, pull the extra shelf out (some models). Press the switch to the "O" position to turn it Off and press manually stop the ice maker. - Electrolux EI26SS55GW | Complete Owner's Guide (English) - Page 26
too long may develop an odd flavor. Empty the ice container as explained below. • Occasionally shake the ice container to keep ice separated. • If your refrigerator is not connected to a water supply or the water supply is turned off, turn off the ice maker by pressing the On/Off switch. • If - Electrolux EI26SS55GW | Complete Owner's Guide (English) - Page 27
below) until the ice bin fits into place with the drive mechanism. If the auger is not properly aligned when replacing the ice bin, the refrigerator will only dispense Crushed Ice. The freezer door may also not close properly causing warm air to leak into the freezer. - Electrolux EI26SS55GW | Complete Owner's Guide (English) - Page 28
impurities from the refrigerator compartment. Water refrigerator odors. You may in your refrigerator. To replace refrigerator has not been before reinstalling the refrigerator. 1 Pull refrigerator. Electrolux recommends that you order extra filters when you first install your refrigerator - Electrolux EI26SS55GW | Complete Owner's Guide (English) - Page 29
waters that may contain filterable cysts. Test & certification results: • Rated Capacity - 400 gallons for PureAdvantageTM ice and water filter • Rated service flow - .5 gallons per minute • Maximum Rated Pressure - 100 pounds per square inch • Operating Temp.: Min. 33° F, Max. 100° F • Recommended - Electrolux EI26SS55GW | Complete Owner's Guide (English) - Page 30
varies less. Ideas for saving energy Installation • Locate the refrigerator in the coolest part of the room, out of direct sunlight, and away from Level the refrigerator so that the doors close tightly. Temperature settings • Refer to the "Controls" section in this Use & Care Guide for procedures - Electrolux EI26SS55GW | Complete Owner's Guide (English) - Page 31
You may hear air being forced through the refrigerator by the evaporator fan. C Defrost heater E Electronic control & automatic defrost control These parts can produce a snapping or clicking sound when the ice chute. M Perfect Temp Drawer (some models) Fans run intermittently when door is closed but - Electrolux EI26SS55GW | Complete Owner's Guide (English) - Page 32
with bleach to clean stainless steel. • Do not wash any removable parts in a dishwasher. • Always unplug the electrical power cord from the water leaks when the refrigerator is put back into service. Contact a service representative to perform this operation. Refer to the guide on the next page - Electrolux EI26SS55GW | Complete Owner's Guide (English) - Page 33
bulb or any electrical part. • Wipe gaskets with Instructions). • Vacuum backside and wipe with sudsy cloth or sponge. Rinse and dry. Exterior & Handles Exterior & Handles (Stainless Steel Models refrigerator operating during vacations of 3 weeks or less. • Use all perishable items from refrigerator - Electrolux EI26SS55GW | Complete Owner's Guide (English) - Page 34
designed for appliance lighting. CAUTION Wear gloves when replacing light bulbs to avoid getting cut. To replace light bulbs: 1 Unplug your refrigerator's power cord. 2 Wear gloves as protection against possible broken glass. 3 Remove light cover, if necessary. 4 Unscrew and replace old bulb with - Electrolux EI26SS55GW | Complete Owner's Guide (English) - Page 35
Food loss due to any refrigerator or freezer failures. 6. Products used in a commercial setting. 7. Service calls which do not involve services performed by unauthorized service companies; use of parts other than genuine Electrolux parts or parts obtained from persons other than authorized service - Electrolux EI26SS55GW | Complete Owner's Guide (English) - Page 36
at a constant temperature. • Electronic control system has detected a performance problem. • This is normal. Refrigerator goes on and off to keep temperature constant. • Call your Electrolux service representative, who can interpret any messages or number codes flashing on the digital displays. - Electrolux EI26SS55GW | Complete Owner's Guide (English) - Page 37
37 Temperatures Are Too Cold Problem Freezer temperature too cold. Refrigerator temperature is satisfactory. Refrigerator temperature too cold. Freezer temperature is satisfactory. Food stored in drawers freezes. Food stored in Meat Keeper freezes (some models). Cause • Freezer control is set - Electrolux EI26SS55GW | Complete Owner's Guide (English) - Page 38
from inside refrigerator to meet warm air from outside. Correction • The rate of frost buildup and internal sweating increases. • See Problem section, See Problem section, Opening/Closing of Doors/ Drawers. Perfect Temp Drawer (some models) Problem Display does not illuminate or shows "CE". - Electrolux EI26SS55GW | Complete Owner's Guide (English) - Page 39
• Water supply is not connected • Connect water supply (see Installation to refrigerator. Instructions). • Household water line valve is • Turn on household water line valve. not open. • Freezer is not cold enough. • See Problem section, Temperatures Are Too Warm. • Valve on cold water pipe - Electrolux EI26SS55GW | Complete Owner's Guide (English) - Page 40
. Allow sufficient time for the ice to be made. When ice is made, the dispenser should operate. • Ensure freezer door is closed. (See Problem Section, Opening/Closing of Doors/Drawers) • Motor is overloaded. Motor overload protector will reset in approximately 3 minutes. Ice can then be dispensed - Electrolux EI26SS55GW | Complete Owner's Guide (English) - Page 41
Ensure floor is level and solid, and can adequately support the refrigerator. Contact a carpenter to correct a sagging or sloping floor. • Keep less food in drawer. • Clean drawer, runners, and tracks. See Care & Cleaning Tips. Light Bulb Is Not On Problem Light bulb is not on. Cause • Light bulb - Electrolux EI26SS55GW | Complete Owner's Guide (English) - Page 42
-
 1
1 -
 2
2 -
 3
3 -
 4
4 -
 5
5 -
 6
6 -
 7
7 -
8
-
9
-
10
-
11
-
12
-
13
-
14
-
15
-
16
-
17
-
18
-
19
-
20
-
21
-
22
-
23
-
24
-
25
-
26
-
27
-
28
-
29
-
30
-
31
-
32
-
33
-
34
-
35
-
36
-
37
-
38
-
39
-
40
-
41
-
42
 |
 |
241868903
December 2008
Use & Care Guide
Side-By-Side Refrigerator
Guia de Uso y Cuidado
Refrigerador de dos puertas
Guide d’utilisation et d’entretien
Réfrigérateur à compartiments juxtaposés