Electrolux EW30GS65G Use and Care Manual
Electrolux EW30GS65G - 30 in. Gas Range Manual
 |
View all Electrolux EW30GS65G manuals
Add to My Manuals
Save this manual to your list of manuals |
Electrolux EW30GS65G manual content summary:
- Electrolux EW30GS65G | Use and Care Manual - Page 1
Use & Care Guide Gas Slide-In Range 318 203 868 (0710) Rev. A - Electrolux EW30GS65G | Use and Care Manual - Page 2
side trim of the oven and visible when the door is opened. See picture below. QUESTIONS? For toll-free telephone support in the U.S. and Canada: 1-877-4ELECTROLUX (1-877-435-3287) For online support and internet product information: www.electrolux.com ©2007 Electrolux Home Products, Inc. Post - Electrolux EW30GS65G | Use and Care Manual - Page 3
a Record for Future Use 2 Model and Serial Number Location 2 Questions 2 Table of Contents 3 Safety 4 Important Safety Instructions 4-7 Feature Overview 8 Your Slide-In Range 8-9 Oven Rack Supports and Oven Vents 10 Removing and Replacing Oven Racks 11 Oven Control Pad Functions 12-13 - Electrolux EW30GS65G | Use and Care Manual - Page 4
Safety IMPORTANT SAFETY INSTRUCTIONS Please read all safety instructions before using your new Electrolux range. ! WARNING To reduce the risk of fire, electrical shock, or injury when using your wall oven, follow basic precautions including the following: If the information in this manual is not - Electrolux EW30GS65G | Use and Care Manual - Page 5
and overheating of the oven. Do not store items of interest to children in the cabinets above the appliance. Children climbing on the range to reach items could to become too hot. In case of fire or gas leak, be sure to turn off the main gas shutoff valve. • Use Only Dry Potholders-Moist or damp - Electrolux EW30GS65G | Use and Care Manual - Page 6
gas burners. If you use a stove top grill on a sealed gas utensils are suitable for cooktop service without breaking due to the Do not use Searing Grill on the cooktop. The searing grill is not designed burner and cause combustion problems. IMPORTANT INSTRUCTIONS FOR USING YOUR OVEN • Use Care When - Electrolux EW30GS65G | Use and Care Manual - Page 7
removing and replacing light bulb. IMPORTANT INSTRUCTIONS FOR CLEANING YOUR RANGE • Clean the range regularly to keep all parts free the parts of the oven listed in this owner's guide. Before self-cleaning the oven, remove all utensils stored in the oven. • Do not clean the oven door gasket. The - Electrolux EW30GS65G | Use and Care Manual - Page 8
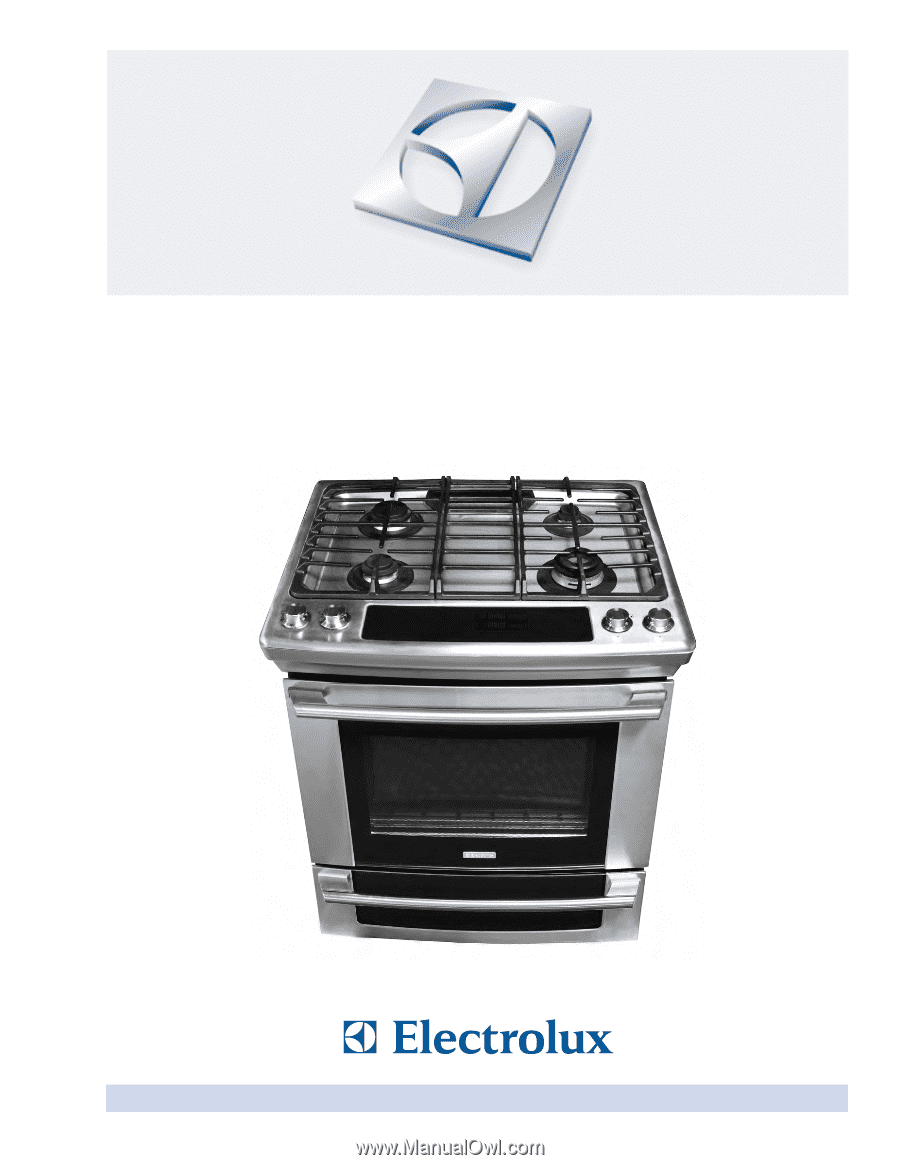
8 Feature Overview YOUR SLIDE-IN RANGE PORCELAIN GRATES DEEP DRAWN COOKTOP TOUCH ACTIVATED GLASS CONTROL PANEL LARGE METAL HANDLE CURVED GLASS OVEN DOOR WARMER DRAWER DOOR WINDOW GLASS POWER BURNER 14 000 BTU REGULAR BURNER 9 500 BTU SIMMER BURNER 5 000 BTU DUAL FLAME BURNER 18 000 BTU - Electrolux EW30GS65G | Use and Care Manual - Page 9
Feature Overview 9 YOUR SLIDE-IN RANGE OVEN DOOR LATCH OVEN VENT BROILING ELEMENT OVEN RACK SUPPORT SLIDEABLE OVEN RACKS CONVECTION FAN OVEN LIGHT OVEN RACK SUPPORT BRACKETS BROILER PAN BROILER PAN GRID CONVECTION ROASTING RACK - Electrolux EW30GS65G | Use and Care Manual - Page 10
not removed, the self-clean cycle won't start. Oven Rack Positions This oven is equipped with ladder rack supports with 7 positions to accomodate precisely every mode of cooking. Rack positions 7 6 5 4 3 2 1 (NON-SLIDING RACK ONLY) Oven Vent Location The oven is vented above each door. When the - Electrolux EW30GS65G | Use and Care Manual - Page 11
on how to clean the racks. Replacing Sliding Oven Racks To replace the oven racks, follow the intructions above in reverse order. TOWARD FRONT OF OVEN TOWARD BACK OF OVEN 1st Bracket 2nd Bracket Oven Rack Oven Rack Slider Oven Rack Support Removing Non-Sliding Oven Rack Simply pull the rack and - Electrolux EW30GS65G | Use and Care Manual - Page 12
13 14 15 16 17 18 19 20 1 Light Pad- Used to turn the oven light on and off. 2 Bake Pad- Used to enter the normal baking mode Used to select the slow cook mode. 8 Control Lock Pad- Used to disable all oven function. 9 Perfect Turkey Pad- Used to select the perfect turkey cooking mode. 10 Defrost - Electrolux EW30GS65G | Use and Care Manual - Page 13
30 32 34 35 21 Bread Proof Pad- Used to select the bread proof mode. 22 Clean Pad- Used to select the self-cleaning mode. 23 Upper Oven Pad- Used to activate the upper oven for cooking operation. 24 Warmer Oven timer. 32 Start Pad- Used to start all oven functions. 33 0 Thru 9 Number Pads- Used - Electrolux EW30GS65G | Use and Care Manual - Page 14
supply to the range has been interrupted, the timer in the display will flash with "12:00". The clock cannot be set when the oven is on. time of day. To set the clock (example for 1:30): 1. Press 1 3 0 pads to set the time of day to 1:30. The pads + hi or lo can also be pressed - Electrolux EW30GS65G | Use and Care Manual - Page 15
message will appear in the upper display. Do not attempt to open the oven door while DOOR LOCK is flashing. To toggle the Control Lock ON or stop cooking. The Timer feature can be used during any of the other oven control functions and cooking modes. To set the Timer (example for 5 minutes): - Electrolux EW30GS65G | Use and Care Manual - Page 16
18 000 BTU burner : Place the burner head over the gas orifice (Figure 1). Be careful not to damage the electrode light. If the burner does not light, contact a Service Center. Do not service the sealed burner yourself. PROPER BURNER ADJUSTMENTS The color instructions under General Care & Cleaning. - Electrolux EW30GS65G | Use and Care Manual - Page 17
Follow manufacturer's instructions. Some utensils were not made to be used in the oven or on the process. Use the chart below as a guide for determining proper flame size for various types properly. RIGHT *Flame Size High Flame Medium Flame Low Flame Type of Cooking Start most foods; bring water - Electrolux EW30GS65G | Use and Care Manual - Page 18
control knobs do not have to be set at a particular mark. Use the guides and adjust the flame as needed. DO NOT cook with the Surface Control knob In the event of an electrical power outage, the surface burners can be lit manually. To light a surface burner, hold a lit match to the burner head, - Electrolux EW30GS65G | Use and Care Manual - Page 19
Surface Cooking 19 USING THE GRIDDLE The griddle is intended for direct food cooking and can be used on both sides. Do not use pans or other cookware on the griddle. Doing so could damage the finish. With the grate in position over the burner, set the griddle on top of the grate positioning the - Electrolux EW30GS65G | Use and Care Manual - Page 20
use in the warmer drawer. Arranging Warmer Oven Rack Positions Set the warmer oven rack in the vertical position as shown below. Upright Position Downward Position The rack can be used in 2 ways: • In the upright position to allow low profile food items to be placed both under and on top of the - Electrolux EW30GS65G | Use and Care Manual - Page 21
Bake Temperature of 425°F: 1. Select oven by pressing UPPER OVEN . UPPER OVEN 2. Press the HI + hi or LO lo pads to get to the desired temperature. 3. Press START . Baking Problems Refer to the Baking Problems Table in the Solutions to Common Problems section of this manual. - Electrolux EW30GS65G | Use and Care Manual - Page 22
can also be part of a Multi-Stage sequence. To set a timed cooking (example is a 450°F Bake for 30 minutes): 1. Select oven by pressing UPPER OVEN . UPPER OVEN 2. Press BAKE . The temperature numbers will blink in the display. 3. Enter temperature needed; 4 5 0 . 4. Press COOK OPTIONS to - Electrolux EW30GS65G | Use and Care Manual - Page 23
outer appearance. The temperature probe cannot be used with this mode. The oven can be programmed to broil at any temperature from 300°F to 550 Well Well Well Well Well Medium Well Should an oven fire occur, keep the oven door closed and turn off the oven. If the fire continues, throw baking soda on - Electrolux EW30GS65G | Use and Care Manual - Page 24
see Convection Convert section on next page for further instruction on temperature conversion. • Use tested recipes with multiple racks, place the oven racks in positions 2 and 6 or 1, 4 and 7. • Most bakeries (except cakes) should be baked on pans with no sides or very low sides to allow heated - Electrolux EW30GS65G | Use and Care Manual - Page 25
the cook time and end time features, "CF" (check food) will be displayed when 75% of the bake time is complete. At this time the oven control will sound 3 long beeps at regular intervals until baking had finished. When the bake time has completely finished the control will beep at regular - Electrolux EW30GS65G | Use and Care Manual - Page 26
spatters. The roasting rack will hold the meat. • Place an oven rack on rack position 2 (next-bottom). • Make sure the 180° F 180° F 160° F 160° F 160° F 160° F 25-30 25-30 15-25 8-10 10-15 12-16 12-16 30-40 20-30 20-25 30-40 * For beef: med rare 145°F, med 160°F, well done 170°F ** Stuffed - Electrolux EW30GS65G | Use and Care Manual - Page 27
cooking modes in the Setting Warmer Oven section of this manual. To set a Keep Warm Temperature of 170°F: 1. Arrange interior oven racks (for upper oven only). 2. Select oven by pressing UPPER OVEN UPPER OVEN or WAMER OVEN . 3. Press KEEP WARM . 4. Press START . 5. The Multi-Stage - Electrolux EW30GS65G | Use and Care Manual - Page 28
burnt. This is normal. The Slow Cook mode uses the hidden bake element to maintain a low temperature in the oven. The temperature probe cannot be used in this cooking mode. There are 2 settings available, high (HI) or low (LO). The maximum cook time for the Slow Cook feature is 12 hours unless the - Electrolux EW30GS65G | Use and Care Manual - Page 29
used to dry and/or preserve foods such as fruits, meats, vegetables and herbs. This mode holds an optimum low temperature while circulating the heated air to slowly remove moisture. The oven can be programmed for Dehydrating at any temperature between 100°F to 225°F with a default temperature of 120 - Electrolux EW30GS65G | Use and Care Manual - Page 30
: • No need to preheat for this feature. • Proof bread until dough has doubled in bulk. • For best results, place a shallow pan with 1 to 3 cups of boiling hot water on the lowest rack position to keep the air moist inside the oven cavity. • Allow at least 1" between edge of pan and walls of - Electrolux EW30GS65G | Use and Care Manual - Page 31
prevent spatters. The roasting rack will hold the turkey. • Place an oven rack on next-bottom rack position. • Make sure the roasting rack is whole* Chicken Weight 12 to 16 lbs. 16 to 20 lbs. 20 to 24 lbs. 3 to 4 lbs. Oven Temp 325° F 325° F 325° F 350-375° F Internal Temp 180° F 180° F 180° F - Electrolux EW30GS65G | Use and Care Manual - Page 32
at any temperature between 130°F to 210°F with a default temperature of 170°F. This unit is equipped with one temperature probe entry in the upper oven only. IMPORTANT: 1. Use only the probe supplied with your appliance; any other may result in damage to the probe or the appliance. 2. Handle the - Electrolux EW30GS65G | Use and Care Manual - Page 33
starts. To set a Multi Stage sequence (Timed Convection Bake, Timed Broil, Keep Warm): 1. Arrange interior oven racks and place food. 2. Select oven by pressing UPPER OVEN UPPER OVEN 3. Press MULTI STAGE . Stage 1 4. Press CONVECTION BAKE . "000" will flash in the display prompting to - Electrolux EW30GS65G | Use and Care Manual - Page 34
pad. The temperature and cook time pads will light up and the control will display the programmed values. To edit a programmed stage cooking mode being reviewed, press CANCEL . This will bring you back to the programming steps explained in the previous page. The third stage cannot be edited but can - Electrolux EW30GS65G | Use and Care Manual - Page 35
range is first plugged in, or when the power supply to the range has been interrupted, the display will show "CLO 12:00". The clock must be set before the oven page. 2. Press 1 3 0 pads to set the time of day to 1:30. The pads + hi or lo can also be pressed to raise or lower - Electrolux EW30GS65G | Use and Care Manual - Page 36
the recommended temperature. The baking results should help you to decide how much of an adjustment is needed. Each oven can be individually adjusted. To adjust the oven temperature: 1. Press USER PREFERENCES until you get to the UPO menu page. 2. Enter the temperature by pressing the + hi - Electrolux EW30GS65G | Use and Care Manual - Page 37
setting on and off. 3. Press START to accept the changes and go back to user preferences menu display. RE-SETTING TO DEFAULT FACTORY SETTINGS The oven control can be set to return to its original factory settings. This includes: Setting the Clock ON/OFF to ON, Setting the clock display mode - Electrolux EW30GS65G | Use and Care Manual - Page 38
and features. To save a Favorite (example is a 450°F Bake for 30 minutes): - Saving a Favorite can only be done for an oven which is currently in operation. 1. Select oven by pressing UPPER OVEN . UPPER OVEN 2. Press BAKE . The default temperature will appear in the display. 3. Enter - Electrolux EW30GS65G | Use and Care Manual - Page 39
control for a COOK TIME do so at this time. If not, skip this step and continue to step 5. Refer to their section for complete instructions. Remember the oven will shut down after using COOK TIME and therefore may only be used once during the Sabbath/Jewish Holidays. 5. Press START . 6. The - Electrolux EW30GS65G | Use and Care Manual - Page 40
hi and LO lo pads for at least 3 seconds. SAb will disappear from the display and the oven may be used with all normal functions. For further assistance, guidelines for proper usage, and a complete list of models with the Sabbath feature, please visit the web at http:\\www.star-k.org. - Electrolux EW30GS65G | Use and Care Manual - Page 41
oven to cool before cleaning. • Wear rubber gloves when cleaning any exterior parts of the oven manually. During the self-cleaning cycle, the outside of the wall oven Hand Clean Door Area outside of the Door Gasket 4. Oven racks and oven rack supports must be removed. If they are not removed the - Electrolux EW30GS65G | Use and Care Manual - Page 42
oven racks and the racks supports. 2. Be sure the clock is set with the correct time of day and the oven door is closed. 3. Select oven by pressing UPPER OVEN UPPER OVEN the oven door lock to close. To set the controls for a delayed Self-Cleaning cycle: 1. Follow the instructions above. - Electrolux EW30GS65G | Use and Care Manual - Page 43
paper towel for 30 to 40 minutes. Rinse. Cleaners made especially for stainless steel are recommended. Be sure to rinse the cleaners as bluish stains may occur during heating and cannot be removed. Oven Racks Oven racks and oven rack supports must be removed from the oven during the selfclean - Electrolux EW30GS65G | Use and Care Manual - Page 44
the beginning of the General Care & Cleaning section in this Use & Care Manual. TO REMOVE AND REPLACE OVEN DOOR 1. Open the door to the fully opened position. 2. Pull up the lock located on each hinge support toward front of range. You may have to apply a little upward pressure on the lock to pull - Electrolux EW30GS65G | Use and Care Manual - Page 45
with a glass shield. The glass shield can be remove to be cleaned manually or to change the oven light. THIS GLASS SHIELD MUST BE IN PLACE WHENEVER THE OVEN IS IN USE. To replace the light bulb: CAUTION: BE SURE THE OVEN IS COOL. 1. Turn the power off at the main source. 2. Wear a leather - Electrolux EW30GS65G | Use and Care Manual - Page 46
spraw water on them). Surface Burner 2nd Cap Refer to the following instructions: To Remove and Replace the Surface Burner Grate, Surface Burner Cap FOOD, CLEANING AGENTS OR ANY OTHER MATERIAL TO ENTER THE GAS ORIFICE HOLDER OPENING. ALWAYS make sure that the surface burner service technician. - Electrolux EW30GS65G | Use and Care Manual - Page 47
General Care & Cleaning 47 PORCELAIN ENAMEL COOKTOP CLEANING INSTRUCTIONS ! WARNING Do not use a cooktop cleaner on a hot controls are turned to OFF and the cooktop is cool. DO NOT use commercial oven cleaners on the exterior surfaces including rangetop and door frame. Correct and consistent cleaning - Electrolux EW30GS65G | Use and Care Manual - Page 48
door opened too frequently. • Place a marked glass measuring cup filled with water on the center of the oven rack. If the water level is uneven, refer to the installation instructions for leveling the range. • Be sure to allow 5.1 cm to 10.2 cm (2" to 4") of clearance on all sides of each pan in - Electrolux EW30GS65G | Use and Care Manual - Page 49
Solutions to Common Problems 49 IMPORTANT Before calling for service, review this list. It may save you both time and expense. This list includes common experiences that are not the result of defective workmanship or material in your cooktop. OVEN CONTROL BEEPS AND DISPLAYS AN "F" ERROR CODE • - Electrolux EW30GS65G | Use and Care Manual - Page 50
50 Solutions to Common Problems SELF-CLEANING CYCLE DOES NOT WORK • Make sure the oven door is closed. • Make sure you have removed the oven racks and the oven rack supports from the oven. • Controls not set properly. Follow instructions under "Using the Self-Clean Feature". OVEN SMOKES EXCESSIVELY - Electrolux EW30GS65G | Use and Care Manual - Page 51
Problems 51 FLAMES INSIDE OVEN OR SMOKE FROM VENT • Excessive spillovers in oven. This is normal, especially for high oven temperatures, pie spillovers or for large amounts of grease on bottom of oven models only). Burners can be lit manually. See Setting Surface Controls in this Use and Care Guide. - Electrolux EW30GS65G | Use and Care Manual - Page 52
performed by Electrolux or an authorized service company. Product features or specifications as described or illustrated are subject to change without notice. USA 1-877-435-3287 Electrolux Major Appliances North America P.O. Box 212378 Augusta, GA 30907 Canada 1-800-265-8352 Electrolux Canada Corp
-
 1
1 -
 2
2 -
 3
3 -
 4
4 -
 5
5 -
 6
6 -
 7
7 -
8
-
9
-
10
-
11
-
12
-
13
-
14
-
15
-
16
-
17
-
18
-
19
-
20
-
21
-
22
-
23
-
24
-
25
-
26
-
27
-
28
-
29
-
30
-
31
-
32
-
33
-
34
-
35
-
36
-
37
-
38
-
39
-
40
-
41
-
42
-
43
-
44
-
45
-
46
-
47
-
48
-
49
-
50
-
51
-
52
 |
 |
318 203 868 (0710) Rev. A
Use & Care Guide
Gas Slide-In Range