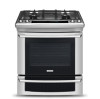
Electrolux EW30IS6CJS Use and Care Manual
Electrolux EW30IS6CJS Manual
 |
View all Electrolux EW30IS6CJS manuals
Add to My Manuals
Save this manual to your list of manuals |
Electrolux EW30IS6CJS manual content summary:
- Electrolux EW30IS6CJS | Use and Care Manual - Page 1
Use & Care Guide Electric Slide-In Range 318 205 809 (1012) Rev. B - Electrolux EW30IS6CJS | Use and Care Manual - Page 2
side trim of the oven and visible when the door is opened. See picture below. QUESTIONS? For toll-free telephone support in the U.S. and Canada: 1-877-4ELECTROLUX (1-877-435-3287) For online support and internet product information: www.electroluxappliances.com ©2010 Electrolux Home Products, Inc - Electrolux EW30IS6CJS | Use and Care Manual - Page 3
Model and Serial Number Location 2 Questions 2 Table of Contents 3 Safety 4 Important Safety Instructions 4-7 Feature Overview 8 Your Slide-In Range 8-9 Oven Rack Supports and Oven Vents 10 Removing and Replacing Oven Racks 11 Control -38 Electronic Control Settings 39 User Preference Menu - Electrolux EW30IS6CJS | Use and Care Manual - Page 4
and local code requirements, and in Canada with CSA C22.1 PART 1-latest edition and local code requirements. Install only per installation instructions provided in the literature package for this appliance. Ask your dealer to recommend a qualified technician and an authorized repair service. Know how - Electrolux EW30IS6CJS | Use and Care Manual - Page 5
in the cabinets above the appliance. Children climbing on the range to reach items could be seriously injured. • Do not leave oven off. If the oven is not turned off and the power resumes, the oven may begin to operate again. Food left unattended could catch fire or spoil. Electronic controllers - Electrolux EW30IS6CJS | Use and Care Manual - Page 6
to line oven bottom or any other part of the service . IMPORTANT INSTRUCTIONS FOR USING YOUR OVEN • Use oven/warmer drawer. • Keep Oven Vent Ducts Unobstructed. The oven is vented at the front above the oven door (ceramic glass cooktop models) or through the right rear element (coil element models - Electrolux EW30IS6CJS | Use and Care Manual - Page 7
bulb. IMPORTANT INSTRUCTIONS FOR CLEANING YOUR RANGE • Clean the range regularly to keep all parts free of OVENS: • Clean in the self-cleaning cycle only the parts of the oven listed in this owner's guide. Before self-cleaning the oven, remove all utensils stored in the oven. • Do not clean the oven - Electrolux EW30IS6CJS | Use and Care Manual - Page 8
YOUR SLIDE-IN RANGE CERAMIC GLASS COOKTOP TOUCH ACTIVATED GLASS CONTROL PANEL LARGE METAL HANDLE CURVED GLASS OVEN DOOR LOWER OVEN DOOR WINDOW GLASS OVEN VENT OVEN DOOR LATCH BROILING ELEMENT OVEN RACK SUPPORT CONVECTION FAN HALOGEN OVEN LIGHT SLIDEABLE OVEN RACKS LOWER OVEN RACK CONVECTION ROASTING - Electrolux EW30IS6CJS | Use and Care Manual - Page 9
adapts the Cooking Zones to the pan sizes in use. EFFICIENT- Induction cooking heats faster while using less energy. Induction power levels are quick to boil and delicate when simmering. 7" INDUCTION ELEMENT 8" INDUCTION ELEMENT UPPER OVEN LOW E R OVEN 6" INDUCTION ELEMENT 10" INDUCTION ELEMENT - Electrolux EW30IS6CJS | Use and Care Manual - Page 10
Feature Overview OVEN RACK SUPPORTS & OVEN VENTS Installing Oven Rack Supports ALWAYS INSTALL OVEN RACK SUPPORT BEFORE TURNING ON THE OVEN (WHEN THE OVEN IS COOL). To install oven rack support, insert the supports by pushing them downward into the two brackets on each side of the oven interior, as - Electrolux EW30IS6CJS | Use and Care Manual - Page 11
on how to clean the racks. Replacing Sliding Oven Racks To replace the oven racks, follow the instructions above in reverse order. TOWARD FRONT OF OVEN TOWARD BACK OF OVEN 1st Bracket 2nd Bracket Oven Rack Oven Rack Slider Oven Rack Support Removing Non-Sliding Oven Rack Simply pull the rack and - Electrolux EW30IS6CJS | Use and Care Manual - Page 12
. 8 Slow Cook Pad- Used to select the slow cook mode. 9 Perfect Turkey Pad- Used to select the perfect turkey cooking mode. 10 Control Lock Pad- Used to disable all oven function. 11 Multi Stage Pad- Used to enter up to three subsequent modes. 12 Cook Options Pad- Used to light up the - Electrolux EW30IS6CJS | Use and Care Manual - Page 13
Feature Overview 13 OVEN CONTROL PAD FUNCTIONS (CONTINUED) 18 19 20 21 28 cycle. 28 Upper Oven Pad- Used to activate the upper oven for cooking operation. 29 Lower Oven Pad- Used to activate the lower oven for cooking operation. 30 User Preference Pad- Used to bring the user preference menu in the - Electrolux EW30IS6CJS | Use and Care Manual - Page 14
14 Feature Overview COOKTOP CONTROL PAD FUNCTIONS 38 39 40 42 44 46 41 43 45 38 ON / OFF Pad- Used to toggle ON and OFF the associated induction element. 39 HI + Pad- Used to select the "Power Boost" temperature or raise the temperature currently displayed. 40 MED Pad- Used to select the - Electrolux EW30IS6CJS | Use and Care Manual - Page 15
feature you must select either the upper oven or the lower oven. User preferences will be available during this mode as well as timers, oven light and the control lock. TEMPERATURE VISUAL DISPLAY Your oven is equipped with a temperature visual display for each oven. When a cooking mode is set, the - Electrolux EW30IS6CJS | Use and Care Manual - Page 16
when the set time has run out. It does not start or stop cooking. The Timer feature can be used during any of the other oven control functions and cooking modes. To set the Timer (example for 5 minutes): 1. Press TIMER . "00:00" will appear in the display. + - 2. Press 5 pad to set the - Electrolux EW30IS6CJS | Use and Care Manual - Page 17
Controls with Induction cooktops Induction cooking. It is recommended to always use heavier high quality stainless steel cookware on your Induction Induction Cooktop require a MINIMUM pan size to be used at each location. The inner ring of each Cooking Zone is your guide the digital part of the display - Electrolux EW30IS6CJS | Use and Care Manual - Page 18
18 Setting Surface Controls COOKWARE RECOMMENDATIONS INCORRECT CORRECT • Cookware not centered on Cooking Zone surface. • Cookware centered correctly on turned off circle surrounding the digital display for that affected zone. Correct the problems before attempting to reactivate the cooktop. - Electrolux EW30IS6CJS | Use and Care Manual - Page 19
Setting Surface Controls 19 USE QUALITY COOKWARE IN GOOD CONDITION The cookware used with the Induction Cooktop should have flat bottoms ! CAUTION DO NOT TOUCH HOT COOKWARE or PANS directly with hands. Always use oven mitts or pot holders to protect hands from burns. ! CAUTION DO NOT SLIDE - Electrolux EW30IS6CJS | Use and Care Manual - Page 20
be used at any moment to lower the power setting of the cooking zone. The hi+ and lo- keys provide incremental adjustments for more precise control when changing settings between the lower heat levels (Lo to 3.0 power levels). Higher heat level setting changes (between 3.0 to HI) will change much - Electrolux EW30IS6CJS | Use and Care Manual - Page 21
using any of the induction heating zones, the ceramic cooktop will become very hot from heat transferred by the cookware. Even after turning the control off, the cooktop and pepper shakers, spoon holders or plastic wrappings on top of the range when it is in use. These items could melt or ignite. - Electrolux EW30IS6CJS | Use and Care Manual - Page 22
OVEN LOW E R OVEN Fig. 2 Your cooktop is equipped with four cooking zones within two heating sections: right and left. Each section is powered by one induction inverter with Induction Cooking create some unusual background noises. These noises are normal and part of the Induction Cooking process - Electrolux EW30IS6CJS | Use and Care Manual - Page 23
keep warm feature to keep hot cooked foods at serving temperature. The lower oven can only be used with some cooking modes; Bake, Slow Cook and Keep Warm (read their sections for precise instructions). KEEP CHILDREN AWAY FROM THE LOWER OVEN WHEN HOT. FAILURE TO DO SO CAN RESULT IN BURNS. Always use - Electrolux EW30IS6CJS | Use and Care Manual - Page 24
of 425°F: UPPER LOWER 1. Select oven by pressing UPPER OVEN OVEN or LOWER OVEN . OVEN + - 2. Press the HI hi or LO lo pads to get to the desired temperature. 3. Press START . Baking Problems Refer to the Baking Problems Table in the Solutions to Common Problems section of this manual. - Electrolux EW30IS6CJS | Use and Care Manual - Page 25
be part of a Multi-Stage sequence. To set a timed cooking (example is a 450°F Bake for 30 minutes): UPPER 1. Select oven by pressing UPPER OVEN . OVEN 2. END TIME End Time allows the oven to be set to shut off automatically at a set time of day. The oven control will calculate the remaining time by - Electrolux EW30IS6CJS | Use and Care Manual - Page 26
allows the dripping grease to be kept away from the high heat of the broil element (see Figure 1). • For best broiling results, broil with the oven door slightly open. • DO NOT use the broil pan without the insert. DO NOT cover the broil pan insert with foil. The exposed grease could - Electrolux EW30IS6CJS | Use and Care Manual - Page 27
Please see Convection Convert section on next page for further instruction on temperature conversion. • Use tested recipes with times be set to control your cooking time (read their sections for directions). 7. Remove food. Always use oven mitts when removing hot pans from the oven. 8. Press CANCEL - Electrolux EW30IS6CJS | Use and Care Manual - Page 28
the cook time and end time features, "CF" (check food) will be displayed when 75% of the bake time is complete. At this time the oven control will sound 3 long beeps at regular intervals until baking had finished. When the bake time has completely finished the - Electrolux EW30IS6CJS | Use and Care Manual - Page 29
Probe, Cook Time, Timer, End Time and Rapid Preheat features can be set to control your cooking time (read their sections for directions). 6. Remove food. Always use oven mitts when removing hot pans from the oven. Figure 1 7. Press CANCEL time. to stop or cancel the Convection Roast feature at - Electrolux EW30IS6CJS | Use and Care Manual - Page 30
on. Broiler Pan To set a Convection Broil Temperature of 550°F: 1. Arrange interior oven racks. 2. Select oven by pressing UPPER OVEN . UPPER OVEN 3. Press CONVECTION BROIL . 4. Press START . 5. Place food in the oven after 2 minutes. 6. Turn food when the top side is browned and cook - Electrolux EW30IS6CJS | Use and Care Manual - Page 31
recommendations for lower oven cooking modes in the Setting Lower Oven section of this manual. To set a Keep Warm Temperature of 170°F: 1. Arrange interior oven racks (for upper oven only). 2. Select oven by pressing UPPER OVEN UPPER OVEN or LOWER OVEN . LOWER OVEN 3. Press KEEP WARM - Electrolux EW30IS6CJS | Use and Care Manual - Page 32
mode. There are 2 settings available, high (HI) or low (LO). The maximum cook time for the Slow Cook feature is 12 hours unless the oven control has been changed to the Continuous Bake mode or the Sabbath mode has been activated. Slow Cook Tips: • Completely thaw all frozen foods before cooking - Electrolux EW30IS6CJS | Use and Care Manual - Page 33
racks and place food in the oven. 2. Select oven by pressing UPPER OVEN . UPPER OVEN 3. Press DEFROST . 4. Press START to start the defrosting. A "dEF" message is displayed when active. 5. The Cook Duration, End Time and Timer features can be set to control your Defrost time (read their - Electrolux EW30IS6CJS | Use and Care Manual - Page 34
and place bread dough in the oven. 2. Select oven by pressing UPPER OVEN . UPPER OVEN 3. Press BREAD PROOF . 4. Press START to begin the bread proofing. 5. The Cook Time, Timer and End Time features can be set to control your Bread Proof time (read their sections for directions). 6. Remove - Electrolux EW30IS6CJS | Use and Care Manual - Page 35
PERFECT TURKEY This mode uses the temperature probe to control precisely the cooking of a perfect turkey. The the grid will help prevent spatters. The roasting rack will hold the turkey. • Place an oven rack on rack position 2 (next-bottom). • Make sure the roasting rack is securely seated on - Electrolux EW30IS6CJS | Use and Care Manual - Page 36
into the thickest part of the inner thigh from below and parallel to the leg (see figure 1). Setting the Oven when using the oven will go into a KEEP WARM mode until you press CANCEL . The probe can be damaged by very high temperature. To protect the probe against this damage, the oven control - Electrolux EW30IS6CJS | Use and Care Manual - Page 37
. During stage 2 and 3, the electronic control displays the set temperature only. To set a Multi Stage sequence (Timed Convection Bake, Timed Broil, Keep Warm): 1. Arrange interior oven racks and place food. 2. Select oven by pressing UPPER OVEN . UPPER OVEN 3. Press MULTI STAGE . Stage - Electrolux EW30IS6CJS | Use and Care Manual - Page 38
time while it is in progress (or during its programming) by the Cancel key. If the key is pressed during a multi-stage programming, the electronic control returns to Idle mode. - Electrolux EW30IS6CJS | Use and Care Manual - Page 39
Hours Time of Day, Audio Control, and Adjusting the oven temperature. The User Preferences menu is only available when the oven is not being used (not cooking). To browse through the User Preferences menu: 1. Press USER PREF to bring up the User Preferences menu. 2. Press USER PREF again to browse - Electrolux EW30IS6CJS | Use and Care Manual - Page 40
lo or hi to toggle between displaying or hiding the clock. 3. Press START display. to accept the changes and go back to user preferences menu SETTING TIME OF DAY DISPLAY - 12 OR 24 HOURS The oven control can be programmed to display time of day in 12 hours or 24 hours mode. The - Electrolux EW30IS6CJS | Use and Care Manual - Page 41
to toggle the energy saving setting on and off. 3. Press START to accept the changes and go back to user preferences menu display. RE-SETTING TO DEFAULT FACTORY SETTINGS The oven control can be set to return to its original factory settings. This includes: Setting the Clock ON/OFF to ON, Setting - Electrolux EW30IS6CJS | Use and Care Manual - Page 42
42 Oven Controls MY FAVORITES The Favorites settings allows you to save your most frequently used or most complex cooking sequences. This feature will save the cooking mode, the target temperature and the cooktime (if any). The oven can recall up to six cooking sequences from its internal memory, - Electrolux EW30IS6CJS | Use and Care Manual - Page 43
pressing either UPPER OVEN UPPER OVEN or LOWER OVEN . LOWER OVEN 3. Press BAKE . 4. If you desire to set the oven control for a COOK TIME do so at this time. If not, skip this step and continue to step 5. Refer to their section for complete instructions. Remember the oven will shut down - Electrolux EW30IS6CJS | Use and Care Manual - Page 44
oven control will no longer beep or display any further changes once the oven is set for the Sabbath feature. 8. The oven models with the Sabbath feature, please visit the web at http:\\www.star-k.org. Notes for the use of the cooktop in Sabbath mode: • No Sabbath mode is available for induction - Electrolux EW30IS6CJS | Use and Care Manual - Page 45
oven to cool before cleaning. • Wear rubber gloves when cleaning any exterior parts of the oven manually. During the self-cleaning cycle, the outside of the oven items can not withstand high cleaning temperatures. 4. Oven racks and oven rack supports must be removed. If they are not removed - Electrolux EW30IS6CJS | Use and Care Manual - Page 46
locked the "DOOR flashing and remain on. Note: Allow about 15 seconds for the oven door lock to close. " indicator light will stop To set the controls for a delayed Self-Cleaning cycle: 1. Follow the instructions above. 2. Press COOK OPTIONS to bring up the cook options items. 3. Press END TIME - Electrolux EW30IS6CJS | Use and Care Manual - Page 47
GENERAL CLEANING Cleaning Various Parts of Your appliance Before cleaning any part of the appliance, be sure all controls are turned OFF occur during heating and cannot be removed. Oven Racks Oven racks and oven rack supports must be removed from the oven during the self-clean cycle for cleaning. - Electrolux EW30IS6CJS | Use and Care Manual - Page 48
of stainless parts. Please refer to the table provided at the beginning of the General Care & Cleaning section in this Use & Care Manual. TO REMOVE AND REPLACE OVEN DOOR 1. Open the door to the fully opened position. 2. Pull up the lock located on each hinge support toward front of range. You may - Electrolux EW30IS6CJS | Use and Care Manual - Page 49
the door is closed by using the oven light switch located on the control panel. The lamp is covered with a glass shield. The glass shield can be remove to be cleaned manually or to change the oven light. THIS GLASS SHIELD MUST BE IN PLACE WHENEVER THE OVEN IS IN USE. To replace the light - Electrolux EW30IS6CJS | Use and Care Manual - Page 50
metal or glass across the cooktop. Do not use your cooktop as a cutting board or work surface in the kitchen. Do not cook foods directly on the FOR THE CERAMIC GLASS COOKTOP ! CAUTION Before cleaning the cooktop, be sure the controls are turned to OFF and the cooktop is COOL. ! WARNING DO NOT use - Electrolux EW30IS6CJS | Use and Care Manual - Page 51
nylon pads. They may scratch the cooktop, making it more difficult to clean. • Do not use harsh cleaners, such as chlorine bleach, ammonia or oven cleaners, as they may etch or discolor the cooktop. • Do not use dirty sponges, cloths or paper towels, as they can leave soil or lint - Electrolux EW30IS6CJS | Use and Care Manual - Page 52
space on all sides of pan. • Place a marked glass measuring cup filled with water on the center of the oven rack. If the water level is uneven, refer to the installation instructions for leveling the range. • Be sure to allow 5.1 cm to 10.2 cm (2" to 4") of clearance on all sides of each pan in - Electrolux EW30IS6CJS | Use and Care Manual - Page 53
Common Problems 53 IMPORTANT Before calling for service, review this list. It may save you both time and expense. This list includes common experiences that are not the result of defective workmanship or material in your cooktop. OVEN CONTROL BEEPS AND DISPLAYS AN "F" ERROR CODE • Electronic control - Electrolux EW30IS6CJS | Use and Care Manual - Page 54
54 Solutions to Common Problems SELF-CLEANING CYCLE DOES NOT WORK • Make sure the oven door is closed. • Make sure you have removed the oven racks and the oven rack supports from the oven. • Controls not set properly. Follow instructions under "Using the Self-Clean Feature". OVEN SMOKES EXCESSIVELY - Electrolux EW30IS6CJS | Use and Care Manual - Page 55
control is ON. Be sure to use correct control for the element needed. • No cookware was placed on the induction cooking zones or the cookware material type is incorrect for induction been used. See Ceramic-Glass Cooktop section in this Owner's Guide. • Cookware with rough bottom has been used. Use - Electrolux EW30IS6CJS | Use and Care Manual - Page 56
blade scraper to remove soil. See instructions under General Care & Cleaning. • Cleaning materials not recommended for ceramic-glass cooktop have been used. Use recommended cleaners and cleaning method. See Ceramic-Glass Cooktop section in this Owner's Guide. AREAS OF DISCOLORATION ON CERAMIC GLASS - Electrolux EW30IS6CJS | Use and Care Manual - Page 57
or home incurred during transportation or installation, including but not limited to floors, cabinets, walls, etc. 15. Damages caused by: services performed by unauthorized service companies; use of parts other than genuine Electrolux parts or parts obtained from persons other than authorized - Electrolux EW30IS6CJS | Use and Care Manual - Page 58
58 Notes - Electrolux EW30IS6CJS | Use and Care Manual - Page 59
Notes 59 - Electrolux EW30IS6CJS | Use and Care Manual - Page 60
-
 1
1 -
 2
2 -
 3
3 -
 4
4 -
 5
5 -
 6
6 -
 7
7 -
8
-
9
-
10
-
11
-
12
-
13
-
14
-
15
-
16
-
17
-
18
-
19
-
20
-
21
-
22
-
23
-
24
-
25
-
26
-
27
-
28
-
29
-
30
-
31
-
32
-
33
-
34
-
35
-
36
-
37
-
38
-
39
-
40
-
41
-
42
-
43
-
44
-
45
-
46
-
47
-
48
-
49
-
50
-
51
-
52
-
53
-
54
-
55
-
56
-
57
-
58
-
59
-
60
 |
 |

318 205 809 (1012) Rev. B
Use & Care Guide
Electric Slide-In Range