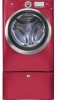
Electrolux EWFLW65IRR Installation Instructions
Electrolux EWFLW65IRR - 27" Front-Load Washer Manual
 |
UPC - 012505379543
View all Electrolux EWFLW65IRR manuals
Add to My Manuals
Save this manual to your list of manuals |
Electrolux EWFLW65IRR manual content summary:
- Electrolux EWFLW65IRR | Installation Instructions - Page 1
Installation Instructions Electrolux Front-Load Washer Instrucciones de Instalacion Lavadora de carga frontal Electrolux Instructions d'installation Laveuse à chargement frontal Electrolux 137064300 A (0801) - Electrolux EWFLW65IRR | Installation Instructions - Page 2
read and save this guide Thank you for choosing Electrolux, the new premium brand in home appliances. These Installation Instructions are part of our ? For toll-free telephone support in the U.S. and Canada: 1-877-4ELECTROLUX (1-877-435-3287) For online support and product information visit http - Electrolux EWFLW65IRR | Installation Instructions - Page 3
that may cause bodily injury or property damage. NOTE The electrical service to the washer must conform with local codes and ordinances and the latest edition the fire department. IMPORTANT The instructions in this manual and all other literature included with this washer are not meant to cover every - Electrolux EWFLW65IRR | Installation Instructions - Page 4
result in a risk of electrical shock. Check with a licensed electrician if you are in doubt as to whether the appliance is properly grounded. 1. The washer MUST be grounded. In the event of malfunction or breakdown, grounding will reduce the risk of electrical shock by a path of least resistance for - Electrolux EWFLW65IRR | Installation Instructions - Page 5
may be necessary. INSTALLATION IN A RECESS OR CLOSET If washer and dryer are installed in the same closet, door full length of the door is acceptable. MINIMUM INSTALLATION CLEARANCES - Inches (cm) SIDES REAR TOP FRONT Alcove 0" (0 cm) 0" (0 cm)* 0" (0 cm) n/a UnderCounter 0" (0 cm) - Electrolux EWFLW65IRR | Installation Instructions - Page 6
.5cm). 50.6" (128.5cm)* to clear open door 31.50" (80cm)* to front of closed door 27.00" (68.5cm) 38.00" (96.52cm) 53.00" (134.62cm) 75.75" (192.5cm) water supply connection on rear of washer ¹ gas supply pipe on rear of gas unit 39.00" (99cm) drain hose - Electrolux EWFLW65IRR | Installation Instructions - Page 7
airtight chambers causing suffocation. Place all materials in a garbage container or make materials inaccessible to children. 1. Temporarily remove door tape. 2. Open washer door and remove everything from the drum. 3. Close door and reapply door tape. 4. Using a rug, blanket or piece of cardboard - Electrolux EWFLW65IRR | Installation Instructions - Page 8
spacers for future use. If the washer is to be transported at a later date, the shipping hardware must be reinstalled to help prevent shipping damage. Locate 7 hole plugs in the small bag supplied with washer instruction guides. Insert them in the holes in washer back panel. 7 HOLE PLUGS (IN BAG - Electrolux EWFLW65IRR | Installation Instructions - Page 9
washer. 2. Use the universal wrench to adjust the leveling legs so the washer is level front- washer sits solidly on the floor on ALL four legs. Keep the leveling leg extension at a minimum for best performance of the washer. NOTE For pedestal installations, see additional installation instructions - Electrolux EWFLW65IRR | Installation Instructions - Page 10
10 Installation Instructions Connecting inlet water 1. Run some water from the hot and . 2. Look in the end of each water supply inlet hose and verify that the rubber washers are in place. RUBBER WASHERS MUST BE PRESENT NOTE HOT and COLD water inlet hoses are color coded for identification. The - Electrolux EWFLW65IRR | Installation Instructions - Page 11
. 8. If you have any questions during initial operation, please review the "Service Prevention Checklist" in your Use & Care Guide before calling for service. 9. Place these instructions in a location near the washer for future reference. NOTE A wiring diagram and technical data sheet are located - Electrolux EWFLW65IRR | Installation Instructions - Page 12
or CALL SERVICE 877 435 3287, review the installation steps and make the necessary corrections before you attempt to use the washer. 5.Your washer will exit Guide and enjoy your new premium washer! If your washer has this console: 1.After you plug in the washer the first time: wake up the washer - Electrolux EWFLW65IRR | Installation Instructions - Page 13
washer or floor near washer, with a soft cloth or towel. 4 Be sure washer is unplugged from power source! WARNING ELECTRICAL SHOCK HAZARD Failure to disconnect power source before servicing -clockwise and pull it away from the front of the door. 3 While supporting the weight of the door with both - Electrolux EWFLW65IRR | Installation Instructions - Page 14
up on the tab and the release harness from the retainer, allowing the harness to lay outside the front panel. WARNING ELECTRICAL SHOCK HAZARD Failure to disconnect power source before servicing could result in personal injury or even death. 3 Release the harness from the terminal with the small - Electrolux EWFLW65IRR | Installation Instructions - Page 15
opposite opening. 2 Connect the harness to the door lock by inserting it in the terminal and firmly pushing it in place. F) Reattaching Hinge to Front Panel 1 Rotate the hinge and move it to the opposite opening. 2 Connect the harness to the hinge retainer by inserting it in the retention terminal - Electrolux EWFLW65IRR | Installation Instructions - Page 16
16 Reversing Door G) Removing Striker Plate I) Removing Hole Plug 1 Remove 2 long, course-thread, counter-sunk screws and striker plate. 2 Set the striker plate to the side for later. H) Removing Latch Indicator 1 Insert flat blade screwdriver into open slot of hole plug. 2 Gently pry upward to - Electrolux EWFLW65IRR | Installation Instructions - Page 17
Reversing Door 17 J) Reinserting Latch Indicator 1 Rotate the latch indicator and move it to the opposite hole in the door. insert indicator through slot K) Reattaching Striker Plate 1 Rotate the striker plate and move it to the opposite side of door above the indicator. 2 Reattach with 2 long, - Electrolux EWFLW65IRR | Installation Instructions - Page 18
the cover plate from the right, pivot point is up. To remove the cover plate from the left, pivot point is down. UP Q) Plug in washer and continue operation. 3 Rotate the trim ring cover plate and move it to the opposite opening in the trim and reinsert. - Electrolux EWFLW65IRR | Installation Instructions - Page 19
accessory, specifically designed for this washer may be washer, call 1-877-4ELECTROLUX (1-877-4353287), or visit our website, www.electroluxappliances.com, for the Electrolux Authorized Parts Distributor nearest you. WARNING ELECTRICAL HAZARD Label all wires prior to disconnection when servicing - Electrolux EWFLW65IRR | Installation Instructions - Page 20
20 Notes
-
 1
1 -
 2
2 -
 3
3 -
 4
4 -
 5
5 -
 6
6 -
 7
7 -
8
-
9
-
10
-
11
-
12
-
13
-
14
-
15
-
16
-
17
-
18
-
19
-
20
 |
 |

137064300 A (0801)
Installation Instructions
Electrolux Front-Load Washer
Instrucciones de Instalacion
Lavadora de carga frontal Electrolux
Instructions d’installation
Laveuse à chargement frontal Electrolux