Electrolux EWMGD65IMB Installation Instructions
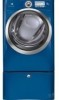
Electrolux EWMGD65IMB - 8.0 cu. Ft. Gas Dryer Manual
 |
UPC - 012505380426
View all Electrolux EWMGD65IMB manuals
Add to My Manuals
Save this manual to your list of manuals |
Electrolux EWMGD65IMB manual content summary:
- Electrolux EWMGD65IMB | Installation Instructions - Page 1
Installation Instructions Electrolux Front-Load Gas & Electric Dryer Instrucciones de Instalacion Secadora eléctrica y a gas de carga frontal Electrolux Instructions d'installation Sécheuse à gaz et à l'électricité à chargement frontal Electrolux 137018200 A (0801) - Electrolux EWMGD65IMB | Installation Instructions - Page 2
Information Please read and save this guide Thank you for choosing Electrolux, the new premium brand in home appliances. These Installation Instructions are part of our commitment to customer satisfaction and product quality throughout the life of your new appliance. We view your purchase as the - Electrolux EWMGD65IMB | Installation Instructions - Page 3
practice and caution MUST be applied when installing, operating and maintaining any appliance. Read all of the following instructions before installing and using this appliance: • Destroy the carton and plastic bags after the dryer is unpacked. Children might use them for play. Cartons covered with - Electrolux EWMGD65IMB | Installation Instructions - Page 4
or closed loop connectors and marked for use with clothes dryers. For 3-wire cord connection instructions see ELECTRICAL CONNECTIONS FOR A 3-WIRE SYSTEM. 4-WIRE POWER SUPPLY CORD KIT (not supplied) 4-wire receptacle (NEMA type 14-30R) The dryer MUST employ a 4-conductor power supply cord NEMA 14-30 - Electrolux EWMGD65IMB | Installation Instructions - Page 5
other obstruction. WARNING FIRE HAZARD Failure to follow these instructions can create excessive drying times and fire hazards. Correct by the appliance manufacturer as suitable for use with clothes dryers and in the United States must also comply with the Outline for Clothes Dryer Transition Duct - Electrolux EWMGD65IMB | Installation Instructions - Page 6
outdoors, some fine lint will be expelled into the laundry area. An accumulation of lint in any area of the home can create a health and fire hazard. The dryer must be connected to an exhaust outdoors. Regularly inspect the outdoor exhaust opening and remove any accumulation of lint around the - Electrolux EWMGD65IMB | Installation Instructions - Page 7
32-80 (formerly the Federal Standard for Mobile Home Construction and Safety, Title 24, HUD Part 280) or Standard CAN/CSAZ240 MH. 2. Dryer MUST be exhausted outside (outdoors, not beneath the mobile home) using metal ducting that will not support combustion. Metal ducting must be 4 inches (10.16 - Electrolux EWMGD65IMB | Installation Instructions - Page 8
appliance shall be installed in the same closet as the gas dryer. 3. Your dryer needs the space around it for proper ventilation. DO NOT install your dryer 54 cm) * For other than straight back venting, a quick-turn 90° dryer vent elbow must be installed to achieve 0" (0 cm) installation. 0" (0cm - Electrolux EWMGD65IMB | Installation Instructions - Page 9
gas unit 39.00" (99cm) electrical supply on rear of unit centerline height for rear vent 41.00" (104cm) * To obtain these minimal depth dimensions, dryer must either be vented straight back or with a quick-turn 90° elbow. Connection of water inlet hose on Steam Models adds 3/4 in. (2 cm) to - Electrolux EWMGD65IMB | Installation Instructions - Page 10
can create electrical shock and/or a fire hazard. WARNING ELECTRICAL SHOCK HAZARD • This appliance MUST be properly grounded. Electrical shock can result if the dryer is not properly grounded. Follow the instructions in this manual for proper grounding. • Do not use an extension cord with this - Electrolux EWMGD65IMB | Installation Instructions - Page 11
Installation Instructions 11 Grounding requirements - Electric dryer (Canada) WARNING ELECTRICAL SHOCK HAZARD Improper connection of the equipment grounding conductor can result in a risk of electrical shock. Check with a licensed electrician if you are in doubt as to whether the appliance is - Electrolux EWMGD65IMB | Installation Instructions - Page 12
the screw securing the terminal block access cover in the lower corner on the back of the dryer. 3. Install a UL-approved strain relief according to the power cord/strain relief manufacturer's instructions in the power cord entry hole below the access panel. At this time, the strain relief should - Electrolux EWMGD65IMB | Installation Instructions - Page 13
the screw securing the terminal block access cover in the lower corner on the back of the dryer. 3. Install a UL-approved strain relief according to the power cord/strain relief manufacturer's instructions in the power cord entry hole below the access panel. At this time, the strain relief should - Electrolux EWMGD65IMB | Installation Instructions - Page 14
Instructions Gas connection 1. Remove the shipping cap from gas pipe at the rear of the dryer. IMPORTANT DO NOT connect the dryer to L.P. gas service without converting the gas valve. An L.P. conversion kit approved manual shutoff valve. This valve should be located in the same room as the dryer - Electrolux EWMGD65IMB | Installation Instructions - Page 15
Installation Instructions 15 Water connection (Steam Model only) 1. Turn off COLD water supply to washer a bucket or container to clear any contaminants in the line. 4. Remove hose kit from dryer drum and inspect hose couplings for proper placement of rubber washers. RUBBER WASHERS MUST BE PRESENT - Electrolux EWMGD65IMB | Installation Instructions - Page 16
Installation Instructions Water with pliers. 5. Connect the straight end of the long hose from the kit to the other outlet on the "Y" connector and snug it by hand. water inlet on the back of the dryer and snug it by hand. Tighten each connection of the dryer inlet hose another 2/3 turn with pliers. - Electrolux EWMGD65IMB | Installation Instructions - Page 17
. 7. If you have any questions during initial operation, please review the "Avoid Service Checklist" in your Use & Care Guide before calling for service. 8. Place these instructions in a location near the dryer for future reference. NOTE A wiring diagram and technical data sheet are located inside - Electrolux EWMGD65IMB | Installation Instructions - Page 18
installed and ready for use. If it prompts an action such as SERVICE CORD, NO GAS or call service 877 435 3287, review the installation steps and make the necessary corrections before you attempt to use the dryer. 5.Your dryer will exit the Installation Cycle and return to normal operation the next - Electrolux EWMGD65IMB | Installation Instructions - Page 19
dryer or floor near dryer, with a soft cloth or towel. 4 Be sure dryer is unplugged from power source! WARNING ELECTRICAL SHOCK HAZARD Failure to disconnect power source before servicing counterclockwise and pull ring away from door. 3 While supporting door with the other hand, remove 3 short, fine - Electrolux EWMGD65IMB | Installation Instructions - Page 20
-thread, panhead screws. 2 Remove 4 long, course-thread, recessed screws and hinge. Set hinge aside. 3 Install original plastic hole plugs or use new plugs supplied with dryer. - Electrolux EWMGD65IMB | Installation Instructions - Page 21
E) Removing Latch Indicator Reversing Door 21 F) Removing Hole Plug 1 Insert flat blade screwdriver into open slot of latch indicator. 2 Gently pry upward to release tab. 1 Insert flat blade screwdriver into open slot of hole plug. 2 Gently pry upward to release tab. 3 Pull the indicator out and - Electrolux EWMGD65IMB | Installation Instructions - Page 22
22 Reversing Door G) Reinserting Latch Indicator 1 Rotate the latch indicator and move it to the opposite hole in the door. insert indicator through slot H) Reinserting Hole Plug 1 Rotate the hole plug and move it to the opposite hole in the door. 2 Firmly insert the two small tabs on either side - Electrolux EWMGD65IMB | Installation Instructions - Page 23
Reversing Door 23 I) Reattaching Latch Plate 1 Rotate latch plate and move to opposite side of door above indicator. 2 Reattach with 2 long, course-thread, counter-sunk screws. K) Reattaching Door to Front Panel 1 Use side locating pins to align hinge and install 1 short, fine-thread, counter-sunk - Electrolux EWMGD65IMB | Installation Instructions - Page 24
opening in trim and reinsert. N) Reinstalling Trim Plug 1 Open door to 90 degree angle. 2 Install trim plug with 1 long, course-thread, panhead screw. O) Plug in dryer and continue operation. - Electrolux EWMGD65IMB | Installation Instructions - Page 25
may order one. LP CONVERSION KIT P/N 134709300 Gas dryers intended for use in a location supplied with LP must use a conversion kit prior to installation. MOBILE HOME INSTALLATION KIT P/N 137067200 Installations in mobile homes require use of MOBILE HOME INSTALLATION KIT. DRYING RACK P/N 134912700 - Electrolux EWMGD65IMB | Installation Instructions - Page 26
26 Notes
-
 1
1 -
 2
2 -
 3
3 -
 4
4 -
 5
5 -
 6
6 -
 7
7 -
8
-
9
-
10
-
11
-
12
-
13
-
14
-
15
-
16
-
17
-
18
-
19
-
20
-
21
-
22
-
23
-
24
-
25
-
26
 |
 |

Installation Instructions
Electrolux Front-Load Gas & Electric Dryer
Instrucciones de Instalacion
Secadora eléctrica y a gas de carga frontal Electrolux
Instructions d’installation
Sécheuse à gaz et à l’électricité à chargement frontal Electrolux
137018200 A (0801)