Epson 1815p Product Information Guide
Epson 1815p - PowerLite XGA LCD Projector Manual
 |
UPC - 010343858190
View all Epson 1815p manuals
Add to My Manuals
Save this manual to your list of manuals |
Epson 1815p manual content summary:
- Epson 1815p | Product Information Guide - Page 1
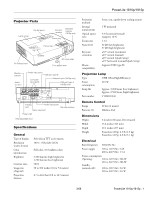
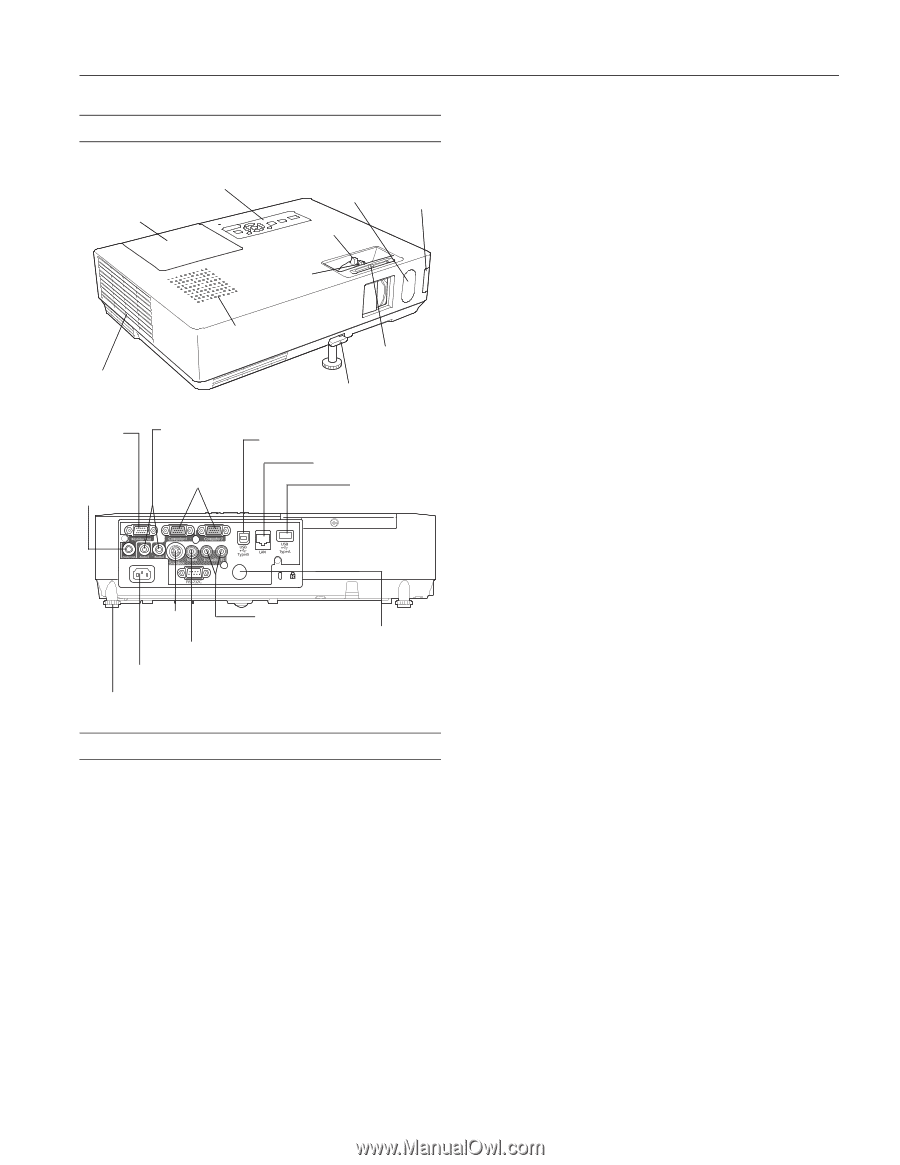
PowerLite 1810p/1815p Projector Parts Lamp cover Control panel Remote receiver Wireless module (1815p only) Zoom ring Focus ring Air exhaust vent Speaker A/V mute slide Foot adjust lever Monitor out port Audio out port Audio input ports USB port - Epson 1815p | Product Information Guide - Page 2
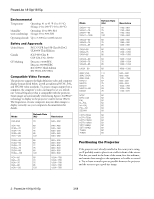
55024 Compatible Video Formats The projector supports the high definition video and projector. Some images are automatically resized using Epson's SizeWizeTM technology to display in the projector's native format (XGA projector and the screen to get a good-size image. 2 - PowerLite 1810p/1815p 3/08 - Epson 1815p | Product Information Guide - Page 3
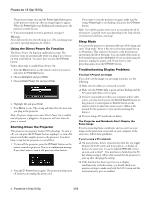
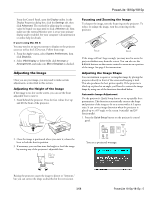
detect and display the image source. If you turn on the projector first or have multiple pieces of connected equipment, you may have to select the image source manually (see page 5). 3. Press the PPower button on the remote control or on top of the projector. 3/08 PowerLite 1810p/1815p - 3 - Epson 1815p | Product Information Guide - Page 4
, and extends the life of the lamp. You can enable sleep mode in the Extended menu under Operation. If you are done using the projector, unplug the power cord. If you want to start projecting again, press the PPower button. Troubleshooting Display Problems You Can't Project an Image If you - Epson 1815p | Product Information Guide - Page 5
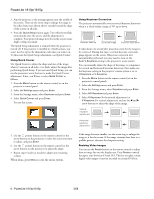
buttons on the remote control to zoom in on a portion of the image. See page 8 for instructions. Adjusting the Image Shape You can maintain a square or rectangular image by placing the projector directly in front of the screen and keeping it level. This also produces the best picture quality. If - Epson 1815p | Product Information Guide - Page 6
PowerLite 1810p/1815p 2. Aim the projector so the message appears near the middle of the screen. Then use the zoom ring to enlarge the image so the white frame (not shown - Epson 1815p | Product Information Guide - Page 7
the remote control, there are several Source buttons. Use them to switch between equipment connected to the port identified on each button, or to use EasyMP (PowerLite 1815p only). After you select a source, the screen goes dark for a moment before the image appears. 3/08 PowerLite 1810p/1815p - 7 - Epson 1815p | Product Information Guide - Page 8
PowerLite 1810p/1815p Turning Off the Picture and Sound You can temporarily turn off the image and sound when you want to redirect your audience's attention. There are two ways to do this: ❏ Press the A/V Mute button on the remote control. This turns the image off and stops the sound. To turn the - Epson 1815p | Product Information Guide - Page 9
settings from being changed. None of the User's Logo features in the Extended menu can be changed when the User's Logo Protect function is enabled. ❏ Network Protect to lock the Network settings in the menu system (PowerLite 1815p only). Caution: If you lose the remote control, you will not be able - Epson 1815p | Product Information Guide - Page 10
mini-jack audio cable to play sound through the projector, or connect a USB cable to use the remote control as a mouse. Note: The PowerLite 1815p can also be connected to a third PC (but not to a Macintosh) through a USB connection. See the User's Guide for details. Caution: Don't try to force - Epson 1815p | Product Information Guide - Page 11
PowerLite 1810p/1815p ❏ Ad Hoc mode (computer-to-computer mode) lets you connect just one computer to the projector at a time; it's easy to set up, and the only equipment you need is a computer with a wireless (802.11g, 802.11b, or 802.11a) network card or adapter, or a Macintosh with an AirPort® - Epson 1815p | Product Information Guide - Page 12
PowerLite 1810p/1815p Configuring the Network Settings for Windows Before connecting to the projector, you need to make sure the settings for your notebook's or PC's network card match the settings you entered for the projector. 1. Access your wireless network Properties window. For example, in - Epson 1815p | Product Information Guide - Page 13
Automatic Select Network Port Configurations then select AirPort PowerLite 1810p/1815p 3. Choose Wireless LAN and press Enter. You see this pointer button on the remote control to highlight 802.11a, then press Enter to select it. 6. To enable your computer to find the projector on the network, you - Epson 1815p | Product Information Guide - Page 14
page 16. Note: For specific details about your network, projector, you need to make sure the settings for your computer's wireless card or adapter match the settings you entered for the projector. 1. Access your wireless Properties 14 - PowerLite 1810p/1815p 5. Check your wireless card's or adapter - Epson 1815p | Product Information Guide - Page 15
PowerLite 1810p/1815p 8. Right-click the Wireless Network Connection icon again and select Properties. You see this screen: ❏ Preferred DNS server/Alternate DNS server: Enter the IP address of the DNS server(s) for your network. 11.When you're done, click OK. 12.Click the Wireless the projector. - Epson 1815p | Product Information Guide - Page 16
PowerLite 1810p/1815p Checking the Gateway IP Address on Windows If you're entering IP addresses manually and need to find out the gateway IP address (the IP address of your access point), make sure the wireless connection to the access point is currently active, as described in the previous - Epson 1815p | Product Information Guide - Page 17
the same time. If the selected projector is already being used by another person, you can still connect to it (unless it is "locked"); doing so automatically disconnects the other user. If a projector is locked, you won't be able to connect to it when it is in use. 3/08 PowerLite 1810p/1815p - 17 - Epson 1815p | Product Information Guide - Page 18
your wireless interface, access point, or base station. ❏ Restart your computer and start NS Connection again. ❏ If you still don't see your projector, follow the instructions in "Connecting in Advanced Connection Mode" in the next section to connect to the printer. 18 - PowerLite 1810p/1815p 3/08 - Epson 1815p | Product Information Guide - Page 19
the software (available for Windows only). The computer you're using to monitor the projector should already be connected to your network. Opening and Closing EMP Monitor To start EMP Monitor, click Start > Programs or All Programs > EPSON Projector > EMP Monitor. 3/08 PowerLite 1810p/1815p - 19 - Epson 1815p | Product Information Guide - Page 20
. Follow these steps to automatically search for your projector(s). 1. Open EMP Monitor as described above. You see this screen: 3. Click Search to locate projectors currently operating on the network. Any projectors found on the network are listed as shown below: 20 - PowerLite 1810p/1815p 3/08 - Epson 1815p | Product Information Guide - Page 21
Data is currently being updated. Network error (for example, the projector is not connected to the network, or the power cable is disconnected). You may also see this error if Network Off is selected in Standby Mode. Network error (Esc/VP.net communication error). 3/08 PowerLite 1810p/1815p - 21 - Epson 1815p | Product Information Guide - Page 22
door open. Close the lamp cover door. Lamp out. The lamp has reached the end of its life. Control buttons Configuring the Monitoring Interval If you need to have the most current status information about your projectors, click the Refresh button in EMP Monitor. 22 - PowerLite 1810p/1815p 3/08 - Epson 1815p | Product Information Guide - Page 23
PowerLite 1810p/1815p To select how often EMP Monitor checks the status of projectors, follow the steps below: 1. From the Tool menu, select Environment Setup. You see this screen: What To Do When the Lights Flash The lights on top of the projector indicate the projector's status. Power light - Epson 1815p | Product Information Guide - Page 24
. Do not try to service this product yourself, except as specifically explained in this manual or the User's Guide. Refer all other servicing to qualified service personnel. Cleaning the Projector Case Before you clean the case, turn off the projector and unplug the power cord. ❏ To remove dirt - Epson 1815p | Product Information Guide - Page 25
new air filter until it clicks in place. 11.Reset the lamp timer as described in the next section. Note: When you get a replacement lamp for your projector, you should replace the filter. Turn off this product when not in use to prolong the life of the projector. 3/08 PowerLite 1810p/1815p - 25 - Epson 1815p | Product Information Guide - Page 26
(Spanish) PowerLite 1810p Guia de instalação (Portuguese) PowerLite 1815p Quick Setup (English) PowerLite 1815p Installation rapide (French) PowerLite 1815p Guide de installación (Spanish) PowerLite 1815p Guia de instalação (Portuguese) CD-ROM containing the PowerLite 1810p and 1815p User's Guide in
-
 1
1 -
 2
2 -
 3
3 -
 4
4 -
 5
5 -
 6
6 -
 7
7 -
8
-
9
-
10
-
11
-
12
-
13
-
14
-
15
-
16
-
17
-
18
-
19
-
20
-
21
-
22
-
23
-
24
-
25
-
26
 |
 |
PowerLite 1810p/1815p
3/08
PowerLite 1810p/1815p
-
1
Projector Parts
Specifications
General
Type of display
Poly-silicon TFT active matrix
Resolution
1024
×
768 pixels (XGA)
(native format)
Color
Full color, 16.8 million colors
reproduction
Brightness
3,500 lumens (high brightness)
2,700 lumens (low brightness)
Contrast ratio
500:1
Image size
30 to 300 inches (0.8 to 7.6 meters)
(diagonal)
Projection
2.7 to 48.2 feet (0.8 to 14.7 meters)
distance
Projection
Front, rear, upside-down (ceiling mount)
methods
Internal
5 W monaural
sound system
Optical aspect
4:3 (horizontal:vertical)
ratio
(supports 16:9)
Zoom ratio
1:1.6
Noise level
32 dB (low brightness)
37 dB (high brightness)
Keystone
±30° vertical (automatic)
correction
±45° vertical (manual)
±45° vertical (Quick Setup)
±25° horizontal (manual/Quick Setup)
Mouse
Supports USB (type B)
compatibility
Projection Lamp
Type
UHE (Ultra High Efficiency)
Power
210 W
consumption
Lamp life
Approx. 3,000 hours (low brightness)
Approx, 2,500 hours (high brightness)
Part number
V13H010L40
Remote Control
Range
20 feet (6 meters)
Batteries (2)
Alkaline AAA
Dimensions
Height
3.4 inches (86 mm), feet retracted
Width
13.6 inches (345 mm)
Depth
10.1 inches (257 mm)
Weight
PowerLite 1810p: 6.5 lb (2.9 kg)
PowerLite 1815p: 6.9 lb (3.1 kg)
Electrical
Rated frequency
50/60 Hz AC
Power supply
100 to 120 VAC, 3.4A
200 to 240 VAC, 1.5 A
Power consumption
Operating:
100 to 120 VAC, 306 W
220 to 240 VAC, 286 W
Standby
(network off):
100 to 120 VAC, 2.6 W
220 to 240 VAC, 4.6 W
Lamp cover
A/V mute slide
Air exhaust vent
Foot adjust lever
Remote
receiver
Zoom ring
Focus ring
Speaker
Control panel
Wireless
module
(1815p only)
Remote receiver
Rear adjustable foot
Power inlet
USB port type B
S-Video
port
USB port type A
(1815p only)
Network port (1815p only)
Video input port
Audio input ports
Monitor
out port
Computer
input ports
Audio input ports
Audio
out port