Epson 2400 Start Here Card
Epson 2400 - Perfection Photo - Dpi x Manual
 |
UPC - 010343842502
View all Epson 2400 manuals
Add to My Manuals
Save this manual to your list of manuals |
Epson 2400 manual content summary:
- Epson 2400 | Start Here Card - Page 1
everything: Built-in transparency unit AC adapter Scanner Power cord CD-ROM with EPSON® scanner software and electronic manual Adobe® Photoshop® Elements CD-ROM USB cable Film holder See your on-screen Scanner Reference Guide for detailed scanning instructions. 2 Remove all the packing tape - Epson 2400 | Start Here Card - Page 2
OS 10.1.x is not supported. Follow the steps below for your system. Windows 1 Insert the scanner software CD-ROM in the CD-ROM or DVD drive. The installer starts automatically. If it doesn't start, do the following: • Windows XP: Click Start, click My Computer, then double-click the EPSON CD - Epson 2400 | Start Here Card - Page 3
instructions below to connect the scanner. Then restart your system to fully activate the scanner and software. 3 Connect the Scanner After your software is installed the AC adapter and power cord, as shown. 5 Connect the AC adapter to the scanner. Arrow Transportation lock AC adapter Power cord - Epson 2400 | Start Here Card - Page 4
! ScanneBrasics Your First Scan 1 Raise the scanner lid and place your photo face down on the glass. Then close the lid. Place top of photo in the upper right corner 2 Press the Start button on the scanner. Start button EPSON Smart Panel opens on your computer. Note: In Windows XP, you may - Epson 2400 | Start Here Card - Page 5
: • You can use the scanner buttons. Press the button for the type of scan you want. Smart Panel automatically opens and scans your documents. Then follow the easy on-screen instructions to finish your task. Note: If you are using Windows XP, you will have to select EPSON Smart Panel and Always use - Epson 2400 | Start Here Card - Page 6
Reprint Photo. You see the screen below. 2 Click the Color Restoration icon. Click Color Restoration Click here to scan and print EPSON Scan the bottom of the screen.) Scanning Film The scanner cover has a built-in film transparancy unit. To scan film or negative strips, slides, or transparencies, - Epson 2400 | Start Here Card - Page 7
Negative Film, B&W Negative Film, or Positive Film. Tip: Make sure your film is dust-free for the best scan. You can also select the Dust Removal setting in EPSON Scan, as shown. Click to lessen the appearance of dust Got Questions? Here's where to look for answers: On-screen Scanner Reference Guide - Epson 2400 | Start Here Card - Page 8
Photo Print, EPSON Scan, EPSON Smart Panel, and ScanToWeb. In the Windows Control Panel, use the Add/Remove Programs utility to uninstall software. Then follow the instructions on the other side of this sheet to reinstall your scanner software. You can't scan negatives Make sure the scanner film
-
 1
1 -
 2
2 -
 3
3 -
 4
4 -
 5
5 -
 6
6 -
 7
7 -
8
 |
 |

EPSON Perfection
®
2400 Photo
Start
Here
Start
Here
1
Make sure you have everything:
See your on-screen
Scanner Reference Guide
for detailed scanning
instructions.
2
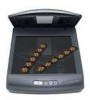
Remove all the packing tape, but leave the yellow sticker
in place for now.
IMPORTANT!
Leave the yellow sticker in
place until you’re instructed
to remove it.
Unpack Your Scanner
1
AC adapter
Scanner
CD-ROM with EPSON
®
scanner software and
electronic manual
USB cable
Film holder
Power cord
Adobe
®
Photoshop
®
Elements
CD-ROM
Built-in
transparency unit