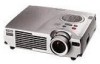
Epson 710C User Manual - Supplement
Epson 710C - PowerLite UXGA LCD Projector Manual
 |
UPC - 010343821538
View all Epson 710C manuals
Add to My Manuals
Save this manual to your list of manuals |
Epson 710C manual content summary:
- Epson 710C | User Manual - Supplement - Page 1
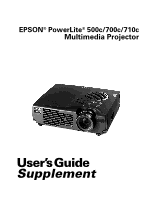
EPSON® PowerLite® 500c/700c/710c Multimedia Projector User's Guide Supplement - Epson 710C | User Manual - Supplement - Page 2
the projector, except the lamp and filter covers. Dangerous electrical voltages inside the projector can severely injure you. Except as specifically explained in the User's Guide or this Supplement, do not attempt to service this product yourself. Refer all servicing to qualified service personnel - Epson 710C | User Manual - Supplement - Page 3
10 Connecting the Computer Cable 11 Connecting the Audio Cable 13 Connecting the Cable for Remote Mouse Control . . . . 13 Turning the Projector On and Off 14 Turning On Other Equipment 16 B Using the Projector Menus Changing Menu Settings 18 Video Menu (Computer Image Source 20 Video Menu - Epson 710C | User Manual - Supplement - Page 4
C Technical Specifications Index General 33 Projection Lamp 34 Remote Control 34 Mouse Compatibility 34 Remote IR Receiver 34 Mechanical 34 Electrical 34 Environmental 34 Safety 35 CE Marking 35 Supported Monitor Displays 35 Computer Connector Pin Assignments 37 4 - Epson 710C | User Manual - Supplement - Page 5
to control the screen cursor. s Provide audio for one or both image sources. The audio source can be the computer, video source, or another device such as a stereo. s Connect to an external speaker or PA system to amplify the audio (see your User's Guide for instructions). Positioning the Projector - Epson 710C | User Manual - Supplement - Page 6
to position the image high enough on the screen. Then you can use the projector's keystone control to correct the distortion caused by tilting up the front of the projector. The distance between the projector and the screen determines the actual image size. Use the general guidelines in the table - Epson 710C | User Manual - Supplement - Page 7
configurations vary. See your computer manual for the location of the ports needed to connect your projector. Power Inlet Mouse/Com Mouse/ the mouse cable (if you want to use the remote control as a mouse) If you connect the projector to your desktop computer, you cannot view your images on - Epson 710C | User Manual - Supplement - Page 8
to the projector's Computer port. 3. Connect the other end of the cable to your computer's video (monitor) port. 4. Tighten the screws on all connectors. If you don't need to make any other connections, you can plug in your projector and turn it on. See page 14 for instructions. 8 Connecting to - Epson 710C | User Manual - Supplement - Page 9
system to the projector. See your User's Guide for instructions. Connecting the projector. Audio in jack audio cable 2. Connect the other end of the audio cable to the speaker or audio out port on your computer's sound card. Connecting the Cable for Remote Mouse Control Using the remote control - Epson 710C | User Manual - Supplement - Page 10
mouse will be disabled while you are using the remote control as a mouse.) note Macintosh configurations vary. See your computer manual for the location of the ports needed to connect your projector. Connecting to a Desktop Macintosh To connect the projector to your desktop Macintosh,® you need to - Epson 710C | User Manual - Supplement - Page 11
the documentation for your Macintosh to determine what type of connections are available. Connecting the Computer Cable Before you start, make sure your projector, computer, and all peripherals are all turned off. 1. Disconnect the monitor cable from the monitor port on the back of your Macintosh - Epson 710C | User Manual - Supplement - Page 12
). s Remove the small cover on the Macintosh adapter and set its DIP switches according to the resolution you want to use (such as 16-inch mode). See your Macintosh documentation for instructions. s Connect the small end of the Macintosh adapter to the computer cable. s Connect the computer cable - Epson 710C | User Manual - Supplement - Page 13
address system to the projector. See your User's Guide for instructions. Connecting the Audio Cable projector. Audio in jack audio cable 2. Connect the other end of the audio cable to the speaker jack on your Macintosh. Connecting the Cable for Remote Mouse Control Using the remote control - Epson 710C | User Manual - Supplement - Page 14
s Flat USB mouse port 2. Connect one end of the appropriate mouse cable to the standard Mouse/Com port or the USB Mouse port on the projector. connecting Mac mouse cable connecting USB mouse cable 3. Connect the other end to the port on your Macintosh. Turning the - Epson 710C | User Manual - Supplement - Page 15
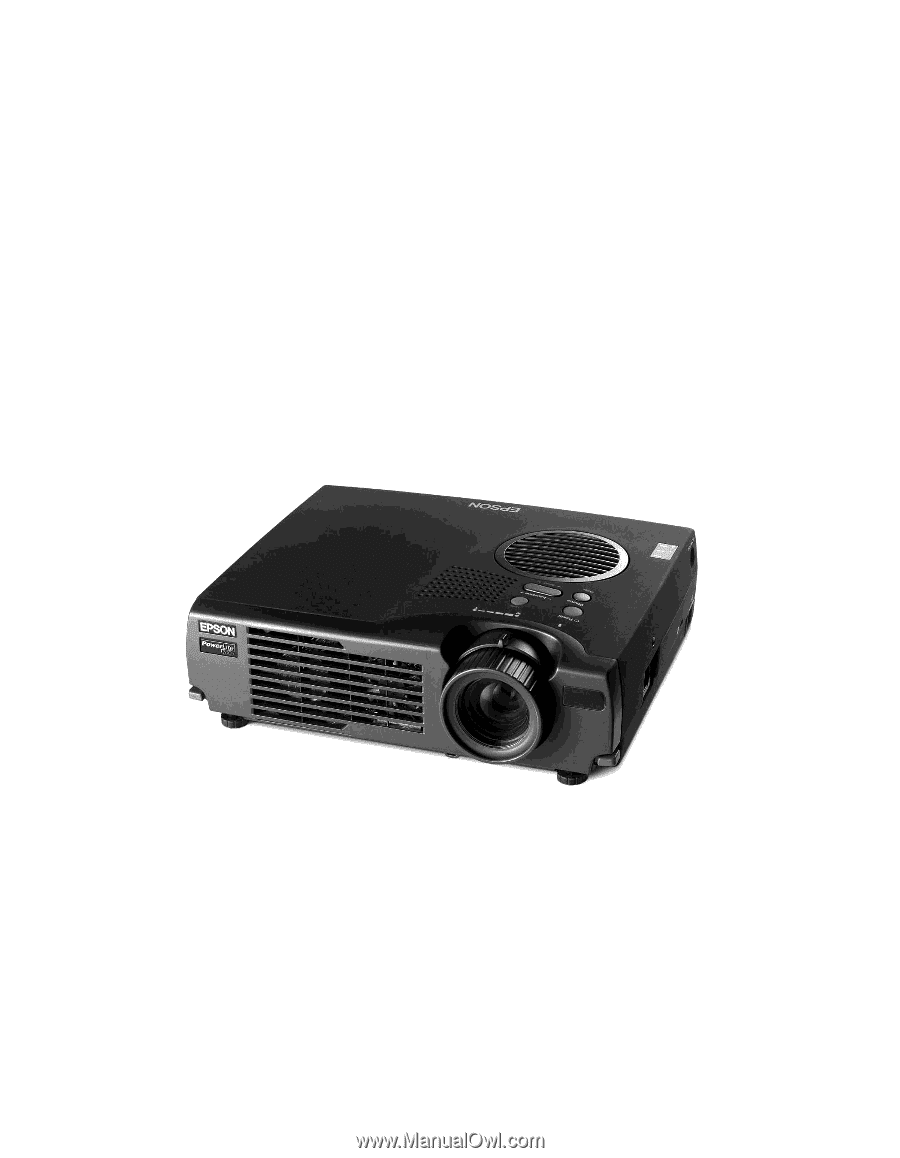
remove the lens cap. Squeeze here warning Never look into the lens when the lamp is on. This can damage your eyes, and is especially dangerous for children. 5. Press the red Power button on top of the projector. power button power light The power light flashes green, and then stays on. You - Epson 710C | User Manual - Supplement - Page 16
lamp, never unplug the power cord when the power light is green. When you are ready to turn off the projector, follow these steps: 1. Press the red Power button on top of the projector Power button. 3. When you are finished using the projector, replace the lens cap, retract the lens, and unplug the - Epson 710C | User Manual - Supplement - Page 17
available on the remote control. s Setting Controls settings such as menu language, use of startup screen, color temperature, and rear or ceiling projection. s About Provides information about lamp usage and the current display settings. s Reset All Restores the factory defaults for all the projector - Epson 710C | User Manual - Supplement - Page 18
to change menu settings. To change a menu setting: 1. To access the menu system, open the cover on the lower part of the remote control and press the Menu button. Freeze A/V Mute E-Zoom Power R/C ON OFF 3 2 5 4 1 Enter Menu button Esc Menu Help Comp S-Video Video Auto Resize P in - Epson 710C | User Manual - Supplement - Page 19
go back to the default settings on any menu, select Reset, press Enter, select Yes, and then press Enter. 7. Press the Esc button on the remote to go back to the main menu display. Your changes are saved automatically. 8. Press the Menu button to exit the menu system. The settings available - Epson 710C | User Manual - Supplement - Page 20
options are limited to being enabled (turned on) or disabled (turned off). The computer must be connected and operating, and the image source on the projector must be set to Computer for you to access these menu options. The Video menu lets you make adjustments to the projected image. The following - Epson 710C | User Manual - Supplement - Page 21
computer automatically optimize the image for projection. Adjusts the projected image for natural coloration. Returns all menu items to their initial factory defaults. Using the Projector Menus 21 - Epson 710C | User Manual - Supplement - Page 22
Video, and the video source (such as a VCR or camcorder) must be connected and operating for you to access these menu options. For example, the projector must actually be projecting the image from your video tape if you're using a VCR. Video Menu (Video Image Source) The Video menu lets you - Epson 710C | User Manual - Supplement - Page 23
the Audio menu to adjust the sound volume and quality of your audio. Menu item Volume Tone Reset Description Adjusts the volume level for the projector's speaker and audio-out terminal. Increase the setting to raise the volume, or decrease it to lower the volume. Adjusts the sound quality. Move - Epson 710C | User Manual - Supplement - Page 24
Effect Menu The Effect menu lets you customize the drawing tools available on the remote control. Menu item Cursor/ Stamp Box Marker Freehand Cursor Speed Reset Description Selects the stamp , Middle, or High. Returns all menu items to their initial factory defaults. 24 Using the Projector Menus - Epson 710C | User Manual - Supplement - Page 25
S-Video) for the picture-in-picture subscreen. Specifies whether no screen, a black screen, a blue screen, or a user logo is displayed when the projector is not receiving a signal. Turns off the message identifying the image source (computer or video). Specifies whether a blue, black, or user logo - Epson 710C | User Manual - Supplement - Page 26
then use it as the screen displayed when the projector is not receiving a signal. You can also set it as a startup screen or to be displayed when you press the A/V Mute button on the remote. The image can be a company logo, slogan, photograph, or another other image you want to use. Capturing - Epson 710C | User Manual - Supplement - Page 27
press Enter. A selection box displays over the image. 5. Use the Enter button on the remote control to select the area of the image you want to use. Once you have selected the Enter button on the remote control to select a zoom rate (display size), and then press Enter. Using the Projector Menus 27 - Epson 710C | User Manual - Supplement - Page 28
8. When the following message appears, select Yes and press Enter. Saving the logo may take a few moments. Do not use the projector or other sources (computer, video, speaker, etc.) while the logo is being saved. 9. When you see the following message, press the Menu or Enter button - Epson 710C | User Manual - Supplement - Page 29
highlight No-Signal Msg. 5. Press the right side of the Enter button to select Logo. This sets your image as the screen displayed when the projector is not receiving a signal. 6. If you want to set up your image as the A/V mute display, press the bottom edge of the Enter button (or - Epson 710C | User Manual - Supplement - Page 30
ON turns mirroring on, while OFF turns it off (for a normal image). Flips the projected image so it looks correct when the projector is mounted upside-down from the ceiling. Selecting ON turns the feature on, while OFF turns it off (for a normal image). Returns all Advanced menu items to their - Epson 710C | User Manual - Supplement - Page 31
) When the image source is a computer, the About menu displays information about the projector's horizontal and vertical frequency, lamp hours, and computer connection. Menu item Lamp Frequency Sync Polarity Sync Mode Resolution Refresh Rate Description Displays the number of hours the current - Epson 710C | User Manual - Supplement - Page 32
Image Source) When the image source is video, the About menu displays information about the projector's lamp hours and video signal. Menu item Description Lamp Displays the number of hours the current lamp has been used. Video Signal Displays the input image signal mode. Reset All Feature The - Epson 710C | User Manual - Supplement - Page 33
(ANSI) 700c: 800 lumens (ANSI) 710c: 1000 lumens (ANSI) 2.2 to 25 feet (0.7 to 7.6 meters) 3.6 to 45.3 feet (1.1 to 13.8 meters) Front, rear, upside-down (ceiling mount) 1 monaural 4:3 (horizontal:vertical) 1.2:1 ±15° NTSC, NTSC4.43, PAL, PAL-M, PAL-N, PAL60, SECAM Technical Specifications 33 - Epson 710C | User Manual - Supplement - Page 34
Type UHE (Ultra High Efficiency) Power consumption 120 W Lamp life About 2000 hours Part number ELPLP10S (710c) ELPLP10B (500c, 700c) Range 32.8 feet (10 meters) Batteries Alkaline AA (2) Supports PS/2, USB, Macintosh Supports EPSON Remote IR Receiver, 10-foot cable (typical use for rear - Epson 710C | User Manual - Supplement - Page 35
CE Marking Supported Monitor Displays United States FCC Part 15J Class B UL1950 Rev. 3 Canada DOC SOR/88-475 CSA C22.2 No. 950 Rev. 3 Directive 89/336/EEC EN 55022 Class B EN 50082-1 Directive 73/23/EEC EN 60950 The following table lists the display formats supported by the projector: Mode - Epson 710C | User Manual - Supplement - Page 36
Resolution H(KHz)/V(Hz) SXGA3_43i SXGA3_60 SXGA3_75 SXGA_85 1280 x 1024 1280 x 1024 1280 x 1024 1280 x 1024 46.433 / 86.871 63.981 / 60.02 79.976 / 75.025 91.146 / 85.024 UXGA48i UXGA60 (these are not supported by PowerLite allow the image to be displayed correctly. 36 Technical Specifications - Epson 710C | User Manual - Supplement - Page 37
7 Green video GND 8 Blue video GND 9 Reserve 10 Synchronous GND 11 GND 12 SDA 13 Horizontal sync/composite sync 14 Vertical sync 15 SCL Technical Specifications 37 - Epson 710C | User Manual - Supplement - Page 38
Audio connecting desktop, 9, 13 menu, 23 B Brightness, 33 Brightness setting, 20, 22 Buttons, remote control, 18 to 19 C Camcorder, adjusting the projected image, 22 CE Marking, 35 Ceiling, hanging the projector from, 30 Color setting, 21, 22 Color Temp setting, 30 Computer connector pin assignments - Epson 710C | User Manual - Supplement - Page 39
34 Projector distance to screen, 6 hanging from the ceiling, 30 lamp specifications, 34 positioning, 5 to 6 positioning the screen image, 20, 22 setting up, 5 turning off, 16 turning on, 14 R Rear projection, 30 Remote control buttons, 18 to 19 specifications, 34 Reset All feature, 32 Resolution, 33
-
 1
1 -
 2
2 -
 3
3 -
 4
4 -
 5
5 -
 6
6 -
 7
7 -
8
-
9
-
10
-
11
-
12
-
13
-
14
-
15
-
16
-
17
-
18
-
19
-
20
-
21
-
22
-
23
-
24
-
25
-
26
-
27
-
28
-
29
-
30
-
31
-
32
-
33
-
34
-
35
-
36
-
37
-
38
-
39
 |
 |
User’s Guide
Supplement
EPSON
®
PowerLite
®
500c/700c/710c
Multimedia Projector