Epson AcuLaser CX11N Start Here Card
Epson AcuLaser CX11N Manual
 |
View all Epson AcuLaser CX11N manuals
Add to My Manuals
Save this manual to your list of manuals |
Epson AcuLaser CX11N manual content summary:
- Epson AcuLaser CX11N | Start Here Card - Page 1
Start Here Epson AcuLaser® CX11N/CX11NF 1 Unpack Note: The illustrations show the CX11NF, but the instructions apply to both the CX11N and CX11NF unless otherwise noted. 1 Check that you have the following: • 4 toner cartridges (Cyan, Magenta, Yellow, Black) • Photoconductor unit • USB cable • Power - Epson AcuLaser CX11N | Start Here Card - Page 2
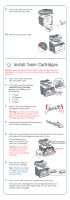
power cord to the CX11N and to an AC outlet. 10 Push the power switch to On. 2 Install Toner Cartridges Caution: Make sure the CX11N is turned on before installing the toner cartridges. Do not install the photoconductor before installing the toner cartridges. 1 Open cover A and remove the tape and - Epson AcuLaser CX11N | Start Here Card - Page 3
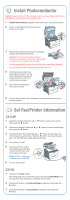
sure the CX11N is turned on and you have installed all the toner cartridges, as described in the previous section. 1 Install Photoconductor appears in the LCD screen. Lift up the scanner. 2 Lift up cover B and raise the orange lever inside, on the right. 3 Remove the photoconductor from its package - Epson AcuLaser CX11N | Start Here Card - Page 4
" for information on setting up the CX11N as a network printer. Windows® 1 Make sure the CX11N is not connected to your computer. Note: If you see a screen like this, click Cancel and disconnect the USB cable. You cannot install your software that way. 2 Insert the Epson CD-ROM into the CD drive of - Epson AcuLaser CX11N | Start Here Card - Page 5
, the registration screen appears. Follow the on-screen instructions to register your product. 8 Click Restart Now. 9 Open the Applications folder, then open the Utilities folder and double-click Printer Setup Utility (OS X 10.3.x or 10.4.x) or Print Center (OS X 10.2.x). 10 Click the Add button. - Epson AcuLaser CX11N | Start Here Card - Page 6
and Configure the Client Software (Windows Only)" to install the software on each computer that will be using the CX11N on the network. Static 1 Press the Setup button. The Setup light turns on and the LCD screen shows Setup Mode for a few seconds, then changes to the Setup menu screen. 2 Press the - Epson AcuLaser CX11N | Start Here Card - Page 7
will be using the CX11N on the network. Install and Configure the Client Software (Windows Only) Note: For Mac OS X 10.2.4 or later, see the Basics Guide for information on setting up a Macintosh computer to connect to the CX11N over a network. Install Software 1 Insert the Epson CD-ROM into the - Epson AcuLaser CX11N | Start Here Card - Page 8
Network. The IP address of the CX11N appears in the list. 3 Select the IP address, then click Test. 4 Close the Epson Scan Settings. You are now ready to print, copy, and scan. Questions? The Basics Guide tells you how to use your Epson AcuLaser CX11N and contains maintenance and troubleshooting
-
 1
1 -
 2
2 -
 3
3 -
 4
4 -
 5
5 -
 6
6 -
 7
7 -
8
 |
 |
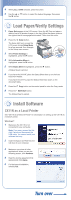
Start Here
Cover A
Epson AcuLaser
®
CX11N/CX11NF
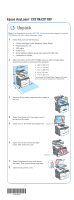
Unpack
Note:
The illustrations show the CX11NF, but the instructions apply to both the
CX11N and CX11NF unless otherwise noted.
1
Check that you have the following:
•
4 toner cartridges (Cyan, Magenta, Yellow, Black)
•
Photoconductor unit
•
USB cable
•
Power cord
•
Documentation:
Basics Guide
,
Fax Guide
(CX11NF only)
•
3 software CD-ROMs
2
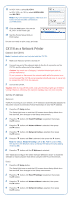
Select a location for the CX11N. Make sure you allow enough space
around the product to ensure smooth operation.
a
36.2 in. (920 mm)
b
10.2 in. (258 mm)
c
34.2 in. (868 mm)
d
3.9 in. (100 mm)
e
11.8 in. (300 mm)
The optional 500-Sheet Paper Cassette Unit adds
5.1 in. (130 mm) to the bottom of the CX11N.
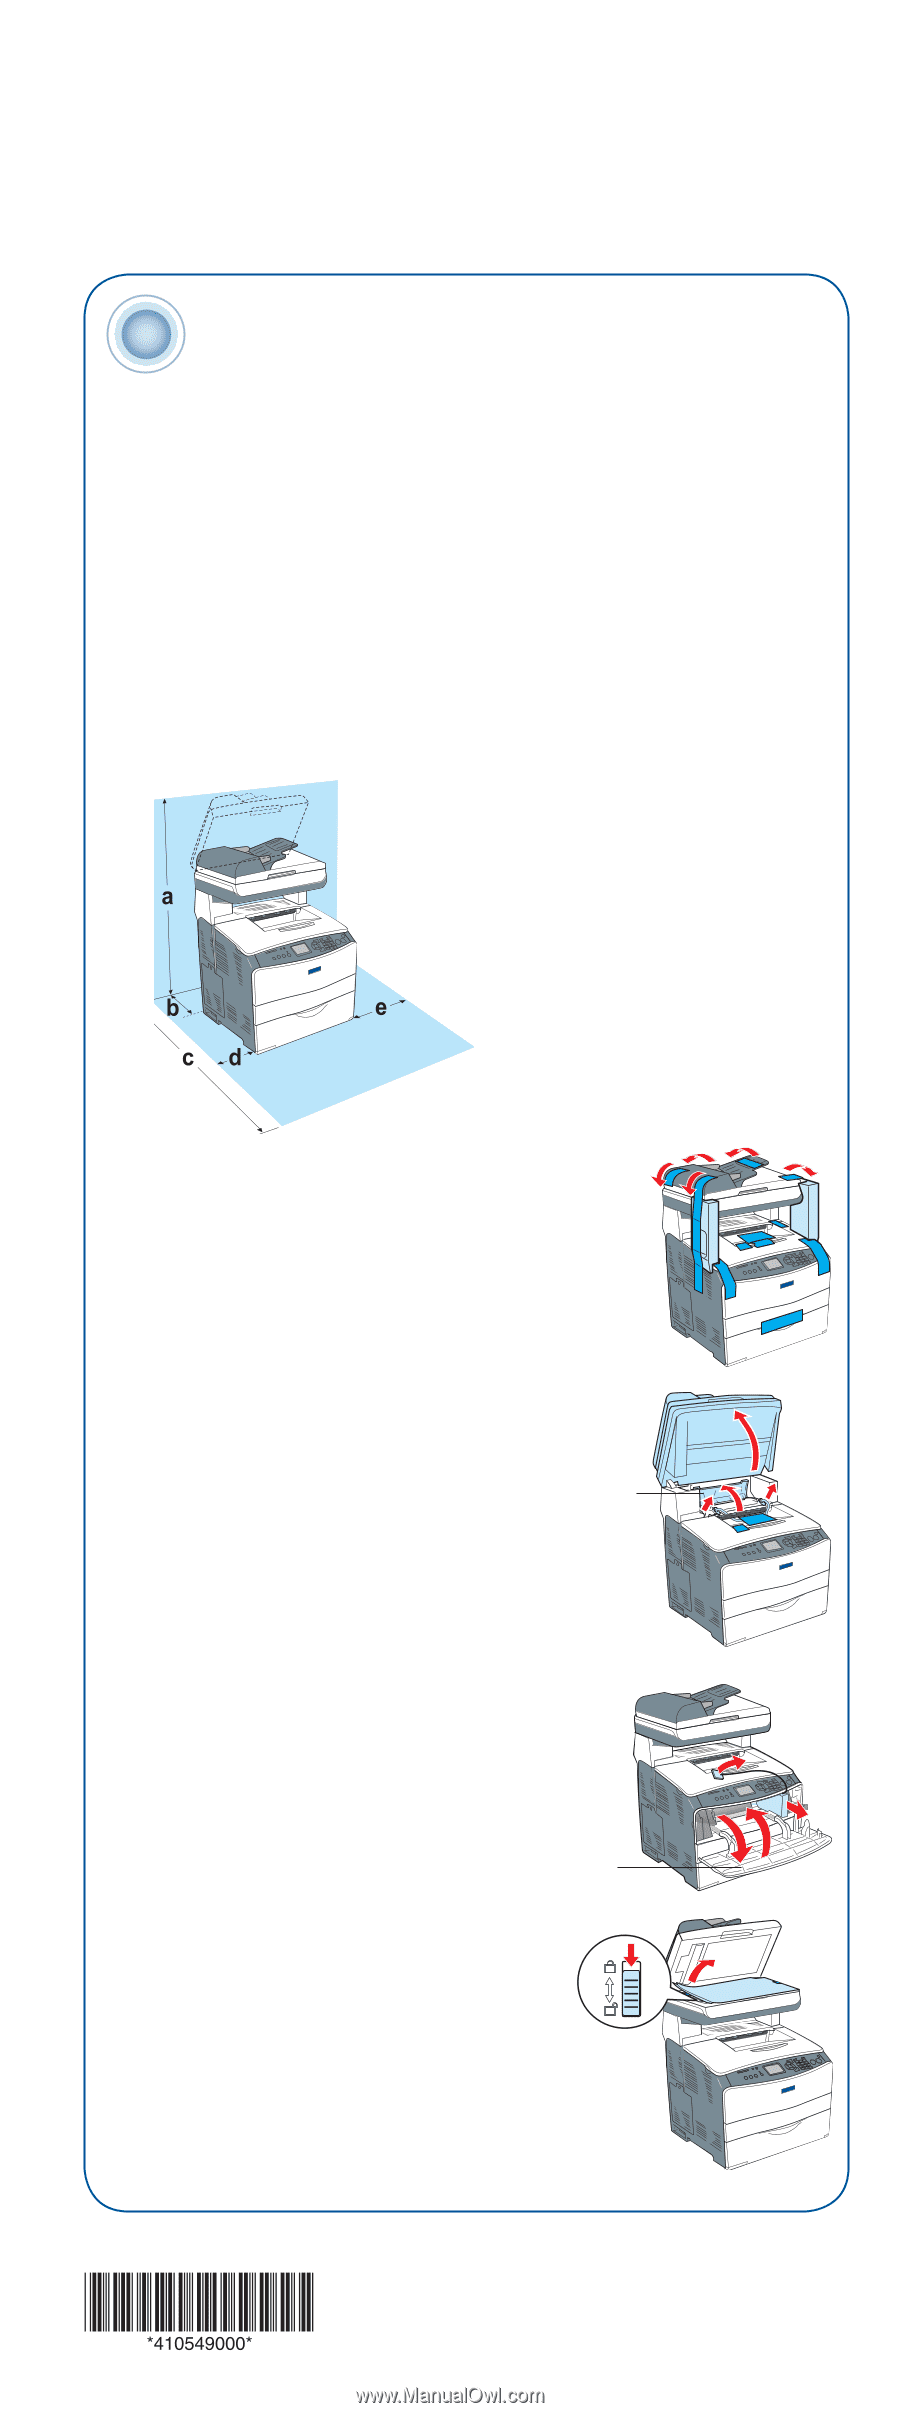
3
Remove all the packing tape from the outside of
the unit.
4
Raise the scanner unit, then open cover C
and pull out the insert.
5
Close cover C and lower the scanner unit.
6
Open cover A and remove the foam
insert. Then close the cover.
7
Open the document cover and remove
the insert. Then unlock the carriage lock.
8
Close the document cover.
Cover C
1