Epson AcuLaser CX11NF Fax Guide
Epson AcuLaser CX11NF Manual
 |
View all Epson AcuLaser CX11NF manuals
Add to My Manuals
Save this manual to your list of manuals |
Epson AcuLaser CX11NF manual content summary:
- Epson AcuLaser CX11NF | Fax Guide - Page 1
Epson AcuLaser® CX11NF Fax Guide - Epson AcuLaser CX11NF | Fax Guide - Page 2
comply with Seiko Epson Corporation's operating and maintenance instructions. Seiko Epson Corporation shall not be liable for any damages or problems arising from the law. Trademarks Epson and Epson AcuLaser are registered trademarks and Exceed Your Vision is a trademark of Seiko Epson Corporation. - Epson AcuLaser CX11NF | Fax Guide - Page 3
Introduction About Your Documentation 5 Changing to Fax Mode 6 Accessing Fax Settings 7 2 Sending Faxes Sending a Basic Fax 9 Using Speed-Dial Codes 10 Using One-Touch Buttons 12 Forwarding 19 4 Speed Dialing Using the Setup Menu 21 Using the Speed Dial Utility (Windows Only 28 Contents 3 - Epson AcuLaser CX11NF | Fax Guide - Page 4
49 Fax Job Information 51 7 Solving Problems Fax Error Messages 53 Sending and Receiving 53 Printing Problems 55 Where To Get Help 56 8 Notices Important Safety Instructions 57 FCC Compliance Statement 58 Declaration of Conformity 60 Epson America, Inc. Limited Warranty 61 4 Contents - Epson AcuLaser CX11NF | Fax Guide - Page 5
Epson AcuLaser® CX11NF, and how to access the fax mode and settings. About Your Documentation This Fax Guide tells you how to send and receive faxes with your AcuLaser CX11NF. It also tells you how to set up speed dialing, specify fax settings, and maintain and troubleshoot fax-related problems - Epson AcuLaser CX11NF | Fax Guide - Page 6
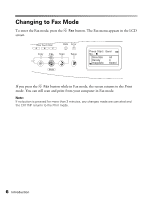
. If you press the Fax button while in Fax mode, the screen returns to the Print mode. You can still scan and print from your computer in Fax mode. Note: If no button is pressed for more than 3 minutes, any changes made are canceled and the CX11NF returns to the Print mode. 6 Introduction - Epson AcuLaser CX11NF | Fax Guide - Page 7
You can access the Fax settings through the Setup menu in the LCD screen. 1. Make sure the CX11NF is turned on, then press the Setup button. The Setup light turns on and the LCD screen displays Setup Mode for a few seconds, and then changes to the Setup menu. 2. Use the d button to select the Fax - Epson AcuLaser CX11NF | Fax Guide - Page 8
and switch to another mode you can do one of the following: ■ Press the Copy, Fax, or Scan button to switch to the corresponding mode. ■ Press the Setup button again in Setup mode to switch to the Print mode. For more information on changing these settings see "Fax Menu" on page 41. 8 Introduction - Epson AcuLaser CX11NF | Fax Guide - Page 9
ADF and on the document table, only the documents in the ADF are scanned. ■ The transmission result might differ from the original size. For example, is transmitted in Letter landscape. Sending a Basic Fax 1. Make sure the CX11NF is turned on, then press the Fax button. The Fax light turns on and - Epson AcuLaser CX11NF | Fax Guide - Page 10
, any changes made are an incorrect number, press the Reset button to delete a character to supports only black-and-white fax, a color fax is received as a black-and-white fax even if you press the x Color Start button. Using Speed-Dial Codes When a recipient fax number is registered on the CX11NF - Epson AcuLaser CX11NF | Fax Guide - Page 11
information beforehand. For details, see page 21. 1. Make sure the CX11NF is in Fax mode. If not, press the Fax button. 2. Start button. To send a color fax, press the x Color Start button. Note: When the recipient's fax machine supports only black-and-white fax, a color fax is received as a black- - Epson AcuLaser CX11NF | Fax Guide - Page 12
Using One-Touch Buttons When a frequently used recipient fax number is assigned to a One Touch Dial button (A, B, or C), you can send a fax to the recipient by simply pressing the corresponding One Touch Dial button. Pressing a One Touch Dial button (A, B, or C) in any mode accesses the Fax mode. - Epson AcuLaser CX11NF | Fax Guide - Page 13
. You can specify the Document Size, Density, Image Quality, Polling Reception, and Overseas transmission mode settings. For details, see page 44. 6. Press the x B&W Start or x Color Start button to start the transmission. Faxing to Multiple Recipients 13 - Epson AcuLaser CX11NF | Fax Guide - Page 14
to cancel from the Fax Reception Job list. 5. Press the u or d button to select the fax job you want to cancel, and then press the Reset button. 6. Press the u or d button to select Yes for confirmation, then press the r button. 14 Sending Faxes - Epson AcuLaser CX11NF | Fax Guide - Page 15
phone detects a fax/phone signal while answering an incoming call, the CX11NF automatically receives the fax. To change Incoming Mode settings, follow these steps. 1. Press the Setup button. The Setup light turns on and the Setup menu appears in the LCD screen. 2. Press the d button twice to - Epson AcuLaser CX11NF | Fax Guide - Page 16
incoming call using an attached phone. Note: To use this function, the CX11NF needs to have an attached phone, and Incoming Mode in Reception Settings call using the attached phone. 2. Press the x B&W Start or x Color Start button after confirming the fax tone. The received faxes are printed page - Epson AcuLaser CX11NF | Fax Guide - Page 17
fax machine. 1. Make sure the CX11NF is in Fax mode. If not, x B&W Start or x Color Start button to start the transmission 1. Press the Setup button on the control panel. The Setup light turns on and the Setup menu appears in select the item you would like to change, then press the r button. When - Epson AcuLaser CX11NF | Fax Guide - Page 18
allows the AcuLaser CX11NF to distinguish between different ring patterns. When DRPD is set to On (Normal), the CX11NF will answer the : 1. Press the Setup button. The Setup light turns on and the LCD screen displays Setup Mode for a few seconds, and then changes to the Setup menu. 2. Press the - Epson AcuLaser CX11NF | Fax Guide - Page 19
can set up your CX11NF to automatically forward any faxes it receives to another fax machine. Follow these steps to set up fax forwarding: 1. Press the Setup button. The Setup light turns on and the LCD screen displays Setup Mode for a few seconds, and then changes to the Setup menu. 2. Press the - Epson AcuLaser CX11NF | Fax Guide - Page 20
20 Receiving Faxes - Epson AcuLaser CX11NF | Fax Guide - Page 21
register, change, or delete a recipient number for one-touch dial or speed dial through the Setup menu on the control panel. Note: If you want to register multiple recipient fax numbers as a group, use the EPSON Speed Dial Utility. For details, see "Using the Speed Dial Utility (Windows Only)" on - Epson AcuLaser CX11NF | Fax Guide - Page 22
the d button to select Number=, then press the r button. Number= Note: To register a recipient name to the speed dial, see "Using the Speed Dial Utility (Windows Only)" on page 28. 22 Speed Dialing - Epson AcuLaser CX11NF | Fax Guide - Page 23
to go back one character or the Reset button to delete. The registered number is added to the speed dial list. Changing Speed Dial Recipients Follow these steps to change a recipient registered in the speed dial list. 1. Press the Setup button. The Setup light turns on. 2. Press the d button twice - Epson AcuLaser CX11NF | Fax Guide - Page 24
button several times to select the recipient you want to change, then press the r button. Unregistered 6. Make sure Change Fax Number is selected, then press the r button while entering it, use the l button or the Reset button. The registered number is changed to the new one on the speed dial list. - Epson AcuLaser CX11NF | Fax Guide - Page 25
Recipients to One-Touch Dialing You can assign recipients from the registered speed dial list to the three One Touch Dial buttons A, B, or C. 1. Press the Setup button. The Setup light turns on. Using the - Epson AcuLaser CX11NF | Fax Guide - Page 26
2. Press the d button twice to select Fax Settings, then press the r button. The Fax Settings menu appears. 3. Press the u or d button several times to select Speed Dial Settings, then press the r button. 4. Press the d button to select One-Touch Dial, then press the r button. The One-Touch Dial - Epson AcuLaser CX11NF | Fax Guide - Page 27
Deleting One-Touch Dial Recipients Follow these steps to delete recipients from the assigned One-Touch Dial buttons A, B, or C. 1. Press the Setup button. The Setup light turns on. 2. Press the d button twice to select Fax Settings, then press the r button. The Fax Settings menu appears. 3. Press - Epson AcuLaser CX11NF | Fax Guide - Page 28
Utility must be uploaded to the CX11NF before it can be used. Note: You cannot print or fax while uploading or downloading speed dial data. To open the Speed Dial Utility, click Start, point to All Programs (Windows XP) or Programs (Windows Me, 98, or 2000), EPSON Speed Dial Utility, and then click - Epson AcuLaser CX11NF | Fax Guide - Page 29
, make sure the CX11NF is in Print mode. Then follow these steps to register a recipient using the Epson Speed Dial utility. 1. Open the Edit menu on the left side of the screen, then select Create New. The Speed Dial tab appears: 2. Click the Add button. The Edit Address window appears: Using the - Epson AcuLaser CX11NF | Fax Guide - Page 30
number is added to the registered recipient list. Note: Remember to click the Save button to save any changes. For more information, see page 37. Remember to click Send Record to send changes to the CX11NF. For more information, see page 40. To add your name to the fax cover page on faxes - Epson AcuLaser CX11NF | Fax Guide - Page 31
. 1. In the Speed Dial tab, select a registered recipient from the list. 2. Click the Edit button. The Edit window appears: 3. Make the desired changes to the information. Then click OK. The changes are saved and displayed in the registered recipient list in the Speed Dial tab. Deleting Speed Dial - Epson AcuLaser CX11NF | Fax Guide - Page 32
Registering Groups Follow these steps to register a particular list of recipients as a group. 1. Click the Group Dial tab. The list of group dial names appears: 2. Click the Add button. 32 Speed Dialing - Epson AcuLaser CX11NF | Fax Guide - Page 33
The Register Group [Add] window appears: 3. Select a Group Number from the drop-down list. You can select a number from 1 to 20. 4. Type a Group Name. 5. From the group, click the OK button. The group is registered and appears in the Group Dial tab. Using the Speed Dial Utility (Windows Only) 33 - Epson AcuLaser CX11NF | Fax Guide - Page 34
Group [Edit] window appears. 2. Add registered recipients to the group, and/or delete them. See "Registering Groups" on page 32 for instructions. To edit individual names see page 29. 3. When you are finished, click OK. The changes are saved and displayed - Epson AcuLaser CX11NF | Fax Guide - Page 35
One-Touch Dial list appears: 2. Click the Edit button for the button to which you want to assign a registered recipient. The Set Button window appears: 3. Select the registered recipient from the list, then click OK. The registered recipient is assigned to the button. Using the Speed Dial Utility - Epson AcuLaser CX11NF | Fax Guide - Page 36
click the Not Set button for the button from which you want to remove a registered recipient. 2. At the confirmation, click Yes. The recipient is faxes you send: 1. Click the Sender Information tab. The Set Sender Information window appears. 2. Type the name you want to appear on the fax cover page - Epson AcuLaser CX11NF | Fax Guide - Page 37
meter appears. 4. Once the upload is complete, a message window appears. Click OK. To include the Sender Name on the you need to save the information as a file and send it to the CX11NF. Follow these steps to save additions or changes made in the Speed Dial Utility to a file on your PC. 1. From - Epson AcuLaser CX11NF | Fax Guide - Page 38
The Save As window appears. 2. Select a location on your PC's hard drive, type a File Name, then click Save. 3. At the confirmation, click OK. The speed dial data is saved to a file with the extension .CSV. 38 Speed Dialing - Epson AcuLaser CX11NF | Fax Guide - Page 39
you can add, edit, or delete registered recipients and group lists, or assign or reassign recipients to one-touch dial. Using the Speed Dial Utility (Windows Only) 39 - Epson AcuLaser CX11NF | Fax Guide - Page 40
Sending Speed Dial Information Changes made in the EPSON Speed Dial Utility do not take effect in the CX11NF until the data is sent to it. Follow these steps to send the speed dial information created and/or changed in the Speed Dial Utility to the product. 1. While in the Speed Dial, Group Dial, - Epson AcuLaser CX11NF | Fax Guide - Page 41
in the Fax menu, the transmit and receive settings, and the outgoing fax settings. Fax Menu You can use the Fax Settings menu to make changes to the following settings: ■ Basic Settings ■ Transmission Settings ■ Reception (Incoming Fax) Settings ■ Speed Dial Settings ■ Forward Settings ■ Report - Epson AcuLaser CX11NF | Fax Guide - Page 42
Tone, 10 pps, 20 pps Name3: up to 32 characters Number: up to 50 digits Off, 1, 2, 3 Argentina, Australia, Austria, Belgium, Brazil, Canada, China, settings vary depending on the destination. 3 Name can be registered only with EPSON Speed Dial Utility. For details, see page 28. 4 Default value is - Epson AcuLaser CX11NF | Fax Guide - Page 43
Item Forward Number Forward Settings Number: Name * On, Off *Unregistered is displayed when no forward (speed dial) numbers are registered. Report Setup This menu allows you to specify when you want to print the following reports. Item Settings Activity Report On, Off Transmission Report On - Epson AcuLaser CX11NF | Fax Guide - Page 44
factory settings. Customizing Transmit and Receive Settings You can change the following settings for transmitting or receiving faxes: ■ Density (-3 to 3). The greater the number, the darker the image. 1. Make sure the CX11NF is in Fax mode. If not, press the Fax button. 2. Press the d button - Epson AcuLaser CX11NF | Fax Guide - Page 45
. The default size is set to Letter. 1. Make sure the CX11NF is in Fax mode. If not, press the Fax button. 2. button to return to the recipient item, or change other settings if necessary. Selecting Image Quality In is transmitted with the moiré-removal and background-clearance functions active. - Epson AcuLaser CX11NF | Fax Guide - Page 46
of the header information (head of the original). Using Overseas Transmission Mode When you transmit faxes overseas, set this function to On. 1. Make sure the CX11NF is in Fax mode. If not, press the Fax button. 2. Press the u or d button several times to select Overseas Mode. 3. Press the l or - Epson AcuLaser CX11NF | Fax Guide - Page 47
the sender's fax machine. 1. Make sure the CX11NF is in Fax mode. If not, press the necessary. Selecting Outgoing Fax Settings You can change the number of auto redial attempts and disables Auto Redial. 1. Press the Setup button. The Setup light turns on and the Setup menu appears in the LCD screen. - Epson AcuLaser CX11NF | Fax Guide - Page 48
at the top of the transmission image. See page 36 for instructions on entering the sender name using the EPSON Speed Dial Utility (Windows only). 1. Press the Setup button on the control panel. The Setup light turns on and the Setup menu appears in the LCD screen. 2. Press the d button twice to - Epson AcuLaser CX11NF | Fax Guide - Page 49
dial information. Prints a list of faxes sent and received. Prints a list of Fax settings. Prints job information stored in memory. 1. Make sure the CX11NF is in Fax mode. If not, press the Fax button. 2. Press the Menu button. 3. Make sure Printing Report is selected, then press the r button - Epson AcuLaser CX11NF | Fax Guide - Page 50
report automatically only when an error occurs. Off To not print this report. Follow these steps to change the report settings. 1. Press the Setup button. The Setup light turns on and the Setup menu appears in the LCD screen. 2. Press the d button twice to select Fax Settings, then press the - Epson AcuLaser CX11NF | Fax Guide - Page 51
memory level in percent. Displays the list of faxes to be transmitted. Displays the list of faxes to be printed. Follow the steps below to change the Fax Job Information settings. 1. Press the Fax button on the control panel. The Fax light turns on and the Fax menu appears in the - Epson AcuLaser CX11NF | Fax Guide - Page 52
52 Reports - Epson AcuLaser CX11NF | Fax Guide - Page 53
Try contacting the recipient by phone. • There might be problems with the phone line. Turn up the volume on the unit and press the x B&W Start or x Color Start button on the control panel. If you hear a dial tone, the phone line is working. To change the speaker volume, see "Basic Settings" on page - Epson AcuLaser CX11NF | Fax Guide - Page 54
Problem Solution Unit 99. Press the y Cancel button when the fax is redialing. Change the redial setting if necessary. Faxes you send are not arriving Try removing the last device connected to see if the product works. If not, continue removing devices one at a time and retry after removing each - Epson AcuLaser CX11NF | Fax Guide - Page 55
half of the toner cartridge. For more information, see "Maintenance" in the page Basics Guide. Reports are not printing correctly If a transmission report or activity report is not printed correctly, try one the following solutions: • Check the driver settings and the specifications and status - Epson AcuLaser CX11NF | Fax Guide - Page 56
to common problems. You can download drivers and documentation, get FAQs and troubleshooting advice, or e-mail Epson with your questions. Speak to a Support Representative Before you call for support, please have the following information ready: ■ Product name (Epson AcuLaser CX11NF) ■ Product - Epson AcuLaser CX11NF | Fax Guide - Page 57
regulatory compliance. Important Safety Instructions When Using the CX11NF With Telephone Equipment When using the CX11NF with telephone equipment, the risk of fire, electric shock, and injury: ■ Do not use the CX11NF near water. ■ Avoid using a telephone during an electrical storm. There may - Epson AcuLaser CX11NF | Fax Guide - Page 58
service. 7. If trouble is experienced with this equipment Model EU-96, for repair or warranty information, please contact EPSON AMERICA, INC. 800-556-6025. If the equipment is causing harm to the telephone network, the telephone company may request that you disconnect the equipment until the problem - Epson AcuLaser CX11NF | Fax Guide - Page 59
you should use the FAX Recipient Registration Tool (EPSON Speed Dial Utility). 10. According to the FCC's electrical safety advisory, and that this is a major nationwide problem. 11. If your home has specially . Canada 1. This product meets the applicable Industry Canada technical specifications. Le - Epson AcuLaser CX11NF | Fax Guide - Page 60
, complies with 47CFR Part 2 and 15 of the FCC rules as a Class B digital device. Each product marketed is identical to the representative unit tested and found to , including interference that may cause undesired operation. Trade Name: Epson Type of Product: MFPP Model: KBA-5b 60 Notices - Epson AcuLaser CX11NF | Fax Guide - Page 61
any color change or fading of prints or reimbursement of materials or services required for reprinting. This warranty does not cover damage to the Epson product caused by parts or supplies not manufactured, distributed or certified by Epson. This warranty does not cover toner cartridges or third - Epson AcuLaser CX11NF | Fax Guide - Page 62
ENTIRE LIABILITY FOR LOSS OR DAMAGE OF ANY KIND SHALL BE LIMITED TO A REFUND OF THE PRICE PAID FOR THE EPSON PRODUCT. In Canada, warranties include both warranties and conditions. Some jurisdictions do not allow limitations on how long an implied warranty lasts, and some jurisdictions do not allow - Epson AcuLaser CX11NF | Fax Guide - Page 63
- Epson AcuLaser CX11NF | Fax Guide - Page 64
CPD-19582R2 Printed in XXXXXX XX.XX-XX XXX
-
 1
1 -
 2
2 -
 3
3 -
 4
4 -
 5
5 -
 6
6 -
 7
7 -
8
-
9
-
10
-
11
-
12
-
13
-
14
-
15
-
16
-
17
-
18
-
19
-
20
-
21
-
22
-
23
-
24
-
25
-
26
-
27
-
28
-
29
-
30
-
31
-
32
-
33
-
34
-
35
-
36
-
37
-
38
-
39
-
40
-
41
-
42
-
43
-
44
-
45
-
46
-
47
-
48
-
49
-
50
-
51
-
52
-
53
-
54
-
55
-
56
-
57
-
58
-
59
-
60
-
61
-
62
-
63
-
64
 |
 |
Epson AcuLaser
®
CX11NF
Fax Guide