Epson B113111 Installation Guide
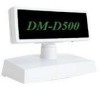
Epson B113111 - DM D500 - Vacuum Fluorescent Display Character Manual
 |
View all Epson B113111 manuals
Add to My Manuals
Save this manual to your list of manuals |
Epson B113111 manual content summary:
- Epson B113111 | Installation Guide - Page 1
DM-D500 Installation Guide 401467400 - Epson B113111 | Installation Guide - Page 2
Epson Corporation's operating and maintenance instructions. Seiko Epson Corporation shall not be liable against any damages or problems manual are subject to change without notice. Copyright © 2001 by Seiko Epson Corporation, Nagano, Japan. EMC and Safety Standards Applied Product Name: DM-D500 - Epson B113111 | Installation Guide - Page 3
your dealer or a SEIKO EPSON service center for advice. Never attempt EPSON service center for advice. Continued usage may lead to fire or shock. CAUTION: Do not plug the cable differently from the instruction in this manual Do not attach more than one extension support. The product may be damaged or - Epson B113111 | Installation Guide - Page 4
or disconnecting cables, make sure that the power switch of the DM-D500 and printers connected to the DM-D500 are turned off. ❏ Do not drop the DM-D500, because you may damage the builtin vacuum fluorescent display. Usage The DM-D500 can be used with the following equipment. ❏ IR Series. You can - Epson B113111 | Installation Guide - Page 5
) is required. Also, if you want to raise the height of the DM-D500, an optional extension support unit (DP-105) is required. (See page 21.) Precautions When Connecting to a TM Printer Before the DM-D500 is connected to a TM printer, check the serial number on the label affixed to the rear or bottom - Epson B113111 | Installation Guide - Page 6
000001 and higher B5X0 510001 and higher Printer TM-U590 TM-H6000 TM-U675 DM-D500. If your TM printer is not listed above, it can be connected to the DM-D500 without any the DM-D500 without an additional board. 2 3 blue seal Assembling scribed square Attaching to the IR Series The DM-D500 can - Epson B113111 | Installation Guide - Page 7
Series, and secure it with the screws. Note: When attaching the base, note that the corners of the base are set as shown in illustration 7. support B for extension 7 DM-D500 Installation Guide 5 - Epson B113111 | Installation Guide - Page 8
-503). Required items The items shown in illustration 11 are used to attach the DM-D500 to a TM-H5000II or TM-J8000 printer. These items are packed with the "DM-D pole unit for TM printers (Type B)" (DP-503). 11 base fixing screws support C support B (for extension) 6 DM-D500 Installation Guide - Epson B113111 | Installation Guide - Page 9
13 until you feel it click. 12 13 when using support B for extension 2. Attach the base to the setting position on the TM printer, and secure it with the 14 screws as shown in illustration 14. 3. Pass the cable for the DM-D500 through the base as shown in illustration 15. 4. Insert the - Epson B113111 | Installation Guide - Page 10
TM-U375> 18 19 rubber feet rubber feet (square) (large) rubber feet (square) fixing screws fixing screws for rubber for metallic feet (large) portion fixing screws 20 support C support B for extension fixing plate A 8 DM-D500 Installation Guide - Epson B113111 | Installation Guide - Page 11
in illustration 22 until you feel it click. 21 22 when using support B for extension 2. Attach the rubber feet to the printer as shown in illustration 23 or 24. 23 24 [TM-U375] [TM-U950] 3. Pass the cable for the DM-D500 through the 25 hole on fixing plate A, and fix the cable - Epson B113111 | Installation Guide - Page 12
5. Adjust the length of the cable, and secure fixing plate A to the printer with screws as shown in illustration 27 or 28. 27 28 [TM-U375] [TM-U950] 6. Store any excess cable in the support, and attach the DM-D500 to fixing plate A as shown in 29 illustration 29. Attaching to the TM - Epson B113111 | Installation Guide - Page 13
through support C, and attach support C to the DM-D500 as shown in illustration 31. When using support B for extension, insert the tab on support B into the hole on support C as shown in illustration 32 until you feel it click. 31 32 when using support B for extension DM-D500 Installation Guide - Epson B113111 | Installation Guide - Page 14
attach the stopper, insert the projections on the stopper into the holes of fixing plate B. Fixing plate A can be attached on either side of the printer. (Illustration 37 shows fixing plate A attached to the right side of the printer.) 36 37 12 DM-D500 Installation Guide - Epson B113111 | Installation Guide - Page 15
English 7. The horizontal rotation mechanism of fixing plate A can be adjusted. To secure the location of the display, set fixing plate A to one of the four positions shown in illustration 38, 39, 40, or 41, and secure it with the angle fixing screw. 38 39 40 41 DM-D500 Installation Guide 13 - Epson B113111 | Installation Guide - Page 16
the roll paper cover. See illustration 42. 8. Store any excess cable in the support, and attach the DM-D500 to fixing plate A as shown in illustration 43. 42 43 roll paper cover 9. Connect the power cable of the printer. To avoid 44 disconnection, hook the cable to the tabs on fixing plate B, as - Epson B113111 | Installation Guide - Page 17
in illustration 45 are used to attach a DM-D500 to a TM-T88II, TM-U210, TM-U230, TM-T90, or TM-L90 printer. These items are packed with the "DM-D pole unit for TM printers" (DP-505). 45 support extension support fixing plate installation manual fixing screws for wooden position Velcro tapes - Epson B113111 | Installation Guide - Page 18
hole on the support as shown in illustration 47 until you feel it click. 46 47 when using an extension support 4. Pass the cable for the display through the hole on the fixing plate, and attach the 48 support to the fixing plate as shown in illustration 48. 16 DM-D500 Installation Guide - Epson B113111 | Installation Guide - Page 19
printer. (The positioning numbers of Velcro tapes on the fixing plate are shown in illustrations 49 and 50.) Printer 1 to 11 Attaching position for display (seen from the front of the printer) Right side Left side Both sides 3 1 49 50 5 8 6 the TM printer (UB-S09) until you feel it click - Epson B113111 | Installation Guide - Page 20
printer.) Printer type TM-T88II TM-U210/U230/T90/L90 Mounting positions for TM printers Set the printer so that no rubber foot on the rear side of the printer is placed on the Velcro tape. Set the printer the TM printer. Assembling Printers When using with other TM printers, the DM-D500 can be - Epson B113111 | Installation Guide - Page 21
54 are used when the DM-D500 is used with other TM printers. These items are packed with the "DM-D pole unit for TM printers (Type A)" (DP-502). 54 fixing plate A Velcro tapes Velcro tapes fixing screws for wood position support C support B (for extension) Assembling using Velcro tapes - Epson B113111 | Installation Guide - Page 22
the cable for the DM-D500 to the DC connector on the TM printer as shown in illustration 59. 59 5. Store any excess cable in the support, and attach the DM-D500 to fixing plate A as screws as shown in illustration 61. 3. Attach the DM-D500 to fixing plate A. 20 DM-D500 Installation Guide - Epson B113111 | Installation Guide - Page 23
to a TM printer or be used as a standalone product. Required items The items shown in illustration 62, 63, or 64 are used to attach the DM-D500 to the DM-D stand. Note that an optional power unit (PS-170) is required when using the DM-D stand. Also, another optional extension support (DP-105) is - Epson B113111 | Installation Guide - Page 24
Set the jumpers on the DM-D stand as follows: RS-232C connector installation screw JP1 JP2 Contents 1-2 1-2 When connecting both the TM printer and the DM-D stand. (Default setting.) 2-3 2-3 When using the DM-D stand as a standalone. (TM printer is not connected.) 22 DM-D500 Installation Guide - Epson B113111 | Installation Guide - Page 25
unit To avoid damage to the DM-D500 and the power supply unit, note the following points. ❏ Use the optional Seiko Epson products, PS-170, PA-6508, the DM-D500 through the DM-D stand as shown in illustration 68. When raising the height of the DM-D stand, attach the extension support (DP-105) to the - Epson B113111 | Installation Guide - Page 26
Insert the tab on the DM-D500 (or the extension support) into the hole on the DM-D stand as shown in illustration 70 until you feel it click. 70 3. Connect the cable for the DM-D500 to the display connector on the on both ends of the cables to fasten them. 72 computer 24 DM-D500 Installation Guide - Epson B113111 | Installation Guide - Page 27
printer, connect one end of the printer interface cable for the printer to the printer connector on the DM-D stand; then connect the other end to the connector on the printer cable to fasten them. 73 printer 6. If not using the printer as shown in illustration 74. extension cable connector 74 extension - Epson B113111 | Installation Guide - Page 28
9. Arrange the cables as shown in illustration 76. Put the cables for the DM-D500 inside the DM-D stand. 76 10. Attach the base plate to the DM-D stand locked by the hook on the DM-D stand. 77 11. When the extension support (DP-105) is used, attach Velcro tapes to the four corners of the plate to - Epson B113111 | Installation Guide - Page 29
) power switch (bottom of the display) ❏ Display: Characters are displayed. ❏ Power switch: The power is turned on/off. ❏ DIP switch: The functions of the DM-D500 are changed. See "DIP Switch" for details. Note: When turning on the DM - Epson B113111 | Installation Guide - Page 30
OFF OFF OFF OFF ON OFF ON (*1) XON/XOFF is effective only when the DM-D500 is connected as a standalone. Transmission speed* SW1-6 ON OFF ON OFF ON OFF *When the DM-D500 is connected to a TM printer, be sure that the transmission speed matches that of the printer. 28 DM-D500 Installation Guide - Epson B113111 | Installation Guide - Page 31
as data length and transmission speed, must be the same on both your computer and printer. Setting the DIP switches CAUTION: Turn off the DM-D500 while removing the DIP switch cover to prevent electrical damage to the DM-D500. 1. Turn off the power for the DM-D500. DM-D500 Installation Guide 29 - Epson B113111 | Installation Guide - Page 32
-D500 You can turn or tilt the display while holding the support. The display can be moved easily, so do not move it any further if it stops. If you move it by force, you may damage it. With the "DM-D pole unit for IR" (DP-504) and the "DM-D pole unit for TM printers D500 Installation Guide - Epson B113111 | Installation Guide - Page 33
The DM-D500 has a self test, follow the steps below. 1. Turn off the power for the DM-D500. 2. Set the SW 2-2 of the DIP switch 2 to ON, and turn of the self test are not displayed, the DM-D500 may be malfunctioning. Contact your DM-D500 dealer for assistance. When the self test is finished and - Epson B113111 | Installation Guide - Page 34
characters: 95, International characters: 37 Extended graphics: 128 × 12 Kanji supports one of the following sets: Japanese (JIS Level 1 and 2), to 85% (no condensation) Storage: 30% to 90% (no condensation) See figures below. DM-D500: 460 g {1.01 lb}, DP-501: 440 g {0.97 lb}, DP-502: 264 g - Epson B113111 | Installation Guide - Page 35
DM-D500 213 mm {8.4"} English 83 mm {3.3"} DM-D stand (DP-501) 200 mm {7.9"} 65 mm {2.6"} 51 mm {2.0"} 48° 118 mm {4.7"} 90° DM-D500 Installation Guide 33 - Epson B113111 | Installation Guide - Page 36
(Type B) (DP-503) DM-D pole unit for TM printers (Type A) (DP-502) 129 mm {5.0"} 248 mm {9.8"} 260 mm {10.2"} 50 mm {1.9"} 53 mm {2.1"} base 78 mm {3.1"} DM-D pole unit for TM printers (DP-505) 164 mm {6.5"} 260 mm {10.2"} 130 mm {5.1"} 214 mm {8.4"} 34 DM-D500 Installation Guide - Epson B113111 | Installation Guide - Page 37
2001.07
-
 1
1 -
 2
2 -
 3
3 -
 4
4 -
 5
5 -
 6
6 -
 7
7 -
8
-
9
-
10
-
11
-
12
-
13
-
14
-
15
-
16
-
17
-
18
-
19
-
20
-
21
-
22
-
23
-
24
-
25
-
26
-
27
-
28
-
29
-
30
-
31
-
32
-
33
-
34
-
35
-
36
-
37
 |
 |

DM-D500
Installation Guide
401467400