Epson B12B808393 User Manual
Epson B12B808393 - NETWORK IMAGE EXPRESS CARD Manual
 |
UPC - 010343850392
View all Epson B12B808393 manuals
Add to My Manuals
Save this manual to your list of manuals |
Epson B12B808393 manual content summary:
- Epson B12B808393 | User Manual - Page 1
Network Image Express Interface Card This section explains how to install the optional Network Image Express interface card (B12B808393) in your scanner. Setting Up Client Computers Before connecting the scanner to your network, make sure any computer you want to use for scanning is set up properly. - Epson B12B808393 | User Manual - Page 2
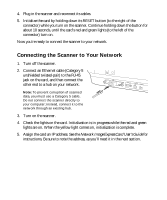
. Initialization is in progress while the red and green lights are on. When the yellow light comes on, initialization is complete. 5. Assign the card an IP address. See the Network Image Express Card User's Guide for instructions. Be sure to note the address, as you'll need it in the next section.
-
 1
1 -
 2
2
 |
 |

61
Network Image Express Interface Card
This section explains how to install the optional Network Image Express interface
card (B12B808393) in your scanner.
Setting Up Client Computers
Before connecting the scanner to your network, make sure any computer you want to
use for scanning is set up properly. Check that:
■
an Ethernet network card is installed in the computer
■
the computer is configured to use the TCP/IP network protocol
■
your scanner software is installed (see the
Start Here
sheet for instructions)
For instructions on installing your computer’s card, see the manual that came with
the card. For instructions on setting up TCP/IP, see your computer’s manual or
online help.
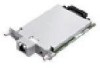
Installing the Card in Your Scanner
1.
Turn off the scanner and disconnect the power cord and any cables.
2.
Remove the two screws securing the shield plate to the scanner’s optional interface
slot, and then remove the plate. Keep the screws and shield plate in case you want
to reinstall them later.
3.
Fully insert the Network Image Express card in the slot, and tighten its screws.
Caution:
Do not insert the card with the scanner turned on, or you could damage
the card or the scanner.