Epson BrightLink 450Wi User's Guide
Epson BrightLink 450Wi - Interactive Projector Manual
 |
View all Epson BrightLink 450Wi manuals
Add to My Manuals
Save this manual to your list of manuals |
Epson BrightLink 450Wi manual content summary:
- Epson BrightLink 450Wi | User's Guide - Page 1
BrightLinkTM 450Wi Interactive Projector User's Guide - Epson BrightLink 450Wi | User's Guide - Page 2
User's Guide, do not attempt to service this product yourself. Refer all servicing to qualified service personnel. WARNING: The projector and with Seiko Epson Corporation's operating and maintenance instructions. Seiko Epson Corporation shall not be liable for any damages or problems arising from - Epson BrightLink 450Wi | User's Guide - Page 3
Information 10 Registration and Warranty 11 Unpacking the Projector 12 Unpacking the Mounting Hardware 13 Projector Parts 14 Base 15 Connection Panel 15 Projector Control Panel 16 Interactive Pens 16 Remote Control 17 Projector Dimensions 18 Additional Components 20 Optional Accessories - Epson BrightLink 450Wi | User's Guide - Page 4
Image 44 Selecting the Color Mode 45 Resizing Video Images 46 3 Using the Interactive Pens 47 Using the Easy Interactive Pen Driver 48 Calibrating the Projector 49 Using the Pens 51 Using the Easy Interactive Tools for Windows 52 4 Presenting With the Remote Control 59 Using the Remote - Epson BrightLink 450Wi | User's Guide - Page 5
Network 86 Installing the Optional Wireless LAN Module 89 Using Quick Wireless Connection 91 Configuring Basic Settings 91 Configuring a Wireless Connection 93 Configuring the Projector 94 Selecting Wireless Network Settings in Windows. . . . . . 96 Selecting Wireless Network Settings in Mac - Epson BrightLink 450Wi | User's Guide - Page 6
Sound 126 Solving Problems With the Interactive Pens 134 Solving Password Problems 136 Solving Network Problems 136 Solving Problems With the Remote Control 139 Where To Get Help 140 Internet Support 140 Speak to a Support Representative 140 Software Technical Support 141 Purchase Supplies - Epson BrightLink 450Wi | User's Guide - Page 7
B Notices 149 Important Safety Instructions 149 FCC Compliance Statement 152 Software Notices 153 Index 181 7 - Epson BrightLink 450Wi | User's Guide - Page 8
8 - Epson BrightLink 450Wi | User's Guide - Page 9
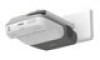
The BrightLink™ 450Wi is an easy-to-use, ultra short-throw projector that turns any wall into an interactive whiteboard. The projector can be wall-mounted above a whiteboard or other surface and project an image up to 96 inches (diagonal) in native WXGA format. You can use the interactive pens to - Epson BrightLink 450Wi | User's Guide - Page 10
Monitor Operation Guide Provides instructions on using the EasyMP Monitor software to manage projectors on a network (PDF installed along with this manual from the projector CD). ■ Built-in help system Provides assistance for common problems. Available from the ? Help button on the projector or the - Epson BrightLink 450Wi | User's Guide - Page 11
Guide. In addition, Epson offers free Extra CareSM Road Service. In the unlikely event of an equipment failure, you won't have to wait for your unit to be repaired. Instead, Epson will ship you a replacement unit anywhere in the United States or Canada. See the brochure included with your projector - Epson BrightLink 450Wi | User's Guide - Page 12
, make sure you have all these parts: Projector BrightLink 450Wi CD Epson Projector Software for Meeting and Monitoring CD Power cord VGA computer cable Epson Projector Software for Easy Interactive Function CD USB cable Remote control 2 AA batteries (for remote control) Security sticker - Epson BrightLink 450Wi | User's Guide - Page 13
and mounting hardware, make sure you have all these parts: Wall plate Wall mount (setting plate) End cap Installation template Hex wrenches Wall plate cover Bolts See the Installation Guide for instructions on mounting the projector on a wall. Save all packaging in case you need to ship the - Epson BrightLink 450Wi | User's Guide - Page 14
Speaker Remote receiver Control panel Cable cover Air exhaust vent 14 Welcome Kensington security slot Security cable attachment Filter cover switch Air filter Lamp cover Lamp cover screw Air filter cover Focus lever Remote control receiver Projection window Wireless LAN module slot - Epson BrightLink 450Wi | User's Guide - Page 15
Base Wall mounting slide plate Security cable attachment Connection Panel Video port Audio out port Computer1 S-Video port Audio in ports Microphone input and jack audio jack AC power inlet RS-232C port Monitor - Epson BrightLink 450Wi | User's Guide - Page 16
menu items) Power light Power button Help button Lamp and Temperature warning lights Wide button (increases image size Tele button (decreases image size) Keystone button (corrects screen shape) Enter button (selects menu items) Interactive Pens Battery indicator Button Battery compartment - Epson BrightLink 450Wi | User's Guide - Page 17
button (turns off image and audio) Auto button (adjusts image size and position) Aspect button (changes screen size) Page Up/Down buttons (control PowerPoint® slides; USB cable required) E-Zoom +/- buttons (zoom into image) Menu button (accesses projector menus) Source Search and Source buttons - Epson BrightLink 450Wi | User's Guide - Page 18
With slide plate Projector Dimensions Use the dimensions below to guide you in placing or installing the projector. 0.33 in. (8.3 mm) 0.22 in. (5.5 mm) 6.7 in. (170 mm) 18 Welcome 11.5 in. (292 mm) 19.0 in. (483 mm) 14.5 in. (369 mm) 7.0 in. (177 mm) - Epson BrightLink 450Wi | User's Guide - Page 19
Without slide plate 0.91 in. (23 mm) 6.1 in. (155 mm) 4.2 in. (107 mm) 14.5 in. (369 mm) Mounting screw holes 6.7 in. (170 mm) 14.5 in. (369 mm) 3.6 in. (92 mm) 6.2 in. (157 mm) 6.3 in. (160 mm) 19.0 in. (483 mm) 6.5 in. (166 mm) Welcome 19 - Epson BrightLink 450Wi | User's Guide - Page 20
one end). Optional Accessories To enhance your use of the projector, Epson offers the following optional accessories: Product Additional interactive pen Replacement lamp Replacement air filter set Wireless LAN module* Quick Wireless Connection USB key Kensington security lock DC-06 document camera - Epson BrightLink 450Wi | User's Guide - Page 21
You can purchase accessories from an Epson authorized reseller. To find the nearest reseller, call 800-GO-EPSON (800-463-7766). Or you can purchase online at www.epsonstore.com (U.S. sales) or www.epson.ca (Canadian sales). Welcome 21 - Epson BrightLink 450Wi | User's Guide - Page 22
22 Welcome - Epson BrightLink 450Wi | User's Guide - Page 23
camera. You can also connect the projector to a USB storage device or document camera. Follow the instructions in this chapter on: ■ Connecting to a computer ■ Connecting an external monitor ■ Connecting to video equipment ■ Playing sound through the projector ■ Connecting to a document camera or - Epson BrightLink 450Wi | User's Guide - Page 24
computer that has a standard video output (monitor) port. This connection is recommended for use with the interactive pens. See the next section for instructions. You can also connect the projector to a computer using the projector's TypeB (square) USB port, including desktop models, PC notebook - Epson BrightLink 450Wi | User's Guide - Page 25
and adjusting the image. For instructions on using the interactive pens, see page 47. Connecting to the USB Port You can connect a Windows or Macintosh computer to the projector's TypeB (square) USB port and project your computer's display. This feature supports the following operating systems - Epson BrightLink 450Wi | User's Guide - Page 26
square end of the USB cable to the projector's TypeB (square) USB port. note If the software does not install automatically, you can install it manually. See page 125 for instructions. 5. Connect the flat end of the cable to any available USB port on your notebook or desktop computer. Messages - Epson BrightLink 450Wi | User's Guide - Page 27
the USB cable. Mac OS: click the USB Display icon on the Dock and drag it to the trash, then remove the USB cable. Connecting the USB Cable for the Interactive Pens or Remote Mouse Control In order to use the interactive pens, you must connect the USB cable to the projector and your computer - Epson BrightLink 450Wi | User's Guide - Page 28
note Some LCD monitors may not be able to display the image correctly. If you have trouble displaying the image, connect a multiscan monitor. If you're projecting computer images, make sure the computer's refresh rate is set to 65 Hz or greater. The projector must be turned on for the Monitor Out - Epson BrightLink 450Wi | User's Guide - Page 29
video cable was not provided with your video device, you can purchase one from an electronics dealer. 2. If you want to play sound through the projector, see page 33 for instructions on connecting an audio cable. Connecting to Computers, USB Devices, and Other Equipment 29 - Epson BrightLink 450Wi | User's Guide - Page 30
with your video device, you can purchase one from Epson; see page 20. 3. When you've finished making connections, see page 40 for instructions on turning on the projector and page 43 for instructions on displaying and adjusting the image. Once the projector is turned on, select the image source by - Epson BrightLink 450Wi | User's Guide - Page 31
Signal setting in the projector's Signal menu to Auto (see page 74). 4. If you want to play sound through the projector, see page 33 for instructions on connecting an audio cable. 5. When you've finished making connections, see page 40 for instructions on turning on the projector and page 43 for - Epson BrightLink 450Wi | User's Guide - Page 32
see page 74). 3. If you want to play sound through the projector, see page 33 for instructions on connecting audio cables. 4. When you've finished making connections, see page 40 for instructions on turning on the projector and page 43 for instructions on displaying and adjusting the image. Once the - Epson BrightLink 450Wi | User's Guide - Page 33
use a 3.5 mm stereo mini-jack cable, which you can purchase from a computer or electronics store. 1. Connect one end of the cable to the Audio1 or Audio2 jack on the projector. Audio jacks 2. Connect the other end to your laptop's headphone jack or audio-out jack, or your computer's speaker or audio - Epson BrightLink 450Wi | User's Guide - Page 34
an RCA-style audio cable, which you can purchase from an electronics store. 1. Connect the red and white plugs on one end of the cable to the L and R Audio jacks on the projector. Connect to audio-out ports for video equipment 2. Connect the red and white plugs on the other end to the corresponding - Epson BrightLink 450Wi | User's Guide - Page 35
a Microphone You can connect a dynamic microphone to the projector's Mic port, using a 3.5 mm mini-jack cable as shown below. Use the Mic Input Level option on the Settings menu to adjust the volume. See page 76 for more information. Connecting to Computers, USB Devices, and Other Equipment - Epson BrightLink 450Wi | User's Guide - Page 36
For some speakers, you may need a special cable or adapter. 2. Connect the stereo mini-jack end of the audio cable to the Audio Out port on the projector. Audio cable 3. Connect the other end of the cable to your speakers. The projector's internal speaker system is disabled while sound is output to - Epson BrightLink 450Wi | User's Guide - Page 37
a Document Camera or Other USB Device You can connect an interactive whiteboard, document camera, USB thumb (flash memory) drive, USB hard drive, or multimedia storage viewer, such as the Epson P-7000. You can use the projector's Slideshow function to display JPEG images or a presentation - Epson BrightLink 450Wi | User's Guide - Page 38
off or removing the USB device. Be sure to turn off your USB device (if necessary) before you remove the device or cable from the projector. Failure to do so may damage the device and/or the projector. 38 Connecting to Computers, USB Devices, and Other Equipment - Epson BrightLink 450Wi | User's Guide - Page 39
video equipment, you need to follow some basic steps to display your image on the screen. Follow the guidelines in this chapter for: ■ Turning the projector on and off ■ Selecting the image source ■ Adjusting the image 39 - Epson BrightLink 450Wi | User's Guide - Page 40
source. If you turn on the projector first, or have multiple pieces of connected equipment, you may have to select the image source manually (see page 43). Follow these steps to turn on the projector: 1. Make sure the power cord is connected and the projector is plugged into an electrical outlet - Epson BrightLink 450Wi | User's Guide - Page 41
can damage your eyes, and is especially dangerous for children. Using the Direct Power On Function The Direct Power On function enables faster setup. The projector starts up automatically when you plug it in or turn it on with a wall switch. You don't have to press the Ppower button. Follow these - Epson BrightLink 450Wi | User's Guide - Page 42
mode selected, environmental conditions, and usage. Turn off this product when not in use to prolong the life of the projector. You can set the projector to automatically turn off the lamp and enter "sleep mode" when it has not received any signals for 1 to 30 minutes (see page 78). This conserves - Epson BrightLink 450Wi | User's Guide - Page 43
of connected equipment. If you don't see the image you want, press the Source Search button on the remote control or the projector until you USB to project from a USB device or LAN to project over a network. See page 66 for instructions. Adjusting the Image Once you see your image, you may need to - Epson BrightLink 450Wi | User's Guide - Page 44
Image Focusing the projector is part of the installation process. If necessary, you can re-adjust the focus at any time using the focus lever next to the air filter on the side of the projector. 1. Slide the switch to open the air filter cover on the side of the projector. 2. Raise or lower - Epson BrightLink 450Wi | User's Guide - Page 45
button Select from one of these Color Mode options: ■ Dynamic: Brightest mode; for video games or TV in a bright room. ■ Presentation: For color presentations in a bright room (default setting). ■ Theatre: For natural-toned movies in a darkened room. ■ Photo: For vivid, high-contrast still images - Epson BrightLink 450Wi | User's Guide - Page 46
: Displays images as is (aspect ratio and resolution are maintained). Black bands may appear or images may be cut off, depending on the resolution. If you are using the interactive pens, you will have to recalibrate after changing the projector's aspect setting. 46 Displaying and Adjusting the - Epson BrightLink 450Wi | User's Guide - Page 47
draw on a virtual whiteboard. Follow the instructions in this chapter on: ■ Using the Easy Interactive Pen Driver ■ Calibrating the projector ■ Using the pens ■ Using the Easy Interactive Tools for Windows Periodically, it's a good idea to check Epson's support website in the U.S. or Canada for free - Epson BrightLink 450Wi | User's Guide - Page 48
Pen Driver The Easy Interactive Driver software is included on the CD labeled "Epson Projector Software for Easy Interactive Function." Note the following system requirements: ■ Microsoft® Windows 2000, Windows XP, Windows Vista or Windows 7 (32-bit versions for Windows Vista and Windows 7) or Mac - Epson BrightLink 450Wi | User's Guide - Page 49
> All Programs or Programs > Epson Projector > Easy Interactive Driver. Mac OS: open the Application folder, then select the Easy Interactive Driver icon. If you need more help, see page 134. When the computer and projector are connected and the Easy Interactive Driver icon is displayed, you're - Epson BrightLink 450Wi | User's Guide - Page 50
pen at an angle to the projection surface and touch the center of the circle. ■ Signal menu: Auto Setup, Resolution Calibrate (Advanced). ■ In Mac OS, click the pen icon in the Dock, pen and the interactive receiver (next to the projection window on the projector) Don't press the button on the pen - Epson BrightLink 450Wi | User's Guide - Page 51
the next section for more information. Using the Pens The Easy Interactive Driver allows you to use the pen as a mouse. If you installed interactive whiteboard software such as RM Easiteach or the Easy Interactive Tools, you can also use the pens to write or draw on the projected image. Battery - Epson BrightLink 450Wi | User's Guide - Page 52
whiteboard software or Easy Interactive Tools. To download and install Easy Interactive Tools, double-click the Download Easy Interactive Tools link on your desktop. note The Easy Interactive Tools are not required for using the interactive features of the projector. You can use RM Easiteach or - Epson BrightLink 450Wi | User's Guide - Page 53
on page 55. 2. To exit Easy Interactive Tools, select the Easy Interactive Tools icon on the Windows taskbar and select Exit. Following are lists of the interactive and drawing tools: Interactive tools Icon Description Page up or down in a browser or other software program. Use an on-screen - Epson BrightLink 450Wi | User's Guide - Page 54
width. In the erase mode, you can select a free-form, straight line, circle, or rectangle eraser. Select pen width and color (basic/fast). Customize pen width and color (advanced/accurate). Draw free-form lines (or use free-form eraser). Draw straight lines (or use straight-line eraser) Draw circles - Epson BrightLink 450Wi | User's Guide - Page 55
icon to display additional tools. Switch to interactive mode View list of saved pages Print preview Print Clear annotations Open background image or previously from six solid colors, two styles of writing lines, or music staffs. Create a new page on the whiteboard. Using the Interactive Pens 55 - Epson BrightLink 450Wi | User's Guide - Page 56
an image file. See the next section for more information. Display additional tools. Print preview. Print all whiteboard pages in the current folder. Saving Your Pages You can save both right-hand corner of the screen) to open the Easy Interactive Tools menu: 2. Select Saving Setting. 56 Using the - Epson BrightLink 450Wi | User's Guide - Page 57
mode, select the camera icon to capture the current screen and annotations. You see a message confirming that the screen is saved. Easy Interactive Tools adds the time and date to the file name prefix you selected. ■ In whiteboard mode, select the save icon. The on-screen keyboard appears - Epson BrightLink 450Wi | User's Guide - Page 58
58 Using the Interactive Pens - Epson BrightLink 450Wi | User's Guide - Page 59
a number of tools to enhance your presentation. All of them can be accessed using the remote control, which lets you operate the projector from anywhere in the room-up to 19.7 feet (6 meters) away. This chapter covers: ■ Using the remote control ■ Controlling the picture and sound ■ Displaying - Epson BrightLink 450Wi | User's Guide - Page 60
. When you release the button, normal operation resumes. Using the remote control under bright fluorescent lamps or in direct sunlight may affect projector response. Using the Remote Control Make sure batteries are installed as described on page 119. Follow these tips for using the remote control - Epson BrightLink 450Wi | User's Guide - Page 61
Image You can zoom in on a portion of the image using the E-Zoom buttons on the remote control. If you are using one of the interactive pens, the pen position and mouse position will not match when you press the E-Zoom buttons. 1. Press the E-Zoom + button on the remote control. note You cannot - Epson BrightLink 450Wi | User's Guide - Page 62
, press the or button on the remote control. Volume buttons You can also adjust the volume using the projector's menu system. See page 75. Displaying Patterns You can display a test pattern or one of the following 4 patterns for use on a whiteboard or chalkboard: Pattern 1 - Epson BrightLink 450Wi | User's Guide - Page 63
displaying the image you want to use from a computer or other source. Then follow these steps to capture the image and transfer it to the projector: 1. In the Settings menu, highlight Pattern and press Enter. 2. Select User Pattern and press Enter. 3. When you see a message asking if you want to use - Epson BrightLink 450Wi | User's Guide - Page 64
to the computer to control the presentation. Before you can use the remote control to operate your computer, you must connect a USB cable to the TypeB (square) USB port on the projector (see page 25) and select Wireless Mouse as the USB Type B setting on the Extended menu (see page 77). Page - Epson BrightLink 450Wi | User's Guide - Page 65
the Pointer button on the remote control. A pointer appears on the screen. Pointer button If you prefer to use a different style of pointer, see the instructions in the next section. 2. Use the arrow buttons on the remote control to position the pointer on the screen. 3. When you're done using the - Epson BrightLink 450Wi | User's Guide - Page 66
resolutions up to 4608 × 3072, with pixel counts incrementing in multiples of 8. If a .JPG file is highly compressed, your projector may not be able to display it correctly. The projector drive), or other USB device. Then connect the device to the projector and begin your presentation. You can switch - Epson BrightLink 450Wi | User's Guide - Page 67
If you are not connected to another image source, the Slideshow program appears automatically. Files for images that have been scanned or modified will display an icon, rather than a thumbnail - Epson BrightLink 450Wi | User's Guide - Page 68
■ If all the images in a folder do not fit on the Slideshow screen, highlight Next page at the bottom of the screen and press Enter to display the next screen full of images. Select Previous page at the top of the screen to select the previous screen. ■ To exit the slideshow, press Esc, select Exit, - Epson BrightLink 450Wi | User's Guide - Page 69
Menus You can use the projector's on-screen menus to adjust the image, sound, and other features. This chapter covers the following information: ■ Using the menu system ■ Adjusting the image ■ Adjusting signal settings ■ Customizing projector features ■ Customizing power and operation ■ Using - Epson BrightLink 450Wi | User's Guide - Page 70
shown on the right. 2. Use the arrow buttons on the remote control or the projector to scroll through the menu list. When you've highlighted the desired menu, press button to adjust a slider bar. ■ To select from two or more settings, press the up or down arrow button to highlight the setting and press - Epson BrightLink 450Wi | User's Guide - Page 71
settings. Adjusting the Image You can use the Image menu to adjust the brightness, sharpness, color, tint, contrast, and Auto Iris settings. 1. Press the Menu button on the projector or remote control and select the Image menu. You see a screen similar to one of these: Computer/USB/USB Display - Epson BrightLink 450Wi | User's Guide - Page 72
. (Not available if sRGB is selected as the Color Mode setting.) ■ Auto Iris Automatically adjusts the projected luminance according to the brightness of the image. (Available only when Dynamic or Theater is selected as the Color Mode for the current input source.) 72 Using the Projector Menus - Epson BrightLink 450Wi | User's Guide - Page 73
Sync, and Position settings. ■ Resolution Set to Auto to have the projector automatically identify the resolution of the input signal. If necessary, select Wide (for widescreen images) or Normal (for 4:3 or 5:4 ratio images). note If you are using the interactive pens, you will have to recalibrate - Epson BrightLink 450Wi | User's Guide - Page 74
can also use the remote control's Auto button to automatically reset the projector's Tracking, Sync, and Position settings. only) Select the setting for the type of equipment you've connected to the Video port. Leave this setting at Auto unless you are using a 60-Hz PAL system (then select PAL60 - Epson BrightLink 450Wi | User's Guide - Page 75
Consumption Lets you select from two levels of brightness. The ECO setting reduces power consumption and projector noise, and extends the lamp's operating life. ■ Volume Raises or lowers the volume of the projector's speaker. note If you are using the interactive pens and you change the Keystone - Epson BrightLink 450Wi | User's Guide - Page 76
bright fluorescent lights. Restart the projector for this setting to take effect. ■ User Button Lets you create a shortcut to one of the following menu items: , Power Consumption, Info, Progressive, Closed Caption, Test Pattern, Resolution adjusting the projector without connecting it (for - Epson BrightLink 450Wi | User's Guide - Page 77
Black, Blue, or Logo when no image signal is available. Startup Screen: Enables or disables display of the startup (User's Logo) screen when the projector is turned on. A/V Mute: Sets the screen background to Black, Blue, or Logo when the A/V Mute button is pressed. ■ Closed Caption Lets you display - Epson BrightLink 450Wi | User's Guide - Page 78
and controlled from a computer when it is in standby mode (the power light is orange). This setting also allows you to use a microphone connected to the projector when the projector is in standby mode. ■ USB Type B Select how you want to use the TypeB (square) USB port. Select USB Display to use the - Epson BrightLink 450Wi | User's Guide - Page 79
to discourage theft and provides a way to identify the projector should it be stolen. See page 81. ■ Disable the projector's buttons; this is useful, for example, in a classroom when you want to ensure that no one touches the projector's buttons while you're using the remote control. See page - Epson BrightLink 450Wi | User's Guide - Page 80
press Esc to return to the Password Protect screen. ■ Network Protect: Prevents any of the network settings from being changed. Select On, press Enter, then to exit the screen. 8. Turn off and unplug the projector. note If you leave the projector plugged in, the Password screen will not appear. It - Epson BrightLink 450Wi | User's Guide - Page 81
that appears in the Password screen for assistance. See "Where To Get Help" on page 140. ■ If you enter an incorrect password 30 times in succession, the projector remains locked and you must contact Epson to arrange for service. Creating Your Own Startup Screen You can transfer any image from your - Epson BrightLink 450Wi | User's Guide - Page 82
a computer or video source, such as a DVD player or digital camera. Then follow these steps to capture the image and transfer it to the projector: 1. Press the Menu button on the remote control, highlight the Extended menu, and press Enter. 2. Highlight User's Logo and press Enter. 3. When you see - Epson BrightLink 450Wi | User's Guide - Page 83
is no signal. ■ Set Startup Screen to On to display your image when the projector is warming up. ■ Set A/V Mute to Logo to display your image when you Lock and press the Enter button. 3. Select Full Lock (to lock all projector buttons) or Partial Lock (to lock all buttons except the Ppower button) - Epson BrightLink 450Wi | User's Guide - Page 84
is released. Using Security Locking The projector includes two security locking points to prevent its theft when installed or used in public locations: of the projector) is compatible with the MicroSaver security systems manufactured by Kensington. You can purchase this lock from Epson (see page - Epson BrightLink 450Wi | User's Guide - Page 85
) to monitor and control your projector through the network. For information on installing and using EasyMP Monitor, see the EasyMP Monitor Operation Guide. You'll find instructions in this chapter on: ■ Connecting the projector to a wired LAN ■ Installing the optional wireless LAN module ■ Using - Epson BrightLink 450Wi | User's Guide - Page 86
Projection Operation Guide for instructions on installing the software. The guide also contains instructions on using the software to project over the network. If you want to use the interactive pens while projecting through a wired or wireless network, you must set the USB Type B option to Wireless - Epson BrightLink 450Wi | User's Guide - Page 87
Network Configuration and press Enter. 7. Select the Wired LAN menu and press Enter. 8. Choose IP Settings and press Enter. You see a screen like the following: 9. Do one of the following: ■ If your network assigns addresses automatically, turn on the DHCP setting. Using the Projector on a Network - Epson BrightLink 450Wi | User's Guide - Page 88
DHCP and enter the projector's IP Address, Subnet Mask, and Gateway Address, as needed. To enter numbers, use the arrow buttons on the remote control to select each number on the screen, then press the Enter button. When you're finished entering an address in the network menu, highlight Finish, then - Epson BrightLink 450Wi | User's Guide - Page 89
Installing the Optional Wireless LAN Module Make sure you have the optional Wireless LAN Module. Turn off the projector and disconnect the power cord before you install the module. 1. Open the air filter cover by sliding the switch and lifting the cover. Using the Projector on a Network 89 - Epson BrightLink 450Wi | User's Guide - Page 90
4. Close the air filter cover. If you have the optional Quick Wireless Connection USB key (V12H005M005), you can use Quick Wireless connection as described in the next section (Windows only). Or, you can configure your connection manually as described on page 91. 90 Using the Projector on a Network - Epson BrightLink 450Wi | User's Guide - Page 91
projector. 1. Connect the USB key to the projector's TypeA (flat) USB port. 2. When you see a projected message that the network information update is complete, remove the USB key. 3. Connect . 4. Follow the instructions on the screen to install the Quick Wireless Connection driver. If you see - Epson BrightLink 450Wi | User's Guide - Page 92
3. Choose Basic and press Enter. You see the following screen: 4. Make sure the projector has a unique name, so you can identify it on your network. If you need to rename it, highlight the Projector name text box then press Enter. 5. Use the arrow buttons on the remote control to select individual - Epson BrightLink 450Wi | User's Guide - Page 93
note Make sure you've installed the EasyMP Network Projection software as described in the EasyMP Network Projection Operation Guide. To connect to the projector over a wireless network, your computer must be running Windows 2000, XP, Vista, or Windows 7. Your Mac must be running Mac OS X 10.3 to 10 - Epson BrightLink 450Wi | User's Guide - Page 94
this setting when you're using the optional Epson Quick Wireless Connection USB key. ■ Advanced mode lets multiple computers access the projector at the same time and easily trade off control of the projector. This method requires a wireless network access point or an AirPort Extreme (or AirPort - Epson BrightLink 450Wi | User's Guide - Page 95
that the SSID is case-sensitive (if you enter the name in uppercase on the projector, you must type it the same way on the computer connecting to the projector). 8. Select IP Settings and do one of the following: ■ If your network assigns addresses automatically, turn on the DHCP setting. ■ If your - Epson BrightLink 450Wi | User's Guide - Page 96
SSID you assigned to the projector. 3. Click Connect. Now you're ready to connect to the projector. See the EasyMP Network Projection Operation Guide for details. Selecting Wireless Network Settings in Mac OS Before connecting to the projector, select the correct wireless network on your computer - Epson BrightLink 450Wi | User's Guide - Page 97
: note The authentication and firewall features are only effective when the access point for the connection destination supports the same functions. 4. Press Enter to select Security, then select WEP and press Enter. Press Esc to return to the previous menu. Using the Projector on a Network 97 - Epson BrightLink 450Wi | User's Guide - Page 98
. ■ For 64 bit WEP encryption with ASCII or text input, enter 5 alphanumeric characters. 9. For Authentication Type, select Open or Shared, depending on the setting your network uses. Press Esc to return to the previous menu. 98 Using the Projector on a Network - Epson BrightLink 450Wi | User's Guide - Page 99
press Enter to save your settings. Enabling WPA Security 1. Press Menu. Highlight Network and then press Enter. 2. Choose Network Configuration and press Enter. 3. Highlight Security, then press Enter. You see through the input text, highlight the arrows and Using the Projector on a Network 99 - Epson BrightLink 450Wi | User's Guide - Page 100
Projection software, follow these steps to enable data encryption. 1. Click Set options on the main screen. 2. Click the General Settings tab. 3. Select the Encrypt communications checkbox. 4. Click OK. For more information, see the EasyMP Network Projection Operation Guide. 100 Using the Projector - Epson BrightLink 450Wi | User's Guide - Page 101
Using the EasyMP Software Once you've set up your projector and computer for network projection, see the EasyMP Network Projection Operation Guide for instructions on the following EasyMP features: ■ Starting EasyMP Network Projection ■ Projecting over the network (content over IP) ■ Multi-screen - Epson BrightLink 450Wi | User's Guide - Page 102
line of the e-mail is EPSON Projector. The e-mail includes the following information: ■ Line 1: The name of the projector where the problem has occurred ■ Line 2: The IP address of the projector where the problem has occurred ■ Line 3: Details of the problem 102 Using the Projector on a Network - Epson BrightLink 450Wi | User's Guide - Page 103
You see the following screen: note If you're a network administrator, you can use the SNMP option to enter a trap IP address. This lets you receive trap alerts for the projectors you're monitoring. 4. Turn on the SNMP setting. 5. Enter up to two IP addresses for notification in the Trap IP Address - Epson BrightLink 450Wi | User's Guide - Page 104
control. 1. Make sure the projector is set up for your network, as described on page 86. (Standby Mode in the Extended menu should be set to Communication On to monitor the projector in standby mode.) When using a browser to access the projector, you cannot connect through a proxy server. 2. Open - Epson BrightLink 450Wi | User's Guide - Page 105
3. Press Enter, or, if you set a Web control password in the projector's Network menu, enter your user name and password, then press Enter. You see a screen like the following: 4. Select one of the menu options listed on the - Epson BrightLink 450Wi | User's Guide - Page 106
(using the optional wireless unit). ■ The USB button selects USB computer display (see page 25) or a signal from equipment connected to the TypeA (flat) USB port, such as a document camera (see page 37). ■ The Pause button stops the image (see page 61). 106 Using the Projector on a Network - Epson BrightLink 450Wi | User's Guide - Page 107
Volume buttons raise or lower the audio volume. ■ The CC (Closed Captioning) button lets you display closed captioning for content that provides it. Using the Projector on a Network 107 - Epson BrightLink 450Wi | User's Guide - Page 108
108 Using the Projector on a Network - Epson BrightLink 450Wi | User's Guide - Page 109
your dealer or a qualified servicer. This chapter covers the following: ■ Cleaning the projection window ■ Cleaning the projector case ■ Cleaning the air filter ■ Replacing the air filter ■ Replacing the lamp ■ Replacing the pen batteries ■ Replacing the remote control batteries ■ Transporting - Epson BrightLink 450Wi | User's Guide - Page 110
dust on the surface. To remove dirt or smears on the window, use a commercially available cloth for cleaning glasses. Cleaning the Projector Case Before cleaning, turn off the projector and unplug the power cord. ■ To remove dirt or dust, wipe the case with a soft, dry, lint-free cloth. ■ To remove - Epson BrightLink 450Wi | User's Guide - Page 111
to ensure the best performance and help protect your equipment investment. If dust collects on the air filter, clean it as described here. Dust clogs prevent proper ventilation and can cause overheating, which can damage the projector. 1. Turn off the projector. 2. Remove dust from the air filter - Epson BrightLink 450Wi | User's Guide - Page 112
Contact your dealer or call Epson at 800-GO-EPSON (800-463-7766) to obtain a new air filter. Request part number V13H134A27. 1. Turn off the projector and unplug the power cord. 2. Slide the switch, then open the air filter cover on the side of the projector. note Air filters contain polycarbonate, - Epson BrightLink 450Wi | User's Guide - Page 113
projector brightness and image quality, replace the lamp as soon as possible. You may also need to replace the lamp if the Lamp light flashes red. See page 123. note Turn off this product when not in use to prolong the life of the projector. Contact your dealer or call Epson at 800-GO-EPSON - Epson BrightLink 450Wi | User's Guide - Page 114
If the projector has been installed on the ceiling, you should stand to the side of the lamp cover, not underneath it. If the lamp is used after the replacement period has passed, the possibility that the lamp may break increases. When a lamp replacement message appears, replace the lamp with a new - Epson BrightLink 450Wi | User's Guide - Page 115
5. Grasp the lamp handle as shown and pull it straight out. note The lamp(s) in this product contain mercury. Please consult your state and local regulations regarding disposal or recycling. Do not put in the trash. 6. Gently insert the new lamp along the guide rail, then push it in place. - Epson BrightLink 450Wi | User's Guide - Page 116
it in by the handle until it clicks into place. note Tighten the lamp cover securely so you do not receive a lamp cover error when you turn the projector back on. 8. Replace the lamp cover, then tighten its screw. 9. Reset the lamp timer as described in the next section. 116 Maintaining the - Epson BrightLink 450Wi | User's Guide - Page 117
Lamp Timer After you replace the lamp, you need to reset the lamp timer using the projector's menu system. 1. Press the Menu button on the remote control or on the projector's control panel. You see the main menu. 2. Select the Reset menu and press Enter. You see this screen: 3. Select Reset Lamp - Epson BrightLink 450Wi | User's Guide - Page 118
than those specified in this User's Guide and do not use batteries of lamp. Replacing the Pen Batteries To check the pen batteries, press the button. If the indicator light is green, the battery has enough power. Battery indicator light Button If you need to replace the batteries, use two - Epson BrightLink 450Wi | User's Guide - Page 119
the Remote Control Batteries Replace the batteries in the remote as described below: 1. Turn the remote control over. 2. Press in on the catch on the battery cover as you lift the cover off. 3. Install two AA alkaline batteries, inserting the + and - ends as shown. Maintaining the Projector 119 - Epson BrightLink 450Wi | User's Guide - Page 120
4. Replace the battery cover and press it down until it clicks into place. note Epson shall not be liable for any damages incurred during transportation. Transporting the Projector The projector contains many glass and precision parts. Follow these guidelines to prevent damage when transporting it - Epson BrightLink 450Wi | User's Guide - Page 121
the projector's on-screen help system ■ What to do when the projector's status lights flash ■ Solving projector operation problems ■ Solving problems with the image or sound ■ Solving problems with the interactive pens ■ Solving password problems ■ Solving network problems ■ Solving problems with - Epson BrightLink 450Wi | User's Guide - Page 122
Press the Enter button on the remote control or the projector to select the menu item and read the solutions. 4. To exit the help system, press the ? Help button or Esc button. If none of the suggestions solve your problem, see additional solutions to problems in the following sections. 122 Solving - Epson BrightLink 450Wi | User's Guide - Page 123
up. Wait for the image to appear. The projector is operating normally. The projector is in sleep or standby mode. You can unplug it or press the P power button to turn it on. Preparing for network monitoring or cooling down. There is a problem with the projector. Check the next table to diagnose the - Epson BrightLink 450Wi | User's Guide - Page 124
in the Operation menu (see page 78). If none of these suggestions resolves the problem, contact Epson as described on page 140. The projector has an Auto Iris error or power error. Stop using the projector, disconnect the power cord, and contact Epson for help, as described on page 140. 124 Solving - Epson BrightLink 450Wi | User's Guide - Page 125
control instead, or press and hold the projector's Enter button for seven seconds to release the lock (see page 83). You are having trouble projecting through the USB cable connection. ■ If the USB Display driver is not installed automatically the first time you connect the cable, do one of the - Epson BrightLink 450Wi | User's Guide - Page 126
drivers are installed, do one of the following: Windows: Select or Start > All Programs or Programs > EPSON Projector > EPSON USB Display > EPSON USB Display Vx.x. Mac EPSON Projector > EPSON USB Display > EPSON USB Display Vx.x., then clear the Transfer layered window checkbox. Solving Problems - Epson BrightLink 450Wi | User's Guide - Page 127
the USB display drivers manually by clicking My Computer or Computer > EPSON_PJ_UD > EMP_UDSE.EXE. If nothing is projected after the USB display drivers are installed, click All Programs or Programs > EPSON Projector > EPSON USB Display > EPSON USB Display Vx.x on your computer. With Mac OS X, click - Epson BrightLink 450Wi | User's Guide - Page 128
Fn key while pressing it. Allow a few seconds for the projector to sync up after changing the setting. Check your notebook's manual or online help for details. On most systems, the key lets you toggle between the LCD screen and the projector, or display on both at the same time. ■ Depending - Epson BrightLink 450Wi | User's Guide - Page 129
and/or enabled. See your computer's documentation or online help for details. If you're using Mac OS X: You may need to set up your system to display on the projector screen as well as the LCD screen. Make sure your projector is connected and follow these steps: 1. Open System Preferences. 2. Click - Epson BrightLink 450Wi | User's Guide - Page 130
of Mac OS X: Make sure the VGA Display or Color LCD dialog box is selected, click the Arrangement or Arrange tab, then make sure the Mirror Displays checkbox is selected. Only part of the computer image is displayed. ■ Press the Auto button on the remote control or the Enter button on the projector - Epson BrightLink 450Wi | User's Guide - Page 131
displayed simultaneously on your notebook computer and the projector, turn off the notebook's LCD display. ■ Make sure the correct input signal the projector. See page 145. ■ If you're projecting from a computer, press the Auto button on the remote control to reset the projector's Problems 131 - Epson BrightLink 450Wi | User's Guide - Page 132
. Press the Auto button on the remote control or the Enter button on the projector to reset the projector's Tracking, Sync , and Position settings. ■ If further adjustment is needed, you can fine-tune the Tracking and Sync settings manually Problems - Epson BrightLink 450Wi | User's Guide - Page 133
to correct the color balance. ■ The projector's lamp may need to be replaced. See page 113 for instructions. ■ Make sure the correct input signal is selected in the Signal menu (see page 74). ■ Make sure that all cables are connected to the proper ports and connected securely. Nothing appears on an - Epson BrightLink 450Wi | User's Guide - Page 134
you install the driver from the CD labeled "Epson Projector Software for Easy Interactive Function." ■ In Windows, select All Programs or Programs > Epson Projector > Easy Interactive Driver. ■ In Mac OS, open the Application folder, then select the Easy Interactive Driver icon. ■ If the pen icon - Epson BrightLink 450Wi | User's Guide - Page 135
and turn off any fluorescent lights. Make sure the projection surface and the pen receiver are not in direct sunlight or other sources of bright lighting. ■ Make sure the USB cable is securely connected to the projector and computer. Try disconnecting and reconnecting the cable to your computer. The - Epson BrightLink 450Wi | User's Guide - Page 136
securely connected to the computer. Try restarting the Easy Interactive Driver, as described on page 134. ■ If the circles don't stop flashing and turn black (or they stop flashing and turn black automatically), dim or turn off any bright lights near the projection surface. Solving Password Problems - Epson BrightLink 450Wi | User's Guide - Page 137
projector or network, or restarted your computer, allow a minute or two for the connection connected to the same SSID as the projector. On a Mac, click the AirPort icon at the top of your Mac desktop to make sure AirPort is turned on and the right network segment of the projector's IP address should - Epson BrightLink 450Wi | User's Guide - Page 138
AirPort tab. ■ If you're prompted for a password when you connect, enter the WEP encryption key (if you're using WEP encryption). You are not receiving mail when a projector problem occurs. ■ Make sure the Mail settings are correct in the Network menu. For details, see page 101. ■ To receive mail - Epson BrightLink 450Wi | User's Guide - Page 139
(6 meters) of the projector and within a 30° horizontal angle and a 15° vertical angle from the projector's front or back receiver. ■ The remote control's batteries may not be installed correctly or may be low (see page 78). Also, make sure you have connected the USB cable. Solving Problems 139 - Epson BrightLink 450Wi | User's Guide - Page 140
Where To Get Help Epson provides these technical support services: Internet Support Visit Epson's support website in the US or Canada for solutions to common problems. You can download utilities and documentation, get FAQs and troubleshooting advice, or e-mail Epson with your questions. Speak to a - Epson BrightLink 450Wi | User's Guide - Page 141
Description of the problem Software Technical Support If your projector included RM Easiteach and you need help, call (866) 728-6758 or visit the following support websites: www.rmeducation.com/support/et. www.rmeducation.com/easiteach For all other software issues, please contact Epson as described - Epson BrightLink 450Wi | User's Guide - Page 142
142 Solving Problems - Epson BrightLink 450Wi | User's Guide - Page 143
General Type of display Resolution (native format) Color reproduction Light output (brightness) Contrast ratio Image standard) Color light output 1740 lumens 2000:1 (Dynamic color mode, Normal Power Consumption, with Auto Iris setting turned on in the Image menu; see page 71) 59 to 97 inches (149.8 - Epson BrightLink 450Wi | User's Guide - Page 144
will vary depending upon mode selected, environmental conditions, and usage. Brightness decreases over time. Turn off this product when not in use to prolong the life of the projector. Projection Lamp Type Power consumption Lamp life Part number Remote Control Range Batteries (2) Dimensions Height - Epson BrightLink 450Wi | User's Guide - Page 145
This projector supports the high definition video and computer display formats listed here. To project images output from a computer, the computer's video card must be set at a refresh rate (vertical frequency) that's compatible with the projector. Some images are automatically resized using Epson - Epson BrightLink 450Wi | User's Guide - Page 146
Computer, component video, composite video, and S-Video Mode Refresh rate (Hz) Resolution VGA-60 VESA-72 VESA-75 VESA-85 60 640 × 480 72 640 × 480 75 640 × 480 85 640 × 480 SVGA-56 SVGA-60 SVGA- - Epson BrightLink 450Wi | User's Guide - Page 147
Computer, component video, composite video, and S-Video Mode Refresh rate (Hz) Resolution MAC13 MAC16 MAC19 MAC19-60 MAC21 67 640 × 480 75 832 × 624 75 1024 × 768 720 × 576 1280 × 720 1920 × 1080 * Available only when you select Wide as the Resolution setting Technical Specifications 147 - Epson BrightLink 450Wi | User's Guide - Page 148
148 Technical Specifications - Epson BrightLink 450Wi | User's Guide - Page 149
Notices This appendix includes safety instructions and other important information about your projector. Important Safety Instructions Follow these safety instructions when setting up and using the projector: ■ Do not look into the lens when the projector is on. The bright light can damage your eyes - Epson BrightLink 450Wi | User's Guide - Page 150
it will not be used for extended periods. ■ Unplug the projector from the wall outlet and refer servicing to qualified service personnel under the following conditions: if it does not operate normally when you follow the operating instructions, or exhibits a distinct change in performance; if smoke - Epson BrightLink 450Wi | User's Guide - Page 151
heat near the exhaust vents. Do not bring your hands or face close to the vents while projection is in progress. ■ Before you move the projector, make sure its power is turned off, the plug is disconnected from the outlet, and all cables are disconnected. ■ Never try to remove the - Epson BrightLink 450Wi | User's Guide - Page 152
installation. This equipment generates, uses, and can radiate radio frequency energy and, if not installed and used in accordance with the instructions to which the receiver is connected. ■ Consult the dealer or an experienced radio/TV technician for help. WARNING The connection of a non-shielded - Epson BrightLink 450Wi | User's Guide - Page 153
projector product. If you desire to receive the source code of the GPL Programs, please contact the customer support rev.219 wireless_tools 29 Pixelworks PWC950 SDK drivers The GNU General Public License Version allowed. Preamble The licenses for most software are designed to take away your freedom - Epson BrightLink 450Wi | User's Guide - Page 154
software, we are referring to freedom, not price. Our General Public Licenses are designed to make sure that you have the freedom to distribute copies of free software (and charge for this service your rights with two steps: (1) copyright the software, and (2) offer you this license which gives - Epson BrightLink 450Wi | User's Guide - Page 155
user how to view a copy of this License. (Exception: if the Program itself is interactive but does not normally print such an announcement, your work based on the Program is not required to print an announcement.) These requirements apply to the modified work as a whole. If identifiable sections of - Epson BrightLink 450Wi | User's Guide - Page 156
above on a medium customarily used for software interchange; or, b) Accompany it for a charge no more than your cost of physically performing source distribution, a control compilation and installation of the executable. signed it. However, nothing else grants you permission to modify or distribute - Epson BrightLink 450Wi | User's Guide - Page 157
as if written in the body of this License. 9. The Free Software Foundation may publish revised and/or new versions of the General Public License spirit to the present version, but may differ in detail to address new problems or concerns. Each version is given a distinguishing version number. If the - Epson BrightLink 450Wi | User's Guide - Page 158
software which is copyrighted by the Free Software Foundation, write to the Free Software Foundation; we sometimes make exceptions for this. Our decision will be guided by the two SHOULD THE PROGRAM PROVE DEFECTIVE, YOU ASSUME THE COST OF ALL NECESSARY SERVICING, REPAIR OR CORRECTION. 12. IN NO EVENT - Epson BrightLink 450Wi | User's Guide - Page 159
with this program; if not, write to the Free Software Foundation, Inc., 51 Franklin Street, Fifth Floor, Boston, MA 02110-1301 USA. Also add information on how to contact you by electronic and paper mail. If the program is interactive, make it output a short notice like this when it starts in an - Epson BrightLink 450Wi | User's Guide - Page 160
on the explanations below. When we speak of free software, we are referring to freedom of use, not price. Our General Public Licenses are designed to make sure that you have the freedom to distribute copies of free software (and charge for this service if you wish); that you receive source code or - Epson BrightLink 450Wi | User's Guide - Page 161
's reputation will not be affected by problems that might be introduced by others. Finally, software patents pose a constant threat to the linking those libraries into non-free programs. When a program is linked with a library, whether statically or using a shared library, the combination of the two - Epson BrightLink 450Wi | User's Guide - Page 162
A "library" means a collection of software functions and/or data prepared so as to be conveniently linked with application programs (which use some of definition files, plus the scripts used to control compilation and installation of the library. Activities other than copying, distribution and - Epson BrightLink 450Wi | User's Guide - Page 163
modifications or work under the terms of Section 1 above, provided that you also meet all of these conditions: a) The modified work must itself be a software library. b) You must cause the files modified to carry prominent notices stating that you changed the files and the date of any change. c) You - Epson BrightLink 450Wi | User's Guide - Page 164
of Sections 1 and 2 above on a medium customarily used for software interchange. If distribution of object code is made by offering access to is not. Whether this is true is especially significant if the work can be linked without the Library, or if the work is itself a library. The threshold for - Epson BrightLink 450Wi | User's Guide - Page 165
2 above); and, if the work is an executable linked with the Library, with the complete machine-readable "work version of the library, if the user installs one, as long as the modified version 6a, above, for a charge no more than the cost of performing this distribution. d) If distribution of the - Epson BrightLink 450Wi | User's Guide - Page 166
otherwise permitted, and provided that you do these two things: a) Accompany the combined library with a you have not signed it. However, nothing else grants you permission to modify or distribute the Library or the original licensor to copy, distribute, link with or modify the Library subject to - Epson BrightLink 450Wi | User's Guide - Page 167
version, but may differ in detail to address new problems or concerns. Each version is given a distinguishing version software which is copyrighted by the Free Software Foundation, write to the Free Software Foundation; we sometimes make exceptions for this. Our decision will be guided by the two - Epson BrightLink 450Wi | User's Guide - Page 168
IS WITH YOU. SHOULD THE LIBRARY PROVE DEFECTIVE, YOU ASSUME THE COST OF ALL NECESSARY SERVICING, REPAIR OR CORRECTION. 16. IN NO EVENT UNLESS REQUIRED BY THIRD PARTIES OR A FAILURE OF THE LIBRARY TO OPERATE WITH ANY OTHER SOFTWARE), EVEN IF SUCH HOLDER OR OTHER PARTY HAS BEEN ADVISED OF THE - Epson BrightLink 450Wi | User's Guide - Page 169
of Vice That's all there is to it! BSD License (Berkeley Software Distribution License) This projector product includes the open source software program "University of California, Berkeley License (Berkeley Software Distribution License)" which applies the terms and conditions provided by owner of - Epson BrightLink 450Wi | User's Guide - Page 170
(INCLUDING, BUT NOT LIMITED TO, PROCUREMENT OF SUBSTITUTE GOODS OR SERVICES; LOSS OF USE, DATA, OR PROFITS; OR BUSINESS INTERRUPTION) HOWEVER USE OF THIS SOFTWARE, EVEN IF ADVISED OF THE POSSIBILITY OF SUCH DAMAGE. libjpeg This projector product includes the open source software program "libjpeg" - Epson BrightLink 450Wi | User's Guide - Page 171
as specified below. Permission is hereby granted to use, copy, modify, and distribute this software (or portions thereof) for any Software Foundation but is freely distributable. The same holds for its supporting scripts (config.guess, config.sub, ltconfig, ltmain.sh). Another support script, install - Epson BrightLink 450Wi | User's Guide - Page 172
GIF files. To avoid entanglement with the Unisys LZW patent, GIF reading support has been removed altogether, and the GIF writer has been simplified to (sm) is a Service Mark property of CompuServe Incorporated." libpng This projector product includes the open source software program "libpng" which - Epson BrightLink 450Wi | User's Guide - Page 173
damages, which may result from the use of the PNG Reference Library, even if advised of the possibility of such damage. Permission is hereby granted to use, copy, modify, and distribute this source code, or portions hereof, for any purpose, without fee, subject to the following restrictions: 1. The - Epson BrightLink 450Wi | User's Guide - Page 174
the use of this source code as a component to supporting the PNG file format in commercial products. If you 12, 2004 zlib This projector product includes the open source software program "zlib" which the use of this software. Permission is granted to anyone to use this software for any purpose, - Epson BrightLink 450Wi | User's Guide - Page 175
information documenting your changes. libmd5-rfc This projector product includes the open source software program "libmd5-rfc" which applies the damages arising from the use of this software. Permission is granted to anyone to use this software for any purpose, including commercial applications, - Epson BrightLink 450Wi | User's Guide - Page 176
04-13 lpd Removed support for non-ANSI This projector product includes the open source software program Software Foundation, Inc. Permission is hereby granted, free of charge, to any person obtaining a copy of this software and associated documentation files (the "Software"), to deal in the Software - Epson BrightLink 450Wi | User's Guide - Page 177
mDNSResponder This projector product includes the open source software program " granted by this License. "Source" form shall mean the preferred form for making modifications, including but not limited to software remain separable from, or merely link (or bind by name) to the interfaces of, the - Epson BrightLink 450Wi | User's Guide - Page 178
in a lawsuit) alleging that the Work or a Contribution incorporated within the Work constitutes direct or contributory patent infringement, then any patent licenses granted to You under this License for that Work shall terminate as of the date such litigation is filed. 4. Redistribution. You may - Epson BrightLink 450Wi | User's Guide - Page 179
separate license agreement you may have executed with Licensor regarding such Contributions. 6. Trademarks. This License does not grant permission to use the trade names, trademarks, service marks, or product names of the Licensor, except as required for reasonable and customary use in describing - Epson BrightLink 450Wi | User's Guide - Page 180
fee for, acceptance of support, warranty, indemnity, or fields enclosed by brackets "[]" replaced with your own identifying information. be included on the same "printed page" as the copyright notice applicable law or agreed to in writing, software distributed under the License is distributed on - Epson BrightLink 450Wi | User's Guide - Page 181
adapter, 34 cable, 33 connecting equipment, 33 to 36 controlling volume, 62 problems, troubleshooting, 133 to 134 turning off (using A/V Mute), 60 Auto Iris setting, 72 Auto Setup setting, 73 B Background screen settings, 77, 83 Bands, vertical, 132 Batteries, replacing, 118 to 120 Blackboard color - Epson BrightLink 450Wi | User's Guide - Page 182
, 41 Distance from projector to screen, 143 Document camera connecting, 37 to 38 ordering, 20 Documentation, 10 DVD player, connecting, 29 to 32 Dynamic color mode, 45 E Easy Interactive Driver, 48 to 49 Easy Interactive Tools, 52 to 57 EasyMP Monitor, 85 EasyMP Network Projection creating password - Epson BrightLink 450Wi | User's Guide - Page 183
, 85 e-mail notifications, 101 to 102 SNMP, 103 to 104 using browser, 104 Mouse connecting cable for remote, 27 to 28 using pen as, 51 to 52 using remote control as, 64 N Network managing projector remotely, 101 to 105 problems, 136 to 138 security, 97 to 100 settings, 86 to 104 wired, 86 to 88 - Epson BrightLink 450Wi | User's Guide - Page 184
Support, 11 Problems color, 132 to 133 connecting wirelessly, 136 to 138 image, 126 to 133 interactive pens, 134 to 136 network, 136 to 138 no signal, 127 to 128 remote control, 139 sound, 133 to 134 USB Display, 125 using on-screen help, 122 Progressive format, 74 Projection lamp, see Lamp - Epson BrightLink 450Wi | User's Guide - Page 185
to 66 problems, 139 range, 144 specifications, 144 troubleshooting, 139 USB button, 38, 43 using, 60 virtual over network, 106 Remote Receiver, deactivating, 76 Replacing lamp, 113 to 117 Request code, password, 81 Resetting lamp timer, 117 Resetting menu options, 71 Resize image, 46 Resolution, 46 - Epson BrightLink 450Wi | User's Guide - Page 186
, 74, 132 Transporting projector, 120 Troubleshooting blank screen, 126 to 128 cut-off image, 130 image and sound problems, 126 to 134 network problems, 136 to 138 no signal, 127 to 128 projector problems, 121 to 141 remote control problems, 139 wireless projection problems, 136 to 138 Turning
-
 1
1 -
 2
2 -
 3
3 -
 4
4 -
 5
5 -
 6
6 -
 7
7 -
8
-
9
-
10
-
11
-
12
-
13
-
14
-
15
-
16
-
17
-
18
-
19
-
20
-
21
-
22
-
23
-
24
-
25
-
26
-
27
-
28
-
29
-
30
-
31
-
32
-
33
-
34
-
35
-
36
-
37
-
38
-
39
-
40
-
41
-
42
-
43
-
44
-
45
-
46
-
47
-
48
-
49
-
50
-
51
-
52
-
53
-
54
-
55
-
56
-
57
-
58
-
59
-
60
-
61
-
62
-
63
-
64
-
65
-
66
-
67
-
68
-
69
-
70
-
71
-
72
-
73
-
74
-
75
-
76
-
77
-
78
-
79
-
80
-
81
-
82
-
83
-
84
-
85
-
86
-
87
-
88
-
89
-
90
-
91
-
92
-
93
-
94
-
95
-
96
-
97
-
98
-
99
-
100
-
101
-
102
-
103
-
104
-
105
-
106
-
107
-
108
-
109
-
110
-
111
-
112
-
113
-
114
-
115
-
116
-
117
-
118
-
119
-
120
-
121
-
122
-
123
-
124
-
125
-
126
-
127
-
128
-
129
-
130
-
131
-
132
-
133
-
134
-
135
-
136
-
137
-
138
-
139
-
140
-
141
-
142
-
143
-
144
-
145
-
146
-
147
-
148
-
149
-
150
-
151
-
152
-
153
-
154
-
155
-
156
-
157
-
158
-
159
-
160
-
161
-
162
-
163
-
164
-
165
-
166
-
167
-
168
-
169
-
170
-
171
-
172
-
173
-
174
-
175
-
176
-
177
-
178
-
179
-
180
-
181
-
182
-
183
-
184
-
185
-
186
 |
 |

BrightLink 450Wi
Interactive Projector
TM
User’s Guide