Epson C11C498001 Printer Basics
Epson C11C498001 - Stylus Photo 825 Inkjet Printer Manual
 |
UPC - 010343843509
View all Epson C11C498001 manuals
Add to My Manuals
Save this manual to your list of manuals |
Epson C11C498001 manual content summary:
- Epson C11C498001 | Printer Basics - Page 1
- Epson C11C498001 | Printer Basics - Page 2
, scanners, and ink jet printers. Trademarks EPSON, EPSON Stylus, EPSON Photo Stickers, and MicroWeave are registered trademarks and PRINT Image Matching is a trademark of SEIKO EPSON CORPORATION. EPSON Print Lab, EPSON PhotoCenter, EPSON Store, SoundAdvice, and EPSON Connection are service marks - Epson C11C498001 | Printer Basics - Page 3
Print About Your Software About Your Documentation Viewing Your On-Screen Printer Manual Printing Without a Computer Getting Photos into the Printer Inserting Memory Cards Configuring PhotoStarter Removing Memory Cards Using EPSON Paper Loading Paper Using the Control Panel Selecting Print Settings - Epson C11C498001 | Printer Basics - Page 4
Print Settings 45 Customizing Windows Print Settings 45 Customizing Macintosh Print Settings 47 Selecting the Correct Paper or Media Type 49 Printing BorderFree Photos 50 Using PRINT Image Matching 51 Using Film Factory 51 Using the P.I.M. Plug-in for Adobe Photoshop 56 iv Contents - Epson C11C498001 | Printer Basics - Page 5
Ink Cartridges 64 Ink Cartridge Precautions 65 Removing and Installing Ink Cartridges 65 Aligning the Print Head 68 Cleaning the Printer 69 Transporting the Printer 70 Installing Your Printer Software 71 Installing Printer Software on Mac OS X 71 Installing the Printer Driver - Epson C11C498001 | Printer Basics - Page 6
91 Paper Problems 93 Miscellaneous Problems 95 Uninstalling and Reinstalling the Printer Software (Windows) 97 Where To Get Help 98 Requirements and Notices 101 Windows System Requirements 101 Macintosh System Requirements 101 Important Safety Instructions 102 Ink Cartridge Safety - Epson C11C498001 | Printer Basics - Page 7
immediately to your Windows® or Macintosh® computer and print from there. Here are some of the printer's outstanding features: ■ EPSON's exclusive 6-color ink technology gives you beautiful digital photos that look like traditional photographs, as well as crisp everyday documents of all types. ■ The - Epson C11C498001 | Printer Basics - Page 8
PRINT Image Matching and Exif Print Your EPSON Stylus Photo 825 printer supports these innovative digital image formats to give you the best photo prints possible: ■ PRINT Image Matching ■ Exif Print About PRINT Image Matching EPSON's revolutionary PRINT Image Matching™ (P.I.M.) technology lets your - Epson C11C498001 | Printer Basics - Page 9
's a good idea to check EPSON's support web site periodically for free updates to your printer driver. Visit http://support.epson.com. Download instructions are posted for your convenience. ■ Your photo software includes these great tools: The EPSON PhotoStarter and CardMonitor utilities (installed - Epson C11C498001 | Printer Basics - Page 10
warranty, and instructions on: ■ Printing all types of photos without a computer ■ Printing with Windows or on a Macintosh ■ Maintaining the printer ■ Solving basic problems For more details about printing with, maintaining, or troubleshooting your printer, see your on-screen Reference Guide, as - Epson C11C498001 | Printer Basics - Page 11
Guide (Printer Manual). You need a browser-such as Microsoft Internet Explorer 4.0 or later or Netscape Navigator 3.0 or later-to view it. If you are using a different browser, the pages may not display correctly. (A browser is not included on the printer software CD-ROM.) Follow the instructions - Epson C11C498001 | Printer Basics - Page 12
to to close a subtopic list. Click to go to topic Closed list, click to expand If you see an icon for a graphic when viewing your manual in Netscape Navigator, click the Reload button to load the graphic. 6 Welcome! - Epson C11C498001 | Printer Basics - Page 13
17. Before you start, make sure you plug in the printer, turn it on, and install ink cartridges, as described on your Start Here sheet. Then follow the instructions in these sections: ■ "Getting Photos into the Printer" on page 8 ■ "Using EPSON Paper" on page 12 ■ "Using the Control Panel" on page - Epson C11C498001 | Printer Basics - Page 14
need to take the memory card out of your digital camera, insert it into the adapter, and then insert the adapter into the printer. Your EPSON Stylus Photo 825 is designed to print digital camera files that meet these requirements: ■ JPEG files captured with a digital camera. The files must meet the - Epson C11C498001 | Printer Basics - Page 15
up and pointing into the slot If your computer is connected to your printer and turned on, you will see a message on your screen the first time you insert a memory card (in Windows 98, Me, or 2000). Follow the instructions in the next section to respond to the message and configure PhotoStarter - Epson C11C498001 | Printer Basics - Page 16
Configuring PhotoStarter PhotoStarter and CardMonitor are utility programs that detect when a memory card is inserted in your printer and automatically copy photos to your computer (not available in Windows XP). Note: If you're using Windows XP, you don't need PhotoStarter and CardMonitor. You can - Epson C11C498001 | Printer Basics - Page 17
go back and change settings at any time by opening PhotoStarter: ■ In Windows, click Start, point to Programs, Film Factory, and click EPSON PhotoStarter. Open the Settings menu and choose Change Settings. ■ On a Macintosh, open the PhotoStarter folder and double-click the PhotoStarter icon. Open - Epson C11C498001 | Printer Basics - Page 18
on the inside back cover. With proper care, photographs from your EPSON Stylus Photo printer will last for many years. The special EPSON inks designed for your printer are formulated to achieve improved lightfastness when used with EPSON papers for prints that are properly displayed or stored. Tip - Epson C11C498001 | Printer Basics - Page 19
sunlight. ■ For proper storage, EPSON recommends that you keep prints in a photo album or plastic photo storage box in acid free, archival the left edge guide against the paper. Note: If any paper you buy comes with a cleaning sheet, don't use the cleaning sheet with this printer; it may cause - Epson C11C498001 | Printer Basics - Page 20
to 20 sheets of EPSON Photo Paper, Glossy Photo paper, or Matte Paper Heavyweight. ■ Load EPSON ColorLife, Premium Glossy and Semigloss Photo Paper one sheet at a time. ■ Load EPSON Photo Quality Ink Jet paper and plain paper up to the arrow mark inside the left edge guide. Using the Control Panel - Epson C11C498001 | Printer Basics - Page 21
card. Print one selected photo. Print a group of selected photos. Paper Type The printer adjusts the ink coverage for each type of paper. That's why this setting is especially important. Print on plain paper. Recommended for index or test prints. Print on EPSON Premium Glossy, Premium Semigloss - Epson C11C498001 | Printer Basics - Page 22
and Photo Quality Ink Jet paper. See page 22 for instructions. Paper Size Make sure this setting matches the paper you loaded in the printer. Use for letter-size enlargements or printing multiple photos on one sheet. You can't use this setting for borderless photos. Use for snapshots on EPSON Photo - Epson C11C498001 | Printer Basics - Page 23
or Index mode) or the number of copies for each photo (in Set mode). Quality Always use for the best photographic results. Use for faster, draft printing and saving ink (not available for glossy paper). PhotoEnhance Use this setting if your camera supports PRINT Image Matching. If not, you can still - Epson C11C498001 | Printer Basics - Page 24
Press the Select Photo and Brightness buttons at the same time. The settings are saved as defaults, even if you turn off the printer. 3. Repeat Photo, Brightness, and Cancel buttons at the same time. Note: If you want to select Photo Paper or Photo Quality Ink Jet paper, see page 22 for instructions - Epson C11C498001 | Printer Basics - Page 25
printer is set up, plugged in, and turned on, as described on the Start Here sheet. ■ Unless you have the optional preview monitor, it's a good idea to start by printing an index, so you can select your photos by number. ■ If your camera supports If you have EPSON 4 × 6 Photo Paper with perforations, - Epson C11C498001 | Printer Basics - Page 26
1. Load up to 20 sheets of EPSON Borderless Photo Paper 4" × 6" in the printer, short edge first as shown. Make sure the printable (glossier) side of the paper is face up Slide the left edge guide against the paper 2. In the Print Mode menu, select Set. (If you want to print all the pictures on the - Epson C11C498001 | Printer Basics - Page 27
time. ■ If you're using EPSON Matte Paper Heavyweight, Photo Paper, or Glossy Photo Paper, you can load up to 20 sheets at a time. ■ If you're using EPSON Photo Quality Ink Jet Paper, you can load as many sheets as necessary, up to the arrow mark on the left edge guide. Make sure the printable side - Epson C11C498001 | Printer Basics - Page 28
Matte, depending on the type of paper you're using. ■ If you're using EPSON Photo Paper or Glossy Photo Paper, press the button and hold it until PP flashes on the Select Photo menu. ■ If you're using EPSON Photo Quality Ink Jet paper, press the button and hold it until SF (SuperFine) flashes on the - Epson C11C498001 | Printer Basics - Page 29
on the memory card (as described on page 19). 1. Load paper in the printer. 2. Select your Print Mode, Paper Type, and Paper Size. Note: If you're using Photo Paper or Photo Quality Ink Jet paper, see page 22 for instructions on selecting the Paper Type. 3. In the Page Layout menu, select one of - Epson C11C498001 | Printer Basics - Page 30
and humidity and out of direct sunlight. See page 12 for more information about storing and displaying your pictures. When you print multi-photo layouts, your photos are sized to fit standard frames and wallet inserts, as shown in the following tables: Paper size Letter Page layout Size of each - Epson C11C498001 | Printer Basics - Page 31
ink levels before you print on roll paper. See page 86 for instructions. Replacing cartridges while roll paper is loaded can smear the paper. Loading Roll Paper 1. Make sure the roll paper adapter is attached to the printer problems. If necessary, trim the paper. 3. To avoid paper feeding problems, - Epson C11C498001 | Printer Basics - Page 32
paper support and lower the output tray. Make sure the printer is turned on. 5. Insert the tabs on the roll paper holders into the slots at the back of the printer as shown. 6. Feed the end of the paper into the printer as far as it will go, then slide the left edge guide against - Epson C11C498001 | Printer Basics - Page 33
the printer. Caution: Be careful not to get fingerprints on the paper. 8. Open the printer cover and make sure the paper is feeding straight into the printer. If photos on 4" roll paper.) If you want to print all the photos on the card (or you're using DPOF), skip to step 5. 4. In the Select Photo - Epson C11C498001 | Printer Basics - Page 34
supports PRINT Image Matching or to increase brightness and contrast) or Off. 6. Press the large green Print button. Your pictures are printed. 7. When the printer following: Caution: To avoid paper feeding problems, make sure you follow these instructions to continue printing or remove the roll - Epson C11C498001 | Printer Basics - Page 35
the error code. Remove the roll paper holder from the printer. Then remove the paper roll from the holder and store Photos and Using Filters The EPSON Stylus Photo 825 lets you enhance your photos even without a computer. Several different types of enhancement are available: ■ If your camera supports - Epson C11C498001 | Printer Basics - Page 36
Select your Print Mode and other settings. 2. When you're ready to print, press the Brightness button. The word Brightness flashes on the Select Photo menu, and the number 0 is displayed. 3. Press the button to make your pictures 1 level lighter (1 is displayed). Press the button again to make your - Epson C11C498001 | Printer Basics - Page 37
paper. Brightness level -2 (filter 7) Brightness level -1 (filter 6) Original photo Brightness level 1 (filter 4) Brightness level 2 (filter 5) 1. Select button until Filter No. flashes on the Copies menu. 3. In the Select Photo menu, use the button to select the number of the picture that you - Epson C11C498001 | Printer Basics - Page 38
each one. First print an index to identify the photos on the memory card (as described on page 19). Make sure you have a package of EPSON Photo Stickers (S041144). 1. Follow the instructions in the package to load a sheet of stickers with the two support sheets beneath it. Make sure the cut corner - Epson C11C498001 | Printer Basics - Page 39
menu, press the button to display your picture numbers. For each picture you want to print on stickers, press the round Select Photo button. 4. Choose your Quality and PhotoEnhance settings. 5. Go back up to the Page Layout menu. Press and hold the button until the layout icons disappear - Epson C11C498001 | Printer Basics - Page 40
stickers. Printing Special Layouts You can turn a normal landscape into a panoramic photo, or take a portrait and print an "ID sheet" with 8 different Panoramic ID sheet 1. Select your Print Mode and other settings and select the photo(s) you want to print. 2. In the Page Layout menu, press and - Epson C11C498001 | Printer Basics - Page 41
or a Mac When you print from your computer, your EPSON Stylus Photo 825 works like any other printer. You can edit and enhance your photos, create photo greeting cards or calendars, and then print them out. Before you start, make sure your printer software is installed as described on the Start Here - Epson C11C498001 | Printer Basics - Page 42
face up. It's usually whiter or brighter than the other side. ■ Load letterhead or preprinted paper into the printer top edge first. ■ Don't load paper above the arrow on the left edge guide. Loading Envelopes You can load up to 10 envelopes at a time, top edge first and printable side up. Place - Epson C11C498001 | Printer Basics - Page 43
Set the thickness lever to the + position. (Remember to move the thickness lever back to the 0 position when you're done printing envelopes.) Load with the printable side up Set the thickness lever to the + position Before you print, make sure you choose the correct envelope size as the paper - Epson C11C498001 | Printer Basics - Page 44
. You see a Print window like this one: Make sure your printer is selected here Click here to open your printer software 2. Make sure EPSON Stylus Photo 825 is selected. 3. Click the Properties or Preferences button. (If you see a Setup, Printer, or Options button, click it. Then click Properties or - Epson C11C498001 | Printer Basics - Page 45
quality Text & Image: For documents with text and images with higher quality Photo: For photos and graphics with good quality and speed Best Photo: For photos or graphics with high print quality Tip: For more information about printer settings, click the or Help button. 5. You return to the Print - Epson C11C498001 | Printer Basics - Page 46
the window shown on page 39. 3. Select the default settings you want for all your applications, then click OK. You can still change the printer settings in your program, if necessary. Basic Printing on a Macintosh After you create a document in a software program, follow the steps in one of these - Epson C11C498001 | Printer Basics - Page 47
Quality or Speed (for faster printing) Tip: For more information about printer settings, click the button. 4. You can also do the following: the screen. You see the EPSON Monitor3 window: Select your print job, then click here to cancel printing Click to check ink levels Note: If you're not - Epson C11C498001 | Printer Basics - Page 48
with Macintosh Classic mode, follow the steps on page 40 instead.) Before you begin, make sure you added your printer to Print Center as described on the Start Here sheet. 1. Open a photo or document. 2. From the File menu, select Page Setup. 3. Select the following Page Setup settings as necessary - Epson C11C498001 | Printer Basics - Page 49
4 Select Quality or Speed (for faster printing) Tip: For more information about printer settings, click Help. The OS X printer driver contains a subset of the settings available with the OS 8.6 to 9.x Macintosh printer driver described in this book. 8. You can also choose other print settings by - Epson C11C498001 | Printer Basics - Page 50
10. To monitor the progress of your print job, click the Print Center icon when it appears in the dock on the bottom of your desktop. You see a screen like this: 11. Monitor the progress of your print job or do one of the following: ■ Click the print job, then click Delete to delete the job. ■ Click - Epson C11C498001 | Printer Basics - Page 51
options as necessary Click here to select Photo RPM for the best print quality on Options as necessary Click here to select Black Ink Only printing 3 Select a color management method . Note: For more information about advanced settings, or instructions on saving them as a group so you can reuse - Epson C11C498001 | Printer Basics - Page 52
4. Select the following page layout settings as necessary: 1 Select image position options here 2 Select image resizing options here; these affect only your printed image 3 Add a watermark to printed page here 4 Select multi-page document options here and here To print a large image on several - Epson C11C498001 | Printer Basics - Page 53
the printer settings window, click Custom, then click the Custom Settings list to open it. Click Custom, then choose: Economy (to save ink on X Macintosh OS 8.6 to 9.x Click Custom, then choose: Economy (to save ink on plain paper) or ColorSync (to match printed colors with compatible device colors - Epson C11C498001 | Printer Basics - Page 54
here Macintosh OS 8.6 through 9.x 1 Click here to select Photo RPM for the best print quality on certain paper types 2 Select the Print Settings pull-down menu Note: For more information on advanced settings, or instructions on saving them as a group so you can reuse them later, click Help - Epson C11C498001 | Printer Basics - Page 55
your printer knows what kind of paper you're using and adjusts the ink coverage accordingly. For this paper . . . Select this Type or Media Type setting Plain paper sheets or envelopes Plain paper EPSON Premium Bright White Paper EPSON Iron-On Transfer Paper 360 dpi Ink Jet Paper EPSON Photo - Epson C11C498001 | Printer Basics - Page 56
for a complete list of paper types, sizes, and ordering information. Follow these steps to print BorderFree photos: 1. Start your printing application and open your photo file. 2. Access the printer settings window (see page 38 for Windows or page 41 for Macintosh OS 8.6 to 9.x). 3. Windows only - Epson C11C498001 | Printer Basics - Page 57
Matching With PRINT Image Matching, special print instructions are saved in your digital photo files. For example, macro mode pictures might utility that comes with the program for printing instructions). Using Film Factory If your digital camera supports PRINT Image Matching or Exif Print, you can - Epson C11C498001 | Printer Basics - Page 58
select it from the Help menu or check the on-screen Getting Started Guide that was installed with Film Factory. 2. Select a "roll of film" a photo from a scanner or digital camera. If your device is already selected, the software will open. If not, click Import Settings, and select your scanner or - Epson C11C498001 | Printer Basics - Page 59
were taken with a digital camera that supports PRINT Image Matching, the P.I.M. logo appears in your photo thumbnails. Right-click (Windows) or Ctrl-click (Macintosh) a photo thumbnail to display information about the P.I.M. and/or Exif Print data in the photo file. (If you retouched a PRINT Image - Epson C11C498001 | Printer Basics - Page 60
're ready to print, click the Print Assignment button. You see this screen: Click to print the date with your photo Select your printer settings here 2. Windows and Macintosh OS 8.6 to 9.x: Select these options in the Printer Settings box at the bottom of the screen, in this order: 1 Make sure your - Epson C11C498001 | Printer Basics - Page 61
of copies you want to print Leave these boxes checked for the best printed output using P.I.M. and/or Exif Print data, if available 5. If your photo doesn't look right in the preview, click the Back button to change your settings. (Click the Detailed Preview button for a closer look.) 6. Select the - Epson C11C498001 | Printer Basics - Page 62
the printer driver (Macintosh). (Not available for Macintosh OS X.) Photoshop doesn't retain the PRINT Image Matching information separately in the JPEG's header file when you import your P.I.M. image. Instead, it converts that information in the file and embeds a color space called EPSON RGB 2001 - Epson C11C498001 | Printer Basics - Page 63
Note: If you overwrite your original file, you will lose all P.I.M. header information. Printing a P.I.M. Image P.I.M. images are converted into the EPSON RGB 2001 color space. To retain P.I.M. quality and enhancements, don't change the color space. Note: The illustrations in the sections below show - Epson C11C498001 | Printer Basics - Page 64
Select the profile for your printer and paper Make sure this source is selected 2. In the Source Space box, make sure the EPSON RGB 2001 option is selected You see the printer settings window. Photoshop 6.0: Go to step 5. Note: In Windows, click Setup, then select your printer and click Properties - Epson C11C498001 | Printer Basics - Page 65
OK. Macintosh: Select No Color Adjustment and click OK. Macintosh Windows No Color Adjustment 9. Continue clicking OK (Windows) or click Print (Macintosh) to print your photo. Printing From Windows or a Mac 59 - Epson C11C498001 | Printer Basics - Page 66
60 Printing From Windows or a Mac - Epson C11C498001 | Printer Basics - Page 67
Maintaining Your Printer Follow the instructions in this chapter to keep your printer working at its best and prepare it for moving, if necessary. ■ "Cleaning the Print Head" below ■ "Replacing an Ink Cartridge" on page 63 ■ "Aligning the Print Head" on page 68 ■ "Cleaning the Printer" on page 69 ■ - Epson C11C498001 | Printer Basics - Page 68
flashing or on, you may need to replace the ink cartridge; see page 63 for details.) 2. Windows: Right-click the printer icon on your taskbar (in the lower right and select EPSON Printer Utility. Select SP 825 in the printer list, click OK, and select Head Cleaning. 3. Follow the instructions on - Epson C11C498001 | Printer Basics - Page 69
or gaps (as shown), clean the print head again; see page 62 for instructions. Replacing an Ink Cartridge When the red b error light flashes, an ink cartridge is low on ink. This is a good time to make sure you have a new cartridge handy. When the red b error light stays on, you may need to replace - Epson C11C498001 | Printer Basics - Page 70
File > Print. Click the ink icon. OS X: Choose Applications > EPSON Printer Utility > SP825 > Status Monitor. You see a window like this: Click a cartridge image to display information about the cartridge. Purchasing Ink Cartridges Use these EPSON ink cartridges within six months of installing them - Epson C11C498001 | Printer Basics - Page 71
and not printing (the Processing light should be on, but not flashing), then open the printer cover. 2. Press the e ink cartridge replacement button. The print head moves to the center and the Processing light flashes. 3. The color cartridge is on the right and the black is on the left. Pull up the - Epson C11C498001 | Printer Basics - Page 72
4. Lift the cartridge out of the printer and dispose of it carefully. 5. Unwrap the new ink cartridge. Then remove only the yellow tape seal on top. Caution: You must remove the yellow tape from the top of the cartridge or you will permanently damage it. Don't try to remove the clear seal - Epson C11C498001 | Printer Basics - Page 73
until it snaps in place. 8. If you need to replace the other ink cartridge, repeat steps 3 through 7 before continuing with step 9. 9. Press the e ink cartridge replacement button and close the printer cover. The printer begins charging the ink delivery system. The Processing light flashes, and the - Epson C11C498001 | Printer Basics - Page 74
click the Print Head Alignment button. Macintosh OS X: Open the Applications folder and select EPSON Printer Utility. Select SP 825 in the printer list, click OK, and select Print Head Alignment. 4. Follow the instructions on the screen to print an alignment pattern. You see this window: 5. On the - Epson C11C498001 | Printer Basics - Page 75
any dust or dirt from the sheet feeder. 3. Clean the exterior of the printer with a soft, damp cloth. 4. Clean ink out of the printer's interior with a soft, damp cloth. Warning: Don't touch the gears inside the printer. Caution: Never use a hard or abrasive brush, or alcohol or thinner for cleaning - Epson C11C498001 | Printer Basics - Page 76
outlet. Then disconnect the printer cable from the printer. 3. Remove any paper from the printer and remove the paper support. 4. Open the printer cover. If you still have the packing insert, slide it down into the area beside the ink cartridge holder and tape it to the printer case. If you don - Epson C11C498001 | Printer Basics - Page 77
one. Then you'll restart your Macintosh in OS 9.x and install your printer software for OS 8.6 to 9.x applications. Installing the Printer Driver for Mac OS X 1. Start up your Macintosh in OS X. (Make sure your printer is still on.) 2. Put the EPSON CD-ROM in your CD-ROM or DVD drive and wait a few - Epson C11C498001 | Printer Basics - Page 78
3. Select EPSON on your desktop. Then select the SP825 icon in the window that opens: Install. 9. Follow the on-screen instructions to complete the installation and restart your Macintosh. Then follow the steps in the next section to install the storage driver and additional software. Click the lock - Epson C11C498001 | Printer Basics - Page 79
the Installer. 5. Select to install ArcSoft PhotoImpression and follow the on-screen instructions. Then click Quit to return to the Installer. 6. Select to install the Printer Manual on your desktop and follow the on-screen instructions. 7. If you have Photoshop 7, you can install the P.I.M. plug-in - Epson C11C498001 | Printer Basics - Page 80
Macintosh in OS 9.x. Click Add Follow the instructions in the next section to install the OS 9.x printer driver and optional software for your Macintosh Classic applications. (You don't need to reinstall your printer manual.) Installing the Printer Driver and Utilities for Mac OS 9.x 1. Leave in - Epson C11C498001 | Printer Basics - Page 81
for Mac OS 9x 1. After your Macintosh restarts, register your printer with EPSON as instructed. 2. Open the Chooser from the Apple menu. Select SP 825, then select your USB port and turn on background printing. 3. Close the Chooser. 4. Select EPSON in the window on your desktop to open the Install - Epson C11C498001 | Printer Basics - Page 82
, and turned on, as described on the Start Here sheet. Follow the instructions in the two sections below, first to install your printer driver and utilities, and then to install additional software. Installing the Printer Driver and Utilities for Windows Me 1. Turn on your computer. 2. Wait for - Epson C11C498001 | Printer Basics - Page 83
installed, then you see the EPSON PhotoStarter Setup. 2. Click Next and follow the on-screen instructions to accept the license agreement and and follow the instructions on the screen. 5. If you see a message about installing QuickTime, click Yes and follow the on-screen instructions. You don't need - Epson C11C498001 | Printer Basics - Page 84
Start Here sheet. Installation takes place in several phases. Follow the instructions in the two sections below, first to install your printer driver and utilities, and then to install additional software. Installing the Printer Driver and Utilities for Windows 2000 1. Turn on your computer. 2. Wait - Epson C11C498001 | Printer Basics - Page 85
-ROM drives, then click Next. 12. At the next screen, click Next. Installation proceeds automatically. If you see this screen, click Yes to continue. Otherwise, driver installation will not be complete. Installing Your Printer Software 79 - Epson C11C498001 | Printer Basics - Page 86
Setup. 2. Click Next and follow the on-screen instructions to accept the license agreement and install PhotoStarter. Do the same thing when you see the EPSON Card Monitor Setup. 3. When setup is complete, select Yes to restart your computer and click Finish. 80 Installing Your Printer Software - Epson C11C498001 | Printer Basics - Page 87
number. 6. When you're finished installing software, close any open windows and click Exit. 7. When you see the registration screen, register your printer with EPSON as instructed. Remove the CD-ROM and keep it in case you need to reinstall any software later. You're ready to print. Installing Your - Epson C11C498001 | Printer Basics - Page 88
82 Installing Your Printer Software - Epson C11C498001 | Printer Basics - Page 89
Problems" on page 95 ■ "Uninstalling and Reinstalling the Printer Software (Windows)" on page 97 ■ "Where To Get Help" on page 98 Tip: It's a good idea to check EPSON's support web site periodically for free updates to your printer driver. Visit http://support.epson.com. Download instructions - Epson C11C498001 | Printer Basics - Page 90
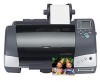
Parts Paper support Printer cover Roll paper adapter Card eject button Left edge guide Output tray Paper thickness lever Memory card slot Output tray extensions Preview monitor slot Ink cartridges USB port Roll paper holders Preview monitor port Processing light Error light Power button - Epson C11C498001 | Printer Basics - Page 91
, including any torn pieces. Then reload paper, turn on the printer, and press the b maintenance button. ■ If you see IEb (Ink Empty black) or IEc (Ink Empty color) on the control panel, you need to replace one of your ink cartridges. Replace the cartridge as described on page 63. ■ If you see IC - Epson C11C498001 | Printer Basics - Page 92
it in your camera. Running a Printer Check You can run a printer check to determine whether a problem comes from the printer itself or some other source. The printer check also shows how much black and color ink you have left. 1. Make sure both the printer and computer are turned off. Then - Epson C11C498001 | Printer Basics - Page 93
you need to clean the print head; see page 61.) 4. Turn off the printer after it prints the check page. Then reconnect the cable and turn on your printer and computer. ■ If the check page prints, the problem probably lies in your memory card, software settings, the interface cable, or your computer - Epson C11C498001 | Printer Basics - Page 94
on, contact EPSON as described on page 98. ■ Make sure the ink cartridge clamps are locked down completely and no packing material remains in the printer. Turn off the printer, wait a moment, then turn it back on to clear the error. You're having problems installing the printer software. ■ Turn - Epson C11C498001 | Printer Basics - Page 95
're printing over a network, see your on-screen Reference Guide for instructions on configuring your printer. Printer Problems Only the green Processing light is on, but nothing prints. ■ In Windows 98 or Me, right-click the EPSON CardMonitor icon and select Turn off monitoring. Solving Problems 89 - Epson C11C498001 | Printer Basics - Page 96
only contains photos taken with a DCF-compliant digital camera. ■ Make sure you follow the instructions on the Check your PhotoStarter settings. See page 10 for instructions. ■ If you access the card from your respond too slowly. When you have lots of photos or large files on your memory card, it - Epson C11C498001 | Printer Basics - Page 97
Problems You see banding (light lines). ■ Clean the print head; see page 61 for instructions. Photo in the Quality Type setting (Windows). ■ Make sure Maximum is not selected as the printable area setting in your printer software; this may cause banding in the expanded area. ■ The ink cartridges - Epson C11C498001 | Printer Basics - Page 98
Make sure the printer is on a ■ Use a support sheet with special Guide. ■ Use EPSON papers for proper saturation and absorption of genuine EPSON inks. ■ Align the print head as described on page 68. 92 Solving Problems ■ Clean the print head; see page 61 for instructions. ■ The ink cartridges - Epson C11C498001 | Printer Basics - Page 99
see page 61 for instructions. ■ The ink cartridges may be old or low on ink; see page 63. as close as possible. Paper Problems Paper doesn't feed correctly or jams in the printer. ■ If paper doesn't 't load paper above the arrow mark on the left edge guide. ■ Make sure the edges of the paper are not - Epson C11C498001 | Printer Basics - Page 100
Don't force the paper to feed into the printer. Allow the paper to feed automatically. ■ If -only about 9 inches. See page 25 for instructions. ■ Use a triangle or other tool to paper button to resume printing. ■ Remove the paper support and close the output tray extensions. ■ Always select Problems - Epson C11C498001 | Printer Basics - Page 101
(If you're printing on EPSON Iron-On Transfer Paper, the image should be inverted.) The printer prints blank pages. ■ Make sure your printer is selected in the Print window, or the Macintosh Chooser or Print Center. ■ Clean the print head; see page 61 for instructions. You see incorrect characters - Epson C11C498001 | Printer Basics - Page 102
in the printer may not match the numbering in your camera. If you're printing without a computer, first print an index to identify your photos. Too many copies are printing. Make sure that the Copies option in your printer software or program is not set for multiple copies. 96 Solving Problems - Epson C11C498001 | Printer Basics - Page 103
to Epson or EPSON Printers, then select EPSON Printer Software Uninstall. 3. In the next window, make sure EPSON Stylus Photo 825 is selected and click OK. Then follow the on-screen instructions. 4. Restart your computer, then see the Start Here sheet to reinstall your software. Solving Problems 97 - Epson C11C498001 | Printer Basics - Page 104
in the following table. Service World Wide Web Automated Telephone Services Access From the Internet, you can reach EPSON Support at http://support.epson.com. At this site, you can download drivers and other files, look at product documentation, access troubleshooting information, and receive - Epson C11C498001 | Printer Basics - Page 105
You can purchase ink cartridges, paper, manuals, and accessories from the EPSON Store at (800) 873-7766 or visit www.epsonstore.com : ■ Web site: www.arcsoft.com/techmain.htm ■ E-mail: [email protected] ■ Telephone: (510) 440-9901, 8:30 AM-5:30 PM PST, Monday through Friday Solving Problems 99 - Epson C11C498001 | Printer Basics - Page 106
100 Solving Problems - Epson C11C498001 | Printer Basics - Page 107
or better display adapter and monitor ■ CD-ROM or DVD drive for installing the printer software ■ A shielded USB "AB" cable no longer than 6.5 feet (2 meters). Macintosh System Requirements To use your printer and its software, your system should have: ■ An Apple® iMac™ series, Power Macintosh® G3 - Epson C11C498001 | Printer Basics - Page 108
to follow all warnings and instructions marked on the printer. ■ Use only the type of power source indicated on the printer's label. ■ Connect all explained in this manual, do not attempt to service the printer yourself. ■ Do not remove a memory card or turn off the printer while the computer - Epson C11C498001 | Printer Basics - Page 109
has been dropped or the case damaged; if the printer does not operate normally or exhibits a distinct change in performance. Adjust only those controls that are covered by the operating instructions. Ink Cartridge Safety Instructions ■ Keep ink cartridges out of the reach of children and do not - Epson C11C498001 | Printer Basics - Page 110
ENERGY STAR Partner, EPSON has determined that this the introduction of energy-efficient personal computers, monitors, printers, fax machines, and copiers in an effort to , if not installed and used in accordance with the instructions, may cause harmful interference to radio or television reception. - Epson C11C498001 | Printer Basics - Page 111
; and/or CPU Boards and Power Supplies used with Class B Personal Computers: We: EPSON AMERICA, INC. Located at: MS: 3-13 3840 Kilroy Airport Way Long Beach, CA may cause undesired operation. Trade Name: EPSON Type of Product: Ink Jet Printer Model: P270A Requirements and Notices 105 - Epson C11C498001 | Printer Basics - Page 112
the date of original purchase. Epson also warrants that the consumable ink cartridges enclosed with the printer will perform to the manufacturer's specified usage, which usage may expire before the expiration of the limited warranty for the EPSON printer. For warranty service, you must provide proof - Epson C11C498001 | Printer Basics - Page 113
ANY LOSS, INCONVENIENCE, OR DAMAGE, INCLUDING DIRECT, SPECIAL, INCIDENTAL OR CONSEQUENTIAL DAMAGES, RESULTING FROM THE USE OR INABILITY TO USE THE EPSON PRODUCT, WHETHER RESULTING FROM BREACH OF WARRANTY OR ANY OTHER LEGAL THEORY. In Canada, warranties include both warranties and conditions. Some - Epson C11C498001 | Printer Basics - Page 114
108 Requirements and Notices - Epson C11C498001 | Printer Basics - Page 115
to 40 Black Ink Only setting, 45, 93 Blank pages, 95 Blurry images, 92 BorderFree printing, 16, 50 to 51, 54 Borderless Photo Paper, 20 , 61 to 63 printer, 69 sheets, 69 Color Management settings Mac OS 8.6 to 9.x, 47 to 48 Mac OS X, 43 Windows, 45 Color problems, 93 ColorLife Photo Paper, 12 to - Epson C11C498001 | Printer Basics - Page 116
manual, 4 to 6 Energy Star compliance, 104 Enlargements, printing without computer, 21 to 22 EPSON 55 Film, Photo Quality Glossy, Ink cartridge level of ink in, 39, 41, 63 to 64, 87 ordering, 64 problems, solving, 88 replacing, 63 to 67 safety instructions, 65 to 66, 103 Ink Jet Transparencies, 49 Ink - Epson C11C498001 | Printer Basics - Page 117
printing, 89 Noise, printer, 89 Nozzle Check, 62 to 63 Numbering of photos, 20 O Orientation setting, 39 to 40, 42, 51 P P.I.M., see PRINT Image Matching Page Layout setting, 16 Page Setup, Macintosh, 40, 42 Panoramic paper, 49 photos, 34 Paper EPSON, 12 to 14, 49 feeding problems, 93 to 94 jams - Epson C11C498001 | Printer Basics - Page 118
to 55 Print Mode setting, 15 Print quality problems, 91 to 93 Printer cable, 101 check, 86 to 87 cleaning, problems, 94 loading, 25 to 27 printing, 27 to 29 RPM, 1, 45, 48 S Safety instructions, 102 to 103 Select Photo setting, 17 Self adhesive sheets, 49 Semigloss Photo Paper, 12 to 14, 49 Service - Epson C11C498001 | Printer Basics - Page 119
uninstalling, 97 SoundAdvice, 98 Stickers, 12, 32 to 34, 49 Support, 98 to 99 System requirements, 101 T Technical support, 98 to 99 Thickness lever, 37, 91 Transfer paper, 49, 95 Transparencies, 49 Transporting printer, 70 Troubleshooting, 83 to 99 Type setting, 39, 91 U Uninstalling software, 97 - Epson C11C498001 | Printer Basics - Page 120
114 Index
-
 1
1 -
 2
2 -
 3
3 -
 4
4 -
 5
5 -
 6
6 -
 7
7 -
8
-
9
-
10
-
11
-
12
-
13
-
14
-
15
-
16
-
17
-
18
-
19
-
20
-
21
-
22
-
23
-
24
-
25
-
26
-
27
-
28
-
29
-
30
-
31
-
32
-
33
-
34
-
35
-
36
-
37
-
38
-
39
-
40
-
41
-
42
-
43
-
44
-
45
-
46
-
47
-
48
-
49
-
50
-
51
-
52
-
53
-
54
-
55
-
56
-
57
-
58
-
59
-
60
-
61
-
62
-
63
-
64
-
65
-
66
-
67
-
68
-
69
-
70
-
71
-
72
-
73
-
74
-
75
-
76
-
77
-
78
-
79
-
80
-
81
-
82
-
83
-
84
-
85
-
86
-
87
-
88
-
89
-
90
-
91
-
92
-
93
-
94
-
95
-
96
-
97
-
98
-
99
-
100
-
101
-
102
-
103
-
104
-
105
-
106
-
107
-
108
-
109
-
110
-
111
-
112
-
113
-
114
-
115
-
116
-
117
-
118
-
119
-
120
 |
 |
