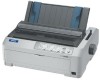
Epson C11C524001 User Manual
Epson C11C524001 - FX-890 Impact Dot Matrix Printer Manual
 |
UPC - 010343846739
View all Epson C11C524001 manuals
Add to My Manuals
Save this manual to your list of manuals |
Epson C11C524001 manual content summary:
- Epson C11C524001 | User Manual - Page 1
® 9-pin Dot Matrix Printer User's Guide This manual is divided in two sections: English and Spanish. The English section begins after this page. The Spanish section begins approximately at the middle of the manual. Este manual está dividido en dos secciones: Inglés y Español. El manual en español - Epson C11C524001 | User Manual - Page 2
or alterations to this product, or (excluding the U.S.) failure to strictly comply with SEIKO EPSON CORPORATION's operating and maintenance instructions. SEIKO EPSON CORPORATION shall not be liable for any damages or problems arising from the use of any options or any consumable products other than - Epson C11C524001 | User Manual - Page 3
the Printer 7 Choosing a Place for the Printer 7 Assembling the Printer 8 Connecting the Printer to Your Computer 11 Installing the Printer Software 12 For Windows XP, Me, or 2000 12 For Windows 98, 95, or NT 4.0 13 For DOS programs 14 Installing and Using the Online Reference Guide 15 - Epson C11C524001 | User Manual - Page 4
Changing the Printer's Default Settings 38 Default-setting mode 39 Emulating the Okidata Microline 320/321 Turbo 40 Troubleshooting Using the Error Indicators 41 Clearing Paper Jams 42 Printing a Self Test 43 Where To Get Help 44 Product Information Safety Instructions 45 Hot Parts Caution - Epson C11C524001 | User Manual - Page 5
to get you started using your printer: ❏ Setting Up the Printer ❏ Paper Handling ❏ Using the Control Panel ❏ Troubleshooting ❏ Product Information Although the illustrations in this manual show the FX-890, the instructions apply to both the FX-890 and the FX-2190. w Warnings must be followed - Epson C11C524001 | User Manual - Page 6
interface cards are also available to supplement your printer's built-in interfaces. (See the Reference Guide for more information.) You can purchase ribbon cartridges, paper, manuals, and accessories from EPSON® at (800) 873-7766, or visit the EPSON StoreSM at www.epsonstore.com (U.S. sales only - Epson C11C524001 | User Manual - Page 7
and set up your printer. Unpacking the Printer Make sure you have the following items. Printer Ribbon cartridge Power cord Paper guide Printer software Follow the directions on the Notice Sheet to remove the protective materials before you turn on the printer. Save all packing and protective - Epson C11C524001 | User Manual - Page 8
❏ Avoid electrical outlets controlled by wall switches or automatic timers. An interruption in power can erase information in the memory of your printer or computer. Also avoid outlets on the same circuit as large motors or other appliances that can cause voltage fluctuations. ❏ Use a grounded power - Epson C11C524001 | User Manual - Page 9
with a small tab. To release it, hold the sides of the ribbon guide and gently disconnect it. (Do not remove the ribbon guide from the ribbon, however.) Ribbon guide 5. Hold the ribbon cartridge by its handle and insert it into the printer at an angle, as shown below; then press down on both sides - Epson C11C524001 | User Manual - Page 10
press down on both ends until it clicks into place. 8. To replace the printer cover, insert the front tabs into the slots on the printer and lower the cover into place. Then push it down until it clicks. 9. Make sure the top part of the cover is folded forward, as shown. Then attach the - Epson C11C524001 | User Manual - Page 11
interface and a USB (Universal Serial Bus) interface. It also includes a Type-B optional interface slot in case your computer requires a different type of printer interface. (See the Reference Guide if you need to install an interface card.) Note: You can connect cables to both interfaces; the - Epson C11C524001 | User Manual - Page 12
Yes. If you click No, you must reinstall the printer driver. The printer software CD-ROM also includes the EPSON Remote Configuration Manager, which lets you change the printer's default settings. See "Installing the Remote Configuration Manager" on page 15. For Windows XP, Me, or 2000 1. Make sure - Epson C11C524001 | User Manual - Page 13
then follow the instructions on the screen. 5. When the installation is complete, see page 15 to install the Reference Guide and the EPSON Remote Configuration Utility. For Windows 98, 95, or NT 4.0 1. Make sure Windows is running and the printer is turned off. 2. Insert the printer software CD-ROM - Epson C11C524001 | User Manual - Page 14
need to specify a path. ❏ If you are using Windows 98, the Printer Utility Setup may start. If it does, follow the instructions on the screen. 9. When the installation is complete, see page 15 to install the Reference Guide and the EPSON Remote Configuration Utility. For DOS programs To control - Epson C11C524001 | User Manual - Page 15
double-click SETUP.EXE. 2. Select User Guides. 3. To open the Reference Guide, select View Reference Guide. Installing the Remote Configuration Manager The EPSON Remote Configuration Manager provides an easy way to change your printer's default settings in Windows. Follow these steps to install it - Epson C11C524001 | User Manual - Page 16
Remote Configuration Mgr, and then click Epson Remote Configuration Manager. To open the manual, select Programs, Epson Remote Configuration Mgr, and then click Epson Remote Configuration Manager User's Guide. Note: If you are using Windows 2000 and the printer is connected to the parallel port - Epson C11C524001 | User Manual - Page 17
Chapter 2 Paper Handling This chapter covers some important instructions you need to load and use paper in your printer. For complete paper handling information, see the Reference Guide. Setting the Paper Release Lever Before you start printing, be sure to set the paper release lever to indicate the - Epson C11C524001 | User Manual - Page 18
left side of the printer. The numbers next to the lever indicate the thickness setting. Select the correct setting according to this table: Paper type Ordinary paper Thin paper Carbonless multipart forms with: 2 parts (original + 1 copy) 3 parts (original + 2 copies) 4 parts (original + 3 copies - Epson C11C524001 | User Manual - Page 19
Paper with the Front Push Tractor 1. Make sure the printer is turned off. Then open the front cover and position for your paper's thickness. See "Adjusting the Paper-Thickness Setting" on page 18 for instructions. 3. Release the left and right sprockets by pushing the blue lock levers backward. 4. - Epson C11C524001 | User Manual - Page 20
cover with the continuous paper positioned as shown. 10. Make sure the paper guide is lying flat on the printer and slide the edge guides to the middle of the paper guide. 11. Turn on the printer. When the printer receives data, it automatically loads the paper and starts printing. 20 Paper Handling - Epson C11C524001 | User Manual - Page 21
to lose the top-of-form position. Loading Continuous Paper with the Rear Push Tractor 1. Make sure the printer is turned off, the tractor is installed in the rear push position, and the paper guide is removed. (You may need to move the tractor from the front push or pull position.) 2. Set - Epson C11C524001 | User Manual - Page 22
lock it in place by pushing the blue lock lever down. 7. Attach the paper guide and lay it flat on the printer. Slide the edge guides to the middle of the paper guide. 8. Turn on the printer. When the printer receives data, it automatically loads the paper and starts printing. If the first line on - Epson C11C524001 | User Manual - Page 23
to match the width of your paper, but do not lock it. Slide the edge guides to the center. 5. Make sure your paper has a clean, straight edge. Then open the sprocket covers. Note: Make sure the printer is off before you insert the paper in the paper slot. If you insert the - Epson C11C524001 | User Manual - Page 24
or bottom paper slot as shown below until it emerges between the platen and the ribbon guide. Then pull up the paper until the perforation between the first and second pages is even with the top of the printer's ribbon. Front slot Before you load paper in the front slot, remove the front cover - Epson C11C524001 | User Manual - Page 25
tabs into the slots, then lowering the cover into place. Close the paper guide cover. 13. Send a print job to the printer. The printer starts printing from the top-of-form position. After you finish printing, open the paper guide cover and tear off the printed document at the perforation nearest the - Epson C11C524001 | User Manual - Page 26
ordinary single sheets and envelopes one at a time from the top of the printer using the paper guide. The paper can be up to 10.1 inches (257 mm) wide on the FX-890 and 16.5 inches (420 mm) wide on the FX-2190. To load single-sheet multipart forms, use the front paper entry slot - Epson C11C524001 | User Manual - Page 27
match the width of your paper. 4. Insert a sheet of paper with the printable side down between the edge guides until it meets resistance. The printer feeds the paper automatically and is ready to print. If the first printed line on your page appears too high or low, you can use - Epson C11C524001 | User Manual - Page 28
slot with the optional front paper guide or front sheet guide installed. Thick paper, such as multipart forms with five or six parts, requires a straight paper path to ❏ Do not leave labels loaded in the printer between jobs; they may curl around the platen and jam when you resume printing. 28 - Epson C11C524001 | User Manual - Page 29
paper path is curved, labels may come off their backing sheets inside the printer and cause a paper jam. ❏ Do not load paper that is curled envelopes, follow the instructions in "Loading Single Sheets with the Paper Guide" on page 26. To load multiple envelopes, see the Reference Guide. Note: ❏ Be - Epson C11C524001 | User Manual - Page 30
within the printable area of your envelope. See "Printer Specifications" in the Reference Guide for more information on the printable area of card, follow the instructions in "Loading Single Sheets with the Paper Guide" on page 26. To load multiple cards, see the Reference Guide. Note: ❏ When - Epson C11C524001 | User Manual - Page 31
button to advance the paper to the tear-off position. Make sure the Tear Off/Bin light is flashing (the paper is at the current tear-off position). 2. Hold down the Pause button for about three seconds. The Pause light begins flashing and the printer enters the Micro Adjust mode. Paper Handling 31 - Epson C11C524001 | User Manual - Page 32
3. Open the paper guide cover, then press the LF/FF D button to feed paper backward, or press the Load/Eject U button to feed paper forward, until the paper perforation is aligned with the tear-off edge of the printer cover. Tear-off edge of the printer cover Paper perforation Note: The printer has - Epson C11C524001 | User Manual - Page 33
Hold down the Pause button for three seconds. The Pause light flashes and the printer enters the Micro Adjust mode. 4. Press the LF/FF beyond these limits, the printer beeps and stops moving the paper. ❏ When the paper reaches the default top-of-form position, the printer beeps and stops moving the - Epson C11C524001 | User Manual - Page 34
34 Paper Handling - Epson C11C524001 | User Manual - Page 35
Selecting a font and pitch ❏ Changing the printer's default settings ❏ Emulating the Okidata Microline 320/321 Turbo printer Buttons and Lights Button/Light 1 Font (ItemD) button Font lights 2 Reset (Font and Pitch) buttons 3 Pitch (ItemU) button Pitch lights Function Selects one of the fonts. See - Epson C11C524001 | User Manual - Page 36
to select a value. Both flash when continuous paper is in the tear-off position. Both off when continuous paper is not in the tear-off position or when bin 1 of the optional cut-sheet feeder is selected. Both on when the printer is in default setting mode. Left light is on when Card mode - Epson C11C524001 | User Manual - Page 37
, 17, 20, PS 1. Make sure that the printer is not printing. Then press the Font button until the three Font lights indicate the desired font. NNO NON NOO ONN ONO USD O=On, N=Off 2. Press the Pitch button until the three Pitch lights indicate the desired pitch. NNO NON NOO ONN ONO OOO 10 cpi - Epson C11C524001 | User Manual - Page 38
are two ways to do this: ❏ Using the EPSON Remote Configuration Manager on the printer software CD-ROM. (See page 15.) ❏ From the printer's control panel using the default-setting mode. For instructions on using the Remote Configuration Manager, see the PDF manual on the CD-ROM. To use the control - Epson C11C524001 | User Manual - Page 39
. Then press the Menu buttons (ItemU and Set) until the printer beeps and both the Tear Off/Bin lights turn on. The printer enters default-setting mode and prints a line showing which language is currently selected for printing the instructions. The selected language is underlined. 2. If you want - Epson C11C524001 | User Manual - Page 40
, EPSON ESC/P, Oki ML 320T 0.5 second, 1 second, 2 seconds, Others 4.2 mm, 20 mm, 22 mm, 24 mm, Others 6 LPI, 8 LPI Off (No), On (Yes) Note: The FX-890 and FX-2190 do not support the USB interface in Okidata mode. If you want to use your printer in Okidata mode, do not install the Windows driver - Epson C11C524001 | User Manual - Page 41
a self test. For more troubleshooting information, see your Reference Guide. If you cannot resolve the problem using the information in the manuals, see "Where To Get Help" on page 44. Using the Error Indicators Use the following table to diagnose printer errors. Light status O Paper Out O Pause - Epson C11C524001 | User Manual - Page 42
of the printer to clear paper jams only when the printer is off. Otherwise, you may damage the printer or change the top-of-form or tear-off position. 5. Close the printer cover and turn on the printer. Make sure the Paper Out light is not flashing and the Pause light is off. 42 Troubleshooting - Epson C11C524001 | User Manual - Page 43
with the printer. See the Reference Guide for possible causes and solutions to the problem. You can print the self test using either single sheets or continuous paper of at least the following width: Paper type Continuous paper (including perforated border) Single sheet FX-890 9.5 inches (241 - Epson C11C524001 | User Manual - Page 44
name (EPSON FX-890 or FX-2190) ❏ Product serial number (located on the back of the printer) ❏ Proof of purchase (such as a store receipt) and date of purchase ❏ Computer configuration ❏ Description of the problem You can purchase ribbon cartridges, paper, manuals, and accessories from EPSON at - Epson C11C524001 | User Manual - Page 45
. Never touch those parts just after the printer has been used. Let them cool for a few minutes before touching them. Important Safety Instructions Read all of these safety instructions before using the printer. In addition, follow all warnings and instructions marked on the printer itself. ❏ Do not - Epson C11C524001 | User Manual - Page 46
printer does not operate normally or exhibits a distinct change in performance. ❏ Adjust only those controls that are covered by the operating instructions. ENERGY STAR Compliance As an ENERGY STAR® Partner, EPSON for a Class B digital device, pursuant to Part 15 of the FCC Rules. These limits are - Epson C11C524001 | User Manual - Page 47
(562) 276-4322 or (905) 709-2170 (Canada) for warranty repair instructions and return authorization, if required. EPSON will, at its option, repair or replace on an exchange basis the defective unit, without charge for parts or labor. When warranty service involves the exchange of the product or of - Epson C11C524001 | User Manual - Page 48
distributed or certified by Epson. This warranty does not cover ribbon or third party parts, components or peripheral devices added to the EPSON product after its shipment from EPSON, e.g., dealer-added boards or chips. EPSON is not responsible for warranty service should the EPSON label or logo or
-
 1
1 -
 2
2 -
 3
3 -
 4
4 -
 5
5 -
 6
6 -
 7
7 -
8
-
9
-
10
-
11
-
12
-
13
-
14
-
15
-
16
-
17
-
18
-
19
-
20
-
21
-
22
-
23
-
24
-
25
-
26
-
27
-
28
-
29
-
30
-
31
-
32
-
33
-
34
-
35
-
36
-
37
-
38
-
39
-
40
-
41
-
42
-
43
-
44
-
45
-
46
-
47
-
48
 |
 |

9-pin Dot Matrix Printer
®
User’s Guide
This manual is divided in two sections: English and Spanish. The
English section begins after this page. The Spanish section begins
approximately at the middle of the manual.
Este manual está dividido en dos secciones: Inglés y Español. El
manual en español comienza aproximadamente a la mitad del libro. El
manual en inglés comienza después de esta página.