Epson C11C640001 User's Guide
Epson C11C640001 - LX 300+II B/W Dot-matrix Printer Manual
 |
UPC - 010343858558
View all Epson C11C640001 manuals
Add to My Manuals
Save this manual to your list of manuals |
Epson C11C640001 manual content summary:
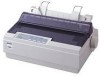
- Epson C11C640001 | User's Guide - Page 1
9-pin Dot Matrix Printer User's Guide - Epson C11C640001 | User's Guide - Page 2
or alterations to this product, or (excluding the U.S.) failure to strictly comply with Seiko Epson Corporation's operating and maintenance instructions. Seiko Epson Corporation shall not be liable for any damages or problems arising from the use of any options or any consumable products other than - Epson C11C640001 | User's Guide - Page 3
Contents Introduction Options 5 1 Setting Up the Printer Unpacking the Printer 7 Choosing a Place for the Printer 8 Assembling the Printer 8 Connecting the Printer 11 Installing the Printer Software 13 For DOS programs 14 Viewing the On-screen Reference Guide 14 2 Paper Handling Printing on - Epson C11C640001 | User's Guide - Page 4
a Built-in Font 35 Changing the Printer's Default Settings 36 Using Default Setting mode 37 4 Troubleshooting Using the Error Indicators 39 Clearing a Instructions 45 FCC Compliance Statement for United States Users 46 WARNING 47 For Canadian users 47 Declaration of Conformity 47 Epson - Epson C11C640001 | User's Guide - Page 5
, such as a cut-sheet feeder or roll paper holder, you can further expand your printer's capabilities. See the Reference Guide for more information. You can purchase ribbon cartridges, paper, manuals, and accessories from an Epson® authorized reseller. To find the nearest reseller, call 800-GO - Epson C11C640001 | User's Guide - Page 6
6 Introduction - Epson C11C640001 | User's Guide - Page 7
how to unpack and set up your printer. Unpacking the Printer Make sure you have the following items. Printer Knob Ribbon cartridge Paper guide Paper supports USB cable holder Printer software Carefully remove all the protective materials from the printer, as shown below, before you assemble - Epson C11C640001 | User's Guide - Page 8
cause voltage fluctuations. ❏ Use a grounded power outlet; do not use an adapter plug. Assembling the Printer 1. Make sure the printer is turned off and unplugged. 2. Insert the paper knob. 3. Attach the USB cable holder to the back of the printer as shown below, then lift it up. 8 Setting Up the - Epson C11C640001 | User's Guide - Page 9
aligning the notches on each side with the tabs on the printer. Then lift up the paper guide and push it into the printer slightly to lock it in place. 5. Attach the paper supports. 6. To install the ribbon cartridge, you need to remove the printer cover. First flip the cover open all the way and - Epson C11C640001 | User's Guide - Page 10
the print head to the middle of the printer, then insert the ribbon cartridge as shown below and make sure it clicks into place. Print head 9. Use a pencil point or similar object to guide the ribbon between the print head and the ribbon guide - Epson C11C640001 | User's Guide - Page 11
and close it. Connecting the Printer Attach the power cord and connect the printer to your computer as follows: 1. Connect the power cord to the printer and to a grounded electrical outlet. 2. Connect the printer to your computer using a USB, parallel, or serial interface cable, as shown on the - Epson C11C640001 | User's Guide - Page 12
holder. IEEE1284 (Parallel) Connect firmly and fasten the screw. RS-232C (Serial) Connect firmly. Connect firmly and fasten. Note: You can connect cables to multiple interfaces simultaneously; the printer switches automatically to the correct interface when it receives data. 12 Setting Up the - Epson C11C640001 | User's Guide - Page 13
software on the CD-ROM that came with your printer. The software includes the printer driver and Epson Status Monitor 3, which displays printer status information and notifies you of printer errors. Note: ❏ Installing the printer software may require administrator privileges. (Ask your administrator - Epson C11C640001 | User's Guide - Page 14
does not include the LX-300+II, choose the first available printer from the following list: LX-300+ LX-300 LX-810/850 LX-800/860 FX-850 FX-860/800 JX-80 EX-800 Any FX printer Epson printer Draft printer Viewing the On-screen Reference Guide To view the Reference Guide on your computer, do - Epson C11C640001 | User's Guide - Page 15
. (See "Printing with the pull tractor" on page 20 for instructions.) Printing with the push tractor Follow these steps to load continuous paper on the push tractor: 1. Turn off the printer. 2. Remove the printer cover and the paper guide, and pull the paper release lever forward to the continuous - Epson C11C640001 | User's Guide - Page 16
, but do not lock it. Move the paper support so it is midway between the sprockets. 6. Stack your continuous paper behind the printer. Make sure there are no obstructions between the paper and the printer, and that the paper is aligned squarely with the printer so it will feed in straight. 16 Paper - Epson C11C640001 | User's Guide - Page 17
by holding it horizontally and fitting its notches over the printer's mounting posts as shown below. Then slide the paper guide toward the front of the printer until you feel it click. 10. Replace the printer cover and close it. 11. Turn on the printer. 12. When using the push tractor, it is a good - Epson C11C640001 | User's Guide - Page 18
document: 1. Press the Tear Off (Font) button. The paper moves to the tear-off position and the Tear Off (Font) lights start flashing. 2. Open the printer cover, then tear off the printed document using the tear-off edge on the paper tension unit. Paper tension unit Note: If your paper's perforation - Epson C11C640001 | User's Guide - Page 19
paper release lever back to the single sheet position. 4. Follow the instructions on page 27 to load single sheets. To switch back to continuous paper steps: 1. Press the Load/Eject button to eject any sheet in the printer. 2. Move the paper release lever to the continuous paper position. 3. Press - Epson C11C640001 | User's Guide - Page 20
, as described below. If your tractor is already installed in this position, make sure the printer is turned off and skip to step 6. 1. Turn off the printer; then remove the printer cover and the paper guide. 2. Remove the paper tension unit by gently squeezing the lock tabs and pulling it out - Epson C11C640001 | User's Guide - Page 21
5. Lower the tractor onto the mounting slots at the top of the printer as shown below, and tilt it back until you feel it lock and pull it up. Position the paper using the scale on the printer as a guide. Printing starts to the right of the position marked 0 (under the paper now). Paper Handling 21 - Epson C11C640001 | User's Guide - Page 22
the width of your paper, but do not lock it. Move the paper supports midway between the two sprockets. 9. Make sure your paper has a clean, the paper guide. Hold it horizontally and fit its notches over the printer's mounting posts. Then slide the paper guide toward the back of the printer until you - Epson C11C640001 | User's Guide - Page 23
the paper may jam. (See page 36 for more information.) When the printer receives data, it begins printing automatically. If you want to change the position loading position. To eject the paper, tear off the paper entering the printer; then press the LF/FF button to feed the paper forward. Adjusting - Epson C11C640001 | User's Guide - Page 24
setting remains in effect until you change it, even if you turn off the printer. ❏ The top margin setting made in some software applications overrides the top-of-form to restore the printer's default top-of-form position, you can reset the printer. See page 37 for instructions. 24 Paper Handling - Epson C11C640001 | User's Guide - Page 25
documents. You can use the tear-off feature in two ways: ❏ Manually, by pressing the printer's Tear Off (Font) button ❏ Automatically, by turning on the Auto mode. For instructions, see "Changing the Printer's Default Settings" on page 36. When Auto tear off is on, the printer automatically advances - Epson C11C640001 | User's Guide - Page 26
has a minimum and a maximum tear-off position. If you try to adjust the tear-off position beyond these limits, the printer beeps and stops moving the paper. 5. After you set the tear-off position, press the Pause button to exit Micro Adjust mode. 6. Tear off the - Epson C11C640001 | User's Guide - Page 27
. (If you want to restore the printer's default tear-off position, you can reset the printer. See page 37 for instructions.) Printing on Single Sheets You can load single sheets of paper one at a time using the printer's paper guide. Before printing on single-sheet multipart forms, envelopes, or - Epson C11C640001 | User's Guide - Page 28
, as shown below. 3. Slide the left edge guide until it locks in place at the guide mark. Then adjust the right edge guide to match the width of your paper. 4. Insert a sheet of paper between the edge guides until it meets resistance. The printer automatically pulls it into the correct printing - Epson C11C640001 | User's Guide - Page 29
Printing on Special Paper With the LX-300+II, you can print on a wide variety of special paper types, including multipart forms, labels, of paper you're using. Follow these steps: 1. Turn off the printer. 2. Lift up or remove the printer cover. The paper thickness lever is on the left side of the - Epson C11C640001 | User's Guide - Page 30
line-glued only at the top. Insert the forms glued-edge-first into the printer. ❏ Make sure that multipart forms are not wrinkled. ❏ If you need may not align with the original. If this happens, raise the paper guide. For multipart forms, you should not print any closer than 0.5 inch (13 mm - Epson C11C640001 | User's Guide - Page 31
way you load ordinary continuous paper. See page 20 for loading instructions. ❏ Because labels are especially sensitive to temperature and humidity, use wide-edge-first, between the edge guides. Push it firmly and hold it until it feeds into the printer. ❏ Use envelopes only under normal - Epson C11C640001 | User's Guide - Page 32
32 Paper Handling - Epson C11C640001 | User's Guide - Page 33
and lights on the control panel let you: ❏ Adjust line and form feeding ❏ Load and eject paper ❏ Select a built-in font ❏ Change the printer's default settings Buttons and Lights 1 Tear Off (Font) lights Flash when continuous paper is in the tear-off position; otherwise, the lights indicate the - Epson C11C640001 | User's Guide - Page 34
or when paper is not loaded correctly. ❏ Flashes when paper has not been fully ejected or if paper is jammed in the printer. 7 Pause light ❏ On when the printer is paused. ❏ Flashes when the printer is in Micro Adjust mode. ❏ Flashes when the print head has overheated. 34 Using the Control Panel - Epson C11C640001 | User's Guide - Page 35
to use your application program to select the font you want to use in a document. However, you may sometimes need to select one of the printer's six built-in fonts using the buttons on the control panel, as described below. (The settings you make in application programs usually override settings you - Epson C11C640001 | User's Guide - Page 36
software or printer driver, you may sometimes need to change one or more of the printer's default settings from the printer's control panel using the Default Setting mode. The table below lists the settings and available options. For detailed descriptions, see your Reference Guide. Setting Page - Epson C11C640001 | User's Guide - Page 37
to exit Default Setting mode. If you want to change any settings, go to step 6. 6. Press the Tear Off (Font) button. The printer prints instructions for changing the settings. 7. Press the LF/FF button to scroll through the options for the selected setting until you see the one you want. - Epson C11C640001 | User's Guide - Page 38
38 Using the Control Panel - Epson C11C640001 | User's Guide - Page 39
test. For more troubleshooting information, see the Reference Guide. If you cannot resolve the problem using the information in the manuals, see "Where To No paper is loaded in the selected paper source. Load paper in the printer. Then press the Pause button to turn off the Pause light, if necessary - Epson C11C640001 | User's Guide - Page 40
turn on the printer again. If the error recurs, contact your dealer. n = on, f = flashing short series of beeps (three beeps long series of beeps (five beeps) Note: The printer beeps once if you press a control panel button when the corresponding function is not available. 40 Troubleshooting - Epson C11C640001 | User's Guide - Page 41
cable.) If the self test does not print properly, there is a problem with the printer. See the Reference Guide for possible solutions to the problem. You can print the self test using either single sheets or continuous paper. Use paper that is at least 8.25 inches (210 mm) wide. Troubleshooting - Epson C11C640001 | User's Guide - Page 42
holding down the LF/FF button. To run the test using the printer's near letter-quality font, hold down the Load/Eject button while you turn on the printer. (Either self test can help you determine the source of your printing problem, but the draft self test prints faster.) After a few seconds, the - Epson C11C640001 | User's Guide - Page 43
printer for solutions to common problems. You can download drivers and documentation, get FAQs and troubleshooting advice, or e-mail Epson with your questions. Speak to a support representative Before you call for support, please have the following information ready: ❏ Product name (Epson LX-300+II - Epson C11C640001 | User's Guide - Page 44
44 Troubleshooting - Epson C11C640001 | User's Guide - Page 45
has been used. Let them cool for a few minutes before touching them. Important Safety Instructions ❏ Do not place the printer on an unstable surface or near a radiator or heat source. ❏ Place the printer on a flat surface. It will not operate properly if it is tilted or placed at an angle. ❏ Do - Epson C11C640001 | User's Guide - Page 46
printer. ❏ Except as specifically explained in this guide, do not attempt to service the printer yourself. ❏ Unplug the printer and refer servicing to qualified service and, if not installed and used in accordance with the instructions, may cause harmful interference to radio or television reception. - Epson C11C640001 | User's Guide - Page 47
shielded equipment interface cable with this device. If this equipment has more than one interface connector, do not leave cables connected to unused and Power Supplies used with Class B Personal Computers: We: Located at: Epson America, Inc. MS 3-13 3840 Kilroy Airport Way Long Beach, CA 90806-2469 - Epson C11C640001 | User's Guide - Page 48
Epson Dot Matrix Printer P170B Epson America, Inc., Limited Warranty What Is Covered: Epson America, Inc., ("Epson") warrants to the original retail purchaser of the Epson of the limited warranty for the Epson product. For warranty service, you must provide proof of the date of original - Epson C11C640001 | User's Guide - Page 49
such as fire, flood, and lightning, improper electrical current, software problems, interaction with non-Epson products, or service other than by an Epson Authorized Servicer. If a claimed defect cannot be identified or reproduced in service, you will be held responsible for costs incurred. Product - Epson C11C640001 | User's Guide - Page 50
which vary from jurisdiction to jurisdiction. To find the Epson Authorized Reseller nearest you, visit our website at: www.epson.com. To find the Epson Customer Care Center nearest you, visit http://support.epson.com. You can also call the Epson ConnectionSM at (562) 276-4322 in the U.S. and (905
-
 1
1 -
 2
2 -
 3
3 -
 4
4 -
 5
5 -
 6
6 -
 7
7 -
8
-
9
-
10
-
11
-
12
-
13
-
14
-
15
-
16
-
17
-
18
-
19
-
20
-
21
-
22
-
23
-
24
-
25
-
26
-
27
-
28
-
29
-
30
-
31
-
32
-
33
-
34
-
35
-
36
-
37
-
38
-
39
-
40
-
41
-
42
-
43
-
44
-
45
-
46
-
47
-
48
-
49
-
50
 |
 |

9-pin Dot Matrix Printer
User’s Guide