Epson C11CA49201 Quick Guide
Epson C11CA49201 - WorkForce 310 Color Inkjet Manual
 |
UPC - 010343871762
View all Epson C11CA49201 manuals
Add to My Manuals
Save this manual to your list of manuals |
Epson C11CA49201 manual content summary:
- Epson C11CA49201 | Quick Guide - Page 1
Epson WorkForce® 310 Series Quick Guide Installing on a Network Basic Printing, Copying, Scanning, and Faxing Maintaining Your All-in-One Solving Problems - Epson C11CA49201 | Quick Guide - Page 2
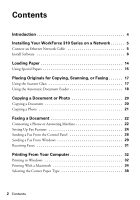
Contents Introduction 4 Installing Your WorkForce 310 Series on a Network 5 Connect an Ethernet Network Cable 5 Install Software 6 Loading Paper 14 Using Special Papers 15 Placing Originals for Copying, Scanning, or Faxing 17 Using the Scanner Glass 17 Using the Automatic Document Feeder 18 - Epson C11CA49201 | Quick Guide - Page 3
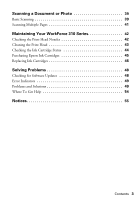
a Document or Photo 39 Basic Scanning 39 Scanning Multiple Pages 41 Maintaining Your WorkForce 310 Series 42 Checking the Print Head Nozzles 42 Cleaning the Print Head 43 Checking the Ink Cartridge Status 44 Purchasing Epson Ink Cartridges 45 Replacing Ink Cartridges 46 Solving Problems 48 - Epson C11CA49201 | Quick Guide - Page 4
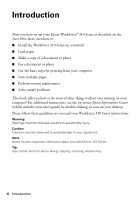
After you have set up your Epson WorkForce® 310 Series as described on the Start Here sheet, turn here to: ■ Install the WorkForce 310 Series on a network ■ Load paper ■ Make a copy of a document or photo ■ Fax a document or photo ■ Get the basic steps for printing from your computer ■ Scan multiple - Epson C11CA49201 | Quick Guide - Page 5
Follow the steps in this chapter to connect the WorkForce 310 Series to your network. After you have connected the printer to your network, you need to install the WorkForce 310 Series software on each computer you would like to print from. Connect an Ethernet Network Cable 1. Connect an Ethernet - Epson C11CA49201 | Quick Guide - Page 6
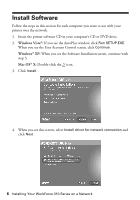
Insert the printer software CD in your computer's CD or DVD drive. 2. Windows Vista®: If you see the AutoPlay window, click Run SETUP.EXE. When you see the User Account Control screen, click Continue. Windows® XP: When you see the Software Installation screen, continue with step 3. Mac OS® X: Double - Epson C11CA49201 | Quick Guide - Page 7
printer is turned on and connected to your network as described on page 5. 7. When you see the Firewall Warning screen, click Next. Note: If you see a firewall alert message click Unblock or Allow to let EpsonNet Setup continue. Do not select Ask Me Later, Keep Blocking, or Block. Install Software - Epson C11CA49201 | Quick Guide - Page 8
8. Wait while EpsonNet Setup configures your printer on the network. 9. Do one of the following: ■ If you see the Installation Complete screen, continue with "Finish the Installation" on page 10. 8 Installing Your WorkForce 310 Series on a Network - Epson C11CA49201 | Quick Guide - Page 9
network, follow the instructions on the screen and click Next. ■ If EpsonNet Setup finds more than one printer on your network, select the printer you want to configure, then click Next. When you see the Installation Complete screen, continue with "Finish the Installation" below. Install Software 9 - Epson C11CA49201 | Quick Guide - Page 10
Finish the Installation Follow the steps for your operating system: ■ "Windows" below ■ "Macintosh" on page 12 Windows 1. Print a test page, then click Finish. 10 Installing Your WorkForce 310 Series on a Network - Epson C11CA49201 | Quick Guide - Page 11
to set up your Fax Header information. 4. Follow the prompts on the screen to install bonus software and finish the installation. 5. When installation is complete, restart your computer. You're ready to scan and print. See your printed documentation and on-screen Epson Information Center for details - Epson C11CA49201 | Quick Guide - Page 12
When you see this screen, click Add Printer. 3. Follow the steps on the right side of the screen to add your EPSON TCPIP printer, then click Next. Note: It may take up to 90 seconds for your computer to find the EPSON TCPIP printer on the network. 12 Installing Your WorkForce 310 Series on a Network - Epson C11CA49201 | Quick Guide - Page 13
Follow the prompts on the screen to print a test page, install bonus software, and finish the installation. 5. When installation is complete, restart your computer. You're ready to scan and print. See your printed documentation and on-screen Epson Information Center for details. Install Software 13 - Epson C11CA49201 | Quick Guide - Page 14
Loading Paper You can print documents and photos on a variety of paper types and sizes. For details, see page 15. 1. Open the paper support and pull up the extensions. Then pull out the output tray extensions, and raise the paper stopper. 2. Squeeze the edge guide and slide it left. Note: If the - Epson C11CA49201 | Quick Guide - Page 15
making a copy or printing a rough draft, plain paper is fine. However, for the best results, you'll want to use one of Epson's special ink jet papers designed for your printer. For example, your photos will look great printed on Epson Premium Photo Paper Glossy (see "Using Special Papers" for more - Epson C11CA49201 | Quick Guide - Page 16
Paper name Epson Premium Presentation Paper Matte Epson Premium Presentation Paper Matte Double-sided Epson Premium Photo Paper Glossy Epson Ultra Premium Photo Paper Glossy Epson Premium Photo Paper Semi-gloss Epson Photo Paper Glossy Size Borderless 8 × 10 inches Letter (8.5 × 11 inches) Letter - Epson C11CA49201 | Quick Guide - Page 17
Placing Originals for Copying, Scanning, or Faxing Before you copy, scan, or fax, place your documents or photos on the scanner glass (below) or in the Automatic Document Feeder (see page 18). Using the Scanner Glass You can place a photo or a document up to letter-size (or A4-size) on the scanner - Epson C11CA49201 | Quick Guide - Page 18
-size (or A4) sheets or 10 legal-size sheets in the Automatic Document Feeder (ADF). 1. Fan the originals, then tap them on a flat surface to even the edges. 2. Open the ADF paper support. 3. Slide the edge guide outward. 4. Insert the originals face-up. 18 Placing Originals for Copying, Scanning - Epson C11CA49201 | Quick Guide - Page 19
not too tightly. Note: When you use the Copy function, letter-size paper is automatically selected for your printed copies. If you copy a legal-size document, the image will be cut off. To copy a legal-size document on letter-size paper, press x Menu, select Reduce/Enlarge, then press OK. Press u or - Epson C11CA49201 | Quick Guide - Page 20
r Copy button. 4. Press u or d or use the numeric keypad to select the number of copies you want (up to 99). 5. To change the layout, press x Menu, then press OK. Press u or d to select a layout setting, then press OK. Note: You cannot print borderless on plain paper. 20 Copying a Document or Photo - Epson C11CA49201 | Quick Guide - Page 21
image or Borderless to expand the image all the way to the edge of the paper (slight cropping may occur), then press OK. 6. To change any other print settings, press u or d to select the setting you want to change, then press OK. Press u or d to select an option, then press OK. 7. When you're - Epson C11CA49201 | Quick Guide - Page 22
WorkForce 310 Series lets you send faxes by entering fax numbers, selecting entries from a speed dial list, or using the one-touch dial buttons. Using the Automatic Document Feeder, you can fax up to 30 pages at a time. Note: In Windows, you can also send a fax from your computer using the Epson FAX - Epson C11CA49201 | Quick Guide - Page 23
. Connect one end of the cable to the telephone or answering machine, and connect the other end to the EXT. port on the back of the WorkForce 310 Series to the EXT. port for the WorkForce 310 Series to detect an incoming fax call when a phone is picked up. If a fax call comes in, and you pick - Epson C11CA49201 | Quick Guide - Page 24
Setting Up Fax Features Before sending faxes, you should create a fax header and select your fax preferences. Note: To change other settings, print fax reports, or set up fax features using the Epson FAX Utility (Windows only), see the on-screen Epson Information Center. Entering Fax Header - Epson C11CA49201 | Quick Guide - Page 25
Function Moves the cursor to the left or right. Inserts a space and moves the cursor one character to the right. Deletes a character and moves the cursor one space to the left. ■ To enter a fax number, use the numeric keypad. Press Redial/Pause to insert a pause symbol (-) when a brief pause - Epson C11CA49201 | Quick Guide - Page 26
faxes, select the paper size loaded in your WorkForce 310 Series, select the size at which faxes are printed, and choose the printed reports you want. 1. Press the K Fax button, then press x Menu. 2. Press u or d to select Fax Setting, then press OK. 3. Press u or d to select Scan & Print Setup - Epson C11CA49201 | Quick Guide - Page 27
add names to identify the recipients, and print a list for easy reference (see page 27). Creating a Speed Dial List 1. Press the K Fax button, then press x Menu. 2. Press u or d to select Fax Setting, then press OK. 3. Press u or d to select Speed Dial Setup, then press OK. 4. Press u or d to select - Epson C11CA49201 | Quick Guide - Page 28
1 to continue. If you do not need to fax another page, press 2. Your document is faxed. ■ If the fax number is busy, you see a redialing message and the WorkForce 310 Series redials after one minute. To redial immediately, press Redial/Pause. To cancel faxing, press y Stop/Clear Settings at any time - Epson C11CA49201 | Quick Guide - Page 29
■ Press a one-touch dial button to select one of the first fax. Sending a Fax From Windows 1. Open the file you want to fax, open the File menu, and select Print. Select EPSON WorkForce 310 Series (FAX) Click here select fax print settings Select print settings as necessary Sending a Fax From Windows - Epson C11CA49201 | Quick Guide - Page 30
2. Select EPSON WorkForce 310 Series (FAX). 3. To change the Paper Size, Orientation, Color, Image Quality, or Character Density settings, click the Preferences or Properties button. Note: If you see a Setup, Printer, or Options button, click it. Then click Preferences or Properties on the next - Epson C11CA49201 | Quick Guide - Page 31
printing, you see the error message Paper out. Load more paper and press the OK button to continue. To receive faxes automatically, make sure the Auto Answer light is turned on. To turn it on, press the Auto Answer/Space button, then press OK. Note: To change the number of rings before the WorkForce - Epson C11CA49201 | Quick Guide - Page 32
the basic steps for printing a photo or document stored on your Windows or Macintosh computer. For detailed instructions on printing, see the on-screen Epson Information Center. Before you start, make sure you've installed your printer software and connected the WorkForce 310 Series to your - Epson C11CA49201 | Quick Guide - Page 33
the type of document you're printing (choose Photo or Best Photo for pictures) Select your paper Type Select your paper Size Click here for borderless photos Select your document or photo Orientation Tip: For quick access to the most common settings, click the Shortcuts tab and select one of the - Epson C11CA49201 | Quick Guide - Page 34
of your print job. Check ink cartridge status Cancel printing Printing With a Macintosh See the section below for your operating system. Mac OS ® X 10.5 1. Open a photo or document in an application, open the File menu, and select Print. 2. Select your Epson printer as the Printer setting. Select - Epson C11CA49201 | Quick Guide - Page 35
, choose a Paper Size setting with a Sheet Feeder - Borderless option. Note: If the setting you want isn't shown (for example, Scale), check for it in your application before printing. Or check for it in the settings for your application at the bottom of this window. (If you're printing from Preview - Epson C11CA49201 | Quick Guide - Page 36
job Mac OS X 10.3 to 10.4 1. Open a photo or document in an application, open the File menu, and select Page Setup. 2. Select the following basic page settings. For borderless printing, choose a Sheet Feeder - Borderless option in the Paper Size list. Select your Epson printer Select your Paper Size - Epson C11CA49201 | Quick Guide - Page 37
before you can select Print Settings. For more information about printer settings, click the ? button. 6. Choose any other printing options you may need from the pop-up menu. See the on-screen Epson Information Center for details. 7. Click the Advanced button to change additional settings. Note: For - Epson C11CA49201 | Quick Guide - Page 38
the print job Selecting the Correct Paper Type Select the correct Type (see page 33) or Media Type (see page 37) setting in your printer software so the ink coverage can be adjusted accordingly. For this paper/media Plain paper Epson Bright White Paper Epson Presentation Paper Matte Epson Ultra - Epson C11CA49201 | Quick Guide - Page 39
or Photo You can use your Epson WorkForce 310 Series to scan original documents and photos and save them as digital files on your computer or other device. The Epson Scan software provides three scanning modes: ■ Office Mode previews your image and scans text documents quickly. ■ Home Mode previews - Epson C11CA49201 | Quick Guide - Page 40
use it. (You can change the scan mode using the Mode selector in the upper right corner.) Click here to change the scan mode Note: You cannot use Home mode to scan with the Automatic Document Feeder. 5. Click Scan. The image is scanned and you see its icon in Windows Explorer or Macintosh Finder - Epson C11CA49201 | Quick Guide - Page 41
Document Feeder) as the Document Source setting. 6. Select the Size of the originals. 7. Select the scanning Resolution based on how you will use the scanned image: ■ E-mail, view on a computer screen, or post on the web: 96 to 150 dpi ■ Print or convert to editable text (OCR): 300 dpi ■ Fax - Epson C11CA49201 | Quick Guide - Page 42
Maintaining Your WorkForce 310 Series Follow the instructions in this chapter for checking and cleaning the print head nozzles and replacing ink cartridges. To align the print head, if necessary, see your on-screen Epson Information Center. Checking the Print Head Nozzles If your printouts are faint - Epson C11CA49201 | Quick Guide - Page 43
and wait at least six hours to let any dried ink soften. Then try printing again. If quality does not improve, one of the ink cartridges may need to be replaced. If that doesn't help, contact Epson as described on page 54. If you do not use your WorkForce 310 Series often, it is a good idea to - Epson C11CA49201 | Quick Guide - Page 44
can check the ink cartridge status anytime using the WorkForce 310 Series display screen. To check the ink cartridge status with your Windows or Macintosh software, see the instructions in your on-screen Epson Information Center. Note: You cannot print or copy when an ink cartridge is expended even - Epson C11CA49201 | Quick Guide - Page 45
based on images printed, print settings, paper type, frequency of use, and temperature. For print quality, a small amount of ink remains in the cartridge after the "replace cartridge" indicator comes on. The printer ships with full cartridges and part of the ink from the first cartridges is used for - Epson C11CA49201 | Quick Guide - Page 46
you are ready to install the ink. Cartridges are vacuum packed to maintain reliability. Leave the expended cartridge(s) installed until you have obtained a replacement, or the ink remaining in the print head nozzles may dry out. 1. Turn on the WorkForce 310 Series. If an ink cartridge is low or - Epson C11CA49201 | Quick Guide - Page 47
finished. Caution: Never turn off the WorkForce 310 Series while ink is charging, or you'll waste ink. If you see an ink replacement message on the display screen, press OK, then press down all the cartridges securely. If you remove a low or expended ink cartridge, you cannot reinstall and use the - Epson C11CA49201 | Quick Guide - Page 48
your Epson WorkForce 310 Series software. Open your on-screen Epson Information Center and select Download the Latest Software or visit Epson's support website at epson.com/support (U.S.) or epson.ca/support (Canada). With Windows, you can select Driver Update on the Maintenance tab in the printer - Epson C11CA49201 | Quick Guide - Page 49
and Epson support is required to continue printing. The printer's ink pads are at Contact Epson to replace ink pads (see page 54). the end of their service life. Please contact Epson Support. Problems and Solutions Check the solutions below if you're having trouble using your WorkForce 310 - Epson C11CA49201 | Quick Guide - Page 50
-size document, your image will be cropped. ■ Make sure your original is positioned against the back left corner of the scanner glass. If the edges are cropped, move your original away from the edges slightly. Paper Feeding Problems If paper doesn't feed correctly when printing, remove the paper and - Epson C11CA49201 | Quick Guide - Page 51
and hear a fax tone and the call disconnects when you hang up, make sure there is a phone or answering machine connected to the EXT. port on the WorkForce 310 Series. Print Quality Problems ■ For the best print quality, use Epson papers (see page 15) and genuine Epson ink cartridges (see page 46 - Epson C11CA49201 | Quick Guide - Page 52
and reinsert the CD to reinstall the printer software. The printer does not appear in the Add Printer window (Mac OS X) Make sure the printer driver was installed correctly and that your computer's TCP/IP settings are configured correctly. Network Printing Problems Cannot print over the network - Epson C11CA49201 | Quick Guide - Page 53
printer off and back on, and then try restarting Epson Scan. Check the Timeout Setting in EPSON Scan Settings. For details, see the Epson Scan Help. ■ If you are scanning a large document at high resolution, a communication error may occur. If the scan did not complete, lower the resolution. Print - Epson C11CA49201 | Quick Guide - Page 54
to common problems. You can download drivers and documentation, get FAQs and troubleshooting advice, or e-mail Epson with your questions. Speak to a Support Representative Before you call Epson for support, please have the following information ready: ■ Product name (Epson WorkForce 310 Series - Epson C11CA49201 | Quick Guide - Page 55
Instructions Before using your WorkForce 310 Series, read and follow these safety instructions: ■ Be sure to follow all warnings and instructions before unplugging the printer or cutting off ink may leak from the cartridges. ■ Avoid placing the product in locations that are subject to rapid changes - Epson C11CA49201 | Quick Guide - Page 56
still have discomfort or vision problems, see a doctor immediately. ■ Do not put your hand inside the product or touch any cartridges during printing. ■ Install a new ink cartridge immediately after removing an expended one. Leaving cartridges uninstalled can dry out the print head and may prevent - Epson C11CA49201 | Quick Guide - Page 57
Canada, will be free from defects in workmanship and materials for a period of one (1) year from the date of original purchase. For warranty service, you must provide proof of the date of original purchase. What Epson Will Do To Correct Problems: Should your Epson printer prove defective during the - Epson C11CA49201 | Quick Guide - Page 58
any color change or fading of prints or reimbursement of materials or services required for reprinting. This warranty does not cover damage to the Epson product caused by parts or supplies not manufactured, distributed or certified by Epson. This warranty does not cover ribbons, ink cartridges or - Epson C11CA49201 | Quick Guide - Page 59
website at: http://www.epson.com. To find the Epson Customer Care Center nearest you, visit http://www.epson.com/support. You can also write to: Epson America, Inc., P.O. that may cause undesired operation. Trade Name: Epson Type of Product: Multifunction printer Model: C362B Notices 59 - Epson C11CA49201 | Quick Guide - Page 60
but not all areas, the sum of the RENs of all devices connected to one line should not exceed five (5.0). To be certain of the number of devices service. This product is not intended to be repaired. If you experience trouble with this equipment, please contact: Name: Address: Telephone: Epson - Epson C11CA49201 | Quick Guide - Page 61
fax machine, follow the instructions in "Entering Fax Header Information" on page 24. According to the FCC's electrical safety advisory, we recommend that you may install nationwide problem. If your home has specially wired alarm equipment connected to the telephone line, ensure the installation of - Epson C11CA49201 | Quick Guide - Page 62
to obtain and use a shielded equipment interface cable with this device. If this equipment has more than one interface connector, do not leave cables connected to unused interfaces. Changes or modifications not expressly approved by the manufacturer could void the user's authority to operate the - Epson C11CA49201 | Quick Guide - Page 63
with Seiko Epson Corporation's operating and maintenance instructions. Seiko Epson Corporation shall not be liable for any damages or problems arising from is a service mark of Seiko Epson Corporation. WorkForce is a registered trademark and Epson Connection is a service mark of Epson America, Inc - Epson C11CA49201 | Quick Guide - Page 64
CPD-27342R1 Printed in XXXXXX
-
 1
1 -
 2
2 -
 3
3 -
 4
4 -
 5
5 -
 6
6 -
 7
7 -
8
-
9
-
10
-
11
-
12
-
13
-
14
-
15
-
16
-
17
-
18
-
19
-
20
-
21
-
22
-
23
-
24
-
25
-
26
-
27
-
28
-
29
-
30
-
31
-
32
-
33
-
34
-
35
-
36
-
37
-
38
-
39
-
40
-
41
-
42
-
43
-
44
-
45
-
46
-
47
-
48
-
49
-
50
-
51
-
52
-
53
-
54
-
55
-
56
-
57
-
58
-
59
-
60
-
61
-
62
-
63
-
64
 |
 |

Epson WorkForce
310 Series
Quick Guide
Installing on a Network
Basic Printing, Copying, Scanning, and Faxing
Maintaining Your All-in-One
Solving Problems
®