Epson C31CA85090 Software User Guide - Page 112
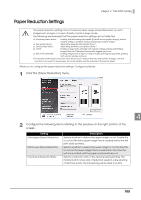
Extra Upper Space, Bottom Logo
 |
View all Epson C31CA85090 manuals
Add to My Manuals
Save this manual to your list of manuals |
Page 112 highlights
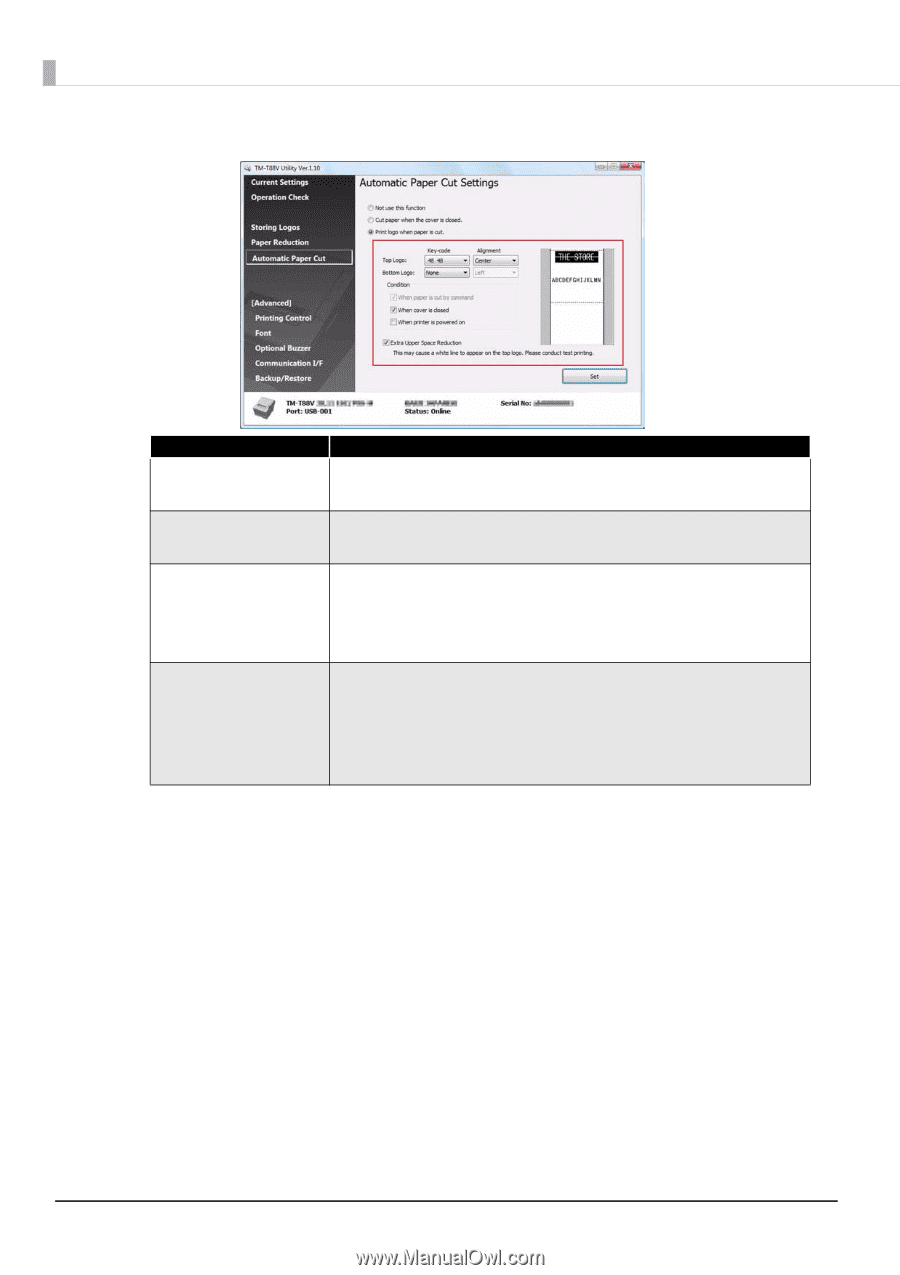
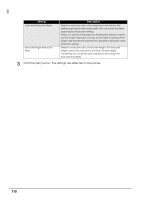
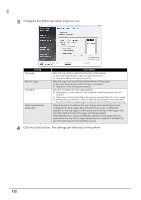
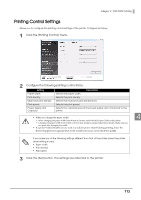
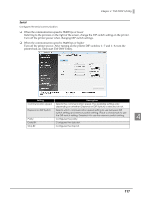
3 Configure the [Print logo when paper is cut.]. Setting Top Logo Bottom Logo Condition Extra Upper Space Reduction: Description Sets the logo that is printed at the top of the paper. ❏ Key-code: Selects the Key-code of the logo to be printed. ❏ Alignment: Selects the logo print position. Sets the logo that is printed at the bottom of the paper. ❏ Key-code: Selects the Key-code of the logo to be printed. ❏ Alignment: Selects the logo print position. Sets the condition for top logo printing. ❏ When paper is cut by command: The checkmark cannot be removed from this checkbox. ❏ When cover is closed: Sets whether the top logo is printed when the cover is closed. ❏ When printer is powered on: When you select this, the printer is reset every time the printer setting is changed, paper is automatically cut and [Top Logo] is printed. Selects whether to reduce the top margin when printing the logo configured at [Top Logo]. Selecting this may cause a white line appear on the top logo (13 mm away from the top of the logo). Run the Test Printing to see if the logo is printed properly. Selecting this may cause a white line appear on the logo (13 mm away from the top of the logo). Make sure to conduct a test print to see if the print result is acceptable for you. 4 Click the [Set] button. The settings are reflected to the printer. 112
-
 1
1 -
2
-
3
-
4
-
5
-
6
-
7
-
8
-
9
-
10
-
11
-
12
-
13
-
14
-
15
-
16
-
17
-
18
-
19
-
20
-
21
-
22
-
23
-
24
-
25
-
26
-
27
-
28
-
29
-
30
-
31
-
32
-
33
-
34
-
35
-
36
-
37
-
38
-
39
-
40
-
41
-
42
-
43
-
44
-
45
-
46
-
47
-
48
-
49
-
50
-
51
-
52
-
53
-
54
-
55
-
56
-
57
-
58
-
59
-
60
-
61
-
62
-
63
-
64
-
65
-
66
-
67
-
68
-
69
-
70
-
71
-
72
-
73
-
74
-
75
-
76
-
77
-
78
-
79
-
80
-
81
-
82
-
83
-
84
-
85
-
86
-
87
-
88
-
89
-
90
-
91
-
92
-
93
-
94
-
95
-
96
-
97
-
98
-
99
-
100
-
101
-
102
-
103
-
104
-
105
-
106
-
 107
107 -
 108
108 -
 109
109 -
 110
110 -
 111
111 -
 112
112 -
 113
113 -
 114
114 -
 115
115 -
 116
116 -
 117
117 -
118
-
119
-
120
-
121
-
122
-
123
-
124
-
125
-
126
-
127
-
128
 |
 |