Epson C31CA85090 Software User Guide - Page 57
Replacing TM-T88III/IV with TM-T88V, Setting Advanced Printer Driver Ver.4.00 to 4.04
 |
View all Epson C31CA85090 manuals
Add to My Manuals
Save this manual to your list of manuals |
Page 57 highlights
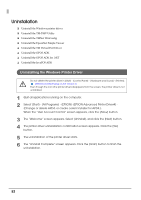
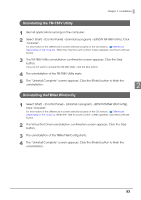
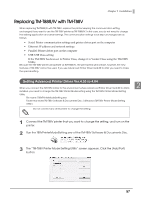
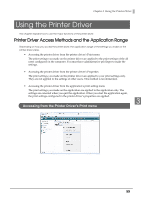
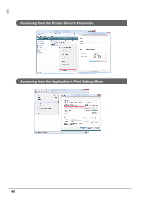
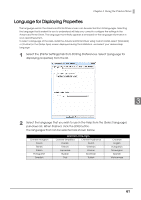
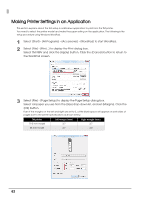
Chapter 2 Installation Replacing TM-T88III/IV with TM-T88V When replacing TM-T88III/IV with TM-T88V, replace the printer keeping the communication setting unchanged if you want to use the TM-T88V printer as TM-T88III/IV. In this case, you do not need to change the existing application and driver settings. The communication settings to be kept unchanged are as follows. • Serial: Printer communication settings and printer driver port on the computer • Ethernet: IP address and network settings • Parallel: Printer driver port on the computer • USB: USB Class setting If the TM‐T88V has been set to Printer Class, change it to Vender Class using the TM‐T88V Utility. Because the TM-T88V printer will operate as TM-T88III/IV, the print speed will increase, however, the new features of TM-T88V cannot be used. If you use Advanced Printer Driver Ver.4.00 to 4.04, you need to make the special setting. Setting Advanced Printer Driver Ver.4.00 to 4.04 2 When you connect the TM-T88V printer to the environment where Advanced Printer Driver Ver.4.00 to 4.04 is installed, you need to change the TM-T88V Printer Model setting using the TM-T88V Printer Model Setting Utility. File name: T88VPrinterModelSetting.exe Folder that stores TM-T88V Software & Documents Disc: \Windows\TM-T88V Printer Model Setting Utility\ Do not connect any other printer to change the setting. 1 Connect the TM-T88V printer that you want to change the setting, and turn on the printer. 2 Run the T88VPrinterModelSetting.exe of the TM-T88V Software & Documents Disc. 3 The "TM-T88V Printer Model Setting Utility" screen appears. Click the [Add Port] button. 57
-
 1
1 -
2
-
3
-
4
-
5
-
6
-
7
-
8
-
9
-
10
-
11
-
12
-
13
-
14
-
15
-
16
-
17
-
18
-
19
-
20
-
21
-
22
-
23
-
24
-
25
-
26
-
27
-
28
-
29
-
30
-
31
-
32
-
33
-
34
-
35
-
36
-
37
-
38
-
39
-
40
-
41
-
42
-
43
-
44
-
45
-
46
-
47
-
48
-
49
-
50
-
51
-
 52
52 -
 53
53 -
 54
54 -
 55
55 -
 56
56 -
 57
57 -
 58
58 -
 59
59 -
 60
60 -
 61
61 -
 62
62 -
63
-
64
-
65
-
66
-
67
-
68
-
69
-
70
-
71
-
72
-
73
-
74
-
75
-
76
-
77
-
78
-
79
-
80
-
81
-
82
-
83
-
84
-
85
-
86
-
87
-
88
-
89
-
90
-
91
-
92
-
93
-
94
-
95
-
96
-
97
-
98
-
99
-
100
-
101
-
102
-
103
-
104
-
105
-
106
-
107
-
108
-
109
-
110
-
111
-
112
-
113
-
114
-
115
-
116
-
117
-
118
-
119
-
120
-
121
-
122
-
123
-
124
-
125
-
126
-
127
-
128
 |
 |