Epson C31CA85090 Software User Guide - Page 80
Printing a 2D Code, Setting 2D Code Fonts
 |
View all Epson C31CA85090 manuals
Add to My Manuals
Save this manual to your list of manuals |
Page 80 highlights
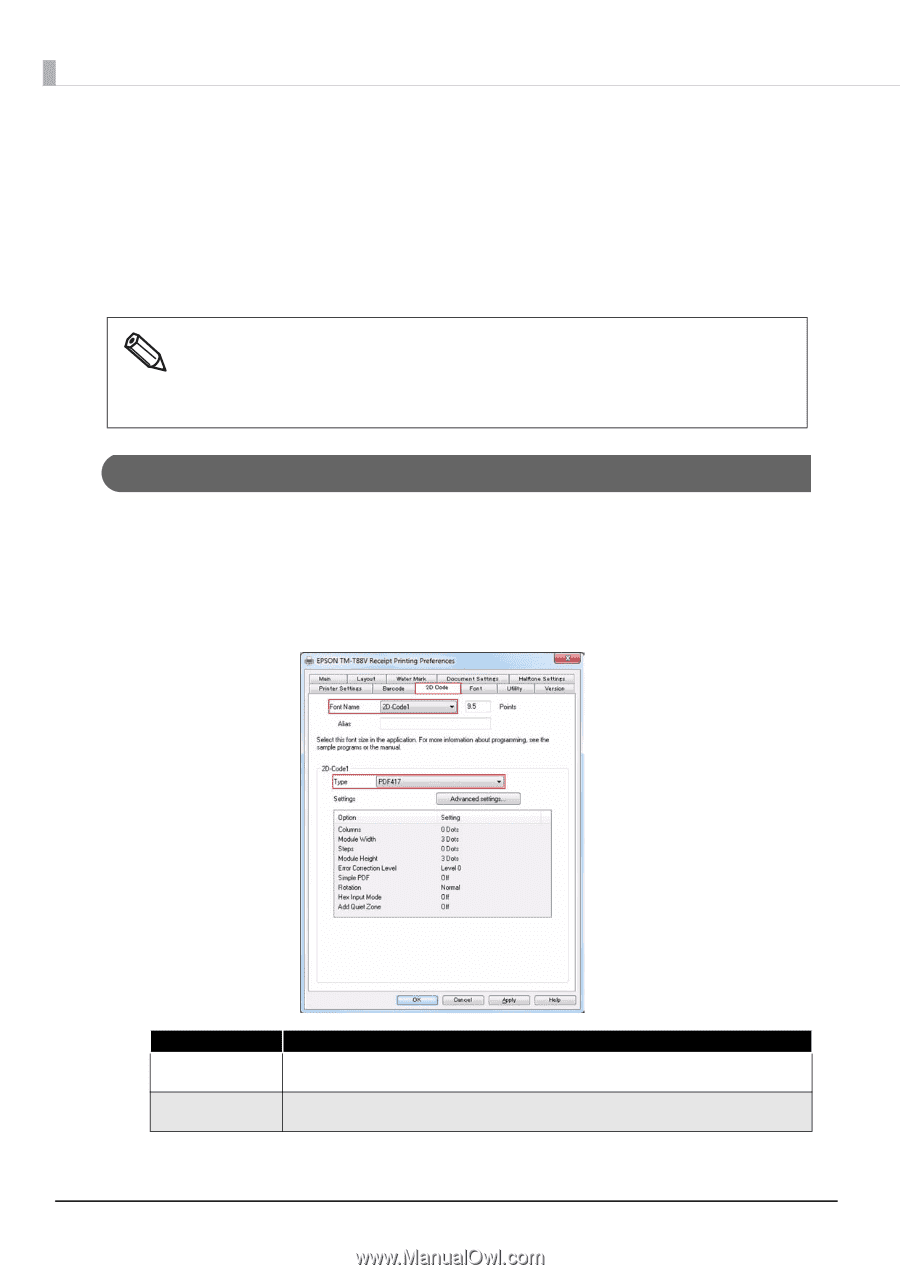
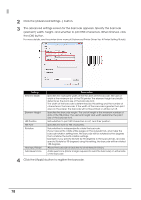
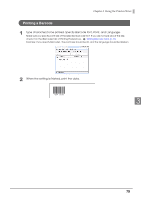
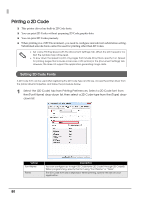
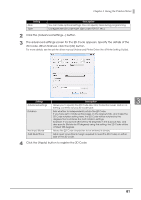
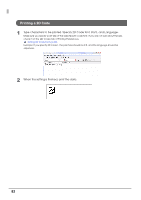
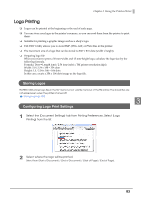
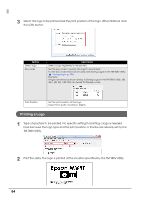
Printing a 2D Code ❏ This printer driver has built‐in 2D Code fonts. ❏ You can print 2D Codes without preparing 2D Code graphic data. ❏ You can print 2D Codes precisely. ❏ When printing in a .NET Environment, you need to configure unicode font substitution setting. Substituted unicode fonts cannot be used for printing other than 2D Codes. Set a slow Printing Speed with the [Document Settings] tab. When the print speed is too fast, the symbols may not be read. To slow down the speed to print only pages that include 2D symbols, specify it on [Speed for printing pages that include a barcode or 2D symbol] in the [Document Settings] tab. However, this does not support the application generating image data. Setting 2D Code Fonts A 2D Code font can be used after registering the 2D Code type and its size. Access the printer driver from the printer driver's Properties, and follow the procedure below. 1 Select the [2D Code] tab from Printing Preferences. Select a 2D Code font from the [Font Name] drop-down list, then select a 2D Code type from the [Type] dropdown list. Setting Font Name Points Description You can configure up to eight 2D Code fonts (2D Code1 through 2D Code8) When programming, specify the font using "Font Name" or "Alias". The 2D Code font size is displayed. When printing, specify this size on your application. 80
-
 1
1 -
2
-
3
-
4
-
5
-
6
-
7
-
8
-
9
-
10
-
11
-
12
-
13
-
14
-
15
-
16
-
17
-
18
-
19
-
20
-
21
-
22
-
23
-
24
-
25
-
26
-
27
-
28
-
29
-
30
-
31
-
32
-
33
-
34
-
35
-
36
-
37
-
38
-
39
-
40
-
41
-
42
-
43
-
44
-
45
-
46
-
47
-
48
-
49
-
50
-
51
-
52
-
53
-
54
-
55
-
56
-
57
-
58
-
59
-
60
-
61
-
62
-
63
-
64
-
65
-
66
-
67
-
68
-
69
-
70
-
71
-
72
-
73
-
74
-
 75
75 -
 76
76 -
 77
77 -
 78
78 -
 79
79 -
 80
80 -
 81
81 -
 82
82 -
 83
83 -
 84
84 -
 85
85 -
86
-
87
-
88
-
89
-
90
-
91
-
92
-
93
-
94
-
95
-
96
-
97
-
98
-
99
-
100
-
101
-
102
-
103
-
104
-
105
-
106
-
107
-
108
-
109
-
110
-
111
-
112
-
113
-
114
-
115
-
116
-
117
-
118
-
119
-
120
-
121
-
122
-
123
-
124
-
125
-
126
-
127
-
128
 |
 |