Epson CX7000F Product Information Guide
Epson CX7000F - Stylus Color Inkjet Manual
 |
UPC - 010343861244
View all Epson CX7000F manuals
Add to My Manuals
Save this manual to your list of manuals |
Epson CX7000F manual content summary:
- Epson CX7000F | Product Information Guide - Page 1
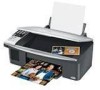
CX7000F Series Epson Stylus CX7000F Series Parts Left edge guide Memory card cover Paper support extension Paper support Feeder guard USB connector (camera only) Document cover Document table Memory card slots Output tray and extension Control panel (button and lights Scanner Ink cartridges - Epson CX7000F | Product Information Guide - Page 2
Epson Stylus CX7000F Series Specifications Printing Printing method On-demand ink jet Nozzle configuration Black: 90 nozzles Color: 270 nozzles (90 each cartridge: cyan, magenta, yellow) Print direction Bidirectional with logic seeking Ink Cartridges Color Cyan, magenta, yellow, black - Epson CX7000F | Product Information Guide - Page 3
Scanner type Photoelectric device Effective pixels Document size Scanning resolution Output resolution Scanning speed Image data Interface Light source Flatbed (maximum) One USB port support closed) Weight 15.2 lb (6.9 kg) without the ink cartridges condensation) Epson Stylus CX7000F Series USB - Epson CX7000F | Product Information Guide - Page 4
Epson Stylus CX7000F Series Paper 1. Open the paper support and slide out the one of Epson's special ink jet papers designed for your printer. For example, your photos will look great printed on Epson Ultra Premium Photo Paper Glossy (see page 1 for more information). 5. Slide the left edge guide - Epson CX7000F | Product Information Guide - Page 5
the printer top edge first. ❏ If you experience paper feeding problems, try loading fewer sheets. ❏ If you're using special paper, check the package for special loading instructions. Note: For instructions on loading envelopes, see the User's Guide. Paper Loading Capacity When loading Epson ink - Epson CX7000F | Product Information Guide - Page 6
Epson Stylus CX7000F Series 2. Close the document cover gently so that your Color/OK button. To make a black and white copy, press the x Start B&W button. Printing appears on the display and the CX7000F Series starts copying. If you need to stop copying, press the y Cancel/Back button. Do not - Epson CX7000F | Product Information Guide - Page 7
Epson Stylus CX7000F Series 5. If you want borderless photos (printed without a white border), press the Copy button again to select Fit to Page mode. (If you select 100%, photos are printed with a border.) The display changes to this: Copies:1 FitPage 6. To make multiple copies (up to 99), press - Epson CX7000F | Product Information Guide - Page 8
Epson Stylus CX7000F Series Slot Right slot Left slot Type of card instructions below to select which photos to print. Selecting Photos on the Index Sheet 1. Once you have printed the index sheet, use a dark pen or pencil to fill in one of the circles beneath each photo you want to print - Epson CX7000F | Product Information Guide - Page 9
Epson Stylus CX7000F Series 2. Place the index sheet face-down on the glass, in the upper left corner, so that the top of the sheet is aligned against the left edge of the glass. 3. Close the document cover. Note: Don't remove the memory card while you're printing from an index sheet. 4. Load up - Epson CX7000F | Product Information Guide - Page 10
in your camera manual. Note: Depending on the CX7000F Series settings and your digital camera settings, some combinations of paper type, size, and layout may not be supported. In addition, some of your digital camera settings may not be reflected in the printed output. Epson cannot guarantee the - Epson CX7000F | Product Information Guide - Page 11
Epson Stylus CX7000F Series 12. Press the keys on the numeric keypad to enter the time in a 12 when the CX7000F Series prints a report for outgoing faxes. Select Off to turn off report printing, On Error to print reports only when an error occurs, or On Send to print reports for every fax you send. - Epson CX7000F | Product Information Guide - Page 12
Epson Stylus CX7000F Series 8. If you need to change the Dial Mode, DRD, ECM, V.34 CX7000F Series dials the fax number and faxes your document. Note: If the fax number is busy or there is some other connection problem, you see an error message and the CX7000F Series redials the number after one - Epson CX7000F | Product Information Guide - Page 13
Rings to Answer setting (see page 11 for details). Receiving Faxes When the CX7000F Series receives a fax with Auto Answer mode turned on, the message Printing appears on the display. When the CX7000F Series receives a fax in manual answer mode, the connected phone begins ringing. Once you answer - Epson CX7000F | Product Information Guide - Page 14
Epson Stylus CX7000F Series 5. You see the File Save Settings window: 4. Select the basic settings for the type of original(s) you are scanning, then select the destination setting for the way you will use your image(s) (see the on-screen User's Guide for instructions). 5. Click the Preview button - Epson CX7000F | Product Information Guide - Page 15
: You can also check the ink status using software when the CX7000F Series is connected to your computer (see the User's Guide for instructions). Replacing Ink Cartridges If you see a message like this on the display, one or more cartridges are low on ink: When you see a message like this on the - Epson CX7000F | Product Information Guide - Page 16
Epson Stylus CX7000F Series Note: You'll also see a low ink or cartridge replacement message on your computer screen when you print from your computer. If a cartridge is more than six months old, print quality may decline. If necessary, try cleaning the print head (see page 15). If printouts still - Epson CX7000F | Product Information Guide - Page 17
the yellow tape before installing the ink cartridge, print quality may decline or you may not be able to print. Do not remove any other seals from the cartridges. . Epson Stylus CX7000F Series 14. Press the x Start Color/OK button. The CX7000F Series begins charging ink and Charging appears on - Epson CX7000F | Product Information Guide - Page 18
Series. 4. Open the scanner section and make sure the ink cartridge holder is in the home position on the right. 5. Secure the ink cartridge holder (print head) to the case with tape. Caution: Before you turn on the CX7000F Series, be sure to remove the tape after installing the printer in its new - Epson CX7000F | Product Information Guide - Page 19
cartridge. An ink cartridge is not installed or is installed incorrectly (see page 15 for replacement instructions). [Cyan, Magenta, Yellow, Black] Ink cartridge error > Cartridge replacement is necessary. Press the OK button to begin. An ink cartridge that is not supported by the CX7000F Series
-
 1
1 -
 2
2 -
 3
3 -
 4
4 -
 5
5 -
 6
6 -
 7
7 -
8
-
9
-
10
-
11
-
12
-
13
-
14
-
15
-
16
-
17
-
18
-
19
 |
 |

Epson Stylus CX7000F Series
10/06
1
Epson Stylus CX7000F Series Parts
Accessories
Media
DURABrite Ultra Ink Cartridges
* The high-capacity 68 black cartridge is available online at
www.epson.com/highcapacity (U.S. sales) and www.epson.ca (Canadian sales).
Feeder guard
Left edge
guide
Memory
card cover
USB connector
(camera only)
Document
cover
Document
table
Memory card slots
Output tray and
extension
Ink cartridges
Paper thickness
lever
Paper support
Paper support
extension
Scanner
AC inlet
USB port
LINE
phone
line port
EXT phone/
answering
machine port
Control
panel
(button
and lights
Paper name
Size
Part
number
Epson Ultra Premium Photo Paper
Glossy
Epson Ultra Premium Glossy Photo
Paper
Borderless
4 x 6 inches
S041934
Letter
(8.5 x 11 inches)
S041935
Epson Premium Photo Paper Glossy
Epson Premium Glossy Photo Paper
Borderless
4 x 6 inches
S041808
S041727
Borderless
5 x 7 inches
S041464
Borderless
8 x 10 inches
S041465
Letter
(8.5 x 11 inches)
S041286
S041667
Epson Premium Photo Paper
Semi-gloss
Epson Premium Semigloss Photo
Paper
Borderless
4 x 6 inches
S041982
Epson Photo Paper Glossy
Epson Glossy Photo Paper
Borderless
4 × 6 inches
S041809
S042038
Letter
(8.5 × 11 inches)
S041141
S041649
Epson Bright White Paper
Epson Premium Bright White Paper
Letter
(8.5 x 11 inches)
S041586
Epson Premium Presentation Paper
Matte
Epson Matte Paper Heavyweight
Borderless
(8 × 10 inches)
S041467
Letter
(8.5 × 11 inches)
S041257
Epson Premium Presentation Paper
Matte Double-sided
Epson Double-Sided Matte Paper
Letter
(8.5 × 11 inches)
S041568
Epson Presentation Paper Matte
Epson Photo Quality Ink Jet Paper
Letter
(8.5 x 11 inches)
S041062
Epson Photo Quality Self-Adhesive
Sheets
8.3 × 11.7
S041106
Epson Iron-On Transfer Paper
Letter
(8.5 x 11 inches)
S041153
PremierArt Matte Scrapbook
Photo Paper for Epson
Letter
(8.5 x 11 inches)
SCR1002
Color
Part number
Black
69 (T069120)
Cyan
69 (T069220)
Magenta
69 (T069320)
Yellow
69 (T069420)
High-Capacity Black*
68 (T068120)