Epson ELPDC20 User Manual
Epson ELPDC20 Manual
 |
View all Epson ELPDC20 manuals
Add to My Manuals
Save this manual to your list of manuals |
Epson ELPDC20 manual content summary:
- Epson ELPDC20 | User Manual - Page 1
Document Camera User's Guide - Epson ELPDC20 | User Manual - Page 2
Important Safety Instructions Read this User's Guide and follow all safety instructions for your document camera. Keep this guide at hand for future reference. Warning This symbol indicates information that, if ignored, could possibly result in personal injury or even death due to incorrect - Epson ELPDC20 | User Manual - Page 3
to qualified service technicians. Unplug the document camera from the outlet and refer all repairs to qualified service technicians under the guide. Use of a different power source may result in fire or electric shock. If the AC adapter, power cord, or document camera is damaged, turn the power - Epson ELPDC20 | User Manual - Page 4
mist into the document camera. Liquids entering the document camera may cause malfunction, fire, or electric shock. If you spilled liquid, turn the power off, unplug the AC adapter from the electrical outlet, and contact your local distributor. Using the damaged device may cause fire or electric - Epson ELPDC20 | User Manual - Page 5
Caution Unplug the AC adapter from the outlet before cleaning to prevent electric shock. Usage Precautions Caution Do not look into the lens when the LED illumination lamp is on. The bright light can damage your eyes. Do not use excessive force when adjusting the document camera. The document camera - Epson ELPDC20 | User Manual - Page 6
Contents 6 Important Safety Instructions 2 Introduction Product Features 9 Included Items 9 Document Camera Parts a Computer 21 Connect for Use with the Document Camera Software 21 Connect for Use Without the Document Camera Software 22 Projecting Plugging In and Turning On 24 Displaying a - Epson ELPDC20 | User Manual - Page 7
and Sharing Your Videos 62 Solving Problems Problems and Solutions 64 Operation Problems 64 Image Quality Problems 64 Problems Using an SD Card 65 Problems Using a USB Drive 65 Problems Connecting a Laptop 65 Problems Using the Document Camera Software 65 Where to Get Help 67 Europe - Epson ELPDC20 | User Manual - Page 8
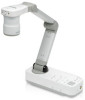
Introduction You can use the Epson ELPDC20 document camera to capture and project pages from books or other documents, and even three-dimensional objects. With the included software, you can create time-lapse photos and annotate images produced by the document camera. - Epson ELPDC20 | User Manual - Page 9
Product Features 9 Included Items • Remote control with 2 AA batteries • Power cord and adapter • VGA cable • USB cable • Software CD • User's manual CD • Quick Start • Microscope adapter - Epson ELPDC20 | User Manual - Page 10
Document Camera Parts Top/Side/Rear Name D Security slot E Interface F Security bar G SD card slot 10 Function The security slot is compatible with the Microsaver security system manufactured by Kensington. s p.17 s "Interface" p.12 Lets you attach a commercially available security cable to lock - Epson ELPDC20 | User Manual - Page 11
lamp when there is not enough light on your document. Captures the image. Name A [t] button B [Source] button [ ][ ] C [Menu] button Function Turns the document camera power on or off. [ ] Projects images from the document camera. [ ] Projects images from a computer. Opens and closes the menu. - Epson ELPDC20 | User Manual - Page 12
composite video signals to a projector or external monitor. Connects the supplied power cord and adapter. Inputs image signals from a computer. Outputs image camera to a computer via the supplied USB cable when using the included software. Connects a commercially available microphone when recording - Epson ELPDC20 | User Manual - Page 13
Document Camera Parts 13 Base Name A Mounting points B Security bar Function You can attach the document camera to a table, cart, or stand with commercially available M4 bolts. s p.17 Lets you attach a commercially available security cable to lock the document camera in place. s p.17 - Epson ELPDC20 | User Manual - Page 14
projector on or off.* Changes the input source connected to an Epson projector.* * This is not supported by some projectors. For more details, contact your local dealer or the nearest service center provided in this guide. s "Where to Get Help" p.67 Document camera operation Name D [t] button - Epson ELPDC20 | User Manual - Page 15
Remote Control Buttons 15 Name J [Esc] button K [Snapshot] button [] L [Record] button [] M [Zoom] button [z] [x] N [Brightness] button [ ][ ] O [Source] button [ ][ ] P Remote control light emitting area Function Stops the current function. When the menu is displayed, pressing this button moves - Epson ELPDC20 | User Manual - Page 16
Storing the Document Camera 16 When you're not using the document camera, simply fold its arm down as shown. Caution Do not try to press the arm flat or fold it backwards, or it may get damaged. - Epson ELPDC20 | User Manual - Page 17
Securing the Document Camera 17 You can secure the document camera by fastening a cable to the security bar, shown below, or by inserting a Kensington anti-theft cable into the Kensington security port. In addition, you can attach the document camera to a table, cart, or stand at the mounting - Epson ELPDC20 | User Manual - Page 18
Connecting Follow the instructions in this section to set up the document camera and give a presentation. - Epson ELPDC20 | User Manual - Page 19
Connecting to a Projector 19 You can connect the document camera to a projector using a standard VGA cable, composite video cable, or HDMI cable, or to other video equipment such as an external monitor. a You can also use the document camera with a computer. s p.21 a Choose the type of cable you - Epson ELPDC20 | User Manual - Page 20
Connecting to a Projector 20 HDMI connection A HDMI port B HDMI cable a • When connecting with a USB cable, video from other output ports is not displayed. • When two or more cables are connected, the priority of video output is HDMI > Display Out > Composite. - Epson ELPDC20 | User Manual - Page 21
PowerPoint slides or images from another application on your computer. Make sure you've already installed the software. s p.54 a Connect the document camera to your computer with a USB cable, as shown. lack this type of port. c Follow the instructions on p.55 to use the document camera software. - Epson ELPDC20 | User Manual - Page 22
This connection method lets you display PowerPoint slides or images from another application on your computer, but you can't use the included software. a If you're using a desktop computer, disconnect the monitor from your computer. b Connect a VGA cable from your computer's monitor-out port to - Epson ELPDC20 | User Manual - Page 23
Projecting - Epson ELPDC20 | User Manual - Page 24
shown and plug the adapter into a wall outlet. b Press the [t] power button to turn on the document camera. It takes about 20 seconds for . a When you're done using the document camera, press the [t] power button twice to turn it off, disconnect any cables, and fold down the camera arm. s p.16 - Epson ELPDC20 | User Manual - Page 25
Displaying a Document or Other Materials 25 Positioning the Document Camera a Raise the camera arm while holding the body with your other hand. b Rotate the camera arm as shown below. c Position the camera head above the display area. - Epson ELPDC20 | User Manual - Page 26
center of your document with the mark on the side of the document camera. a • You can quickly align letter- or A4-size paper with the guides on the side of the document camera. • The maximum paper size that can be projected is A3 landscape. A Lamp switch - Epson ELPDC20 | User Manual - Page 27
Displaying a Document or Other Materials 27 B [Focus] button c Press the [Focus] button on the document camera or the [Auto Focus] button on the remote control. Your document is automatically focused. a To sharpen hard-to-focus objects, press the [Menu] button and select Image > Focus. Use the [ ] - Epson ELPDC20 | User Manual - Page 28
Displaying a Document or Other Materials 28 Displaying Small Objects Up Close To display a small object, lower the camera arm. You can place the lens within approximately 10 cm (4 inches) of the object. To further enlarge an object, press the [Zoom] - [z] button on the document camera or remote - Epson ELPDC20 | User Manual - Page 29
Displaying Live Action or Whiteboard Images 29 You can use the document camera to display a lecture or presentation at the front of a room, or to capture images of a whiteboard or chalkboard. a Press the [Menu] button and select Image > Image Rotation to 180 degrees to display the image upside- - Epson ELPDC20 | User Manual - Page 30
, and other image settings for use with a microscope. a After setting Microscope to On in step 1, if you then adjust the brightness and zoom manually, the Microscope setting changes to Off. b Attach the microscope adapter to an eye piece of a microscope. c Tighten three screws on the microscope - Epson ELPDC20 | User Manual - Page 31
Projecting Through a Microscope 31 - Epson ELPDC20 | User Manual - Page 32
the USB-B port, you cannot use the annotation tools described in this chapter. Use the annotation tools in the included software. s p.56 • USB mouse devices that require installation of a driver cannot be used. Also, some USB mouse models may not be compatible. a Connect a USB mouse to the document - Epson ELPDC20 | User Manual - Page 33
Adding Annotations 33 a Use the left mouse button to draw lines or graphics or erase with an eraser. d Disconnect the USB mouse to end the annotation. a • You cannot use the on-screen menu while annotating. • Images with your annotations cannot be saved. - Epson ELPDC20 | User Manual - Page 34
your computer application and the live camera image. • If you've connected your computer with a USB cable (s p.21), you can use the document camera software to display captured images and videos, or use another application of your choice. To display the live camera image, make sure you've selected - Epson ELPDC20 | User Manual - Page 35
Displaying a Split Screen 35 If you have images saved in the document camera's internal memory or on an SD card or USB drive (s p.37), you can display two images at the same time. a When connecting to a computer with a USB cable, you cannot use this function. a Press the [Menu] button and select - Epson ELPDC20 | User Manual - Page 36
Displaying a Split Screen 36 d If you select Internal Memory, SD Card, or USB Flash Drive as the source, you see a screen that lets you select which image to use: g To exit split screen mode, press [Menu] or [Esc]. Use the arrow buttons to highlight the image you want to display, and press [ - Epson ELPDC20 | User Manual - Page 37
the document camera and an SD card or USB drive. You can view them as a slideshow or on a connected computer. a • SD and SDHC cards are supported. • USB drives with a security function cannot be used. • When connecting to a computer with a USB cable, you cannot use the functions described in this - Epson ELPDC20 | User Manual - Page 38
Saving Images 38 Captured still images are stored in the internal memory, an SD card, or a USB drive. If there is more than one save destination, the priority is as follows: USB drive > SD card > the internal memory. If the save destination only has a small capacity remaining, the image is saved - Epson ELPDC20 | User Manual - Page 39
Recording Movies 39 The document camera's live image is recorded in the internal memory, an SD card, or a USB drive. If there is more than one save destination, the priority is as follows: USB drive > SD card > the internal memory. If the save destination only has a small capacity remaining, the - Epson ELPDC20 | User Manual - Page 40
> Ext. Mic. Volume to adjust the recording volume of the external microphone. • When an external microphone is connected, the internal microphone is disabled. • Plug-in power is not supported. • Live audio from a microphone cannot be output. A Mic In port - Epson ELPDC20 | User Manual - Page 41
Exporting and Importing Images 41 The stored images in the internal memory can be exported to an SD card or USB drive. Also, the stored images on an SD card or USB drive can be imported to the internal memory. The steps below explain how to export images in the internal memory. a Insert an SD card - Epson ELPDC20 | User Manual - Page 42
Exporting and Importing Images 42 a • If you want to remove the SD card, press in on the card and then pull it straight out of the slot. The SD Card screen automatically closes. • When USB Flash Drive is not displayed even if one is connected, set USB Mode to Application. - Epson ELPDC20 | User Manual - Page 43
back to Application. a If you don't change the setting back, you won't be able to see a live camera image when you use the document camera software. If you don't plan to use the software, you don't need to change the setting back. - Epson ELPDC20 | User Manual - Page 44
Displaying a Slideshow 44 Once you have stored images in the document camera's internal memory or on an SD card or USB drive, you can display a slideshow. a In addition to images captured with the document camera, you can display images stored in the inserted SD card or connected USB drive. You - Epson ELPDC20 | User Manual - Page 45
Image Adjustments and Effects The document camera provides a full range of image adjustments and effects, including freeze image, black-and-white, and the ability to display negative film in true color. - Epson ELPDC20 | User Manual - Page 46
Using the On-screen Menu 46 Press the [Menu] button on the document camera or remote control to view the on-screen menu. For details of each item in the screen menu, see s p.48. You see this screen: Use the arrow buttons to navigate the menu and adjust the settings. Press [Enter] to select a - Epson ELPDC20 | User Manual - Page 47
from Auto (to adjust the image automatically), Cloudy, Daylight, Fluorescent (to lessen blue tones), or Incandescent (to lessen yellow tones). • Focus Lets you manually adjust the focus if auto-focus doesn't produce a sharp enough image. • Focus Lock When On is selected, auto-focus is disabled while - Epson ELPDC20 | User Manual - Page 48
fair weather. Fluorescent: Suitable for use in a room with fluorescent lighting. Incandescent: Suitable for use in a room with incandescent lamps. Lets you manually adjust the focus if auto-focus doesn't produce a sharp enough image. Near: Adjusts the focus in. Far: Adjusts the focus out. Sets the - Epson ELPDC20 | User Manual - Page 49
. Explanation/Select Changes how the document camera functions when connected with a USB cable. Application: Enables use of a USB drive and the included software. This is the default setting when turned on. Mass Storage: Lets you use a computer to view images stored in the internal memory. Adjusts - Epson ELPDC20 | User Manual - Page 50
Changes the on-screen menu language. Operation settings when the document camera is inactive. On: The power automatically turns off if the document camera is inactive for a certain amount of time. Off: The power remains on even if the document camera is not being used. Sets the time from when the - Epson ELPDC20 | User Manual - Page 51
Adjusting Other Settings (On-screen Menu List) 51 Memory Menu Setup Item Split Screen Internal Memory SD Card USB Flash Drive Explanation/Select Simultaneously displays two images from the internal memory, an SD card, a USB drive, or the live image. Left Source: Selects the image to be projected - Epson ELPDC20 | User Manual - Page 52
Adjusting Other Settings (On-screen Menu List) 52 Info Menu Setup Item Memory Capacity Number of Files Version Explanation Free Space: Displays the remaining capacity of the document camera's internal memory. Total Size: Displays the total capacity of the document camera's internal memory. - Epson ELPDC20 | User Manual - Page 53
camera with text and graphics, and upload your videos to popular websites. Before starting, follow the instructions in this section to install the software. a For detailed help when using the software, do one of the following: Windows: Press F1 or select Application Help from the Extras menu - Epson ELPDC20 | User Manual - Page 54
Camera" into your computer. d When you see the license agreement, click Yes. e Follow the instructions on the screen to install all the software. a When you see a screen asking if you want to install the Button Manager and TWAIN Driver for Epson Document camera (Windows only), be sure to allow the - Epson ELPDC20 | User Manual - Page 55
does not start, install the Windows Media Player. • Mac OS X: Open the Applications folder, then double-click ArcSoft Application Software for Epson Document Camera. You see the screen shown below. a If you see a message that the document camera is not found, make sure it is connected and - Epson ELPDC20 | User Manual - Page 56
Annotating Images 56 You can annotate live images from the document camera with text and graphics while giving a presentation. When you capture an image, your annotations will be included with the image; if you record your presentation as a video, the recording will show your annotations as they' - Epson ELPDC20 | User Manual - Page 57
Capturing Still Images 57 You can capture a still image or a quick series of images (called a burst). a If necessary, select the settings you want to use. Click the Settings button and select the Image tab. • Select the default image format, quality level, and other properties. • Choose the number - Epson ELPDC20 | User Manual - Page 58
Making Time-lapse Movies 58 You can record a time-lapse movie to show gradual changes that occur over several hours. a Click the Settings button and select the Time Lapse tab. • Set the time interval between each frame (5 seconds minimum). • Set the total capture duration (up to 72 hours). Click - Epson ELPDC20 | User Manual - Page 59
to 8 hours) and see how much hard disk space it will use. b To capture sound, click the Settings button, select the Audio tab, and select ELPDC20 from Audio Device. c Click the Record Video button to start recording. Click Record Video again to stop. You can also use the [ ] button on the - Epson ELPDC20 | User Manual - Page 60
can pause it and capture a still image from the current frame. a Click the Edit button to enter Edit mode. b For detailed help when using the software, do one of the following: Windows: Press F1 or select Application Help from the Extras menu. Mac OS X: Select Help from the menu bar. - Epson ELPDC20 | User Manual - Page 61
can make it easier to find them later on. a Click the mode. File Management button to enter File Management b For detailed help when using the software, do one of the following: Windows: Press F1 or select Application Help from the Extras menu. Macintosh: Select Help from the menu bar. - Epson ELPDC20 | User Manual - Page 62
, such as YouTube and SchoolTube. a This feature is not available for Apple Macintosh systems. a Click the Edit button. b Select a video. c Select a website. d Follow the instructions on the screen to log in, provide a title for your video and other descriptive information, and upload the file. - Epson ELPDC20 | User Manual - Page 63
Solving Problems - Epson ELPDC20 | User Manual - Page 64
and Solutions 64 Operation Problems No image appears on the screen • After you press the [t] Power button, wait a few placing a different document under the camera lens while adjusting the focus. Or focus the image manually with the Focus adjustment in the Image menu. s p.47 • Make sure the lens - Epson ELPDC20 | User Manual - Page 65
Arrange, and make sure Mirror Displays is checked. Problems Using the Document Camera Software The buttons on the document camera don't work with the software When you installed the software, the Button Manager and TWAIN Driver for Epson Document camera (Windows only) weren't installed. Reinstall - Epson ELPDC20 | User Manual - Page 66
Problems and Solutions 66 the software, being sure to allow the Button Manager and TWAIN Driver for Epson Document camera to install. You don't see the live camera image on your computer The document camera's USB Mode setting may be set to Mass - Epson ELPDC20 | User Manual - Page 67
COMPUTER ENGINEERING Vukovarska 24 88000 Mostar Tel: 00387 36449660 Fax: 00387 36449669 Web Address: http://content.epson.it/about/int_services.htm BULGARIA EPSON Service Center, Bulgaria c/o ProSoft Central Service Akad. G. Bonchev SRT. bl.6 1113 Sofia Tel: 00359 2 979 30 75 Fax: 00359 2 971 31 79 - Epson ELPDC20 | User Manual - Page 68
63800 Brno E-mail: [email protected] Web Address: http://www.epson.cz Hotline: 800 142 052 DENMARK EPSON Denmark Transformervej 6 2730 Herlev Tel: 44508585 Fax: 44508586 Email: [email protected] Web Address: http://www.epson.dk Hotline: 70279273 ESTONIA EPSON Service Center, Estonia 68 c/o Kulbert - Epson ELPDC20 | User Manual - Page 69
Samal-2, bldg A1, 5th floor Business Center "Samal Towers" Almaty 050051, Kazakhstan Phone +7 727 3560260 Fax +7 727 3560260 Web Address: http://www.epson.ru LATVIA EPSON Service Center, Latvia c/o ServiceNet LV Jelgavas 36 1004 Riga Tel.: 00 371 746 0399 Fax: 00 371 746 0299 Web Address: http://www - Epson ELPDC20 | User Manual - Page 70
Get Help 70 c/o ServiceNet Gaiziunu 3 50128 Kaunas Tel.: 00 370 37 400 160 Fax: 00 370 37 400 161 Web Address: http://www.epson.lt LUXEMBURG EPSON Europe B.V. Branch office Belgium Belgicastraat 4-Keiberg B-1930 Zaventem Tel: +32 2/ 7 12 30 10 Fax: +32 2/ 7 12 30 20 Hotline: 0900 43010 Web Address - Epson ELPDC20 | User Manual - Page 71
Office Romania Strada Ion Urdareanu nr. 34 Sector 5, 050688 Bucuresti Tel: 00 40 21 4025024 Fax: 00 40 21 4025020 Web Address: http://www.epson.ro RUSSIA EPSON CIS Schepkina street, 42, Bldg 2A, 3rd floor 129110, Moscow, Russia Phone +7 (495) 777-03-55 Fax +7 (495) 777-03-57 Web Address: http - Epson ELPDC20 | User Manual - Page 72
Tel: (01442) 261144 Fax: (01442) 227227 Hotline: 08704437766 Web Address: http://www.epson.co.uk Africa Contact your dealer Web Address: http://www.epson.co.za Email: [email protected] or http://www.epson.fr SOUTH AFRICA Epson South Africa Grnd. Flr. Durham Hse, Block 6 Fourways Office Park Cnr - Epson ELPDC20 | User Manual - Page 73
Free Zone Dubai UAE (United Arab Emirates) Tel: +971 4 88 72 1 72 Fax: +971 4 88 18 9 45 Email: [email protected] Web Address: http://www.epson.ae North and Central America CANADA Epson Canada, Ltd. 185 Renfrew Drive Markham, Canada, L3R 6G3 Tel: 905-709-9475 or 905-709-3839 Web Address: http - Epson ELPDC20 | User Manual - Page 74
Brazil CEP 06460-020 Tel: (55 11) 3956-6868 Web Address: http://www.epson.com.br CHILE EPSON Chile S.A. La Concepción 322 Piso 3 Providencia, Santiago, Chile Tel: (562) 484-3400 Web Address: http://www.epson.cl COLOMBIA EPSON Colombia LTD. Calle 100 No 19-54 Piso 7 Bogota, Colombia Tel: (57 1) 523 - Epson ELPDC20 | User Manual - Page 75
Ltd. Unit 715-723, Trade Square, 681 Cheung Sha Wan Road, Cheung Sha Wan, Kowloon, HONG KONG Support Hotline: (852) 2827 8911 Fax: (852) 2827 4383 Web Address: http://www.epson.com.hk INDIA EPSON INDIA PVT. LTD. 12th Floor, The Millenia, Tower A, No. 1 Murphy Road, Ulsoor, Bangalore 560 008 India - Epson ELPDC20 | User Manual - Page 76
Technology & Trading Ltd. 14F, No. 7, Song Ren Road, Taipei, Taiwan. Tel: (02) 8786-6688 Fax: (02) 8786-6633 Web Address: http://www.epson.com.tw THAILAND EPSON (Thailand) Co., Ltd. 42th Floor, Empire Tower, 195 South Sathorn Road, Yannawa, Sathorn, Bangkok 10120, Thailand. Tel: 02 685 9899 Fax: 02 - Epson ELPDC20 | User Manual - Page 77
Notices - Epson ELPDC20 | User Manual - Page 78
Effective pixels Imaging area Focus adjustment Zoom adjustment Frame rate Internal memory Internal microphone Power supply Power consumption Operating temperature Storage temperature Operating humidity Storage humidity Weight AC adapter ELPDC20 Input port Computer In port 1 Mic In port 1 78 - Epson ELPDC20 | User Manual - Page 79
USB-A port* 1 USB connector (TypeA) USB-B port* 1 USB connector (TypeB) Output: QVGA/VGA/SVGA/SXGA/XGA SD card slot 1 SD/SDHC card compatible * USB 2.0 is supported. However, the operation of all USB compatible devices is not guaranteed. - Epson ELPDC20 | User Manual - Page 80
80 System Requirements These system requirements are for using the included software: Windows: Microsoft Windows 7 32/64-bit, Windows Vista 32-bit, Windows XP (Service Pack 3 or later) Mac OS X: Mac OS X This product is also designed for IT power distribution system with phaseto-phase voltage 230V. - Epson ELPDC20 | User Manual - Page 81
installation. This equipment generates, uses, and can radiate radio frequency energy and, if not installed and used in accordance with the instructions, may cause harmful interference to radio or television reception. However, there is no guarantee that interference will not occur in a particular - Epson ELPDC20 | User Manual - Page 82
Class B Personal Computers and Peripherals; and/or CPU Boards and Power Supplies used with Class B Personal Computers We: Located at: Telephone: Epson America, Inc. 3840 Kilroy Airport Way MS: 3-13 Long cause undesired operation. Trade Name: Type of Product: Model: Epson Document camera ELPDC20 - Epson ELPDC20 | User Manual - Page 83
instructions. Seiko Epson Corporation shall not be liable against any damages or problems arising from the use of any options or any consumable products other than those designated as Original Epson Products or Epson Approved Products by Seiko Epson Corporation. The contents of this guide
-
 1
1 -
 2
2 -
 3
3 -
 4
4 -
 5
5 -
 6
6 -
 7
7 -
8
-
9
-
10
-
11
-
12
-
13
-
14
-
15
-
16
-
17
-
18
-
19
-
20
-
21
-
22
-
23
-
24
-
25
-
26
-
27
-
28
-
29
-
30
-
31
-
32
-
33
-
34
-
35
-
36
-
37
-
38
-
39
-
40
-
41
-
42
-
43
-
44
-
45
-
46
-
47
-
48
-
49
-
50
-
51
-
52
-
53
-
54
-
55
-
56
-
57
-
58
-
59
-
60
-
61
-
62
-
63
-
64
-
65
-
66
-
67
-
68
-
69
-
70
-
71
-
72
-
73
-
74
-
75
-
76
-
77
-
78
-
79
-
80
-
81
-
82
-
83
 |
 |

Document Camera
User's Guide