Epson EMP-5500 Owners Manual - Page 63
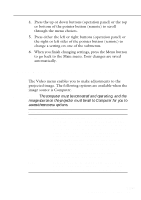
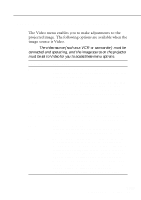
Video Menu (Image source = Video), The Video menu enables you to make adjustments to
 |
View all Epson EMP-5500 manuals
Add to My Manuals
Save this manual to your list of manuals |
Page 63 highlights
Video Menu (Image source = Video) The Video menu enables you to make adjustments to the projected image. The following options are available when the image source is Video. ♦ Note: The video source (such as a VCR or camcorder) must be connected and operating, and the image source on the projector must be set to Video for you to access these menu options. Menu item Description Brightness Contrast Lightens or darkens the overall image. Increase brightness to make the image lighter, or decrease it to make the image darker. Adjusts the relative difference between light and dark areas. Increase contrast to make light areas lighter and dark areas darker, or decrease it to lessen the difference between the light areas and dark areas of the image. Color Adjusts color density. Increase color density to make colors darker and more opaque, or decrease it to make colors lighter and less opaque. Tint (NTSC only) Adjust the red-green balance of the screen. Increase tint to add more green, or decrease it to add more red. Sharpness Adjusts screen sharpness. Increase sharpness to make screen images more sharp, or decrease it to make the images less sharp. Reset Returns all Video Menu items to their factory defaults. Select this item and then press either multi-purpose button(remote) or the button(operation panel) to display the confirmation screen. Next, select Yes and then press a multi-purpose button(remote) or the button(operation panel) to reset the Video Menu items. If you change your mind, select No and then press either multi-purpose button(remote) or the button(operation panel) to clear the confirmation screen without changing any settings. s s s s s s Changing a Menu Setting 41
-
 1
1 -
2
-
3
-
4
-
5
-
6
-
7
-
8
-
9
-
10
-
11
-
12
-
13
-
14
-
15
-
16
-
17
-
18
-
19
-
20
-
21
-
22
-
23
-
24
-
25
-
26
-
27
-
28
-
29
-
30
-
31
-
32
-
33
-
34
-
35
-
36
-
37
-
38
-
39
-
40
-
41
-
42
-
43
-
44
-
45
-
46
-
47
-
48
-
49
-
50
-
51
-
52
-
53
-
54
-
55
-
56
-
57
-
 58
58 -
 59
59 -
 60
60 -
 61
61 -
 62
62 -
 63
63 -
 64
64 -
 65
65 -
 66
66 -
 67
67 -
 68
68 -
69
-
70
-
71
-
72
-
73
-
74
-
75
-
76
-
77
-
78
-
79
-
80
-
81
-
82
-
83
-
84
-
85
-
86
-
87
-
88
-
89
-
90
-
91
-
92
-
93
-
94
-
95
-
96
-
97
-
98
-
99
-
100
 |
 |
