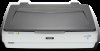
Epson Expression 12000XL Users Guide
Epson Expression 12000XL Manual
 |
View all Epson Expression 12000XL manuals
Add to My Manuals
Save this manual to your list of manuals |
Epson Expression 12000XL manual content summary:
- Epson Expression 12000XL | Users Guide - Page 1
User's Guide - Epson Expression 12000XL | Users Guide - Page 2
to this product, or (excluding the U.S.) failure to strictly comply with Seiko Epson Corporation's operating and maintenance instructions. Seiko Epson Corporation and its affiliates shall not be liable for any damages or problems arising from the use of any options or any consumable products other - Epson Expression 12000XL | Users Guide - Page 3
Guide Trademarks Trademarks ® ❏ EPSON is a registered trademark, and EPSON EXCEED YOUR VISION or EXCEED YOUR VISION is a trademark of Seiko Epson Corporation. ® ® ❏ Microsoft andWindows are either registered trademarks or trademarks of Microsoft Corporation in the United of the software and related - Epson Expression 12000XL | Users Guide - Page 4
53 Solving Problems Scanner Problems 55 Scanner Lights Indicate an Error 55 Problems Starting Scanning 55 Cannot Start Epson Scan 2 56 Cannot Scan Using the Button 56 Cannot Scan Using the Transparency Unit. . . . . .56 Cannot Scan Using Scanning Software Other Than Epson Scan 2 56 - Epson Expression 12000XL | Users Guide - Page 5
User's Guide Contents Scanned Image Problems 57 Uneven Colors, Dirt, Spots, and so on Appear when Scanning from the Scanner Glass 57 The Image the Correct Area on the Scanner Glass 58 Cannot Preview in Thumbnail 59 Cannot Achieve the Results Intended in Auto Photo Orientation 59 Text is Not - Epson Expression 12000XL | Users Guide - Page 6
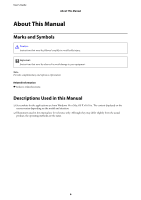
User's Guide About This Manual About This Manual Marks and Symbols ! Caution: Instructions that must be followed carefully to avoid bodily injury. c Important: Instructions that must be observed to avoid damage to your equipment. Note: Provides complementary and reference information. Related - Epson Expression 12000XL | Users Guide - Page 7
User's Guide About This Manual Operating System References Windows In this manual, terms such as "Windows 10", "Windows 8.1", ❏ Microsoft Windows 8 operating system ® ® ❏ Microsoft Windows 7 operating system Mac In this manual, "macOS v10.12.x" refers to macOS Sierra, "Mac OS X v10.11.x" refers to - Epson Expression 12000XL | Users Guide - Page 8
Safety Instructions Read all these instructions, and follow all warnings and instructions marked on the product. ❏ Some of the symbols used on your product are to ensure safety and proper use of the product. Visit the following Web site to learn the meaning of the symbols. http://support.epson.net - Epson Expression 12000XL | Users Guide - Page 9
User's Guide Important Instructions ❏ carry the product. ❏ Do not place heavy objects on the scanner glass and do not press the glass with too much force. Restrictions etc.), monthly passes, concession tickets, etc. ❏ Passports, driver's licenses, warrants of fitness, road passes, food stamps - Epson Expression 12000XL | Users Guide - Page 10
User's Guide Scanner Basics Scanner Basics Part Names Note: Check all of the items that came with your product. A a start button B . power button C Ready light D Error light A Document cover B Scanner glass C Control panel 10 - Epson Expression 12000XL | Users Guide - Page 11
User's Guide Scanner Basics D Carriage (in the scanner glass) A Option connector B USB port C AC inlet D Transportation lock lever A Power cord B USB cable Buttons and Lights Buttons The product has two buttons for scanning operations. 11 - Epson Expression 12000XL | Users Guide - Page 12
User's Guide Scanner Basics Before using the product buttons, make sure you have installed your scanning software. A a button B . cannot scan images, an error may have occurred. Make sure the optional Transparency Unit is completely closed. Initializing or scanning. An error has occurred. An - Epson Expression 12000XL | Users Guide - Page 13
on page 55 Information on Applications This section introduces the software products available for your scanner. The latest software can be installed at the Epson Web site. Epson Scan 2 Epson Scan 2 is a driver for controlling your scanner, enabling a variety of scan settings. This also allows you - Epson Expression 12000XL | Users Guide - Page 14
User's Guide Placing Originals on the Product Placing Originals on the Product c Important: Do not place heavy objects on the scanner glass and do not press the glass with too much force. Placing Originals 1. Open the document cover. 2. Place your original face down on the scanner glass making - Epson Expression 12000XL | Users Guide - Page 15
User's Guide Placing Originals on the Product 3. Close the document cover gently so that your original does not move. Note: ❏ Always keep the scanner glass clean. ❏ Do not leave originals on the scanner glass for an extended period of time as they may stick to the glass. Related Information & " - Epson Expression 12000XL | Users Guide - Page 16
User's Guide Placing Originals on the Product If the size of the original back on the springs. ❏ Do not force the cover off the scanner; otherwise, the cover may be damaged. 2. Place a large or thick original face-down on the scanner glass. Make sure the top corner of the original is aligned with - Epson Expression 12000XL | Users Guide - Page 17
User's Guide Placing Originals on the Product 3. Close the document cover and hold it down firmly as you scan. Note: ❏ When scanning without the document cover, gently - Epson Expression 12000XL | Users Guide - Page 18
the application name in the search charm, and then select the displayed icon. ❏ Windows 7 Click the start button, and select All Programs or Programs > EPSON > Epson Scan 2 > Epson Scan 2. ❏ Mac Select Go > Applications > Epson Software > Epson Scan 2. 3. Select Photo Mode from the Mode list. 18 - Epson Expression 12000XL | Users Guide - Page 19
User's Guide Basic Scanning 4. Make the following settings on the Main Settings tab. ❏ Image Type: Select the color for saving the scanned image. ❏ Resolution: Select the resolution. Note: When scanning films using the Transparency Unit, set the Document Source and Document Type as well. 19 - Epson Expression 12000XL | Users Guide - Page 20
User's Guide Basic Scanning 5. Click Preview. The preview window opens, and the previewed image is displayed as thumbnails. Note: To preview the entire scanned area, select Normal - Epson Expression 12000XL | Users Guide - Page 21
User's Guide Basic Scanning You can adjust the scanned image using detailed settings which are suitable for photos or pictures, such as the following. ❏ Brightness: Select to adjust the brightness for the scanned image. ❏ Contrast: Select to adjust the contrast for the scanned - Epson Expression 12000XL | Users Guide - Page 22
& "Image Adjustment Features for Photo Mode" on page 27 Scanning Documents (Document Mode) Using Document Mode in Epson Scan 2, you can scan the originals using detailed settings that are suitable for text documents. Note: You cannot scan negatives with the Transparency Unit when using Document Mode - Epson Expression 12000XL | Users Guide - Page 23
User's Guide Basic Scanning 4. Make the following settings on the Main Settings tab. ❏ Document Size: Select the size of the original you placed. ❏ Image Type: Select the color for saving the scanned image. ❏ Resolution: Select the resolution. Note: The Document Source setting is fixed as Scanner - Epson Expression 12000XL | Users Guide - Page 24
User's Guide 6. Set the file saving settings. Basic Scanning ❏ Image Format: Select from the list. 7. Click Scan. Related Information & "Placing Originals on the Product" on page 14 & "Epson Scan 2" on page 13 & "Setting a Resolution That Suits the Scanning Purpose" on page 25 & "Image Adjustment - Epson Expression 12000XL | Users Guide - Page 25
User's Guide Basic Scanning Setting a Resolution Advantages and Disadvantages of Increasing the Resolution Resolution indicates the number of pixels (smallest area of an image) for each inch ( - Epson Expression 12000XL | Users Guide - Page 26
User's Guide Basic Scanning Scanning Using a Scanner Button You can scan using the button on your scanner. Note: Before using this feature, check the following. ❏ Epson Scan 2 is installed on your computer. ❏ The scanner is connected to your computer correctly. 1. Place the original. 2. Press the - Epson Expression 12000XL | Users Guide - Page 27
User's Guide Advanced Scanning Advanced Scanning Image Adjustment Features for Photo Mode You can adjust scanned images using the features on the Advanced Settings tab in Epson Scan 2. For Photo Mode, you can use image adjustment features that are suitable for photos or pictures. For most - Epson Expression 12000XL | Users Guide - Page 28
User's Guide Advanced Scanning Contrast You can adjust the contrast for the whole image. If you increase the contrast, the bright areas become brighter, and the dark - Epson Expression 12000XL | Users Guide - Page 29
User's Guide Advanced Scanning Image Adjustment Tab You can adjust the color balance and gray balance of the image. Color Balance Adjusts the color balance of the image. You can adjust the tint when photos are tinted with red and green due to the weather or the lighting where the photo was shot. - Epson Expression 12000XL | Users Guide - Page 30
User's Guide Advanced Scanning Channel Select the color (RGB) to be adjusted using the tone curve. Preset Standard tone curves have already been registered. We recommend fine- - Epson Expression 12000XL | Users Guide - Page 31
User's Guide Advanced Scanning Output Displays the values for the previous shadow and highlight adjustments. Tone Curve Displays the density for the output value for the image - Epson Expression 12000XL | Users Guide - Page 32
User's Guide Advanced Scanning Backlight Correction You can lighten images and film that are dark due to backlight. Note: ❏ Depending on the state of checked in the preview window. ❏ This feature softens the sharpness of the scanned image. Dust Removal You can remove dust on photos and film. 32 - Epson Expression 12000XL | Users Guide - Page 33
's Guide Advanced not be corrected correctly. ❏ This feature is not available when scanning photos. ❏ The effect of this feature cannot be checked in the preview scanned images using the features on the Advanced Settings tab in Epson Scan 2. For Document Mode, you can use image adjustment features - Epson Expression 12000XL | Users Guide - Page 34
User's Guide Advanced Scanning Note: Some items may not be available depending on other settings you made. Unsharp Mask You can enhance and sharpen the outlines of - Epson Expression 12000XL | Users Guide - Page 35
User's Guide Advanced Scanning To check for moiré patterns, display the image at 100 % (1:1). If the displayed image is zoomed out, the image appears rough and may - Epson Expression 12000XL | Users Guide - Page 36
User's Guide Advanced Scanning Dropout You can remove the color specified from the scanned image, and then save it in grayscale or black and white. For example, - Epson Expression 12000XL | Users Guide - Page 37
User's Guide Advanced Scanning Contrast You can adjust the contrast for the whole image. If you increase the contrast, the bright areas become brighter, and the dark - Epson Expression 12000XL | Users Guide - Page 38
User's Guide Advanced Scanning Edge Fill You can remove the shadow created around the scanned image. For double-sided scanning, the settings for the edge fill range - Epson Expression 12000XL | Users Guide - Page 39
User's Guide Advanced Scanning Note: ❏ Text on the originals is recognized using Optical Character Recognition (OCR), and then embedded in the scanned image. ❏ This feature is only available when the EPSON Scan OCR component (Windows) or Epson Scan 2 OCR component (Mac) is installed. 1. Place the - Epson Expression 12000XL | Users Guide - Page 40
originals. Make sure that all the items shown below are included and have not been damaged during shipping. Contact your Epson dealer if any item is missing or damaged. A Transparency Unit B Transparency guide C Film holders (2 of each) Unlocking the transportation lock Before you install the - Epson Expression 12000XL | Users Guide - Page 41
User's Guide Using the Transparency Unit 2. Use a coin to unlock the transportation lock by turning it counter-clockwise one-quarter. Note: ❏ Before transporting the scanner, lock the transportation lock to prevent damage. ❏ If the unit's lamp assembly is not in its home position, you cannot lock - Epson Expression 12000XL | Users Guide - Page 42
User's Guide Using the Transparency Unit 3. Align the pins of the unit with the holes of the scanner, and then lower the unit until it rests securely on the scanner with the pins in the holes. 4. Remove the document mat from the Transparency Unit as shown below. 5. Place the transparency guide on - Epson Expression 12000XL | Users Guide - Page 43
, select the Photo Mode in Epson Scan 2, and make sure you set the Document Source and Document Type correctly. 1. Open the Transparency Unit. 2. Place the film in the appropriate holder. 3. Place the film holder on the scanner glass, aligning it with the notch on the transparency guide. Make sure - Epson Expression 12000XL | Users Guide - Page 44
User's Guide Using the Transparency Unit 35 mm film strips 1. Place the 35 mm film holder on a flat surface, and then remove the strip cover. 2. Insert the film, face down, in - Epson Expression 12000XL | Users Guide - Page 45
User's Guide Using the Transparency Unit 4. Place the film holder on the scanner glass and align it with the notch on the transparency guide as shown below. Mounted slides 1. Load slides, face down, in the Mounted slide holder, as shown below. Repeat this step for all the slides you - Epson Expression 12000XL | Users Guide - Page 46
User's Guide Using the Transparency Unit Medium format (120/220) 1. Place the Medium format holder on a flat surface, and then open the strip cover. 2. Insert the film, face down, in the holder. 3. Close the cover. Repeat steps 1 to 3 for all the films you want to scan. 46 - Epson Expression 12000XL | Users Guide - Page 47
User's Guide Using the Transparency Unit 4. Place the film holder on the scanner glass and align it with the notch on the transparency guide, as shown below. 4×5 inch film 1. Place the 4×5 inch film holder on a flat surface, and then open the cover. 2. Insert the film, face down, in the - Epson Expression 12000XL | Users Guide - Page 48
notch on the transparency guide, as shown below. Non-standard film sizes Place the film directly on the scanner glass, making sure the glossy (smooth) side of the film is facing down. If the document mat is installed in the Transparency Unit, remove it. Close the Transparency Unit. Note: ❏ An area - Epson Expression 12000XL | Users Guide - Page 49
is connected to your computer. 2. Place your films on the scanner glass. 3. Start Epson Scan 2. 4. Select Photo Mode from the Mode list. 5. Make the following settings on the Main Settings tab. ❏ Document Source: Select Transparency Unit. ❏ Document Type: Select the film type to match your films - Epson Expression 12000XL | Users Guide - Page 50
's Guide Using the Transparency Unit 1. Open the Transparency Unit, and then remove the transparency guide from the scanner glass. 2. Slide the mat into the upper side, and then insert the tabs into the slots on the lower side slots on the Transparency Unit. 3. Place your document on the scanner - Epson Expression 12000XL | Users Guide - Page 51
User's Guide Maintenance Maintenance Cleaning the Scanner To keep your scanner operating at its best, clean it periodically using the following procedure. c Important: ❏ Do not press the glass surface of the scanner glass with any force. ❏ Be careful not to scratch or damage the glass surface of - Epson Expression 12000XL | Users Guide - Page 52
Scan 2 Utility. ❏ Mac Select Go > Applications > EPSON Software > Epson Scan 2 Utility. 2. Click the Power Save tab. 3. Set the Sleep Timer (minutes) or Power Off Timer (minutes), and then click Set. Transporting the Scanner Before you transport the scanner for a long distance or store it for an - Epson Expression 12000XL | Users Guide - Page 53
able to clear certain problems and improve or add functions by updating the applications. Make sure you use the latest version of the applications. 1. Make sure that the scanner and the computer are connected, and the computer is connected to the internet. 2. Start EPSON Software Updater, and update - Epson Expression 12000XL | Users Guide - Page 54
: Do not turn off the computer or the scanner while updating. Note: If you cannot find the application you want to update in the list, you cannot update using the EPSON Software Updater. Check for the latest versions of the applications on your local Epson website. http://www.epson.com/support 54 - Epson Expression 12000XL | Users Guide - Page 55
source in the scanner unit may need to be replaced. Contact Epson. Related Information & "Buttons and Lights" on page 11 Problems Starting Scanning ❏ Make sure the scanning software is fully installed. See the Start Here sheet for instructions on installing the scanning software. ❏ Check the status - Epson Expression 12000XL | Users Guide - Page 56
& "Installing the Transparency Unit" on page 41 & "Using the Transparency Unit to Scan" on page 49 & "Setting and Placing Films" on page 43 Cannot Scan Using Scanning Software Other Than Epson Scan 2 ❏ If you are using any TWAIN-compliant programs, make sure that the correct scanner is selected as - Epson Expression 12000XL | Users Guide - Page 57
User's Guide Solving Problems ❏ If you cannot scan using a TWAIN-compliant scanning program, uninstall the TWAIN-compliant scanning program and then reinstall it. Scanned Image Problems Uneven Colors, Dirt, Spots, and so on Appear when Scanning from the Scanner Glass ❏ Clean the scanner glass. ❏ - Epson Expression 12000XL | Users Guide - Page 58
User's Guide Solving Problems Related Information & "Image Adjustment Features for Photo Mode" on page 27 & "Image Adjustment Features for Document Mode" on page 33 Text is Blurred ❏ In Document Mode in Epson Scan 2, select the Advanced Settings tab, and then Image Option > Text Enhancement. ❏ - Epson Expression 12000XL | Users Guide - Page 59
User's Guide Solving Problems ❏ When placing multiple originals on the scanner glass, make sure there is a gap of at least 20 mm (0.8 in.) between the originals. Cannot Preview in Thumbnail ❏ When placing multiple originals on the scanner glass, make sure there is a gap of at least 20 mm (0.8 in.) - Epson Expression 12000XL | Users Guide - Page 60
All Programs or Programs > EPSON > Epson Scan 2 > Epson Scan 2 Utility. ❏ Mac Select Go > Applications > Epson Software > Epson Scan 2 Utility. 2. Select the Other tab. 3. Click Reset. Note: If initialization does not solve the problem, uninstall and re-install Epson Scan 2. Striped Rings Appear - Epson Expression 12000XL | Users Guide - Page 61
User's Guide Solving Problems Related Information & "Cleaning the Scanner" on page 51 Negative Film Preview the system requirements. ❏ Scanning at a high resolution takes a long time. ❏ When using security software, exclude the TWAIN.log file from monitoring, or set the TWAIN.log as a read- only - Epson Expression 12000XL | Users Guide - Page 62
installed EPSON Software Updater. 1. Download the Uninstaller using EPSON Software Updater. Once you have downloaded the Uninstaller, you do not need to download it again each time you uninstall the application. 2. Disconnect the scanner from your computer. 3. To uninstall the scanner driver, select - Epson Expression 12000XL | Users Guide - Page 63
User's Guide Solving Problems 5. Select Finder > Go > Applications > Epson Software > Uninstaller. 6. Select the application you want to uninstall, and then click Uninstall. c Important: The Uninstaller removes all drivers for Epson scanners on the computer. If you use multiple Epson scanners and - Epson Expression 12000XL | Users Guide - Page 64
User's Guide Technical Specifications Technical Specifications General Scanner Specifications Note: Specifications are subject to change without notice. Scanner type Photoelectric device Document Size Scanning resolution Output resolution Image data Interface Light source Flatbed A3 Color Image - Epson Expression 12000XL | Users Guide - Page 65
Guide Technical Specifications Power consumption Operating: ❏ Average 30 W or below (without the optional Transparency Unit) ❏ Average 40 W or below (with the optional Transparency Unit) ❏ Max. 40 W or below (without the optional Transparency Unit . Avoid operating the scanner in direct sunlight, - Epson Expression 12000XL | Users Guide - Page 66
User's Guide Technical Specifications System Requirements Windows Windows 10 (32-bit, 64-bit) Windows 8.1 (32-bit, 64-bit) Windows 8 (32- OS X v10.9.x Mac OS X v10.8.x Mac OS X v10.7.x Mac OS X v10.6.8 *1 Fast User Switching on Mac is not supported. *2 The UNIX File System (UFS) for Mac is not - Epson Expression 12000XL | Users Guide - Page 67
User's Guide Standards and Approvals Standards and Approvals Standards and Approvals for U.S. Model Safety EMC UL60950 to the Directives and harmonized standards used to declare conformity. http://www.epson.eu/conformity J331B Standards and Approvals for Australian Model EMC AS/NZS CISPR22 Class - Epson Expression 12000XL | Users Guide - Page 68
technical support services, use the following support options. Internet Support Visit www.epson.com/support (U.S.), www.epson.ca/support (Canada), or www.epson.com.jm/support (Caribbean) for solutions to common problems. You can download drivers and documentation, get FAQs and troubleshooting advice
-
 1
1 -
 2
2 -
 3
3 -
 4
4 -
 5
5 -
 6
6 -
 7
7 -
8
-
9
-
10
-
11
-
12
-
13
-
14
-
15
-
16
-
17
-
18
-
19
-
20
-
21
-
22
-
23
-
24
-
25
-
26
-
27
-
28
-
29
-
30
-
31
-
32
-
33
-
34
-
35
-
36
-
37
-
38
-
39
-
40
-
41
-
42
-
43
-
44
-
45
-
46
-
47
-
48
-
49
-
50
-
51
-
52
-
53
-
54
-
55
-
56
-
57
-
58
-
59
-
60
-
61
-
62
-
63
-
64
-
65
-
66
-
67
-
68
 |
 |

User's Guide