Epson FX-185 User Manual
Epson FX-185 - Impact Printer Manual
 |
View all Epson FX-185 manuals
Add to My Manuals
Save this manual to your list of manuals |
Epson FX-185 manual content summary:
- Epson FX-185 | User Manual - Page 1
- Epson FX-185 | User Manual - Page 2
in strict accordance with the manufacturer's instructions, may cause interference to radio and Identify and Resolve Radio-TV Interference Problems." This booklet is available from FX-80, FX-100, RX-80, and RX-100 are trademarks of Epson America, Inc. HX-20 Notebook Computer is a trademark of Epson - Epson FX-185 | User Manual - Page 3
The User's Manual for the FX Series printers consists of two volumes: Tutorial and Reference. This volume, the Tutorial, is arranged in the following logical groupings: Introduction (for everyone) Programmer's Easy Lesson (for experienced users) Hardware description: Chapter 1 Software introduction - Epson FX-185 | User Manual - Page 4
the end of such program lines. You will see this technique throughout the manual. A few versions of BASIC use semicolons between any two control codes that appropriate. After the ESCape code-CHR$(27)-the FX always expects another code. The second code tells the printer which mode to turn on or off, - Epson FX-185 | User Manual - Page 5
peculiar, but it gives the same output that the first version does. The G is not printed on the paper; instead, it is interpreted by the printer as part of the ESCape sequence. In long programs with DATA statements or subroutines, we use END after the line that is executed last, but - Epson FX-185 | User Manual - Page 6
Y raised to the second power. Some computer systems use an up-arrow (t), which prints as a left bracket ([) on FX printers. At the end of each chapter, a Summary section provides a concise review of the chapter's subject matter and a list of the control codes (if any) that have been covered. For - Epson FX-185 | User Manual - Page 7
16 Printer Preparation 17 Paper separator 17 Covers 18 Manual-feed knob 19 DIP switches 20 Ribbon Installation 23 Paper Loading 24 FX-80: built-in tractor feed 24 FX-80 and FX-100: friction feed 28 FX-80 and FX-100: removable tractor unit (optional on the FX-80 - Epson FX-185 | User Manual - Page 8
2 BASIC and the Printer 37 BASIC Communications 38 Character strings 39 BASIC print Print Quality 61 Bold Modes 61 Double-StrikeMode 61 Emphasized Mode 62 Proportional Mode 64 Mixing Modes 65 Summary 66 5 Dress-Up Modes and Master Select 69 FourModes - Epson FX-185 | User Manual - Page 9
line spacing 93 Variable line spacing 95 Microscopic line spacing 98 Line Feeds 98 One-time, immediate line feed 99 Reverse feed (FX-80 only 99 Summary 101 8 Forms Control 103 Form Length Control 103 Form feed distance 103 Not-so-standard forms 105 Paper - Epson FX-185 | User Manual - Page 10
9 Margins and Tabs 113 Margins 113 Left margin 113 Margins and pitches 114 Right margin 116 Both margins 118 Tabs 118 Horizontal tab usage 119 Variable horizontal tabs 121 Vertical tab usage 122 Ordinary vertical tabs 123 Vertical tab channels 126 - Epson FX-185 | User Manual - Page 11
Definition 200 Design 201 Dots into DATA 202 Attribute byte 203 Proportional print 203 Printing User-Defined Characters 205 Downloading Command 207 Defining More Characters 207 Redefining Control Codes 208 Mode Strings 211 STRATA 212 Summary 212 xi - Epson FX-185 | User Manual - Page 12
16 Combining User-Defined Characters 215 Large Letters: Double Wide 215 Large Letters: Double High 217 Giant Letters: Double High and Double Wide . . . . . . 217 Core Sets 223 Line Graphics 225 Summary 226 17 Business Application 227 Preparation 227 Barchart 227 - Epson FX-185 | User Manual - Page 13
-80 and FX-100 printers 1-2 Printer parts 1-3 Paperpath 1-4 Paper separator 1-5 Protective lids 1-6 Tractor covers 1-7 Manual-feed knob 1-8 DIP switch vent 1-9 DIP switch location 1-10 DIP switch factory settings 1-11 Ribbon insertion 1-12 Printer readied for - Epson FX-185 | User Manual - Page 14
77 6-1 Bidirectional line 84 6-2 Unidirectional line 84 7-1 Default line spacing 94 7-2 Cascading STAIR STEPS 96 7-3 Staggering STAIR STEPS 100 8-1 Setting the top of form 104 8-2 Two-inch form feed 106 8-3 Two-line form feed 106 8-4 Standardskip 108 - Epson FX-185 | User Manual - Page 15
161 12-2 STRATA logo 162 12-3 STRATA program 163 12-4 Corner of the FX-80 design 164 12-5 FX-80 figure 168 12-6 Program for FX-80 figure 168 12-7 FX-100 figure 169 12-8 Program for FX-100 figure 170 12-9 More distinct version 171 12-10 Most distict version 172 12 - Epson FX-185 | User Manual - Page 16
17-1 Barchart 228 17-2 Program for BARCHART 230 17-3 Statement form 232 17-4 Program for STATEMENT 234 xvi - Epson FX-185 | User Manual - Page 17
of Tables 1-1 DIP switch functions 23 2-1 Several computers' print LIST commands ...... 38 2-2 Several computers' printer activating commands . 40 2-3 ASCII codes on the FX 42 3-1 Summary of print pitches 60 4-1 Summary of modes 67 5-1 Master Select Quick Reference Chart - Epson FX-185 | User Manual - Page 18
FX Features Epson's MX series of printers attracted enough attention to become the most popular line of printers in the industry. Our FX printers follow in the same grand tradition. The FX printers l Up to 233 characters per line with the FX-100™ for spreadsheet users l User-definable character sets. - Epson FX-185 | User Manual - Page 19
reach DIP switches to customize printer features. l Epson reliability, quality, and support In short, the FX is loaded with features that will challenge your ability to put them to work. This manual can help you use one or all of them. Inside the Printer The FX printers contain two kinds of internal - Epson FX-185 | User Manual - Page 20
of the program you are using. You can always learn about the FX's advanced features at a later time. (You might, for instance, someday want to modify a word processing software package so that its printer driver uses special FX features.) The lessons will be waiting for you. l For those who prefer - Epson FX-185 | User Manual - Page 21
Think of the manual as your personal guide in your exploration of the FX's many features. For a preview of what your programs can produce, take a look at the following potpourri of print modes and graphics. 4 - Epson FX-185 | User Manual - Page 22
- Epson FX-185 | User Manual - Page 23
6 - Epson FX-185 | User Manual - Page 24
feeders out of the way. If a tractor unit is installed on your FX-100, you will need to remove it. Then, for either model, push the friction-control lever toward the rear of the printer, pull the paper bail forward, and insert the paper under the plastic separator. Use the manual-feed knob to 7 - Epson FX-185 | User Manual - Page 25
we discuss such compatibility problems and suggest solutions for several off a lot of the FX printer's features. The program can index to find what part of this manual covers it. 10 N=29: E$=CHR TO N: LPRINT CHR$(95);: NEXT X: LPRINT E$"A"CHR$(6) 100 LPRINT "7"H$" " 9"; E$"1" 110 LPRINT "7 ";: FOR - Epson FX-185 | User Manual - Page 26
LPRINT E$"@":END 290 '*** FX xxx 300 DATA 64,0,127,0,127,0,64,0,65,0,112 310 DATA 1,0,127,0,127,0,65,0,96,0,0 320 DATA 64,48,72,54,73,6,1,4,72,48,64 330 DATA 1,6,11,48,64,48,73,54,11,6,1 340 '*** TICKET BORDERS *** 350 DATA 64,0,64,0,64,0,32,0,16,8,7 360 DATA 7,8,16,0,32,0,64,0,64,0,64 370 DATA - Epson FX-185 | User Manual - Page 27
program. That's what the rest of the manual is for. But this brief, line-by source for the active character set. 50 Prepares the printer to redefine characters "0" through ":". 60 Sets a the ticket and sets the line spacing to 6/72-inch. 100 Prints the newly defined symbol "7" (left ticket border), - Epson FX-185 | User Manual - Page 28
bottom half of the FX letters. 190 Turns OFF the codes, prints PRINTERS in Subscript, then prints a border. 200 Prints borders. 210 Prints borders, then switches to Compressed and prints BY. Sets, with ESCape " !X", Emphasized Double-Strike Pica, and prints EPSON - Epson FX-185 | User Manual - Page 29
280 Returns the printer to its defaults. 300-330 Provides data for the FX letters as user-defined characters 0-3. 350-410 Provides data for the ticket borders. 12 - Epson FX-185 | User Manual - Page 30
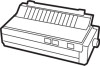
all of the parts. With the FX-80 or FX-100 printer, you should receive the items shown in Figure 1-1: 1. The printer itself 2. A manual-feed knob 3. A paper separator 4. Two protective lids 5. One ribbon cartridge (in a box) 6. This FX Series Printer User's Manual The FX-80 has a tractor built into - Epson FX-185 | User Manual - Page 31
Figure 1-1. The FX-80 and FX-100 printers 14 - Epson FX-185 | User Manual - Page 32
Figure 1-2. Printer parts 15 - Epson FX-185 | User Manual - Page 33
as cables. Printer paper. FX printers are designed to accommodate several types and sizes of paper. Both printers include tractors so that you can use continuous-feed paper with pin-feed holes and friction mechanisms so that you can use paper without these holes. Ribbon cartridge replacement. The - Epson FX-185 | User Manual - Page 34
ve found a good home for FX, you'll need to do some preparing before you can print. This section describes the first steps, which include installing a few parts, checking the setting of some internal switches, and then inserting the ribbon cartridge. Note: The printer should be turned OFF during all - Epson FX-185 | User Manual - Page 35
- tion, FX printers use two types of covers. When you use the friction feed on either the FX-80 or the FX-100 or the built-in tractor on the FX-80, use at the front of the printer opening. This arrangement allows you to easily raise and lower the cover to load paper or ribbon. To install the cover, - Epson FX-185 | User Manual - Page 36
the cover, move it to its full vertical position and then lift it up and a little to the left. Figure 1-5. Protective lids Figure 1-6. Tractor cover Manual-feed knob The manual-feed knob (Figure 1-7) can aid you in loading and adjusting paper. To install the - Epson FX-185 | User Manual - Page 37
now, or you can skip to the ribbon section and check the switches later. The design of the FX printer allows easy access to the internal switches. They (Figure 1-8). Do not replace the screw because in the course of this manual, we will sometimes suggest that you reset switches. Keep the screw in - Epson FX-185 | User Manual - Page 38
Figure 1-8. DIP switch vent 21 - Epson FX-185 | User Manual - Page 39
switch location Figure 2-20. DIP switch factory settings Always turn the power off (with the switch on the left side of the printer) before touching any internal switch. The printer checks most switch settings only at power-up. If you make changes when the power is on, they may be ignored until - Epson FX-185 | User Manual - Page 40
take advantage of the internal 2K buffer. Ribbon installation First, be sure the printer is turned off and move the print head to the middle of the platen. Remove the ribbon cartridge from its packing materials. Holding the cartridge by the plastic fin on the top, guide the pair of tabs at each 23 - Epson FX-185 | User Manual - Page 41
the corresponding slots in the printer frame (Figure 1-11). The cartridge should snap neatly into place. With the paper bail resting on the platen, you can tuck the ribbon between the metal ribbon guide and the black print head. As Figure 1-11 suggests, you can ease the ribbon into place with the - Epson FX-185 | User Manual - Page 42
Figure 1-11. Ribbon insertion 25 - Epson FX-185 | User Manual - Page 43
the paper bail and the friction-control lever toward the front of the printer. Your printer should now look like Figure 1-12. l Adjust the pin-feed levers , start by positioning your paper directly beneath or behind the printer, as in Figure 1-14, so that the paper won't kink or pull - Epson FX-185 | User Manual - Page 44
Figure 1-13. Pin feeder adjustment very important to keep the paper straight so that the pins on both sides engage at the same time. If the paper does not move smoothly, remove it by reversing the manual-feed knob and start again with an unwrinkled sheet. Figure 1-14. Loading the FX-80 27 - Epson FX-185 | User Manual - Page 45
the top of form, as shown at the end of this section. l The friction-control should remain toward the front of the printer as long as the tractor is used. FX-80 and FX-100: friction feed The friction feed is for paper without pin-feed holes. Before using the friction feed on the - Epson FX-185 | User Manual - Page 46
lever to the back. l Guide the paper under the paper separator and the platen with your left hand, while turning the manual-feed knob with your right hand . To add the tractor unit to either the FX-80 or the FX-100, hold the tractor unit over the printer with the gears to your right as shown in - Epson FX-185 | User Manual - Page 47
sides of the tractor assembly are firmly in place. Rock the front of the unit downward, pressing firmly until it locks into place. Figure 1-16. Tractor unit installation Figure 1-17. Hook and stud 30 - Epson FX-185 | User Manual - Page 48
to move the print head to the middle of the platen. l Pull the paper bail and the friction-control lever toward the front of the printer (refer back to Figure 1-12). l Insert the paper under the paper separator and the platen and push the paper through to the front. l Position the - Epson FX-185 | User Manual - Page 49
slightly below the top of the ribbon. The relationship between the perforation and the printhead is the same on both models of the printer, as you can see in Figure you are not done. The printer will not recognize the top of form until the next time you turn it on. The FX considers a form to be 66 - Epson FX-185 | User Manual - Page 50
, be sure to fasten the wires to the grounding screws at each end. With the paper loaded, turn the printer on with the toggle switch at the left-rear comer of the FX. You get a little dance from the print head and three lights go on: the POWER light, the READY light - Epson FX-185 | User Manual - Page 51
Figure 1-20. Paper thickness adjustment 34 - Epson FX-185 | User Manual - Page 52
the printer. That way, your printing can start on the first line of the paper. If you turn the printer on FX a form feed. Remember that the ON LINE light has to be off for the FF and LF buttons to work. The FX tests itself Now it's time to see how your new FX operates. If you're using an FX-100 - Epson FX-185 | User Manual - Page 53
, plus many other characters. If you plan to use your FX printer primarily for word processing or with some other commercial software, you are now ready to follow the printer set-up instructions in your software menu or manual. Because most software packages include set-up routines for dot matrix - Epson FX-185 | User Manual - Page 54
A through D for the ASCII and ESCape codes that your software manual will explain how to use. Here we use BASIC because it is the most popular language for personal computers. One of the simplest things you can do with any FX printer is print listings of your BASIC programs. You merely load - Epson FX-185 | User Manual - Page 55
you naturally want your printer to interpret that code as an A. Most manufacturers of computers, printers, and software use the American problems between printers and computers. (To compare your computer's version of the ASCII table with the FX's version, see your computer manual and this manual - Epson FX-185 | User Manual - Page 56
. Where the printing or action happens-on your screen or your printer-depends on the print command that precedes the character-string command. For just a quick check. We are mainly interested in sending that 193 to the printer, and what it prints on the screen is not as important right now. BASIC - Epson FX-185 | User Manual - Page 57
QX-10, IBM-PC, and Radio Shack TRS-80 Epson HX-20 Notebook Computer Apple II Check your computer's reference manual and type in the commands appropriate to your computer. Then type RUN. With any luck, you will get an Italic capital A on the printer: A If nothing prints, it's time to double-check - Epson FX-185 | User Manual - Page 58
several printers' instruction sequences allow such options as using "0" (quote-zero-quote) in place of CHR$(0). Besides mentioning some of these solutions within the text of this User's Manual, we have written a troubleshooting appendix, Appendix F. Control codes Enough talking about problems. Here - Epson FX-185 | User Manual - Page 59
, even the extended range of codes (0 - 255) is inadequate if only single-code CHR$ instructions can be used. Because of this, Epson has designed the FX printer's logic to understand special sequences of control codes, the ESCape code sequences. You use these code sequences to select one or more - Epson FX-185 | User Manual - Page 60
the Preface, which includes "Conventions Used in This Manual," this is the time to do it. Especially important now are the passages on semicolons typical of the modes on FX printers: nearly all modes stay on until turned off. We will alert you to the few exceptions. If your printer is printing one line - Epson FX-185 | User Manual - Page 61
also change most features that have defaults by software. But whenever you turn your printer off and back on, you will have reset its default settings line of text characters (on the FX-80, 80 characters for normal-width print, more characters for narrower widths; on the FX-100,136 for normal and more for - Epson FX-185 | User Manual - Page 62
. It resets everything to its start-up condition. If you have several different modes active in the printer at one time, they are all shut off by the ESCape CHR$(64). Mode cancelling codes The FX printer also provides specific codes to turn off each mode separately. For example, an ESCape CHR$(53 - Epson FX-185 | User Manual - Page 63
characters. Alternate Formats for ESCape Sequences Activating each of the many FX features with a sequence that consists of the ESCape code plus that you can send the Reset Code with CHR$(27)CHR$(64). Because the @ symbol is the ASCII equivalent of 64, this command can also be typed in as CHR$(27) - Epson FX-185 | User Manual - Page 64
CHR$ to send numeric codes from BASIC, and you use CHR$(27), the ESCape code, to earmark the printing or action to occur on the FX printer. You turn on an FX mode by using the ESCape code and adding to it either the character-string command and an appropriate - Epson FX-185 | User Manual - Page 65
manual, Appendix A for a table of the ASCII codes, and Appendixes B and C for tables of the control codes. Appendix F offers programming solutions to interfacing problems CHR$(27)"4" Turns Italic Mode ON CHR$(27)"@" Resets the printer to its defaults (Reset Code) CHR$(27)"5" Turns Italic Mode - Epson FX-185 | User Manual - Page 66
from a variety of widths, or pitches, for your characters. To use this feature well, it's important to understand just how an FX prints. The technique used by an FX printer is called dot-matrix printing. Dot-Matrix Printing A dot matrix is a grid or graph that someone who designs a character set for - Epson FX-185 | User Manual - Page 67
of the matrix, then fire the appropriate pins. Electrical impulses cause the FX to fire pins at the paper. As a pin is fired, it presses against the ribbon to produce one dot of the matrix. At each position, the printer fires only the pins that are necessary to print the current column of - Epson FX-185 | User Manual - Page 68
Intermediate positions FX characters are designed to be five or fewer columns wide. columns Because the use of 5 dots does not give quite enough detail for the highest quality characters, an FX prints some dots half way between the main columns in the 6-dot-wide matrix. This enhancement results in - Epson FX-185 | User Manual - Page 69
as you will see in Chapter 15. Modes for Pitches Several of the FX printer's modes produce characters in different widths, or pitches. You may recognize two changing to Elite Mode gives you 96. When you print in Pica on the FX-100, you get up to 136 characters per line; Elite Mode gives you 163. - Epson FX-185 | User Manual - Page 70
. Notice that, because Pica is the factory-set default, it comes on whenever you turn the printer on (unless you've changed the pitch default by changing a DIP switch). Compressed Mode To see a third handy print pitch that is available on FX printers, replace your current program with this one: 53 - Epson FX-185 | User Manual - Page 71
characters per inch, Compressed Mode is the narrowest character pitch available on FX printers. FX-80 users can fit 132 Compressed characters into each line (up to 137 by changing the right margin setting; see Chapter 9). FX-100 users can get 233 Compressed characters per print line. Compressed Mode - Epson FX-185 | User Manual - Page 72
the usual commands-CHR$(15) or ESCape " @ "-or by turning the printer off and back on. Mode priorities These first three pitches-Pica (10 cpi), example and many others throughout the manual we use the format that combines the command with the print string. The printer will interpret the letter M as - Epson FX-185 | User Manual - Page 73
Don't take this lesson lightly-it is a good example of how print modes interact on FX printers. Pitch Mode Combinations The previous three modes can't be mixed, but the next mode can be used in combination with any one of them. And - Epson FX-185 | User Manual - Page 74
40 LPRINT "CONTINUOUSLY WITH ESCAPE W" 50 LPRINT CHR$(27)"W"CHR$(0) The printer extends the dot matrix by spreading the dots horizontally to twice their normal distances apart, and then it adds a duplicate of each dot to the - Epson FX-185 | User Manual - Page 75
EXPANDED:" 20 LPRINT CHR$(27)"W1PICA" 30 LPRINT CHR$(15)"COMPRESSED" 40 LPRINT CHR$(27)"MAND ELITE" 50 LPRINT CHR$(27)"@CHARACTERS" Most of the FX modes stay on continuously, and so your program must turn off each mode when you are finished with it. We tell you about the few - Epson FX-185 | User Manual - Page 76
In program lines 30 to 70, CHR$(14) and CHR$(20) move the printer in and out of Expanded Mode. This program turns Compressed Mode on in line the type, and we discuss these techniques in the next three chapters. Summary The FX uses a dot matrix to plot the characters it prints. Vertically, the matrix - Epson FX-185 | User Manual - Page 77
CHR$(27)"M" Turns Elite Mode ON CHR$(27)"P" Turns Elite OFF CHR$(15) Turns Compressed Mode ON CHR$(18) Turns Compressed (set either by software or by hardware) OFF CHR$(14) Turns Expanded Mode (1-line) ON CHR$(20) Turns Expanded (1-line) OFF CHR$(27)"W1" Turns Expanded Mode (continuous - Epson FX-185 | User Manual - Page 78
4 Print Quality In the last chapter you learned how to change the width of the printed characters to achieve six different print pitches. The FX printer also offers several modes that improve print quality without affecting pitch. The three new modes that we discuss in this chapter are Double-Strike - Epson FX-185 | User Manual - Page 79
than that of SingleStrike. It's the old trade-off between speed and print quality. With a normal print speed of 160 characters per second (cps), the FX still moves along pretty quickly in the Double-Strike Mode. Emphasized Mode There is yet another way you can increase the boldness of your printed - Epson FX-185 | User Manual - Page 80
that you want to use it for most of your printouts, you can set it as a default with DIP switch 1-5. This adjustment will make the printer automatically reset to Emphasized Mode, after which you can switch to other modes as needed. Whether you turn Emphasized on with ESCape "E" or by DIP - Epson FX-185 | User Manual - Page 81
use bold characters? It's because most dot-matrix printers use a uniform width for each character (monospacing width as m and w. Now the FX offers you a Proportional Mode on a dot-matrix printer. In this mode characters are printed with Either puts the printer back into the mode that it was in before it - Epson FX-185 | User Manual - Page 82
and the wear and tear on the ribbon. Understandably, these dense modes shorten the life of a ribbon compared to Single-Strike printing. Used you'll attain a higher level of control over your printer. With the many modes available on the FX, there are enough mode combinations to suit just about any - Epson FX-185 | User Manual - Page 83
the printer will prove that Double-Strike has been turned on all the time. Add lines 30 and 50, and make some changes to line 70: 30 - Epson FX-185 | User Manual - Page 84
other modes except Proportional, whereas Emphasized, and thus Proportional, cannot be combined with either Elite or Compressed. Mode combinations are governed by the FX's priority list. This list determines which mode gets printed when two or more conflicting modes are active at the same time. Table - Epson FX-185 | User Manual - Page 85
68 - Epson FX-185 | User Manual - Page 86
without software adjustments. Underline Mode In the old days, dot-matrix printers could not underline words. Even in the not-so-old days, printer users were tedious and time consuming. Those days are now gone, thanks to the FX. It has a built-in Underline Mode that makes underlining very easy. You - Epson FX-185 | User Manual - Page 87
$(95);: NEXT X: LPRINT UNDERLINING IS SIMPLE TO TURN ON/OFF When the FX is in Underline Mode, it is simply using the ninth pin to underscore the under a character its underline appears depends on the model of FX that is printing. The FX-100 prints a character and its underline at the same time, and - Epson FX-185 | User Manual - Page 88
, Elite, and Compressed, affect the width of characters: both Elite and Compressed Modes may be seen as squeezing Pica characters horizontally. FX printers can also squeeze a character vertically-to about half its normal height. These short characters are called Script characters (not to be confused - Epson FX-185 | User Manual - Page 89
several times on one line. If you do that on an FX-100, you'll get a line that declines. If Double-Strike was the current mode before the printer entered Script Mode, the printer exits from Script to Double-Strike. If not, the printer returns to Single-Strike. Italic Mode This is the last print - Epson FX-185 | User Manual - Page 90
many different print combinations are waiting in your FX. Well, hang onto your hat. By combining the various print modes, the FX can print text in 128 type styles. Instead counting these one by one, we'll begin by describing a special FX feature, the Master Select, which lets you choose any one of - Epson FX-185 | User Manual - Page 91
NEW 20 Y$(1)="SINGLE-STRIKE Y$(2)="SNGL-STRIKE EMPHASIZED " 30 Y$(3)="DOUBLE-STRIKE Y$(4)="DBL-STRIKE EMPHASIZED " 40 Z$(1)="PICA Z$(2)="ELITE : Z$(3)="COMPRESSED 50, FOR X=1 TO 2 60 FOR Y=1 TO 4 70 FOR Z=1 TO 3 80 READ N: IF N - Epson FX-185 | User Manual - Page 92
0 SINGLE-STRIKE PICA 1 SINGLE-STRIKE ELITE 4 SINGLE-STRIKE COMPRESSED 8 SNGL-STRIKE EMPHASIZED PICA 16 DOUBLE-STRIKE PICA 17 DOUBLE-STRIKE ELITE 20 DOUBLE-STRIKE COMPRESSED 24 DEL-STRIKE EMPHASIZED PICA 32 SINGLE-STRIKE EXPANDED P I C A 33 SINGLE-STRIKE E X P A N D E DE L I T E 36 SINGLE-STRIKE - Epson FX-185 | User Manual - Page 93
(the ones that don't involve Super- or Subscript) can be combined with any of the 16 Master Select modes. Four times 16 gives you 64 combinations. The other eight combinations that involve Super- and Subscript Modes can be combined with the eight Single-Strike Master Select modes. Eight times eight - Epson FX-185 | User Manual - Page 94
program that does just that, several times. NEW 10 N=4: GOSUB 70: LPRINT CHR$(27)"S1THE FX"CHR$(27)"T" 20 N=17: GOSUB 70: LPRINT CHR$(27)"-1PRINTERS" 30 N=8: GOSUB 70: LPRINT 50) Modes. The Reset in line 60 returns the printer to its defaults. To aid you in quickly finding your way around in this forest - Epson FX-185 | User Manual - Page 95
- Epson FX-185 | User Manual - Page 96
Here are the commands that we introduced in this chapter. CHR$(27) "-1" Turns Underline Mode ON CHR$(27)"-0" Turns Underline OFF CHR$(27)"S1" Turns Subscript Mode ON. Script characters print in Double-Strike and at half speed CHR$(27)"S0" Turns Superscript ON CHR$(27)"T" Turns either - Epson FX-185 | User Manual - Page 97
80 - Epson FX-185 | User Manual - Page 98
Features In this chapter you'll discover several new features that will enhance your control over the printer. Backspacing, for example, allows you to combine characters. You can use a set of software commands to switch in and out of international character sets, and you can control the speed of - Epson FX-185 | User Manual - Page 99
in Spanish that is called a tilde. You backspace the print head by using CHR$(8), then force a partial line feed by using Escape "J" CHR$(11). The FX prints the second tilde just below the first one to form the desired figure. Offsets The backspace function works in all pitches, which opens up - Epson FX-185 | User Manual - Page 100
: LPRINT CHR$(8);: NEXT X 50 LPRINT CHR$(18)"BACKSPACE" After the FX prints each BACKSPACE, it moves the print head 15 Compressed positions backward. or Compressed Mode get slightly misaligned. The printer has a Unidirectional Mode to prevent such problems . To see how effective Unidirectional Mode - Epson FX-185 | User Manual - Page 101
Figure 6-1. Bidirectional line Look carefully at your printout or at the version we show as Figure 6-1. See how the line seems to quiver? Now turn on Unidirectional printing to see how much difference it makes. Add line 10 and RUN the program again: 10 LPRINT CHR$(27)"U1" Figure 6-2. Unidirectional - Epson FX-185 | User Manual - Page 102
of this chapter to create the approximately equal sign? Well, that tilde is only one of the many uncommon characters that are stored in the FX as components of the nine international character sets. We mentioned the international character sets in Chapter 1, when we explained that the factory-set - Epson FX-185 | User Manual - Page 103
Table 6-2) displays the special symbols of each set (if you have problems, consult Appendix F). NEW 10 DIM ARRAY (12): LPRINT CHR$(27)"M" 64,91,92,93,94,96,123,124,125,126 70 FOR Y=0 TO 8: LPRINT CHR$(27)"R"CHR$(Y); 80 READ C$: LPRINT C$CHR$(137)CHR$(14); 90 FOR X=1 TO 12: LPRINT CHR$(ARRAY(X)) 100 - Epson FX-185 | User Manual - Page 104
the printout handy. You can also print international characters in Italic Mode. Change these two lines: 80 READ C$: LPRINT C$CHR$(137)CHR$(14)CHR$(27)"4"; 100 NEXT X: LPRINT CHR$(27)"5": NEXT Y to get the result shown in Table 6-3: Table 6-3. International characters in Italic typeface 87 - Epson FX-185 | User Manual - Page 105
want to use one of the foreign sets all the time, you can change your printer's default. The factory setting of a default international character set-for the USA-is shown of Table 6-4. You can change this by resetting some of the FX's DIP switches. Three switches: Switch 1-6 Switch 1-7 Switch 1-8 - Epson FX-185 | User Manual - Page 106
print head prints one character at a time, as you send it. The FX-80 also moves the paper up so that you can see the current lowercase i, CHR$(27)CHR$(105)"1". But before looking at it, let's review the normal operation of the printer buffer. Enter this program: NEW 20 A$="" : INPUT "TYPE A LETTER - Epson FX-185 | User Manual - Page 107
and print the contents of the buffer, press RETURN alone. Now add this line: 10 LPRINT CHR$(27)"i1" And RUN the program. Your FX-80 responds to your typing-immediately. When you are finished, press RETURN alone, then use the zero version of the command to return to full - Epson FX-185 | User Manual - Page 108
)"i1" CHR$(27)"i0" Turns Half-Speed ON; If your system can't send lowercase letters, use CHR$(115) CHR$(1) Turns Half-Speed OFF For the FX-80 only, turns Immediate-Print Mode ON. If your system can't send lowercase letters, use CHR$(105)CHR$(1). Turns Immediate-Print Mode OFF 91 - Epson FX-185 | User Manual - Page 109
92 - Epson FX-185 | User Manual - Page 110
and Line Feeds Up to this point in the manual, we have not discussed the way the printer moves a page so that it doesn't print lines that distance need not remain the same for every application, or even every line. The FX gives you three types of commands to change the size of a line space. You can - Epson FX-185 | User Manual - Page 111
Figure 7-1. Default line spacing To see 12-dot spacing, reset the printer (to clear any previous modes), and enter: NEW 20 FOR X=0 to 4 30 LPRINT TAB(6*X)"STAIR STEPS" 40, NEXT X 94 - Epson FX-185 | User Manual - Page 112
in the graphics programs presented later. Variable line spacing The FX includes the three line spacing commands shown above mainly for convenience. Besides printing in the preset 7-, 9-, and 12dot spacing, the FX allows you to vary line feeds from 0 to 85 dots worth (0/7-inch - Epson FX-185 | User Manual - Page 113
systems have difficulty with one or more numbers below 13 in character-string commands, we have used X+128 in the linespacing command to avoid those problems. 96 - Epson FX-185 | User Manual - Page 114
line 30-right between the strings STAIR and STEPS. We placed it there to demonstrate that the FX doesn't execute the line-feed command until the end of the print line. Otherwise it would print line spacing commands are simply telling the printer just how many dots to space between the lines. 97 - Epson FX-185 | User Manual - Page 115
third the distance between the pins of the print head (center to center). That means the printer can position a specific line one-third of a dot lower than the previous line. In continuous feature. And if you are using an FX-80, you can send a reverse line feed to make the print head move back up - Epson FX-185 | User Manual - Page 116
Compare Figure 7-3 to Figure 7-2. In the ESCape "A" program of Figure 7-2, the FX prints STAIR and STEPS on the same line, and performs the variable line feed end of the line. In the ESCape "J" program of Figure 7-3, the FX first performs a line feed without a carriage return between the strings (see - Epson FX-185 | User Manual - Page 117
Figure 7-3. Staggering STAIR STEPS 100 - Epson FX-185 | User Manual - Page 118
the numeric equivalent of " j " -CHR$(106). Don't use reverse feed with mailing labels in the printer-they can either move on their gummed paper or peel off and get stuck inside the FX. Summary The FX provides line spacing in increments of 0/72- to 85/72-inch and 00/216- to 255/216 - Epson FX-185 | User Manual - Page 119
/72" CHR$(27)"2" (l/6") (default) n/72" CHR$(27)"A"CHR$(n) n = 0 - 255 n/216" CHR$(27)'3"CHR$(n) n = 0 - 255 n/216" CHR$(27)"J"CHR$h) n = 0 - 255 (immediate) n/216" CHR$(27)"j'CHR$(n) n = 0 - 255 FX-80 only (immediate) 102 - Epson FX-185 | User Manual - Page 120
printing on pre-printed forms, these features are called forms control. With the FX you can easily change the length of a page, the margin settings, and the top of each page, and the printer's response to your use of single sheets of paper. Form Length Control The FX's default form feed is 66 lines, - Epson FX-185 | User Manual - Page 121
off and feed the paper through (using the manual-feed knob) until a perforation lines up with the top of the ribbon (see Figure 8-1 or consult Chapter 1). Figure 8-1. Setting the top of form Turn on the printer. The FX will now remember this position on the paper as the top of form. Each form - Epson FX-185 | User Manual - Page 122
form length, say 2 or 14 inches? The printer has no way of measuring the length of your paper. You must tell the FX about your shorter (or longer) form. The head on the paper. It works just as if you'd turned the printer off and on, but without the resetting of other defaults that happens when - Epson FX-185 | User Manual - Page 123
Figure 8-2. Two-inch form feed Check it by changing your program lines as shown below and RUNning the program again; see if your printout matches Figure 8-3. 10 LPRINT CHR$(27)"C"CHR$(2); 30 LPRINT "TWO-LINE FORM"CHR$(12); Figure 8-3. Two-line form feed 106 - Epson FX-185 | User Manual - Page 124
manual. Paper Perforation Skip You can avoid printing on the paper perforation by setting the top of form properly and making sure the printer system's LLIST command doesn't automatically skip perforations, most printers can't compensate. Your FX, however, can; it can automatically output a form - Epson FX-185 | User Manual - Page 125
Make sure the perforation is even with the top of the ribbon (as in Figure 8-1), reset the printer, then type: NEW 10 LPRINT CHR$(27)"N"CHR$(6); 20 FOR Figure 8-4. Standard skip The CHR$(27)"N"CHR!$(6) in line 10 tells the printer to skip 6 lines (1 inch), which moves the paper across the perforation - Epson FX-185 | User Manual - Page 126
default feature on your printer. Nothing could be easier. Turn the printer off (so that your new setting will take effect when you turn the FX on again). Now remove before proceeding. Single-Sheet Adjustment For instructions on loading single sheets of paper into the friction feeder, refer back to - Epson FX-185 | User Manual - Page 127
your FX printer and run to the end of the form, the paper-out sensor prevents the printer from accidentally printing on the platen. The sensor automatically sounds the beeper and shuts down the printing until you load another sheet and continue. While the sensor saves wear of print head, ribbon, and - Epson FX-185 | User Manual - Page 128
off, either by changing DIP switches or by sending the printer ASCII codes as summarized below. Switch 2-2 When on; activates the beeper; when off, deactivates it Switch 1-3 When off, makes the paper-out sensor active; when - Epson FX-185 | User Manual - Page 129
112 - Epson FX-185 | User Manual - Page 130
trouble with lowercase characters. Here are the ground rules. The allowed values for n on the FX-80 range from 0 to 78 for Pica, 0 to 93 for Elite, and 0 to 133 for Compressed Mode. On the FX-100 the ranges are 0 to 134 for Pica, 0 to 160 for Elite, and 0 to 229 for Compressed. The printer - Epson FX-185 | User Manual - Page 131
Figure 9-2? The left margin is still set at 10, and it will stay at this setting either until it is reset by some software code or until the printer is turned off. Margins and pitches Margin settings are not affected by changing the width of the print after they are set. This - Epson FX-185 | User Manual - Page 132
Figure 9-2. Listing at new margin and then switch to Compressed, the left margin stays the same distance from the edge of the paper. To see an example, type: LPRINT CHR$(15) and then your computer's print listing command. Figure 9-3 shows the page with this addition. Figure 9-3. Absolute left margin - Epson FX-185 | User Manual - Page 133
, n can range from 2 to 80 in Pica, 3 to 96 in Elite, and 4 to 137 in Compressed Mode. For the FX-100, n can range from 2 to 136 in Pica, 3 to 163 in Elite, and 4 to 233 in Compressed. The lower limits may seem strange when compared with - Epson FX-185 | User Manual - Page 134
the current left margin (which is still set at 10). Remember, the FX simply ignores impossible settings. Use a workable number to reset the right margin: the right margin setting to increase your printing width in Compressed Mode on the FX-80. The default right margin in that mode is 132, which is - Epson FX-185 | User Manual - Page 135
new margins and tabs is resetting. Since the FX returns to its default settings whenever you reset the printer, you must be careful about using the Reset vary. You may also set vertical tabs in sets, called channels. In this manual, we often use the terms column and row to refer to the positioning of - Epson FX-185 | User Manual - Page 136
Horizontal tab usage The FX has the ability to tab horizontally, and it has default tabs set in the current pitch you how to change the tabs to suit your needs more closely, but first let's see how the printer's tabs work. You can move the print head from any position on the print line to the next - Epson FX-185 | User Manual - Page 137
Note that many BASICS handle numbers differently from strings. This difference is most evident when you are printing columns that contain mixtures of numbers and strings: many BASICS automatically add spaces both before and after each number. You may have to make adjustments if you want to have a - Epson FX-185 | User Manual - Page 138
$(O) 1 k where n1 and nk stand for the first and last of a series of new tab stops, and the CHR$(0) informs the printer that you are through setting tabs. The FX can store up to 32 tab stops; you may specify one or all of these. You may also add stops to one - Epson FX-185 | User Manual - Page 139
For the FX-100 this is: 135 in Pica, 162 in Elite, and 232 in Compressed. Don't the way to skip a tab. Since in line 70 you specified a tab stop (H$) with no text string, the printer moved to the second stop. Second, this figure shows that the tabs are set absolutely. Although you changed the pitch - Epson FX-185 | User Manual - Page 140
vertical tabbing code as V$. Then line 20 specifies the six lines to which the printer will tab. When you RUN this program, the two sets of text of lines 90 print out at the first and third stops, while line 50 causes the printer to skip over the second stop. Figure 9-10 shows the printout. You set - Epson FX-185 | User Manual - Page 141
Figure 9-10. Ordinary vertical tabs Once you have tabbed to a stop, you can print more than one line of text at that position. See this by changing line 50 and adding the three lines shown below to your current program. If you enter the number of spaces that we have indicated with MS, the entries - Epson FX-185 | User Manual - Page 142
you want to add to this form a graphics logo that uses special line spacing. If you forget to return to 12-dot spacing before the FX prints the next text after the logo, the line spacing will go awry-but each tab stop will remain the same distance from the top - Epson FX-185 | User Manual - Page 143
uses the Reset Code to return the FX to 12-dot spacing. RUNning this program produces a printout to match Figure 9-12. Figure 9-12. Absolute vertical tabs Be sure to delete line 25 after - Epson FX-185 | User Manual - Page 144
already stored a set using ESCape "B", the FX has labelled it as channel 0. If your Because the channels are stored, you must make the printer recall one before you can use it. You use $(45)CHR$(1); 60 ' SET TABS FOR CHANNEL #3 AT 30,45 100 ' ****** START OF MAIN PROGRAM ****** 110 FOR Z=1 TO 3 - Epson FX-185 | User Manual - Page 145
1 TAB #1 FOR CHANNEL 2 TAB #2 FOR CHANNEL 2 TAB #1 FOR CHANNEL 3 TAB #2 FOR CHANNEL 1 TAB #2 FOR CHANNEL 3 Figure 9-13. Printout of multipage channels Summary The FX gives you the ability to set margins and to use default, regulated and variable tabs; you can set tabs in either the horizontal or - Epson FX-185 | User Manual - Page 146
CHR$(27)"1"CHR$(n) Sets the left margin to n. (If you can't use lowercase letters, use CHR$(108) in place of "1".) Limits are 0 - 78 in Pica, 0 - 93 in Elite, and 0 133 in Compressed CHR$(27)"Q"CHR$(n) Sets the right margin to n. Limits are 2 - 80 in Pica, 3 - 96 in Elite, and 4 - 137 in - Epson FX-185 | User Manual - Page 147
130 - Epson FX-185 | User Manual - Page 148
10 Introduction to Dot Graphics Welcome to the world of Epson graphics. To get you off to a solid start, brush and paint, you will use the computer and printer to express your artistic ideas. Think of the page as a series of matrixes. For an FX-80 page and Pica characters, for example, you can - Epson FX-185 | User Manual - Page 149
per FX-80 page. And that doesn't even take into account intermediate columns, the FX-100's ability of the predefined characters or symbols in the printer's memory are used. Instead, you create the and your specifications (see Figure 10-1). Seven-bit systems can control only the middle seven pins - Epson FX-185 | User Manual - Page 150
Figure 10-1. Pins numbered sequentially Each time the print head makes a horizontal pass, it prints a pattern of dots. To print figures taller than 7 or 8 dots, the print head must make more than one sweep. If you use the 12-dot (default) line spacing, the print head will leave gaps between the - Epson FX-185 | User Manual - Page 151
first enter one of the seven versions of Graphics Mode and then tell the printer the number of columns you wish to print on each line. In other in. You use the two sets of numbers together to send large numbers to the printer. The first number that you specify (n1) indicates a number of columns (0 - - Epson FX-185 | User Manual - Page 152
FX-80 and up to 12 times 256 (or 3072) on the FX-100. Actually, the FX-80 will accept numbers larger than 7 for n2, but it is pointless to send them because the printer ll see that the FX does have Graphics Modes of greater density. Some systems, such as those for the IBM-PC and the Epson QX-10, also - Epson FX-185 | User Manual - Page 153
the most practical labelling system. Each pin corresponds to one of the eight data lines from the computer, and each data line corresponds to one bit in a binary number. The place values in a binary number are nothing more than the series made up of powers of two. Figure 10-4 shows how - Epson FX-185 | User Manual - Page 154
Print head Decimal sum of the desired pin pattern Figure 10-4. Pin combinations Now that you, know the labels for the pins, how would you fire the top pin? Why, by sending LPRINT CHR$(128), of course. And how about the bottom graphics pin? That's right, LPRINT CHR$(l). If you wanted to fire only the - Epson FX-185 | User Manual - Page 155
which prints as a left bracket ([) on the FX. Straight line Your first testing of the FX's graphics potential will consist of firing the bottom graphics match the number of columns specified in line 10. The printer is expecting 100 bytes of data; it interprets everything it receives as graphics - Epson FX-185 | User Manual - Page 156
that the printer doesn't print each time it receives a CHR$(l). The FX stores data in its print buffer until it receives as many numbers as it expects-in this case, 100. Slash Using the form 2^X, you can fire individual pins by letting X vary between 0 and 7 (0 and 6 for 7-bit - Epson FX-185 | User Manual - Page 157
110 LPRINT CHR$(2^N); 120 NEXT X: RETURN On the first pass of the loop (line SO), N equals X and the exponents increase in order from 0 to 6. The second time the routine is called, N equals 6 minus X, which reverses the order (from 6 down to 0). The flag F of line 50 activates the change of - Epson FX-185 | User Manual - Page 158
makes? All of the multiple-line graphics programs in this manual use this line spacing. Diamond pattern In this next and the patterns are achieved by IF-THEN tests in a subroutine. To get the final listing, add line 100 and change lines 10, 30, 40, 50, 80, 90, and 120: 10 LPRINT CHR$(27)"1" - Epson FX-185 | User Manual - Page 159
$(27)"K"CHRS(n 1,)CHR$(n2); Enters Single-Density Graphics Mode and specifies width setting. Width = n1+256*n 2 where n1 is 0 - 255 and n2 is 0 - 7 on the FX-80 and 0 - 12 on the FX-100 Note: Single-Density graphics dots are printed 60 per inch horizontally and 72 per inch vertically. 142 - Epson FX-185 | User Manual - Page 160
of Graphics Density We introduced you to FX graphics by having you use SingleDensity Graphics Mode these four labels is 15, send a CHRS(15) to the printer: NEW 20 A$=CHR$(27)+"K"+CHR$(100)+CHR$(0) 30 B$=CHR$(l5) 40 LPRINT A$;: FOR X=1 TO 100: LPRINT B$;: NEXT X 80 LPRINT CHR$(27)"@" Sure enough, - Epson FX-185 | User Manual - Page 161
when you are printing graphics just as it is when you are printing text. The problem again is that most computer systems handle some of these codes in a special way instead of delivering them to the printer. For example, one computer system handles form feeds by itself. It counts lines to keep - Epson FX-185 | User Manual - Page 162
numbers with similar patterns, or you can POKE the trouble codes directly to the FX. Learning how to cope with these problems is part of learning how to use the printer with your system. See Appendix F for help. Density Varieties The FX printer offers you the 16 text densities that we printed out - Epson FX-185 | User Manual - Page 163
The printer fires pins 1, 3, 5, and 7 (with the respective exponential values of 1, 4, 16, and 64) in statement may be different for your BASIC; see your software documentation. HIGH-SPEED DOUBLE-DENSITY GRAPHICS The program still avoided the problem by never calling up one dot twice in succession. - Epson FX-185 | User Manual - Page 164
2, 4, and 6--are not printed at all. The print head is moving too fast to retract the pins and then instantly fire them again, so the FX's program suppresses them. Figure 11-2. No overlapping dots 147 - Epson FX-185 | User Manual - Page 165
Low-Speed Double-Density Graphics Mode Ah, but the FX has a special print mode to take care of this very problem. It's called the Low-Speed Double-Density Graphics Mode. Change the 2 of line 20 to a 1 and change the text in line 50 once more: 20 A$= - Epson FX-185 | User Manual - Page 166
)+CHR$(42) 50 LPRINT QUADRUPLE-DENSITY GRAPHICS ; QUADRUPLE-DENSITY GRAPHICS In Quadruple-Density Graphics Mode, any FX can print 480 times 4 (or 1920) columns of dots on a single 8-inch line and the FX-100 can print 816 times 4 (or 3264) columns on a 13.6-inch line. The graphics setting required to - Epson FX-185 | User Manual - Page 167
graphics density. Table 11-1 describes them. More Graphics Programming Tips The next two sections discuss two modes that the FX offers to help you solve potential graphics problems. A reassigning code allows you to change the density for graphics programs that use one of the four alternate codes - Epson FX-185 | User Manual - Page 168
any one row. Quadruple CHR$(27)"Z" 240 dots per inch; 8 1920 dots per 8" line; 3 3264 dots per 13.6"line The printer does not print consecutive dots in any one row. Epson none Matches the screen 8 QX-10 density of the QX-10: 80 dots per inch; 4 640 dots per 8" iine; 1088 dots - Epson FX-185 | User Manual - Page 169
when you want to use a program developed for a different model of Epson printer. Suppose you have a program for circles written for an MX that uses this purpose, the FX has a special 9-Pin Graphics Mode (it won't, however, work with 7-bit computer systems). In this mode the printer takes 2 bytes to - Epson FX-185 | User Manual - Page 170
Figure 11-5. Nine-pin usage (Use CHR$(94) if you can't generate the caret symbol (^) from your system.) The d determines the density of the graphics: d set to 0 produces Single-Density; d set to 1 produces Double-Density. In this format, n1 and n2 represent the usual width settings, but each print - Epson FX-185 | User Manual - Page 171
2 bytes to define each 9-dot pin pattern: the first byte determines the pattern of the top 8 pins in the usual way and only the top bit of the second byte is used. Thus any second byte of 128 or greater fires the bottom pin of the print head; anything less does - Epson FX-185 | User Manual - Page 172
pattern-add more data? Or store the data in program variables to be recalled as needed? Here you don't need to go to that much trouble. For simple programs 155 - Epson FX-185 | User Manual - Page 173
number, it transfers control to a special subroutine that does the repeating. (Or you could use a STRING$ statement.) Change lines 50 and 90, and add lines 100, 110, and 120 so that your listing looks like this: 20 A$=CHR$(27)+"K"+CHR$(14)+CHR$(0) 30 FOR Y=1 TO 10: RESTORE: LPRINT A$; 40 FOR X=1 TO - Epson FX-185 | User Manual - Page 174
8,28,62,93,-6,28,93,62,28,8 100 READ R: FOR J=1 TO -N 110 LPRINT or data. And we commented on problems that may arise from software interfacing when you try to send codes command with which you can access any one of the seven FX graphics modes; Table 11-1 summarizes them. Here are the commands - Epson FX-185 | User Manual - Page 175
CHR$(27)"L"CHR!$(n 1)CHRS(n 2) Enters Low-Speed Double-Density Graphics Mode and specifies the width setting. Width = n1+(256*n2), where n1 is 0 - 255 and n2 is 0-7 CHR$(27)"Z"CHR!$(n 1)CHR$(n2) Enters Quadruple-Speed Graphics Mode and specifies the width setting. Width = n1+(256*n 2), where n1 is 0 - Epson FX-185 | User Manual - Page 176
show how easy it is to create high-resolution dot graphics on your FX. We hope they inspire you to include graphics in your own programs. computers enable users to draw figures on the screen, then echo them to the printer. Without such a program, there really is no quick and easy way to calculate - Epson FX-185 | User Manual - Page 177
,8,64,8,32,16,0,-7,0,0,128 The program's handling of the data is fairly straightforward. In most cases, the program merely reads a number and sends it to the printer. To make this happen, add three lines: 610 READ N: IF N=128 THEN 650 620 IF N>=$ THEN PRINT CHR$(N;: GOTO 610 650 LPRINT Since 127 is - Epson FX-185 | User Manual - Page 178
the program reads a number greater than or equal to zero and sends it to the printer (line 620). Control then returns to line 610, which reads the next number. If 630. Line 630 reads the next two numbers (16 and 64) into P and R and prints them 16 times. Control then returns to line 610, which reads - Epson FX-185 | User Manual - Page 179
spacing, a loop to process the last five lines of data, and the data lines: 100 LPRINT CHR$(27)"1" 590 FOR K=1 TO 6 650 LPRINT: NEXT K: LPRINT CHR$(27 DATA 0,32,16,64,8,64,-15,8,32,72,16,32,64,-6, 0,0,0,127,0,0,127,0,0,0,128 850 DATA -7,0,0,0,8,4,16,2,16,-15, 2,8,18,36,72,16,32,64,-2,0,0,128 Now RUN - Epson FX-185 | User Manual - Page 180
840 DATA 0,32,16,64,8,64,-15,8,32,72,16,32,64,-6, 0,0,0,127,0,0,127,0,0,0,128 850 DATA -7,0,0,0,8,4,16,2,16,-15, 2,8,18,36,72,16,32,64,-2,0,0,128 Figure 12-3. but the name of your favorite printer. In this section we work through an FX-80 design; if you own an FX-100, do not think that we have - Epson FX-185 | User Manual - Page 181
Figure 72-4. Corner of the FX-80 design 164 - Epson FX-185 | User Manual - Page 182
making the numbers easy to calculate: 1 for the low pin 64 for the high pin 1, 2, 4, 8, 16, 32, 64 for the diagonal rise 64, 32, 16, 8, 4, 2, 1 for the diagonal fall (lines 20 and 170 are different for the FX-100): 29 G$=CHR$(27)+"L"+CHR$(51)+CHR$(3): GOSUB 160 158 LPRINT CHR$(27)"@": END 160 - Epson FX-185 | User Manual - Page 183
the four-step process: 80 FOR X=1 TO L: LPRINT CHR$(l);: NEXT X 100 LPRINT CHR$(l)CHR$(2)CHR$(4)CHR$(8) CHR$(16)CHR$(32)CHR$(64); 110 FOR X=1 TO H: LPRINT CHR$(64);: NEXT X 120 LPRINT CHR$(64)CHR$(32)CHR$(16) CHR$(8)CHR$(4)CHR$(2)CHR$(l); Lines 100 and 120 print the 7-dot rise and fall. The lengths - Epson FX-185 | User Manual - Page 184
low. If your computer system requires a WIDTH statement to prevent the printer from issuing a carriage return before the graphics line is complete, add it see your software documentation. To print the program with one line of data, add lines 40 and 190 (the latter differs for the FX-100): 40 LPRINT - Epson FX-185 | User Manual - Page 185
a large amount of data. Okay, now RUN the program: Figure 12-S. FX-80 figure Success! In your printout (which should look like Figure 12-5), -6. Figure 12-7 shows the printout and Figure 12-8 shows the listing for the FX-100. 7 WIDTH LPRINT 255 10 LPRINT CHR$(27)"1" 20 G$=CHR$(27)+"L"+CHR$(51)+CHR - Epson FX-185 | User Manual - Page 186
100 LPRINT CHR$(1)CHR$(2)CHR$(4)CHR$(8)CHR$(16) CHR$(32)CHR$(64); 110 FOR X=1 TO H: LPRINT CHR$(64);: NEXT X 120 LPRINT CHR$(64)CHR$(32)CHR$(16)CRR$(8)CHR$(4) CHR$(2)CHR$(1); 130 GOTO 50 3,3,19,3,12,3,22,14,8,14,6,-1 Figure 72-6. Program for FX-80 figure (concluded) Figure 12-7. FX-100 figure 169 - Epson FX-185 | User Manual - Page 187
THEN LPRINT: GOT0 140 100 LPRINT CHR$(1)CHR$(2)CHR$(b)CHR$(8)CHR$(16) CHR$(32)CHR$(64); 110 FOR X=1 TO H: LPRINT CHR$(64);: NEXT X 120 LPRINT CHR$(64)CHR$(32)CHR$(16 350 DATA 3,3,19,3,12,3,21,3,6,14,8,14,6,-1 Figure 12-8. Program for FX-100 figure Other versions Now that you've typed in all that data - Epson FX-185 | User Manual - Page 188
These changes fill in the diagonals as illustrated in Figure 12-9: 100 LPRINT CHR$(1)CHR$(3)CHR$(7)CHR$(15) CHR$(31)CHR$(63)CHR$(127); 120 LPRINT CHR$(127)CHR$(63)CHR$(31)CHR$(15) CHR$(7)CHR$(3)CHR$(1); - Epson FX-185 | User Manual - Page 189
Figure 12-10. Most distinct version Figure 12-11. Reversed version 172 - Epson FX-185 | User Manual - Page 190
you may run into printer limitations because dot-matrix printers are designed primarily for fast printing of text. The FX, however, can also that mean the FX can't create the same type of figures that a plotter does? Certainly not. You just have to approach the problem a little differently than - Epson FX-185 | User Manual - Page 191
Figure 13-1. Computer memory as sketch pad holes or cells arranged in rows and columns, as Post Office boxes are. Each cell of the array corresponds to a dot position on the paper (Figure 13-2). Figure 13-2. Array in memory and on paper Although the cells in a numeric array can hold nearly any - Epson FX-185 | User Manual - Page 192
Figure 13-3. Ones and zeros become dots and blanks Why all this fuss and stew about arrays? We want to show you that the FX can simulate a plotter. And once the correspondence between array cells and dot positions is firmly established, you can easily plot in any direction. Let's look - Epson FX-185 | User Manual - Page 193
DIMension and arrays Most BASICS allow you to use up to 10 rows and 10 columns in an array without any special preparation of the computer's memory. Since arrays use up lots of memory, you must inform the system if you intend to use a larger array. In BASIC, this is done with the DIMension statement - Epson FX-185 | User Manual - Page 194
Figure 13-5. Plotting a circle Circle Plotting You can have your program examine the cells of an array in any order; the following program scans them row by row, using two loops: 20 FOR R=1 TO N: FOR C=1 TO N At each cell, line 30 calculates the cell's distance from a center point by using the - Epson FX-185 | User Manual - Page 195
The final step to plotting a circle in an array is to close the loops and display the contents of the array. Add these three lines to your program: 50 LPRENT A(R,C);: NEXT C: LPRINT 60 PRINT "ROW";R: NEXT R 170 LPRINT CHR$(27)"@": END and RUN it. Figure 13-6. Displaying an array The printout shows, - Epson FX-185 | User Manual - Page 196
The next line loads the beginning (B), ending (E), and step (S) values for the loop that will read and print the array. 100 B=1: E=N-6: S=1 We have you use variables here so that you can change them later. That way you can make your program read the array in a number - Epson FX-185 | User Manual - Page 197
PRINT "ROW";R: NEXT R 70 LPRINT CHR$(27)"1"CHR$(7); 100 B=1: E=N-6: S=1 110 FOR P=B TO E STEP 7*S problem involves the codes from nine to 13. Remember that the program determined the dot patterns to send to the printer POKE the codes directly or use a printer driver that allows the codes to pass - Epson FX-185 | User Manual - Page 198
5 from it, putting it out of the trouble range. Adjust this test to fit your system. You may see another problem with the figure. The standard 7-dot line spacing circle). If you pursue this course, keep in mind that the FX has several graphics densities available. With figures this small, it is - Epson FX-185 | User Manual - Page 199
drastic measures. One such measure would be to let each bit of the numbers stored in the array cells represent one graphics dot. This would increase the storage ability but tremendously complicate the programming. For symmetric - Epson FX-185 | User Manual - Page 200
. Add these two lines: 80 B=N: E=7: S=-1 90 FOR Z=1 TO 2 and change these three: 60 PRINT "T MINUS";N-R: NEXT R 100 IF Z=2 THEN B=1: E=N-6: S=1 160 LPRINT: NEXT P: NEXT Z Now lines 80, 90, and 100 change the order in which the array is read. First (Z = 1) it's read upside down, then (Z=2) right side - Epson FX-185 | User Manual - Page 201
100 IF Z=2 THEN B=1: E=N-6: S=1 110 FOR P=B TO E STEP 7*S 120 PRINT "LOADING ROWS";P;"TO"; P+6*S the price you pay for largeness. If your computer system requires a WIDTH statement to prevent the printer from issuing a carriage return before the graphics line is complete, add it now: 7 WIDTH LPRINT - Epson FX-185 | User Manual - Page 202
This adjustment makes it easier to compare the distance value with the value of the RND function (line 40, below). Once the computer knows the distance of each cell from the upperleft corner, it can use the following test to determine which cells receive 1s and which cells continue to contain 0s. 40 - Epson FX-185 | User Manual - Page 203
70 LPRINT CHR$(27)"3"CHR$(20);CHR$(7); 80 B=N: E=7: S=-1 90 FOR Z=1 TO 2 100 IF Z=2 THEN B=1: E=N-6: S=1 110 FOR P=B TO E STEP 7*S 120 PRINT "LOADING ROWS";P;"TO"; P+6*S figure produced by a two-dimensional array. The only problem is that the array for this figure uses over 20,000 bytes, which 186 - Epson FX-185 | User Manual - Page 204
STEP 7 50 PRINT "PRINTING ROWS";P;"TO";P+6 60 LPRINT CHR$(27)"*"CHR$(5)CHR$(N1)CHR$(N2); 70 FOR C=1 TO N 80 F=0: PRINT C; 90 FOR R=P TO P+6 100 D=((R-M)^2+(C-M)^2)/M^2 110 IF D>RND(8) THEN F=F+2^ABS(P+6-R) 115 IF F=9 THEN F=10 120 NEXT R: LPRINT CHR$(F); 130 NEXT C: LPRINT: NEXT P 140 LPRINT CHR$(27 - Epson FX-185 | User Manual - Page 205
sizes. Just be prepared to let your computer cook for several hours. Summary We used this chapter to demonstrate the way you can use your FX as though it were a plotter. You can also use your computer system to design a symmetric pattern, applying mathematical principles to minimize the amount of - Epson FX-185 | User Manual - Page 206
Chapter 14 Symmetrical Graphics Patterns In this chapter we continue to explore the generation of graphics patterns in memory. As in the last chapter, you will use ones and zeros in an array to generate pin patterns, but this time you will save memory by using a one-dimensional array to print a two- - Epson FX-185 | User Manual - Page 207
Reverse pattern of P Number of the current pass Remainder Number of repeats of the pattern 0 or 1 to fill the array 90 IF N>MIN THEN 70 100 NEXT J: PRINT The J loop will Repeat four times (RE = 4). It has two subloops, each of which depends on the value of N. Each time through the - Epson FX-185 | User Manual - Page 208
Figure 14-2. Figure 14-2. Pattern sets Before proceeding, delete line 5 and modify line 110 so that it prints to the screen instead of to the printer: 110 FOR K=1 TO C: PRINT A(K);: NEXT K: PRINT' PRINT "C = "C 191 - Epson FX-185 | User Manual - Page 209
), the program calculates the pin patterns, seven dots at a time. Line 170 calculates P, and line 190 calculates its complement, PO. Appendix F discusses problem codes and the P variable. Adjust the line spacing to match the y-dot passes: 120 LPRINT CHR$(27)"1"; If this spacing produces slight gaps - Epson FX-185 | User Manual - Page 210
. If your computer system requires a WIDTH statement to prevent the printer from issuing a carriage return before the graphics line is complete, format for this statement may be different for your BASIC; see your software documentation. Pattern Printout Now that you've completed the groundwork, add - Epson FX-185 | User Manual - Page 211
MAX=5: MIN=1: RE=4: N=0 30 FOR J=1 TO RE 40 N=N+1 50 GOSUB 300 60 IF NMIN THEN 70 100 NEXT J: PRINT 110 FOR K=1 TO C: PRINT A(K);: NEXT K: PRINT: PRINT "C = "c 120 LPRINT CHR$(27)"1"; 130 LAST=INT(C/7): R=C-7*LAST 140 FOR PASS=0 TO LAST: P=0: PRINT "PASS - Epson FX-185 | User Manual - Page 212
Figure 14-4. Symmetric pattern 1 That's enough to knock your eyes right out of their sockets! And all that from a single one-dimensional array. Variations The computer completely controls your symmetric pattern, dot for dot. Small changes in the program can affect the pattern in a big way. For - Epson FX-185 | User Manual - Page 213
Figure 14-5. Symmetric pattern 2 Here's another interesting variation: 20 MAX=64: MIN=1: RE=1: N=1/2 40 N=N*2 70 N=N/2 Figure 14-6. Symmetric pattern 3 Quite a difference! Instead of adding and subtracting one from N, lines 40 and 70 now double and halve - Epson FX-185 | User Manual - Page 214
Also notice that, because the variable RE is set to one, this pattern repeats only once. Now's the time to experiment with some of your own changes to the variables and loops. Summary In this chapter you used a single string of ones and zeros to create a two-dimensional figure. You can use this - Epson FX-185 | User Manual - Page 215
198 - Epson FX-185 | User Manual - Page 216
If you've studied the program examples in this manual, you are quite adept at printing both graphics and text with the FX. In this chapter we're going to share the secrets of the ultimate in printer control-defining your own characters. With the FX, you can create any number of new characters - Epson FX-185 | User Manual - Page 217
controls the use of the FX's 2K RAM buffer. You can use this RAM memory as a large text buffer to smooth printer/computer communications, or you can as 33 and cz as 43 selects the symbols ! through + . To simplify things a bit, the ASCII symbols can be used in place of CHR$(c1) and CHR$(c2). For - Epson FX-185 | User Manual - Page 218
the line prevents an unwanted carriage-return code from disrupting the data. For each character to be defined (determined by c1 and c2), the printer expects 12 data numbers to follow. The first of these numbers is called the attribute byte. It determines some special attributes or characteristics of - Epson FX-185 | User Manual - Page 219
the top 8 rows, but we shift all the dots down one row so that 7-bit systems can stay with the program. Also note that two adjacent dots cannot be printed in the same row. Even in Half-Speed Mode, the printer simply refuses to print two overlapping dots. Figure 15-3 illustrates an E that - Epson FX-185 | User Manual - Page 220
pins are used? At print time, the printer checks the attribute byte before each character is printed. If the high-order bit is on, the top 8 pins of the . ATTRIBUTE BYTE OFF 0 128 64 32 16 8 4 2 1 If attribute byte is less than 128, bottom eight pins are used ATTRIBUTE BYTE ON 1 128 64 32 16 8 4 2 1 - Epson FX-185 | User Manual - Page 221
attribute byte? The starting column number (1) is converted to a 3-bit binary number (001) and stored in bits 4, 5, and 6 of the attribute byte. The ending column number (10) is converted to a 4-bit binary number (1010) and stored in bits 0 to 3. The conversions are shown in Figure 15-5. Figure 15 - Epson FX-185 | User Manual - Page 222
0 to 11 is used. Also note that if 7-bit system users set the high-order bit with CHR$(27)">" before they use the CHR$(27)"&" FX prints a Roman Pica E. To print your newly defined character, you must tell the printer to ignore the ROM and print only RAM characters. The format for this instruction - Epson FX-185 | User Manual - Page 223
LPRINT CHR$(139); While you are in the neighborhood, take a look at some of the other characters in RAM with: 180 LPRINT "EPSON" Oops! Where is the rest of EPSON? All right, we confess-the only characters in the user-defined RAM are those you put there yourself. Characters that haven't been - Epson FX-185 | User Manual - Page 224
FX provides the option of copying (sometimes called downloading) the entire ROM set into the user-defined RAM area. The downloading the high-order bit of the attribute byte is on. In order to save 7-bit users from total frustration 64,36,16,8,7,0,0: 'My A 1160 DATA 127,0,72,0,72,0,76,2,121,0,0: 'My - Epson FX-185 | User Manual - Page 225
you may end up searching for more storage. Anticipating this need, Epson provides commands that will allow you to define and print certain control These codes do not normally print symbols on paper, rather they cause the printer to change modes. To make them print as normal symbols requires an extra - Epson FX-185 | User Manual - Page 226
CHR$(27)"6" and CHR$(27)"7" commands work with the userdefined characters in RAM by deleting lines 2 through 8, and adding the following (unless yours is a 7-bit system, in which case this won't work): 130 LPRINT CHR$(27)"&"CHR$(0)CHR$(128)CHR$(131); 140 FOR Y=1 TO 4: LPRINT CHR$(139); 165 LPRINT - Epson FX-185 | User Manual - Page 227
getting anything done. Codes that currently activate special modes or actions by the printer cannot be printed as normal characters. These include 7 to 15, 17 to USA France Germ. Eng. Denm. Sweden Italy Spain Japan 35 6 12 36 11 64 0 16 29 91 5 23 18 23 5 7 92 15 24 20 24 9 - Epson FX-185 | User Manual - Page 228
USA), then defining any of the codes 35, 36, 64, 91 to 94, 96, or 123 to 126 gets a bit tricky. These codes are merely pointers to the control-code locations for your own special symbols. In that case, there is no need to download the ROM into RAM. But you will need a quick and easy way to switch - Epson FX-185 | User Manual - Page 229
, 90 and 165 and change line 180: 180, LPRINT " 147646 12345678" STRATA SOFTWARE Save the current program as STRATA. Summary CHR$(27)"&"CHR$(n )CHR$(n )CHR$(n each character in the CHR$(27)"&" sequence from n2 to n3, the printer expects 12 data numbers. The first number, called the attribute byte, - Epson FX-185 | User Manual - Page 230
CHR$(27)": "CHR$(n1)CHR$(n 2)CHR$(n 3) Downloads ROM characters into RAM. All three numbers are 0 CHR$(27)"6" Enables printing of codes 128 to 159 and 255 CHR$(27)"7" Disables printing of codes - Epson FX-185 | User Manual - Page 231
214 - Epson FX-185 | User Manual - Page 232
Y 180 LPRINT CHR$(27)"@";: END The ESCape sequences in line 20, 30, and 60 are the commands from the last chapter. This program prepares the printer to define the two characters A and B. Enter the DATA lines: 200 DATA 0,2,5,0,11,16,3,32,70,0,84 210 DATA 68,32,66,49,8,21,14 - Epson FX-185 | User Manual - Page 233
Very nice. Using two characters side by side provides a larger matrix and therefore gives more flexibility in character design. But there is one problem. When two user-defined characters are placed side by side, there is one intermediate column that, unless the first character is printed in - Epson FX-185 | User Manual - Page 234
changes: 10 LPRINT CHR$(27)"1"CHR$(27)"U1"; 100 LPRINT "A" 110 LPRINT "B" 200 210 DDAATTAA 16,32,95,0,64,0,127,0,63,0,0 14,0,123,0,3,0,123,0,1,127,0,15 Line 10 wide. This gives you an 18 by 22 matrix. If you have a 7-bit system, you will have to skip to "Core Sets," below. Which ASCII numbers - Epson FX-185 | User Manual - Page 235
71 = G 128 64 32 16 8 4 2 1 128 64 32 16 6 4 2 1 199=G 103 = g 231=g Figure 16-2. Double high and wide character In order to define letters in groups of four, you'll have to - Epson FX-185 | User Manual - Page 236
32,31,64,0,64,0,64 280 DATA 64,4,72,2,32,2,24,4,0,0,0 290 DATA 0,120,4,0,2,124,1,0,10,1 300 DATA 1,64,0,124,2,68,8,120,0,64,0 Here's the printing routine: 100 A$="": INPUT NEXT Y 170 LPRINT Some BASIC systems do not support the MID$ statement-instead they use subscripts to isolate portions of a - Epson FX-185 | User Manual - Page 237
'G 260 DATA 71 270 DATA 0,15,16,0,32,31,64,0,64,0,64 280 DATA 64,4,72,2,32,2,24,4,0,0,0 290 DATA 0,120,4,0,2,124,1,0,1,0,1 300 DATA 1,64,0,124,2,68,8,120,0,64,0 Figure 16-3. Program for giant G When you RUN it, you should see line 100's prompt: ENTER A STRING You can respond with any string - Epson FX-185 | User Manual - Page 238
no space after the 0 and then press RETURN. The next prompt on the screen is: ENTER A MASTER PRINT MODE NUMBER For now, enter a 24. Remember, all codes from 0 to 255 produce a combination of print modes, but there are only 16 unique combinations. You may want to refer to Figure 5-2 for the other - Epson FX-185 | User Manual - Page 239
410 DATA 0,1,0,127,0,1,0,127,0,1,0 420 DATA 0,1,0,127,0,1,0,127,0,1,0 430 ' E 440 DATA 69 450 DATA 0,64,0,127,0,64,0,62,65,0,65 460 DATA 65,0,67,0,64,0,64,32,0,0,0 470 DATA 0,1,0,127,0,1,0,126,1,0,1 480 DATA 1,0,69,0,11,0,11,0,6,0,0 490 ' S 500 DATA 83 510 DATA 0,0,0,24,36,0,66,16,105,0,68 520 DATA - Epson FX-185 | User Manual - Page 240
own character set. By the way, the Introduction at the beginning of this manual shows a few more of these Double Wide and Double High letters. You can be combined to make any letter in the alphabet. This requires a bit of imagination; we present an example here to lubricate those creative gears. Prepare - Epson FX-185 | User Manual - Page 241
Deleting line 20 ensures that the printer does not download the ROM characters. That makes your defined characters the only ones around-no funny stuff on the printer. Here is the data: 100'SIX 110 DATA 7,8,16,0,32,3,68,0,72,0,73 120 DATA 73,0,72,0,68,3,32,0,16,8,7 130 DATA 73,0,9,0,17,96,2,0,4,8,112 - Epson FX-185 | User Manual - Page 242
Have fun creating your own designs with these characters. You may wish to SAVE the program before proceeding. Line Graphics The RX series printers have a set of line-graphics characters stored in ROM. In the following program, we define a similar set. What are line-graphics characters? They - Epson FX-185 | User Manual - Page 243
0,0,0,0,127,0,0,0,0,0,0: ' k 1010 DATA 84,0,170,0,84,0,170,0,84,0,170: ' 1 You can put the line-graphics characters to work like this: 100 LPRINT CHR$(27)"1" 170 LPRINT "ajjjjjjfjjjjjjjb" 175 LPRINT "k NAME k PHONE k" 180 LPRINT "fgjjjjjjijjjjjjjh" 185 LPRINT 190 LPRINT "djjjjjjejjjjjjjc" RUN the - Epson FX-185 | User Manual - Page 244
manual. The second one is considerably longer than the programs in previous chapters, and the length provides two benefits. First, you'll have a chance to really test your own understanding of the FX printer -defined characters. Change the following lines: 100 LPRINT CHR$(27)"3"CHR$(10)CHR$(27)"U1 - Epson FX-185 | User Manual - Page 245
for the chart's vertical bars from line 40 and stores them in the array MAX. The next data lines define three new characters: 70 DATA 2,1,64,32,16,8,4,2,1,64,32 80 DATA 127,0,99,0,65,0,65,0,99,0,127 90 DATA 127,0,28,0,62,65,62,0,28,0,127 228 - Epson FX-185 | User Manual - Page 246
Since you will need to switch two features-line feeds and Emphasized Mode-on and off within the program, you can store their commands as shorter strings: 50 B$=CHR$(27)+"E" 60 D$=CHR$(27)+"J"+CHR$(11): C$=CHR$(27)+"F" If your system won't send an 11, change both instances to either 10 or 12. The - Epson FX-185 | User Manual - Page 247
,28,27,30 50 B$=CHR$(27)+"E" 60 D$=CHR$(27)+"J"+CHR$(11): C$=CHR$(27)+"F" 70 DATA 2,1,64,32,16,8,4,2,1,64,32 80 DATA 127,0,99,0,65,0,65,0,99,0,127 90 DATA 127,0,28,0,62,65,62,0,28,0,127 100 LPRINT CHR$(27) "3"CHR$(10) CHR$(27)"U1"; 110 LPRINT CHR$(27) ":"CHR$(0)CHR$(0)CHR - Epson FX-185 | User Manual - Page 248
84,0,170,0,84,0,170,0,84,0,170:'1 Figure 17-2. Program for BARCHART (concluded) Statement Form For the last application of this manual, you will produce, for a hypothetical business-Strata Software, the statement form that is shown as Figure 17-3. Feel free to adapt the form or any of its elements - Epson FX-185 | User Manual - Page 249
STRATA SOFTWARE 80 TRACK DRIVE DATA TOWN, U.S.A. 01248 PHONE FX1-0080 STATEMENT ACCOUNT NO. DATE DATE AMOUNT REMITTED PLEASE DETACH AND RETURN WITH YOUR PAYMENT INVOICE NO. DESCRIPTION CHARGES PAYMENTS BALANCE CURRENT STRATA SOFTWARE 30 DAYS 60 DAYS 90 DAYS AMOUNT DUE THANK YOU - Epson FX-185 | User Manual - Page 250
requires a WIDTH statement to prevent the printer from issuing a carriage return before the graphics line is complete, add it now: 7 WIDTH LPRINT 255 The format for this statement may be different for your BASIC; see your software documentation. If you are using an FX-100, add this line to set the - Epson FX-185 | User Manual - Page 251
7 WIDTH LPRINT 255 90 LPRINT CHR$(27)"QP"; 100 DIM A(18): LPRINT CHR$(27)"3"CHR$(20)CHR$(27)"U1"; 110 LPRINT CHR$(27)":" CHR$(0)CHR$(0)CHR$(0); 120 LPRINT CHR$(27)"%"CHR$(1)CHR$(0); 130 LPRINT - Epson FX-185 | User Manual - Page 252
127,0,8,0,8,0,8: 'g 970 DATA 8,0,8,0,127,0,0,0,0,0,0 'h 980 DATA 8,0,8,0,127,0,8,0,8,0,8: 'i 990 DATA 8,0,8,0,8,0,8,0,8,0,8: 'j 1000 DATA 0,0,0,0,127,0,0,0,0,0,0: 'k: 1010 DATA 84,0,170,0,84,0,170,0,84,0, 170: 'l 1099 ' > Figure 17-4. Program for STATEMENT (continued) 235 - Epson FX-185 | User Manual - Page 253
,0: 'm - S 1110 DATA 0,127,0,65,0,65,0,65,0,127,0: 'n - 0 1120 DATA 0,63,64,8,64,8,64,28,64,32,0: 'o - F 1130 DATA 0,32,64,0,64,63,64,0,64,32,0: 'p - T 1140 DATA 0,126,1,2,4,8,4,2,1,126,0: 'q - W 1150 DATA 0,7,8,16,36,64,36,16,8,7,0: 'r - A 1160 DATA 0,127,0,72,0,72,0,76,2,121,0: 's - R 1170 DATA - Epson FX-185 | User Manual - Page 254
program. STATEMENT breaks down into several large blocks of routines and data: Lines 100-150 160-390 500-660 700-770 800 900-1010 1100-1170 1200-1250 . Line 360 ses new horizontal tabs. Line 370 prints STRATA SOFTWARE in a different print mode. Line 380 thanks us in Italic characters. Line 390 resets - Epson FX-185 | User Manual - Page 255
adjust the left margin of the box. 999 REM: The End In this chapter we developed a program that uses many of the features of the FX printer. The program demonstrates the tremendous potential of the powerful tool you have at your beck and call. We hope it inspires you to use the - Epson FX-185 | User Manual - Page 256
is from the computer. See also Seven-bit systems Blank space, v Board, serial and interface. See Interface Bold printing. See Double-Strike; Emphasized; Proportional Bracket. See Exponent character Buffer. See Printer buffer Business applications, 227-238 Byte, Attribute. See User-defined characters - Epson FX-185 | User Manual - Page 257
C Cable, 16, 35 CANcel, 46 Caret symbol. See Exponent character Carriage return, 23, 41 CHR$(13) produces it. See also Line feed Centronics. See Interface Channels. See Tabs, vertical Character fonts, shown, 253-270 See also User-defined characters Character size, 256-270, 327 See also - Epson FX-185 | User Manual - Page 258
; Script Mode; Italic Mode Driver. See Printer driver Dumping, hex. See Hex dumping E Elite Mode, 52-53 ESCape "M" turns it on; ESCape "P" turns it off. Emphasized Mode, 62-64 ESCape "E" turns it on; ESCape "F" turns it off. END, v Environment, specifications for, 329 Epson computers. See I-K-20; QX - Epson FX-185 | User Manual - Page 259
by number, 271-281 See also specific modes or functions ESCape "!". Master Select. See Master Select ESCape "#". Accepts eighth bit as is from computer. See Bit, high order ESCape "%"CHR$(n1)CHR$(n2). Selects a character set. See User-defined characters ESCape "&"CHR$(n)"s1s2". Selects characters - Epson FX-185 | User Manual - Page 260
ESCape "I1". Enables printing of control codes 0-31. See User-defined characters. ESCape "J"CHR$(n). Produces an immediate one-time line feed of n/216-inch without a carriage return. See Line feed ESCape "K"CHR$(n1)CHR$(n2). Turns Single-Density Graphics Mode on. See Graphics Mode ESCape "L"CHR$(n1) - Epson FX-185 | User Manual - Page 261
densities in. See Graphics Mode designing, 154-155, 159-171, 189-196 line, 225-226 plotter, 173-187 problem codes with, 144-145 Reset Code with, 144 troubleshooting, 302-303 with seven-bit systems, 311 width of, 134-135, 193 See also Graphics Mode Graphics Mode, 134-135 density command, 145,149 - Epson FX-185 | User Manual - Page 262
dumping, 305-306 Humidity, 329 Horizontal tabs. See Tabs, horizontal I-IX-20 and printer commands, 38, 40 I IBM Personal Computer, 38, 40, 313-314 Immediate-Print "4" turns it on; ESCape "5" turns it off. K Knob. See Manual-feed knob L Labels, 101 Left bracket. See Exponent character Left margin. - Epson FX-185 | User Manual - Page 263
computer interface and. See Interface DIP switch for, 23 one-time immediate, 99-100 ESCape "J"CHR$(n) produces it. reverse, 99, 101 ESCape "j"CHR$(n) produces -38 Location of printer, 16-17 LPRINT. See PRINT Lubrication, 323-324 M Mailing labels. See Labels Maintenance, 323-324 Manual-feed knob, 19 - Epson FX-185 | User Manual - Page 264
N NEC, 151 Nine-pin graphics. See Graphics Mode Noise reduction. See Half-Speed Mode O Offsets, 82-83 ON LINE light and button, 35 Overstrikes, 81-82 P Page, top of. See Top of form Paper bail, 15, 24, 26, 29 loading, 24-32, 304 length. See Forms separator, 17-18 thickness adjustment, 32, 34 types - Epson FX-185 | User Manual - Page 265
-66 Print speed. See Half-Speed Mode Print type chart, 78 Print width, See specific pitches by name: Width Printer buffer, 44 Printer driver for problem codes, 308-309 Priorities. See Modes. Proportional Mode, 64-65 ESCape "p1" turns it on; ESCape "p0" turns it off. attribute byte with, 203-204, 206 - Epson FX-185 | User Manual - Page 266
. See Test Semicolons, iv, 45 Sensor. See Paper-out sensor Separator, paper. See paper Serial board. See Interface Set-up operations for printer, 13-36 Seven-bit systems, 309-311 graphics with, 311 limitations of, 132, 137, 309-310 test for computer's type, 309 user-defined characters with, 202 - Epson FX-185 | User Manual - Page 267
35-36 for seven-bit system, 309 Top of built-in, 24-28 cover, 14, 19 removable, 14-15, 28-31 Troubleshooting, 301-315 TRS-80, 38, 40, 307-309, 313 Type style chart, $(n3) defines characters. ESCape ":"CHR$(n1)CHR$(n2)CHR$(n3) downloads ROM characters into RAM. attribute byte, 203-205 compared to ROM - Epson FX-185 | User Manual - Page 268
W Width of characters, 256-270 statements, 313-314 Word processing, 36, 321-322 Z Zero, slashed, 23 251
-
 1
1 -
 2
2 -
 3
3 -
 4
4 -
 5
5 -
 6
6 -
 7
7 -
8
-
9
-
10
-
11
-
12
-
13
-
14
-
15
-
16
-
17
-
18
-
19
-
20
-
21
-
22
-
23
-
24
-
25
-
26
-
27
-
28
-
29
-
30
-
31
-
32
-
33
-
34
-
35
-
36
-
37
-
38
-
39
-
40
-
41
-
42
-
43
-
44
-
45
-
46
-
47
-
48
-
49
-
50
-
51
-
52
-
53
-
54
-
55
-
56
-
57
-
58
-
59
-
60
-
61
-
62
-
63
-
64
-
65
-
66
-
67
-
68
-
69
-
70
-
71
-
72
-
73
-
74
-
75
-
76
-
77
-
78
-
79
-
80
-
81
-
82
-
83
-
84
-
85
-
86
-
87
-
88
-
89
-
90
-
91
-
92
-
93
-
94
-
95
-
96
-
97
-
98
-
99
-
100
-
101
-
102
-
103
-
104
-
105
-
106
-
107
-
108
-
109
-
110
-
111
-
112
-
113
-
114
-
115
-
116
-
117
-
118
-
119
-
120
-
121
-
122
-
123
-
124
-
125
-
126
-
127
-
128
-
129
-
130
-
131
-
132
-
133
-
134
-
135
-
136
-
137
-
138
-
139
-
140
-
141
-
142
-
143
-
144
-
145
-
146
-
147
-
148
-
149
-
150
-
151
-
152
-
153
-
154
-
155
-
156
-
157
-
158
-
159
-
160
-
161
-
162
-
163
-
164
-
165
-
166
-
167
-
168
-
169
-
170
-
171
-
172
-
173
-
174
-
175
-
176
-
177
-
178
-
179
-
180
-
181
-
182
-
183
-
184
-
185
-
186
-
187
-
188
-
189
-
190
-
191
-
192
-
193
-
194
-
195
-
196
-
197
-
198
-
199
-
200
-
201
-
202
-
203
-
204
-
205
-
206
-
207
-
208
-
209
-
210
-
211
-
212
-
213
-
214
-
215
-
216
-
217
-
218
-
219
-
220
-
221
-
222
-
223
-
224
-
225
-
226
-
227
-
228
-
229
-
230
-
231
-
232
-
233
-
234
-
235
-
236
-
237
-
238
-
239
-
240
-
241
-
242
-
243
-
244
-
245
-
246
-
247
-
248
-
249
-
250
-
251
-
252
-
253
-
254
-
255
-
256
-
257
-
258
-
259
-
260
-
261
-
262
-
263
-
264
-
265
-
266
-
267
-
268
 |
 |
