Epson PictureMate PM-400 User Manual
Epson PictureMate PM-400 Manual
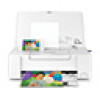 |
View all Epson PictureMate PM-400 manuals
Add to My Manuals
Save this manual to your list of manuals |
Epson PictureMate PM-400 manual content summary:
- Epson PictureMate PM-400 | User Manual - Page 1
PM-400 User's Guide - Epson PictureMate PM-400 | User Manual - Page 2
- Epson PictureMate PM-400 | User Manual - Page 3
Print ...21 Using the Epson iPrint Mobile App 21 Using Epson Remote Print ...22 Using AirPrint ...22 Using Google Cloud Print ...23 Setting Up Google Cloud Print on a Chromebook 24 Using the Mopria Print Service ...25 Wi-Fi Networking ...26 Wi-Fi Infrastructure Mode Setup...26 Selecting Wireless - Epson PictureMate PM-400 | User Manual - Page 4
Loading Paper in the Paper Feed Slot 38 Paper Loading Capacity ...41 Available Epson Papers ...41 Borderless Paper Type Compatibility 42 Paper or Media Type Settings - Product Software 43 Selecting the Paper Source Settings - Control Panel 43 Paper Type Settings - Control Panel 44 Printing from - Epson PictureMate PM-400 | User Manual - Page 5
Your Computer 85 Using an External Device with Your Product 87 Printing from a Camera ...87 Selecting Print and Photo Adjustment Settings 87 Connecting and Printing from a Camera 90 Printing from a Camera Wirelessly 91 Viewing or Printing from a USB Flash Drive or External Device 91 USB Device - Epson PictureMate PM-400 | User Manual - Page 6
Screen 94 Checking Cartridge Status with Windows 95 Checking Cartridge Status with OS X 98 Purchase Epson Ink Cartridges...99 Ink Cartridge Part Numbers ...99 Removing and Installing the Ink Cartridge 100 Adjusting Print Quality...105 Print Head Maintenance...105 Print Head Nozzle Check...105 - Epson PictureMate PM-400 | User Manual - Page 7
Network Software Cannot Find Product on a Network 128 Product Does Not Appear in OS X Printer Window 128 Cannot Print Over a Network...129 Solving Paper Problems...130 Paper Feeding Problems...130 Paper Jam Problems Inside the Product 131 Paper Ejection Problems ...133 Solving Problems Printing - Epson PictureMate PM-400 | User Manual - Page 8
X System Requirements...151 Paper Specifications ...151 Printable Area Specifications ...152 Ink Cartridge Specifications...154 Memory Card General Printer Safety Instructions 159 Ink Cartridge Safety Instructions 160 LCD Screen Safety Instructions 161 Wireless Connection Safety Instructions 161 - Epson PictureMate PM-400 | User Manual - Page 9
PM-400 User's Guide Welcome to the PM-400 User's Guide. For a printable PDF copy of this guide, click here. 9 - Epson PictureMate PM-400 | User Manual - Page 10
product. Using the Control Panel Product Parts Locations The Power Off and Sleep Timers Epson Connect Solutions for Smartphones, Tablets, and More Using AirPrint Using Google Cloud Print Using the Mopria Print Service Using the Control Panel See these sections to learn about the control panel and - Epson PictureMate PM-400 | User Manual - Page 11
Control Panel Buttons 1 The power button 2 The home button 3 The arrow buttons; navigate menus 4 The + and - buttons; increase or decrease the number of copies 5 The stop button 6 The back button 7 The OK button 8 The start button Parent topic: Using the Control Panel 11 - Epson PictureMate PM-400 | User Manual - Page 12
used on the LCD screen. 1. Press the home button, if necessary. 2. Press the arrow buttons to select Setup and press the OK button. 3. Select Printer Setup and press the OK button. 4. Select Language and press the OK button. 5. Select a language and press the OK button. Parent topic: Using the - Epson PictureMate PM-400 | User Manual - Page 13
2. Press the arrow buttons to select Setup and press the OK button. 3. Select Printer Setup and press the OK button. 4. Select Sound and press the OK button. 5. Select Panel Product Parts Locations See these sections to identify the parts on your product. Printer Parts Parent topic: Product Basics - Epson PictureMate PM-400 | User Manual - Page 14
1 Printer cover 2 Rear paper feed 3 Edge guide 4 Inner cover 5 LCD screen 6 Power inlet 7 Micro USB port 8 Ink cartridge holder (do not remove) 9 Memory card slot 10 USB port 11 Power light 14 - Epson PictureMate PM-400 | User Manual - Page 15
Basics Changing the Power Off Timer Setting from the Control Panel You can use the product's control panel to change the time period before the printer turns off automatically. 1. Press the home button, if necessary. 2. Press the arrow buttons to select Setup and press the OK button. 3. Select - Epson PictureMate PM-400 | User Manual - Page 16
before the product enters sleep mode. 1. Press the home button, if necessary. 2. Press the arrow buttons to select Setup and press the OK button. 3. Select Printer Setup and press the OK button. 16 - Epson PictureMate PM-400 | User Manual - Page 17
You see this screen: 4. Select Sleep Timer and press the OK button. You see this screen: 5. Select the time period you want before the product goes to sleep and press the OK button. 6. Press the home button to exit. Parent topic: The Power Off and Sleep Timers 17 - Epson PictureMate PM-400 | User Manual - Page 18
Settings - Windows You can use the printer software to change the time period before the Printer and Option Information button. You see this screen: 6. Turn on the Auto Power On setting if you want the product to automatically turn on when it receives a print job. Note: This setting works with print - Epson PictureMate PM-400 | User Manual - Page 19
software to change the time period before the product enters sleep mode or turns off automatically. 1. Make sure your product is turned on. 2. In the Apple menu or the Dock, select System Preferences. Select Print & Fax, Print & Scan, or Printers & Scanners, select your product, and select Options - Epson PictureMate PM-400 | User Manual - Page 20
you want the product to automatically turn on when it receives a print job. Note: This setting works with print jobs sent over a USB or network connection. Enabling this setting slightly setting. 8. Click Apply. 9. Close the Printer Settings window. Parent topic: The Power Off and Sleep Timers 20 - Epson PictureMate PM-400 | User Manual - Page 21
If you did not already set up Email Print when you installed your product software, visit epson.com/connect to learn more about Email Print, check compatibility, and get detailed setup instructions. 3. Send an email with attachments to your product's Email Print address. Note: Both the email and any - Epson PictureMate PM-400 | User Manual - Page 22
to the same wireless network that your product is using. 5. Print from your mobile device to your Epson product. Parent topic: Epson Connect Solutions for Smartphones, Tablets, and More Related topics Wi-Fi Networking Using Epson Remote Print With Epson Remote Print software, you can print to an - Epson PictureMate PM-400 | User Manual - Page 23
from your Apple or Android device to your Epson product. You can also print from Chromebooks and the Google Chrome browser without drivers or cables. Set up your Epson product for network printing. See the link below. Note: Make sure your Epson printer and computer are connected to the same network - Epson PictureMate PM-400 | User Manual - Page 24
the on-screen instructions. 10. Click Finish printer registration to complete setup and print a test page. Your product is now linked to your Google Account and can be accessed from any Chromebook, computer, Apple or Android device with Internet access. Visit Epson Support for more information - Epson PictureMate PM-400 | User Manual - Page 25
with Internet access. For more information on using Google Cloud Print, visit Epson Support. Parent topic: Using Google Cloud Print Related topics Wi-Fi Networking Using the Mopria Print Service You can use the Mopria Print Service to print from your Android phone or tablet (Android v4.4 or later - Epson PictureMate PM-400 | User Manual - Page 26
Wi-Fi Infrastructure Mode Setup You can set up your product to communicate with your computer using a wireless router or access point. The wireless router or access point can be connected to your computer over a wireless or wired network. 1 Epson product 2 Wireless router or access point 26 - Epson PictureMate PM-400 | User Manual - Page 27
network settings using your product control panel. To install your product on a wireless network, follow the instructions on the Start Here sheet and install the necessary software. The installer program guides you through network setup. 1. Press the home button, if necessary. 2. Press the arrow - Epson PictureMate PM-400 | User Manual - Page 28
wireless network and press the OK button. If you do not see your wireless network's name, you can enter it manually. Note: To enter the wireless network name manually button to confirm Wi-Fi settings. 9. If you want to print a network status report, press the start button. (Otherwise, press the - Epson PictureMate PM-400 | User Manual - Page 29
can set up your product to communicate directly with your computer or another device without requiring a wireless router or access point. 1 Epson product 2 Computer with a wireless interface 3 Other wireless device You can select one of these modes to communicate with your computer or device: Access - Epson PictureMate PM-400 | User Manual - Page 30
must select it from the Web Config Utility, under WiFi/Network Settings > Services > Wi-Fi Direct. Enabling Wi-Fi Direct Mode Parent topic: Wi direct communication between your product and computer or other devices without a wireless router or access point. 1. Press the home button, if necessary. - Epson PictureMate PM-400 | User Manual - Page 31
5. Press the down arrow button to change the password. Note: If you have already connected devices or computers to your product via Wi-Fi Direct, they will be disconnected when you change the password. 6. Select Yes and press the OK button. 7. Enter your new Wi-Fi Direct password. Note: Your - Epson PictureMate PM-400 | User Manual - Page 32
on the LCD screen and should be able to print directly to your product from your computer or Setup (WPS) If your network uses a WPS-enabled wireless router or access point, you can quickly connect your be a virtual WPS button in the software for the device. Check your network product documentation for - Epson PictureMate PM-400 | User Manual - Page 33
a WPS-enabled wireless router or access point Setup (WPS) and press the OK button. 6. Follow the instructions on the LCD screen to complete WPS setup. Your product should now 's network status to help you determine the causes of any problems you may have using your product on a network. 1. Press - Epson PictureMate PM-400 | User Manual - Page 34
You see this screen: 4. Select Network Status and press the OK button. You see a screen like this: Note: If you are connected to a network, the signal strength is displayed. 5. Press the up or down arrow button to view the product's network status. To view additional network details, press the left - Epson PictureMate PM-400 | User Manual - Page 35
Fi Features Parent topic: Wi-Fi Networking Related tasks Selecting Wireless Network Settings from the Control Panel Selecting Wireless Network Settings from the Control Panel Accessing the Web Config connection. 1. Disconnect the USB cable from your product. 2. Uninstall your product software. 35 - Epson PictureMate PM-400 | User Manual - Page 36
Download and install your product software from the Epson website using the instructions on the Start Here sheet. Parent topic: Changing or Updating Network Connections Related concepts Uninstall Your Product Software Connecting to a New Wi-Fi Router If you change the wireless router you have been - Epson PictureMate PM-400 | User Manual - Page 37
You see this screen: 4. Select Wi-Fi Setup and press the OK button. 5. Select Disable Wi-Fi and press the OK button. 6. Select Yes and press the OK button to disable Wi-Fi. Parent topic: Changing or Updating Network Connections 37 - Epson PictureMate PM-400 | User Manual - Page 38
in the Paper Feed Slot Paper Loading Capacity Available Epson Papers Borderless Paper Type Compatibility Paper or Media Type Settings - Product Software Selecting the Paper Source Settings - Control Panel Loading Paper in the Paper Feed Slot You can print photos on a variety of paper types and sizes - Epson PictureMate PM-400 | User Manual - Page 39
2. Load paper, glossy or printable side up and short edge first, against the left side of the paper feed slot. Note: To load envelopes, insert the envelopes printable side up and flap edge left. 39 - Epson PictureMate PM-400 | User Manual - Page 40
the edge guide. • If you have trouble loading a stack of envelopes, press each envelope flat before loading it or load one envelope at a time. • Do not load envelopes that are curled, folded, or too thin, or that have plastic windows. • Check the paper package for any additional loading instructions - Epson PictureMate PM-400 | User Manual - Page 41
You can also purchase supplies from an Epson authorized reseller. To find the nearest one, call 800-GO-EPSON (800-463-7766). Note: Paper/media availability varies by country. Paper Type Print Pack (includes Epson Photo Paper Glossy paper and ink cartridge) Size 4 × 6 inches (102 × 152 mm) Part - Epson PictureMate PM-400 | User Manual - Page 42
Compatibility You can print borderless photos on compatible paper types in compatible sizes: Borderless Paper Types • Epson Photo Paper Glossy • Epson Premium Photo Paper Glossy • Epson Premium Photo Paper Semi-gloss • Epson Ultra Premium Photo Paper Glossy Borderless Paper Sizes • 4 × 6 inches (102 - Epson PictureMate PM-400 | User Manual - Page 43
Software For this paper Plain paper Epson Ultra Premium Photo Paper Glossy Epson Premium Photo Paper Glossy Epson Photo Paper Glossy Epson Premium Photo Paper Semi-gloss Envelope Select this Paper Type or Media Type setting Plain Paper Ultra Premium Photo Paper Glossy Premium Photo Paper Glossy - Epson PictureMate PM-400 | User Manual - Page 44
Parent topic: Loading Paper Paper Type Settings - Control Panel For this paper Plain paper Epson Ultra Premium Photo Paper Glossy Epson Premium Photo Paper Glossy Epson Photo Paper Glossy Epson Premium Photo Paper Semi-gloss Envelope Select this Paper Type setting Plain Paper Ultra Glossy Prem - Epson PictureMate PM-400 | User Manual - Page 45
to your product software on Epson's support website. If you see a Software Update screen, select Enable automatic checking and click OK. The update scans your system to see if you have the latest product software. Follow the on-screen instructions. Printing with Windows Printing with OS X Cancelling - Epson PictureMate PM-400 | User Manual - Page 46
tab of your printer settings window: 4. Select the size of the paper you loaded as the Document Size setting. Note: You can also select the User-Defined setting to create a custom paper size, but you will not be able to use the Borderless setting. 5. If you are printing a borderless photo, select - Epson PictureMate PM-400 | User Manual - Page 47
Options - Windows Parent topic: Printing with Windows Related references Borderless Paper Type Compatibility Paper or Media Type Settings - Product Software Related tasks Selecting Double-sided Printing Settings - Windows Printing Your Document or Photo - OS X Print Quality Options - Windows You - Epson PictureMate PM-400 | User Manual - Page 48
options for 2-Sided Printing: • Manual (Long-edge binding) to print your double-sided print job by printing one side and prompting you to flip the paper over on the long edge to print the other side. • Manual (Short-edge binding) to print your double-sided print job by printing one side and - Epson PictureMate PM-400 | User Manual - Page 49
settings. 6. Follow any instructions displayed on the screen during printing. Note: The surface of the paper may smear during double-sided printing. Make sure the ink has dried before reloading the paper. Double-sided Printing Options - Windows Parent topic: Printing with Windows Related tasks - Epson PictureMate PM-400 | User Manual - Page 50
the Booklet checkbox to print double-sided pages as a booklet. Parent topic: Selecting Double-sided Printing Settings - Windows Selecting Additional Layout and Print Options - Windows You can select a variety of additional layout and printing options for your document or photo on the More Options - Epson PictureMate PM-400 | User Manual - Page 51
your image. • Select Custom and click the Advanced button to manually adjust the color correction settings or turn off color management in your printer software. • Select Image Options to access additional settings for improving printed images. 3. To add the following features, click the Watermark - Epson PictureMate PM-400 | User Manual - Page 52
Custom Color Correction Options - Windows You can select any of the available options in the Color Correction window to customize the image colors for your print job. 52 - Epson PictureMate PM-400 | User Manual - Page 53
includes a face with an intentional color cast, such as a statue, you may want to turn off Fix Photo to retain the special color effects. Parent topic: Selecting Additional Layout and Print Options - Windows Image Options and Additional Settings - Windows You can select any of the Image Options and - Epson PictureMate PM-400 | User Manual - Page 54
Windows For quick access to common groups of print settings, you can select a printing preset on the Main or More Options tab. Note: You can create your own preset by clicking the Add/Remove Presets button. 1. Click the Main or More Options tab. You see the available Printing Presets on the left: 54 - Epson PictureMate PM-400 | User Manual - Page 55
Settings - Windows You can select additional settings that apply to all the print jobs you send to your product. 1. Access the Windows Desktop and right-click the product icon in the Windows taskbar. 2. Select Printer Settings. 3. Click the Maintenance tab. You see the maintenance options: 55 - Epson PictureMate PM-400 | User Manual - Page 56
product monitoring for ink and paper supplies and other issues. Check Paper Width Before Printing Prevents printing beyond the edges of the paper if the paper size setting is incorrect; may reduce print speed. Always Spool RAW Datatype Increases print speed and may solve other printing problems. 56 - Epson PictureMate PM-400 | User Manual - Page 57
perform ICM color matching. Always Use the Driver's Paper Source Setting Prints using the paper source setting in the printer driver, rather than the setting in your application. Parent topic: Selecting Extended Settings - Windows Printing Your Document or Photo - Windows Once you have selected your - Epson PictureMate PM-400 | User Manual - Page 58
You see your application's Print window, such as this one: 2. Click OK or Print to start printing. Checking Print Status - Windows Parent topic: Printing with Windows 58 - Epson PictureMate PM-400 | User Manual - Page 59
print job. It allows you to control printing and check ink cartridge status. • To cancel printing, click Cancel. • To see print jobs waiting to print, click Print Queue. • To check ink status, click Consumables Status. Parent topic: Printing Your Document or Photo - Windows Selecting Default Print - Epson PictureMate PM-400 | User Manual - Page 60
in any program session. Changing the Language of the Printer Software Screens Parent topic: Printing with Windows Changing the Language of the Printer Software Screens You can change the language used on the Windows printer software screens. 1. Access the Windows Desktop and right-click the product - Epson PictureMate PM-400 | User Manual - Page 61
. 5. Click OK to close the printer software window. The printer software screens appear in the language you selected the next time you access them. Parent topic: Selecting Default Print Settings - Windows Changing Automatic Update Options Your printer software for Windows automatically checks for - Epson PictureMate PM-400 | User Manual - Page 62
tasks Checking for Software Updates Printing with OS X You can print with your product using any OS X printing program, as described in these sections. Note: If you have an Internet connection, it is a good idea to check for updates to your product software on Epson's support website. Selecting - Epson PictureMate PM-400 | User Manual - Page 63
to print. 1. Open a photo or document for printing. 2. Select the print command in your application. Note: You may need to select a print icon on your screen, the Print option in the File menu, or another command. See your application's help utility for details. 3. Select your product as the Printer - Epson PictureMate PM-400 | User Manual - Page 64
You see the expanded printer settings window for your product: Note: The print window may look different, depending on the version of OS X and the application you are using. 5. Select the Copies and Pages settings as necessary. Note: If you do not see these settings in the print window, check for - Epson PictureMate PM-400 | User Manual - Page 65
6. Select the page setup options: Paper Size and Orientation. Note: If you do not see these settings in the print window, check for them in your application before printing. They may be accessible by selecting Page Setup from the File menu. 7. Select any application-specific settings that appear on - Epson PictureMate PM-400 | User Manual - Page 66
to use. 11. Select any of the available print options. Print Quality Settings - OS X Print Options - OS X Parent topic: Printing with OS X Related references Paper or Media Type Settings - Product Software Related tasks Selecting Page Setup Settings - OS X Printing Your Document or Photo - OS X 66 - Epson PictureMate PM-400 | User Manual - Page 67
unavailable, depending on the paper type and border setting you have chosen. Normal For everyday text and image printing. Fine For text and graphics with good quality and print speed. Quality For photos and graphics with good quality and print speed. Best Quality For the best print quality, but the - Epson PictureMate PM-400 | User Manual - Page 68
may be accessible by selecting Page Setup from the File menu. 1. Select the size of the paper you loaded as the Paper Size setting. If you are printing a borderless photo, select the Borderless checkbox or a paper size with a Borderless option. You can also select a custom setting to create a custom - Epson PictureMate PM-400 | User Manual - Page 69
variety of layout options for your document or photo by selecting Layout from the popup menu on the print window. • To print multiple pages on one sheet of paper, select the number of pages in the Pages per Sheet pop-up menu. To arrange the print order of the pages, select a Layout Direction setting - Epson PictureMate PM-400 | User Manual - Page 70
and select a paper size from the Destination Paper Size pop-up menu. Parent topic: Printing with OS X Managing Color - OS X You can adjust the Color Matching and Color Options settings to fine-tune the colors in your printout, or turn off color management in your printer software. 1. Select Color - Epson PictureMate PM-400 | User Manual - Page 71
Color Matching and Color Options menus. Color Matching Settings EPSON Color Controls Lets you manage color using controls in your printer software or turn off color management. ColorSync Prints using standard color profiles for your product and paper to help match image colors. You can customize the - Epson PictureMate PM-400 | User Manual - Page 72
You can select printing preferences that apply to all the print jobs you send to your product. 1. In the Apple menu or the Dock, select System Preferences. 2. Select Print & Fax, Print & Scan, or Printers & Scanners, select your product, and select Options & Supplies. 3. Select Driver or Options. 72 - Epson PictureMate PM-400 | User Manual - Page 73
from these settings on the Options or Driver tab. Skip Blank Page Ensures that your product does not print pages that contain no text or images. Warning Notifications Lets you choose whether or not to receive warning notifications from the printer software for various operating conditions. Establish - Epson PictureMate PM-400 | User Manual - Page 74
, you are ready to print. Click Print at the bottom of the print window. Checking Print Status - OS X Parent topic: Printing with OS X Checking Print Status - OS X During printing, you can view the progress of your print job, control printing, and check ink status. 1. Click the printer icon when it - Epson PictureMate PM-400 | User Manual - Page 75
Resume. • To pause printing for all queued print jobs, click Pause or Pause Printer. • To display other printer information, click Settings or Supply Levels. Parent topic: Printing Your Document or Photo - OS X Cancelling Printing Using a Product Button If you need to cancel printing, press the stop - Epson PictureMate PM-400 | User Manual - Page 76
Using Memory Cards With Your Product Follow the instructions here to work with a memory card inserted into your product. Inserting a Memory Card Printing from a Memory Card Transferring Photos on a Memory Card Inserting a Memory Card Insert only one memory card at a time into a memory card slot on - Epson PictureMate PM-400 | User Manual - Page 77
Removing a Memory Card Parent topic: Using Memory Cards With Your Product Memory Card Types You can insert these types of memory cards in your product. Note: Cards marked with an asterisk (*) require an adapter; consult your adapter documentation for details on using it. You can insert the - Epson PictureMate PM-400 | User Manual - Page 78
a memory card inserted into your product: Viewing and Printing Photos Printing Photo Layouts Print Setting Options Photo Adjustment Options Parent topic: Using Memory Cards With Your Product Viewing and Printing Photos You can select photos for printing as you view them on the LCD screen. 1. Press - Epson PictureMate PM-400 | User Manual - Page 79
Press the right or left arrow button to scroll through your photos and display one that you want to print. 5. Press the + or - button to select one or more copies of the photo (up to 99). 6. To select additional photos for printing, repeat the steps above. 7. To view additional settings, press the - Epson PictureMate PM-400 | User Manual - Page 80
. 9. When you are ready to print, press the start button. Note: To cancel printing, press the stop button. Parent topic: Printing from a Memory Card Related references Print Setting Options Photo Adjustment Options Printing Photo Layouts You can print one or more photos from a memory card in special - Epson PictureMate PM-400 | User Manual - Page 81
loaded and press the OK button. 6. Select the paper type setting that matches the paper you loaded and press the OK button. 7. If you see the screen below, do one of the following: • To allow your product to place photos in the layout automatically, select Automatic Layout and press the OK button - Epson PictureMate PM-400 | User Manual - Page 82
manually, select Place Photos Manually and press the OK button. Follow the instructions on the LCD screen to select and place photos on your layout sheet. You see this screen: 8. Press the + or - button to select the number of copies (up to 99) and press the OK button. 9. When you are ready to print - Epson PictureMate PM-400 | User Manual - Page 83
options you want to use when printing photos from a memory card or external device. Print settings Paper Size Paper Type Borderless Quality Expansion Date Fit Frame Available options Various paper sizes Various paper types Borderless With Border Standard Best Standard Medium Minimum Various date - Epson PictureMate PM-400 | User Manual - Page 84
adjustments; see Note below Uses your camera's PRINT Image Matching or Exif Print adjustments Optimizes the Fix Photo adjustments for specific types of photos; select the option that best matches your photo content Automatically fixes the red-eye effect in photos Applies a sepia tone or black-and - Epson PictureMate PM-400 | User Manual - Page 85
in your product and a computer connected to your product over a wireless network. Note: You cannot transfer photos if the product is connected to the computer using a USB cable. Do not transfer photos to and from a memory card while you are printing from the memory card. 1. Make sure the product is - Epson PictureMate PM-400 | User Manual - Page 86
Parent topic: Transferring Photos on a Memory Card Related tasks Inserting a Memory Card Removing a Memory Card Viewing the Network Status 86 - Epson PictureMate PM-400 | User Manual - Page 87
. Epson cannot guarantee the compatibility of your camera. Some combinations of paper type, size, and layout may not be supported, depending on your camera and the product settings. Selecting Print and Photo Adjustment Settings Connecting and Printing from a Camera Printing from a Camera Wirelessly - Epson PictureMate PM-400 | User Manual - Page 88
2. Press the arrow buttons to select Setup and press the OK button. 3. Select External Device Setup and press the OK button. 88 - Epson PictureMate PM-400 | User Manual - Page 89
Settings and press the OK button. 5. Select the print settings you want to use. 6. When you are done, press the back button. 7. Select Photo Adjustments and press the OK button. 8. Select the photo adjustments you want to use, then press the home button to exit. After you select settings, you are - Epson PictureMate PM-400 | User Manual - Page 90
references Print Setting Options Photo Adjustment Options Related tasks Connecting and Printing from a Camera Connecting and Printing from a Camera Before you connect your camera, make sure the product is turned on but not printing. 1. Remove any memory cards from the product. 2. Load the paper you - Epson PictureMate PM-400 | User Manual - Page 91
the instructions that came with your camera to select and print your photos. When you finish printing, turn off your camera and disconnect it from the product. Parent topic: Printing from a Camera Related tasks Removing a Memory Card Related topics Loading Paper Printing from a Camera Wirelessly You - Epson PictureMate PM-400 | User Manual - Page 92
in a camera's built-in memory are not supported. Parent topic: Viewing or Printing from a USB Flash Drive or External Device Connecting printing. Note: Epson cannot guarantee the compatibility of your drive. 1. Remove any memory cards from the product. 2. Load the paper you want to use for printing - Epson PictureMate PM-400 | User Manual - Page 93
from the product. Caution: Do not remove the USB drive or turn off the product when the access light is flashing, or you may lose photos on the drive. Parent topic: Viewing or Printing from a USB Flash Drive or External Device Related topics Loading - Epson PictureMate PM-400 | User Manual - Page 94
like to return your used ink cartridges to Epson for proper disposal, please go to epson.com/recycle for more information. Check Cartridge Status Purchase Epson Ink Cartridges Removing and Installing the Ink Cartridge Check Cartridge Status Your product and its printing software will let you know - Epson PictureMate PM-400 | User Manual - Page 95
Press the OK button to exit. Parent topic: Check Cartridge Status Related tasks Removing and Installing the Ink Cartridge Checking Cartridge Status with Windows A low ink reminder appears if you try to print when ink is low, and you can check your cartridge status at any time using a utility on your - Epson PictureMate PM-400 | User Manual - Page 96
this window: 2. Replace or reinstall the ink cartridge, if necessary. Note: If the cartridge is broken, incompatible with the product model, or improperly installed, Epson Status Monitor will not display an accurate cartridge status. 3. To disable the low ink reminder, right-click the product icon - Epson PictureMate PM-400 | User Manual - Page 97
You see this window: 4. Deselect the See Low Ink Reminder alerts checkbox at the bottom of the screen. 5. To disable promotional offers, deselect the Display Epson Offers checkbox. Parent topic: Check Cartridge Status Related tasks Removing and Installing the Ink Cartridge 97 - Epson PictureMate PM-400 | User Manual - Page 98
. Select Print & Fax, Print & Scan, or Printers & Scanners, select your product, and select Options & Supplies. Select Utility and select Open Printer Utility. 2. Select EPSON Status Monitor. You see a window like this: 3. Do the following as necessary: • To update the ink cartridge status - Epson PictureMate PM-400 | User Manual - Page 99
or purchase new ink cartridges. Note: For best printing results, use up a cartridge within 6 months of opening the package. Part number 320 320P Description Color Ink Cartridge Print Pack - Color Ink Cartridge and Glossy Photo Paper (100 sheets) Parent topic: Purchase Epson Ink Cartridges 99 - Epson PictureMate PM-400 | User Manual - Page 100
after removing the old one. Caution: Leave your old cartridge in the printer until you are ready to replace it to prevent the print head nozzles from drying out. Do not open ink cartridge packages until you are ready to install the ink. Cartridges are vacuum packed to maintain reliability. Note: If - Epson PictureMate PM-400 | User Manual - Page 101
4. Remove the cap as shown. Retain the cap so that you can use it to recap the used cartridge you are replacing. Caution: Do not touch the ink cartridge areas shown here. Doing so may prevent normal operation and printing. Warning: If ink gets on your skin, wash it thoroughly with soap and water. If - Epson PictureMate PM-400 | User Manual - Page 102
6. Open the inner cover. Caution: Do not move the print head by hand; otherwise, you may damage your product. Do not touch the flat white cable inside the product. 7. Press down the blue tab to unlock the used ink cartridge, then lift it out. 102 - Epson PictureMate PM-400 | User Manual - Page 103
. Press down the ink cartridge until it clicks into place. Caution: Make sure to insert the ink cartridge in the correct direction or you may damage the product. 10. Close the inner cover. 11. Press the start button to start charging the ink. Then follow the rest of the on-screen instructions. 103 - Epson PictureMate PM-400 | User Manual - Page 104
as the product. Do not leave the product with the ink cartridges removed for an extended period of time. Otherwise, ink remaining in the print head nozzles may dry out and you may not be able to print. Parent topic: Replacing the Ink Cartridge Related concepts Purchase Epson Ink Cartridges 104 - Epson PictureMate PM-400 | User Manual - Page 105
you may need to run a utility to clean or align the print head. If running these utilities does not solve the problem, you may need to replace the ink cartridge. Print Head Maintenance Print Head Alignment Cleaning the Paper Path Print Head Maintenance If your printouts become too light, or you see - Epson PictureMate PM-400 | User Manual - Page 106
3. Press the arrow buttons to select Setup and press the OK button. 4. Select Maintenance and press the OK button. 5. Select Nozzle Check and press the OK button. 6. Press the start button. The nozzle check pattern is printed. 106 - Epson PictureMate PM-400 | User Manual - Page 107
and press the OK button. Follow the instructions on the screen to clean the print head, check the nozzles, and repeat the Epson. Parent topic: Print Head Nozzle Check Related tasks Cleaning the Print Head Using the Product Control Panel Related topics Loading Paper Replacing the Ink Cartridge - Epson PictureMate PM-400 | User Manual - Page 108
paper in this size in your product: 4 × 6 inches (102 × 152 mm). 3. Do one of the following: • Windows: Access the Windows Desktop and right-click the product icon in the Windows taskbar. • OS X: In the Apple menu or the Dock, select System Preferences. Select Print & Fax, Print & Scan, or Printers - Epson PictureMate PM-400 | User Manual - Page 109
gaps or the pattern is faint, clean the print head. Parent topic: Print Head Nozzle Check Related tasks Cleaning the Print Head Using a Computer Utility Related topics Loading Paper Replacing the Ink Cartridge Print Head Cleaning If print quality has declined and the nozzle check pattern indicates - Epson PictureMate PM-400 | User Manual - Page 110
Head Maintenance Related topics Replacing the Ink Cartridge Cleaning the Print Head Using the Product Control Panel You can clean the print head nozzles using the control panel on your product. 1. Load paper in this size in your product: 4 × 6 inches (102 × 152 mm). 2. Press the home button, if - Epson PictureMate PM-400 | User Manual - Page 111
head again, if necessary. If quality still does not improve, contact Epson. Parent topic: Print Head Cleaning Related tasks Checking the Nozzles Using the Product Control Panel Related topics Loading Paper Replacing the Ink Cartridge Cleaning the Print Head Using a Computer Utility You can clean the - Epson PictureMate PM-400 | User Manual - Page 112
paper in this size in your product: 4 × 6 inches (102 × 152 mm). 3. Do one of the following: • Windows: Access the Windows Desktop and right-click the product icon in the Windows taskbar. • OS X: In the Apple menu or the Dock, select System Preferences. Select Print & Fax, Print & Scan, or Printers - Epson PictureMate PM-400 | User Manual - Page 113
again, if necessary. If quality still does not improve, contact Epson. Parent topic: Print Head Cleaning Related tasks Checking the Nozzles Using a Computer Utility Related topics Loading Paper Replacing the Ink Cartridge Print Head Alignment If your printouts become grainy or blurry, you notice - Epson PictureMate PM-400 | User Manual - Page 114
Head Using the Product Control Panel Parent topic: Adjusting Print Quality Aligning the Print Head Using the Product Control Panel You can align the print head using the control panel on your product. 1. Load paper in this size in your product: 4 × 6 inches (102 × 152 mm). 2. Press the home button - Epson PictureMate PM-400 | User Manual - Page 115
button. 8. Repeat the previous step to select the best printed pattern for each set. Parent topic: Print Head Alignment Related topics Loading Paper Cleaning the Paper Path If your printouts are smeared or scuffed, or your paper does not feed correctly, clean the paper path inside the printer. 115 - Epson PictureMate PM-400 | User Manual - Page 116
the OK button. 4. Select Maintenance and press the OK button. 5. Select Paper Guide Cleaning and press the OK button. 6. Press the start button to begin cleaning the paper guide. 7. Repeat as necessary until the paper comes out clean. Parent topic: Adjusting Print Quality Related topics Loading - Epson PictureMate PM-400 | User Manual - Page 117
ink may leak. • Leave the ink cartridge installed. Removing the cartridge can dry out the print head and may prevent the product from printing. print head may not return to the home position. This can cause the print head to dry out and may prevent the product from printing. 3. Remove all the paper - Epson PictureMate PM-400 | User Manual - Page 118
head. Parent topic: Transporting and Cleaning Your Product Related concepts Print Head Maintenance Print Head Alignment Related tasks Removing a Memory Card Cleaning Your Product To keep your product working at its best, you should clean it whenever necessary. Close the cover and output tray when - Epson PictureMate PM-400 | User Manual - Page 119
1. Turn off the product. 2. Unplug the power cable. 3. Disconnect any connected cables. 4. Remove all the paper. 5. Remove any memory cards inserted in the product. 6. Clean the outer case and control panel with a soft, dry cloth. Do not use any liquid or - Epson PictureMate PM-400 | User Manual - Page 120
Paper Problems Solving Problems Printing from a Computer Solving Page Layout and Content Problems Solving Print Quality Problems Solving Memory Card Problems Uninstall Your Product Software Where to Get Help Checking for Software Updates Periodically, it's a good idea to check Epson's support - Epson PictureMate PM-400 | User Manual - Page 121
to replace the ink cartridge. A printer's ink pad is nearing the end of its service life An ink pad is near the end of its service life and the message will be displayed until the ink pad is replaced. Contact Epson for support. (To resume printing, press the start button.) A printer's ink pad is - Epson PictureMate PM-400 | User Manual - Page 122
warranty. If the product is out of warranty, the pads can be replaced by any Epson authorized service provider. The waste ink pads are not a user-replaceable part. Parent topic: Solving Problems Related references Paper Jam Problems Inside the Product Where to Get Help Related tasks Selecting the - Epson PictureMate PM-400 | User Manual - Page 123
: • If the page prints and the nozzle check pattern is complete, the product is operating properly. Any operation problem you may have could be caused by your computer, cable, software, or selected settings. Check for other solutions or try uninstalling and reinstalling your printer software. 123 - Epson PictureMate PM-400 | User Manual - Page 124
head. • If the page does not print, the product may have a problem. Check for other solutions. If they do not work, contact Epson. Parent topic: Solving Problems Related concepts Print Head Cleaning Print Head Alignment Uninstall Your Product Software Related references Where to Get Help Resetting - Epson PictureMate PM-400 | User Manual - Page 125
After Ink Installation Software Installation Problems USB Connection Problems Parent topic: Solving Problems Noise After Ink Installation If you hear noises from your product after installing ink, check the following: • The first time you install the ink cartridge, the product must charge its print - Epson PictureMate PM-400 | User Manual - Page 126
Connect to a Wireless Router or Access Point Network Software Cannot Find Product on a Network Product Does Not Appear in OS X Printer Window Cannot Print Over a Network Parent topic: Solving Problems Product Cannot Connect to a Wireless Router or Access Point If your product has trouble finding or - Epson PictureMate PM-400 | User Manual - Page 127
SSID), follow the instructions that came with your product to enter your wireless network name manually. • If your Access Point Mode, you may have trouble accessing a low-priority Internet connection. Parent topic: Solving Network Problems Related tasks Selecting Wireless Network Settings from the - Epson PictureMate PM-400 | User Manual - Page 128
before initializing it. 4. Download your product software from the Epson website using the instructions on the Start Here sheet. • If you have replaced your router, reinstall your product software to connect to the new router. Note: If you are using a 5 GHz wireless router, set the router to operate - Epson PictureMate PM-400 | User Manual - Page 129
your software. Note: If you are using a 5 GHz wireless router, set the router to operate in dual band (2.4 GHz and 5 GHz) mode. See your router documentation for instructions. Parent topic: Solving Network Problems Related topics Wi-Fi Networking Cannot Print Over a Network If you cannot print over - Epson PictureMate PM-400 | User Manual - Page 130
Paper Ejection Problems Parent topic: Solving Problems Paper Feeding Problems If you have problems feeding paper, try these solutions: • If paper does not feed for printing, remove it. Then reload it in the rear paper feed against the left side. Slide the edge guide against the edge of the paper - Epson PictureMate PM-400 | User Manual - Page 131
Paper Loading Capacity Paper Jam Problems Inside the Product Related tasks Loading Paper in the Paper Feed Slot Paper Jam Problems Inside the Product If paper has jammed inside the product, follow the steps below to clear the jam. 1. Cancel the print job, if necessary. 2. Remove any jammed paper - Epson PictureMate PM-400 | User Manual - Page 132
3. If necessary, carefully pull out any jammed paper from the front. 4. Open the inner cover and carefully remove any jammed paper. 132 - Epson PictureMate PM-400 | User Manual - Page 133
topic: Solving Paper Problems Related references Paper Jam Problems Inside the Product Paper or Media Type Settings - Product Software Paper Type Settings - Control Panel Related tasks Loading Paper in the Paper Feed Slot Cancelling Printing Using a Product Button Solving Problems Printing from - Epson PictureMate PM-400 | User Manual - Page 134
Preferences from the Apple menu or Dock, select Print & Scan or Printers & Scanners, then double-click your printer icon. Check to see if any jobs are paused. Cancel or resume any jobs as necessary. Parent topic: Solving Problems Printing from a Computer Related tasks Running a Product Check Product - Epson PictureMate PM-400 | User Manual - Page 135
damaged. Let the product rest with the power on for 30 minutes, then try printing again. For the fastest printing, select the following settings in your product software: • Make sure the paper type setting matches the type of paper you loaded. • Turn on any high speed settings in your product - Epson PictureMate PM-400 | User Manual - Page 136
• Page Rendering Mode • Print as Bitmap Parent topic: Solving Problems Printing from a Computer Related references Windows System Requirements OS X System Requirements Paper or Media Type Settings - Product Software Related tasks Selecting Basic Print Settings - Windows Selecting Extended Settings - - Epson PictureMate PM-400 | User Manual - Page 137
in your printer software. (This option has different names, depending on your operating system version.) Note: Leave these options turned on when you print on Epson Iron-on Cool Peel Transfer paper, if available for your product. Parent topic: Solving Page Layout and Content Problems Related tasks - Epson PictureMate PM-400 | User Manual - Page 138
can use the preview option in your printer software to check your margins before you print. Parent topic: Solving Page Layout and Content Problems Related tasks Loading Paper in the Paper Feed Slot Selecting Basic Print Settings - Windows Selecting Basic Print Settings - OS X Selecting Page Setup - Epson PictureMate PM-400 | User Manual - Page 139
can use the preview option in your printer software to check your margins before you print. Parent topic: Solving Page Layout and Content Problems Related tasks Loading Paper in the Paper Feed Slot Selecting Basic Print Settings - Windows Selecting Basic Print Settings - OS X Selecting Page Setup - Epson PictureMate PM-400 | User Manual - Page 140
, try these solutions: • Slide the edge guide against the edge of the paper. • Select a higher print quality setting in your printer software. • Turn off any high speed settings in your product software. • Align the print head. • Make sure the product is not printing while tilted or at an angle - Epson PictureMate PM-400 | User Manual - Page 141
. • You may need to replace the ink cartridge. Parent topic: Solving Print Quality Problems Related concepts Print Head Nozzle Check Print Head Cleaning Print Head Alignment Related references Paper or Media Type Settings - Product Software Paper Type Settings - Control Panel Related tasks Loading - Epson PictureMate PM-400 | User Manual - Page 142
Loading Paper in the Paper Feed Slot Faint Printout or Printout Has Gaps If your printouts are faint or have gaps, try these solutions: • Run a nozzle check to see if any of the print head nozzles are clogged. Then clean the print head, if necessary. • The ink cartridge may be old or low on ink, and - Epson PictureMate PM-400 | User Manual - Page 143
Print Quality Problems Related concepts Print Head Nozzle Check Print Head Cleaning Print Head Alignment Related references Paper or Media Type Settings - Product Software Related tasks Cleaning the Paper Path Loading Paper in the Paper Feed Slot Related topics Replacing the Ink Cartridge Grainy - Epson PictureMate PM-400 | User Manual - Page 144
printed colors can never exactly match your on-screen colors. However, you can use a color management system to get as close as possible. Try using the color management options in your printer software. • For best results, use genuine Epson ink and paper. Parent topic: Solving Print Quality Problems - Epson PictureMate PM-400 | User Manual - Page 145
OS X Related topics Replacing the Ink Cartridge Solving Memory Card Problems Check these solutions if you have problems using memory cards with your product. Memory Card Does Not Fit Into a Slot Cannot View or Print Photos from a Memory Card or Device Cannot Transfer Photos To or From a Memory Card - Epson PictureMate PM-400 | User Manual - Page 146
is set up wirelessly and connected to the same network as your computer. • If you are transferring photos to a memory Photos from a Memory Card to Your Computer Uninstall Your Product Software If you have a problem that requires you to uninstall and re-install your software, follow the instructions - Epson PictureMate PM-400 | User Manual - Page 147
your product, if necessary, and click OK. Then follow any on-screen instructions. • Windows (other versions): Click or Start, and select All Programs or Programs. Select Epson, select your product, then click EPSON Printer Software Uninstall. Note: If you see a User Account Control window, click Yes - Epson PictureMate PM-400 | User Manual - Page 148
contact Epson for technical support services, use the following support options. Internet Support Visit Epson's support website at epson.com/support (U.S.) or epson.ca/support (Canada) for solutions to common problems. You can download drivers and documentation, get FAQs and troubleshooting advice - Epson PictureMate PM-400 | User Manual - Page 149
Canada: (905) 709-2567, 6 AM to 8 PM, Pacific Time, Monday through Friday, and 7 AM to 4 PM, Pacific Time, Saturday Days and hours of support are subject to change without notice. Toll or long distance charges may apply. Purchase Supplies and Accessories You can purchase genuine Epson ink and paper - Epson PictureMate PM-400 | User Manual - Page 150
. Note: Epson offers a recycling program for end of life products. Please go to this site for information on how to return your products for proper disposal. Windows System Requirements OS X System Requirements Paper Specifications Printable Area Specifications Ink Cartridge Specifications Memory - Epson PictureMate PM-400 | User Manual - Page 151
OS X 10.8.x • OS X 10.7.x • OS X 10.6.8 Note: Visit Epson's support website at epson.com/support (U.S.) or epson.ca/support (Canada) for the latest in compatibility and drivers for your product. Parent topic: Technical Specifications Paper Specifications Note: Since the quality of any particular - Epson PictureMate PM-400 | User Manual - Page 152
quality may decline in the shaded areas shown here due to the printer mechanism. Single sheets - normal printing 1 Margin: 0.12 inch (3 mm) minimum 2 A5 (5.8 × 8.2 inches [148 × 210 mm]) paper: 0.39 inch (10.0 mm) Paper smaller than A5 (5.8 × 8.2 inches [148 × 210 mm]): 0.12 inch (3.0 mm) 152 - Epson PictureMate PM-400 | User Manual - Page 153
quality area/top: 1.46 inches (37 mm) minimum 4 Reduced print quality area/bottom: 1.56 inches (39 mm) minimum Single sheets - borderless printing 1 Reduced print quality area/top: 1.57 inches (40 mm) minimum 2 Reduced print quality area/bottom: 1.65 inches (42 mm) minimum Envelopes 1 Left/right - Epson PictureMate PM-400 | User Manual - Page 154
Technical Specifications Ink Cartridge Specifications Note: We recommend that you use genuine Epson cartridges and do not refill them. The use of other products may affect your print quality and could result in printer damage. The cartridge included with the printer is designed for printer setup and - Epson PictureMate PM-400 | User Manual - Page 155
the following requirements: • Dedicated driver • Security settings, such as password are powered via USB are not recommended. Epson cannot guarantee the operation of externally connected devices not supported 4.7GB maximum capacity DVD+R, DVD±RW, DVD-RAM, and Blu-ray Disc are not supported 1.3GB 2TB - Epson PictureMate PM-400 | User Manual - Page 156
ink cartridge and AC adapter) Stored: 3.3 inches (85 mm) Printing: 7.9 inches (201 mm) Stored: 9.8 inches (249 mm) Printing: 9.8 inches (249 mm) Stored: 6.9 inches (176 mm) Printing: 15.1 inches (383 mm) 4.0 lb (1.8 kg) Parent topic: Technical Specifications Electrical Specifications Printer - Epson PictureMate PM-400 | User Manual - Page 157
USB and PictBridge device Hi-Speed USB Hi-Speed USB Note: Epson cannot guarantee the operation of externally connected devices. Parent topic: Technical b/g/n, depending on purchase location) WEP (64/128 bit) WPA2-PSK (AES); complies with WPA2 with support for WPA/WPA2 Personal 2.4 GHz 157 - Epson PictureMate PM-400 | User Manual - Page 158
/IEC CISPR 22 Class B This equipment contains the following wireless module: • Manufacturer: Askey Computer Corporation. • Type: WLU6320-D69 (RoHS) This product conforms to Part 15 of FCC Rules and RSS-210 of the IC Rules. Epson cannot accept responsibility for any failure to satisfy the protection - Epson PictureMate PM-400 | User Manual - Page 159
Epson offers a recycling program for end of life products. Please go to this site for information on how to return your products for proper disposal. General Printer Safety Instructions angle. • Leave enough space in front of the printer for the paper to be fully ejected. • Avoid locations that are - Epson PictureMate PM-400 | User Manual - Page 160
print head is in the home (far right) position and the ink cartridges are in place. • When storing or transporting the printer, do not tilt it, stand it on its side, or turn it upside down; otherwise ink may leak. Ink Cartridge Safety Instructions LCD Screen Safety Instructions Wireless Connection - Epson PictureMate PM-400 | User Manual - Page 161
an ink cartridge. This could damage the print head. • Store ink cartridges in a cool, dark place. • After bringing an ink cartridge inside from a cold storage site, allow it to warm up at room temperature for at least three hours before using it. Parent topic: General Printer Safety Instructions LCD - Epson PictureMate PM-400 | User Manual - Page 162
energy and, if not installed and used in accordance with the instructions, may cause harmful interference to radio or television reception. However EPSON® is a registered trademark, EPSON Exceed Your Vision is a registered logomark, and Epson ConnectTM is a trademark of Seiko Epson Corporation. Epson - Epson PictureMate PM-400 | User Manual - Page 163
or alterations to this product, or (excluding the U.S.) failure to strictly comply with Seiko Epson Corporation's operating and maintenance instructions. Seiko Epson Corporation shall not be liable for any damages or problems arising from the use of any options or any consumable products other than - Epson PictureMate PM-400 | User Manual - Page 164
people assume. Contact your legal advisor for any questions regarding copyright law. Parent topic: Copyright Notice Default Delay Times for Power Management for Epson Products This product will enter sleep mode after a period of nonuse. This is to ensure that the product meets Energy Star standards
-
 1
1 -
 2
2 -
 3
3 -
 4
4 -
 5
5 -
 6
6 -
 7
7 -
8
-
9
-
10
-
11
-
12
-
13
-
14
-
15
-
16
-
17
-
18
-
19
-
20
-
21
-
22
-
23
-
24
-
25
-
26
-
27
-
28
-
29
-
30
-
31
-
32
-
33
-
34
-
35
-
36
-
37
-
38
-
39
-
40
-
41
-
42
-
43
-
44
-
45
-
46
-
47
-
48
-
49
-
50
-
51
-
52
-
53
-
54
-
55
-
56
-
57
-
58
-
59
-
60
-
61
-
62
-
63
-
64
-
65
-
66
-
67
-
68
-
69
-
70
-
71
-
72
-
73
-
74
-
75
-
76
-
77
-
78
-
79
-
80
-
81
-
82
-
83
-
84
-
85
-
86
-
87
-
88
-
89
-
90
-
91
-
92
-
93
-
94
-
95
-
96
-
97
-
98
-
99
-
100
-
101
-
102
-
103
-
104
-
105
-
106
-
107
-
108
-
109
-
110
-
111
-
112
-
113
-
114
-
115
-
116
-
117
-
118
-
119
-
120
-
121
-
122
-
123
-
124
-
125
-
126
-
127
-
128
-
129
-
130
-
131
-
132
-
133
-
134
-
135
-
136
-
137
-
138
-
139
-
140
-
141
-
142
-
143
-
144
-
145
-
146
-
147
-
148
-
149
-
150
-
151
-
152
-
153
-
154
-
155
-
156
-
157
-
158
-
159
-
160
-
161
-
162
-
163
-
164
 |
 |
PM-400 User's Guide