Epson PowerLite Cinema 200 User Manual
Epson PowerLite Cinema 200 Manual
 |
View all Epson PowerLite Cinema 200 manuals
Add to My Manuals
Save this manual to your list of manuals |
Epson PowerLite Cinema 200 manual content summary:
- Epson PowerLite Cinema 200 | User Manual - Page 1
EPSON® PowerLite® Cinema 200 Home Theater Projector User's Guide - Epson PowerLite Cinema 200 | User Manual - Page 2
designated as Original EPSON Products or EPSON Approved Products by SEIKO EPSON CORPORATION. EPSON is a registered trademark of SEIKO EPSON CORPORATION. EPSON Extra Care, EPSON Connection and EPSON Store are service marks, and PrivateLine and PowerLite are registered trademarks of Epson America, Inc - Epson PowerLite Cinema 200 | User Manual - Page 3
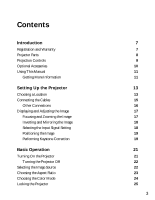
Parts Projection Controls Optional Accessories Using This Manual Getting More Information Setting Up the Projector Choosing a Location Connecting the Cables Other Connections Displaying and Adjusting the Image Focusing and Zooming the Image Inverting and Mirroring the Image Selecting the Input - Epson PowerLite Cinema 200 | User Manual - Page 4
32 Saving and Resetting Menu Selections 33 Creating Memory Settings 33 Resetting the Projector 34 Customizing Projector Features 35 Image Sizing 35 Screen Options 36 Other Setup Options 36 Using Cinema Color Editor 39 Setting Up Your Computer 39 System Requirements 39 Installing - Epson PowerLite Cinema 200 | User Manual - Page 5
's Batteries Cleaning and Replacing the Air Filter Replacing the Lamp Resetting the Lamp Usage Timer Storing the Projector Transporting the Projector Problem Solving What To Do When the Lights Flash Checking the Projector Status Solving Picture Problems Solving Remote Control Problems Where To Get - Epson PowerLite Cinema 200 | User Manual - Page 6
Notices 69 Important Safety Information 69 Remote Control Information 70 FCC Compliance Statement 71 Declaration of Conformity 72 Epson America, Inc., Limited Warranty 72 Index 75 6 - Epson PowerLite Cinema 200 | User Manual - Page 7
Introduction The EPSON® PowerLite® Cinema 200 projector lets you enjoy theater-quality images in the relaxing environment of your own home. Designed especially for home cinema use, it offers these outstanding features: ■ 1280 × 720 resolution, 800:1 contrast ratio, and up to 1300 lumens for - Epson PowerLite Cinema 200 | User Manual - Page 8
Projector Parts Control panel Lamp cover Ventilation slots Adjustable foot Vertical lens shift knob Horizontal lens shift knob Infrared receiver Lens cover Input A (component video) Input B (computer VGA port) D4 port (used mainly in Japan) S-Video port Control (RS-232C) port USB port - Epson PowerLite Cinema 200 | User Manual - Page 9
button Displays the on-screen menu Source button Switches the video input source Power button Zoom button Aspect button Changes the Corrects the shape of a non-rectangular image Menu button Displays the projector's menus Memory button Recalls custom picture settings Menu navigation buttons Menu - Epson PowerLite Cinema 200 | User Manual - Page 10
Optional Accessories EPSON provides the following optional accessories for the projector: Product Replacement lamp (ELPLP28) Air filter replacement (ELPAF04) Ceiling mount Kensington security lock Projection screens: 50-inch portable screen 60-inch portable pop-up screen 80-inch portable pop-up - Epson PowerLite Cinema 200 | User Manual - Page 11
http://support.epson.com. Use this site to download FAQs or product information and e-mail your questions to EPSON support. If you need more help, you can use the EPSON PrivateLine® Support service. Call (800) 637-7661 and enter the PIN on the PrivateLine support card that came with your projector - Epson PowerLite Cinema 200 | User Manual - Page 12
12 - Epson PowerLite Cinema 200 | User Manual - Page 13
Setting Up the Projector Follow the instructions in this section to choose a location for the projector, connect the cables, and display and adjust the image. Choosing a Location You can install the projector for various viewing setups, as shown below. Front/Ceiling Rear/Ceiling Front Rear If - Epson PowerLite Cinema 200 | User Manual - Page 14
. Use this table as a rough guide for projector placement: Projection distance 2.9 feet 3.9 feet 200 in. (174 × 98 in.) 300 in. (261 × 147 in.) Also keep these considerations in mind: ■ Make sure there is plenty of space for ventilation around and under the projector. Do not set the projector - Epson PowerLite Cinema 200 | User Manual - Page 15
Connecting the Cables You can connect the projector to any type of video equipment, such as a VCR, DVD player, HDTV tuner, cable or satellite box, video game console, camcorder, or digital camera. You can also connect it to a desktop or laptop PC or Apple® Macintosh system. You can connect up to - Epson PowerLite Cinema 200 | User Manual - Page 16
to this port (D4 used mainly in Japan) Connect video equipment to one of these ports If you connect to projector's control panel turns orange when the projector is receiving power and is in standby mode. ■ Control (RS-232C) and USB ports Connect a computer to one of these ports to use the Cinema - Epson PowerLite Cinema 200 | User Manual - Page 17
and Adjusting the Image Make sure your video or computer equipment is turned on, then turn on the projector as described on page 21. If projector first, or have multiple pieces of connected equipment, you may have to select the source manually. If an image does not appear, check the troubleshooting - Epson PowerLite Cinema 200 | User Manual - Page 18
Setting If you're using the projector's Input A port, select the correct setting for the type of video equipment you've connected to it: a video player that outputs an NTSC signal. ■ YPbPr for a video player that outputs an HDTV signal. ■ RGB-Video if your video player outputs an RGB video signal. - Epson PowerLite Cinema 200 | User Manual - Page 19
Adjustable feet If you still need to raise the height of the image after using the vertical lens shift knob, lift the front of the projector and rotate the adjustable feet until the image is positioned correctly. You can also use the feet to correct the angle of the image if - Epson PowerLite Cinema 200 | User Manual - Page 20
20 - Epson PowerLite Cinema 200 | User Manual - Page 21
set up as described on page 13, then follow the instructions below to turn it on and display an image. Turning On the Projector 1. Remove the lens cap. 2. Press the On button on the remote control, or press the Power button on the projector. Note: If this is your first time using the - Epson PowerLite Cinema 200 | User Manual - Page 22
cool, or you could damage the projector and reduce lamp life. Selecting the Image Source The Source buttons let you switch between images output from different pieces of equipment connected to the projector (such as a DVD player, cable or satellite box, or video game console). If you don't see the - Epson PowerLite Cinema 200 | User Manual - Page 23
change the size of the image (or aspect ratio) by pressing the Aspect button on the remote control. ■ If your video source is connected to the projector's Video or S-Video port, select Auto to automatically display your image in the correct size. ■ If the Auto option is unavailable (when the source - Epson PowerLite Cinema 200 | User Manual - Page 24
the S-Video source to Living Room if it's usually used for watching movies, and then set the Video source to Dynamic for playing video games.) Select the color and other image quality settings using the projector's menu system (see page 29) or the Cinema Color Editor software (see page 39). You can - Epson PowerLite Cinema 200 | User Manual - Page 25
includes various Lock settings to prevent the image from being accidentally changed once it's adjusted, and to keep children from turning on the projector without adult supervision. To access the Lock settings, follow these steps: 1. Press the Menu button on the remote control. 2. Use the menu - Epson PowerLite Cinema 200 | User Manual - Page 26
26 - Epson PowerLite Cinema 200 | User Manual - Page 27
change the menu language and choose from various options that control how the menus display (see page 28). 1. Press the Menu button on the projector or remote control. You see a screen similar to this one (the actual screen depends on the equipment you've connected): Options for highlighted menu - Epson PowerLite Cinema 200 | User Manual - Page 28
Changing How the Menu Displays Use these options to control how the menu displays on the screen. ■ Language Setting ! Language Select from nine languages to use in the menu system. ■ Menu Position Setting ! On-Screen Display ! Menu Position Use the arrow buttons to choose a position on the screen - Epson PowerLite Cinema 200 | User Manual - Page 29
Most image quality settings are saved independently for each input source (Video, S-Video, Input A, Input B). After you finish adjusting the settings for much light is produced by the projector lamp, and the other settings listed below control how the projector interprets the light and dark areas - Epson PowerLite Cinema 200 | User Manual - Page 30
image. ■ Progressive Setting ! Advanced ! Progressive Leave this setting off (in interlaced mode) when viewing images containing a lot of movement, such as videos and DVDs. If you notice horizontal lines or flickering when viewing still images (such as computer graphics or digital camera photos) or - Epson PowerLite Cinema 200 | User Manual - Page 31
-tune the picture with the last two settings. Note: You can also make color adjustments by attaching a PC or laptop to the projector and using the Cinema Color Editor software. See page 39. ■ Color Intensity Image ! Picture Quality ! Color Intensity Use this setting to adjust the color saturation - Epson PowerLite Cinema 200 | User Manual - Page 32
described above, you can adjust the Tracking and Sync settings for analog RGB computer images. Normally, these settings are adjusted automatically by the projector. If you notice that the image is blurry or contains dark vertical bands, you may need to adjust the settings yourself. ■ Auto Setup - Epson PowerLite Cinema 200 | User Manual - Page 33
as a group in the projector's memory. This stores all the image quality settings described on pages 29 through 32, plus the Aspect and Color Mode Press the Memory button on the remote control. 2. If you've used Cinema Color Editor to create advanced memory settings, choose Standard or Advance to - Epson PowerLite Cinema 200 | User Manual - Page 34
reset the Image menu: Open the Image menu . . . . . . and select Reset You can also reset the lamp usage timer, clear the memory settings, or restore all the projector settings to their original values. Follow these steps: 1. Press the Menu button on the remote control. 2. Open the Reset menu. 3. Do - Epson PowerLite Cinema 200 | User Manual - Page 35
Customizing Projector Features Use the settings in this section to adjust the image image that are not normally visible in the picture. Select Larger to view component video and RGB video at 100% size; composite video and S-video formats are shown at 95%. (Normal displays images at 92% size.) For - Epson PowerLite Cinema 200 | User Manual - Page 36
a black background. ■ Startup Screen Setting ! On-Screen Display ! Startup Screen Turn this setting off if you want to prevent the EPSON logo from appearing while the projector is warming up. Other Setup Options ■ Keystone Setting ! Screen ! Zoom Caption Adjusts the shape of the image, if the left - Epson PowerLite Cinema 200 | User Manual - Page 37
connected to your PC or laptop for running the Cinema Color Editor software. Choose USB or RS-232C projector to enter sleep mode. (Sleep mode shuts the projector off automatically after 30 minutes when there is no video signal.) Leave the setting on to conserve power and extend the life of the lamp - Epson PowerLite Cinema 200 | User Manual - Page 38
38 - Epson PowerLite Cinema 200 | User Manual - Page 39
recall them for future use. Setting Up Your Computer Before using Cinema Color Editor, follow the instructions in this section to install the software and connect the projector to your computer. System Requirements You can install Cinema Color Editor on any Windows® or Macintosh system that meets - Epson PowerLite Cinema 200 | User Manual - Page 40
: 1. Insert the Cinema Color Editor CD-ROM in your computer. 2. Turn off any anti-virus software that may be running, then click Continue. 3. Read the license agreement and click Agree. You see this screen: Not shown for Macintosh 4. Click Install and follow the on-screen instructions to perform the - Epson PowerLite Cinema 200 | User Manual - Page 41
a USB or RS-232C (serial) cable 2. Turn on the projector. 3. Make sure the projector's COM Port setting is correct for the type of cable you're New Hardware or Add New Hardware screen, follow the instructions on the screen to finish installing the EPSON USB driver. Caution: Make sure you have already - Epson PowerLite Cinema 200 | User Manual - Page 42
is connected and turned on, as described on the previous page. 2. Windows: Click Start, Programs, EPSON Projector, and then Cinema Color Editor. Macintosh: From the Applications folder on your hard drive, open the CCEditor folder and double-click Cinema Color Editor. You see this screen: Select your - Epson PowerLite Cinema 200 | User Manual - Page 43
Remote Control Operations You can use Cinema Color Editor to change the image source, adjust the aspect ratio, or turn the power off-just as you would from the remote control. 1. Click - Epson PowerLite Cinema 200 | User Manual - Page 44
Adjusting the Picture Quality You can use Cinema Color Editor in place of the projector's menu system to adjust the image. 1. Click the Picture Quality tab. First, select Picture Quality Then click one of these buttons to access additional settings 2. - Epson PowerLite Cinema 200 | User Manual - Page 45
Adjusting the Color You can use the Color Adjustment settings to fine-tune the color of the image. If you select RGB as the color mode, you can adjust the offset, gamma, and gain for each signal color (red, green, and blue). Or select RGBCMY to adjust the hue and saturation for each of six colors. - Epson PowerLite Cinema 200 | User Manual - Page 46
Once you've adjusted the picture using Cinema Color Editor, you can save your settings in the projector's memory. Then you can use the remote control (or Cinema Color Editor) to easily recall them for future use. To save your settings on the projector: 1. Select Picture Quality, then click Memory - Epson PowerLite Cinema 200 | User Manual - Page 47
To use a memory setting you've saved on the projector: Access the projector's memory settings either from the remote control (see page 33) or by using Cinema Color Editor as follows: 1. Select Picture Quality, then click Memory management and choose Select. 1. Select Picture Quality 3. Click Select - Epson PowerLite Cinema 200 | User Manual - Page 48
can store any number of settings on your computer's hard drive. You can also use Cinema Color Editor to rename or delete memory settings stored on your projector. To save or recall settings on your computer: In Cinema Color Editor, open the File menu, then choose one of the following: ■ Save setting - Epson PowerLite Cinema 200 | User Manual - Page 49
any cover on the projector, except the lamp and filter covers. Dangerous electrical voltages in the projector can injure you severely. Do not try to service this product yourself, except as specifically explained in this User's Guide. The only parts you should replace are the lamp and air filter. If - Epson PowerLite Cinema 200 | User Manual - Page 50
take the remote control to a darkened room and press the illumination button. If the buttons on the remote control do not glow red, replace the batteries as described below. Warning: Keep batteries away from children. If a battery should be swallowed, contact your doctor immediately. 1. Release the - Epson PowerLite Cinema 200 | User Manual - Page 51
the power cord and disconnect any cables. 3. Turn the projector over. Then use a small vacuum cleaner designed for replace it. Contact your dealer or call EPSON at (800) 873-7766 and ask for part number V13H134A04. In Canada, call (800) 463-7766 for dealer referral. 4. If you need to replace - Epson PowerLite Cinema 200 | User Manual - Page 52
. ■ The projector's warning light flashes red at half-second intervals. ■ The message Replace the lamp appears on the screen when you start projecting. Note: Lamp life results will vary depending on mode selected, environmental conditions, and usage. Contact your dealer or call EPSON at (800) 873 - Epson PowerLite Cinema 200 | User Manual - Page 53
the cover and tighten its screws. (The projector won't work if the lamp cover is open or loose.) 9. Reset the lamp usage timer, as described in the next section. Resetting the Lamp Usage Timer After replacing the lamp, follow these steps to reset the lamp usage timer: 1. Press the Menu button on - Epson PowerLite Cinema 200 | User Manual - Page 54
the feet. ■ Remove the batteries from the remote control. ■ Pack the projector in its original packaging or equivalent. Transporting the Projector Note: EPSON shall not be liable for any damages incurred during transportation. The projector contains many glass and precision parts. If you need to - Epson PowerLite Cinema 200 | User Manual - Page 55
support. What To Do When the Lights Flash The lights on top of the projector indicate the projector's status and let you know when a problem occurs. If the projector light is flashing orange and you can't turn on the projector. The lamp is cooling down. Wait until the light stops flashing, then - Epson PowerLite Cinema 200 | User Manual - Page 56
52). ■ There is an internal problem. Turn off the projector and, when the P power light stops flashing, unplug it. Contact your dealer. The warning light is flashing red at half-second intervals. The lamp needs to be replaced (see page 52). Checking the Projector Status You can use the Info - Epson PowerLite Cinema 200 | User Manual - Page 57
, press the Power button to turn the projector back on. ■ Make sure your video equipment is turned on. ■ Make sure manual or online help. On most systems, the key lets you toggle between the LCD screen and the projector, or display on both at the same time. Allow a few seconds for the projector - Epson PowerLite Cinema 200 | User Manual - Page 58
Monitor port is set as your primary display or enabled. See your computer manual or online help for details. If you're using a Macintosh with OS Click Detect Displays. 3. To display the entire desktop on both your projector screen and LCD screen, click the Arrange tab. (If you don't see this - Epson PowerLite Cinema 200 | User Manual - Page 59
contains static or noise. ■ Make sure the Input Signal is set correctly for your connected video equipment (see page 37). ■ If you're viewing still images and you notice flickering or you're displaying the same image on your computer and projector screen, try turning off your laptop's LCD display. 59 - Epson PowerLite Cinema 200 | User Manual - Page 60
the Input Signal is set correctly for your connected video equipment (see page 37). ■ Press the Color Mode replace the lamp. Check the lamp usage timer to see how long the lamp has been in use (see page 56). Replace the lamp if it's close to 1700 hours. Solving Remote Control Problems The projector - Epson PowerLite Cinema 200 | User Manual - Page 61
ready: ■ Product name (EPSON PowerLite Cinema 200) ■ Product serial number (located on the bottom of the projector) ■ Computer configuration, if you're connected to a computer ■ Description of the problem You can purchase screens, carrying cases, or other accessories from EPSON at (800) 873-7766 or - Epson PowerLite Cinema 200 | User Manual - Page 62
62 - Epson PowerLite Cinema 200 | User Manual - Page 63
of LCD panels 720p 1300 ANSI lumens maximum (Dynamic/Living Room color mode) 24 bit, 16.8 million colors 800:1 30 to 300 inches (0.76 to 7.6 m) 2.9 to 37 feet (0.9 to 11.3 m) : -15 to +15° Lamp Type Power consumption Lamp life Part number UHE (Ultra High Efficiency) 200 W Approx. 1700 hours ( - Epson PowerLite Cinema 200 | User Manual - Page 64
(440 mm) 12.6 inches (320 mm) 11.8 lb. (5.3 kg) Electrical Rated frequency Power supply Power consumption 50/60 Hz AC 100 to 120 VAC, 3.0 A 200 to 240 VAC, 1.4 A Operating: 270 W max. Standby: 0.3 W Environmental Temperature Operating: 41 to 95 °F (5 to 35 °C) Storage: 14 to 140 °F (-10 to 60 - Epson PowerLite Cinema 200 | User Manual - Page 65
receive these formats as composite video, S-video, or component video-which it accepts through the Video, S-Video, and Input A (Component) ports, respectively. The projector also supports digital video (SDTV, HDTV) and various monitor display formats. The projector's Input A port accepts SDTV and - Epson PowerLite Cinema 200 | User Manual - Page 66
Images can be automatically resized to display at the projector's native resolution (1280 × 720) when the 720 Through 596 × 446 708 × 528 Squeeze Through 794 × 446 944 × 528 Digital component video Format SDTV HDTV Signal name 480i 480p 575i 575p 720p 1080i Normal 960 × 720 960 × 720 960 × 720 - Epson PowerLite Cinema 200 | User Manual - Page 67
× 720 Squeeze 1280 × 720 1280 × 720 1280 × 720 1280 × 720 1280 × 720 1280 × 720 1280 × 720 1280 × 720 1280 × 720 Through 640 × 480 640 × 480 800 × 600 - - 640 × 480 832 × 624 - - Squeeze Through 853 × 480 853 × 480 1066 × 600 - - 853 × 480 1109 × 624 - - Pixelworks DNXTM ICs are used in this - Epson PowerLite Cinema 200 | User Manual - Page 68
68 - Epson PowerLite Cinema 200 | User Manual - Page 69
cover on the projector, except the lamp and filter covers. Dangerous electrical voltages inside the projector can severely injure you. ■ Except as specifically explained in this User's Guide, do not attempt to service this product yourself. Refer all servicing to qualified service personnel. ■ The - Epson PowerLite Cinema 200 | User Manual - Page 70
, is in the room. If you experience problems, try the following: ■ The remote control's batteries may be low on power; replace them. ■ Dim the ambient lighting and/or turn off any fluorescent lights. ■ Close any window coverings and/or move the projector out of direct sunlight. ■ Turn off other - Epson PowerLite Cinema 200 | User Manual - Page 71
energy and, if not installed and used in accordance with the instructions, may cause harmful interference to radio or television reception. However, by the FCC for this equipment. It is the responsibility of the user to obtain and use a shielded equipment interface cable with this device. If - Epson PowerLite Cinema 200 | User Manual - Page 72
Name: Type of Product: Model: Marketing Name: EPSON Projector EMP-TW200 PowerLite Cinema 200 EPSON AMERICA, INC., LIMITED WARRANTY What Is Covered: Epson America, Inc. ("EPSON") warrants to the original end user customer that the EPSON product enclosed with this limited warranty statement, if - Epson PowerLite Cinema 200 | User Manual - Page 73
. This warranty does not cover consumables (e.g., fuses), other than lamps. This warranty does not apply to refurbished or reconditioned products, and this warranty is not transferable. EPSON is not responsible for warranty service should the EPSON label or logo or the rating label or serial number - Epson PowerLite Cinema 200 | User Manual - Page 74
74 - Epson PowerLite Cinema 200 | User Manual - Page 75
Contrast ratio, 63 Contrast setting, 29 Control panel, projector, 9 D Declaration of Conformity, 72 Desktop adapter, Macintosh, 10 Documentation, 11 E Electrical requirements, 64 EPSON accessories, 10, 61 Home Service, 7 PrivateLine Support, 61 technical support, 11, 61 warranty, 7, 72 to 73 F FCC - Epson PowerLite Cinema 200 | User Manual - Page 76
, 9 Keystone correction, 13, 19, 59 L Lamp checking usage timer, 56 life, 63 ordering, 10, 52 replacing, 52 to 53 resetting usage timer, 53 safety instructions, 69 to 70 specifications, 63 Language setting, 28 Lens shift knobs, 19 Lens, cleaning, 49 Lights, projector, 55 to 56 Lock Kensington, 8, 10 - Epson PowerLite Cinema 200 | User Manual - Page 77
, 22 problems, 60, 70 Replacing lamp, 52 to 53 Resetting lamp usage timer, 34, 53 memory settings, 34, 48 projector settings, 34 Resolution compatible formats, 65 projector, 63 RGB settings, 31, 45 RGBCMY settings, 45 RS-232C (serial) cable, 37, 41 S Safety approvals, 64 Safety instructions, 69 - Epson PowerLite Cinema 200 | User Manual - Page 78
Z Zoom adjustment, 17 Zoom Caption setting, 23, 35 Zoom setting, 23 78 - Epson PowerLite Cinema 200 | User Manual - Page 79
- Epson PowerLite Cinema 200 | User Manual - Page 80
-
 1
1 -
 2
2 -
 3
3 -
 4
4 -
 5
5 -
 6
6 -
 7
7 -
8
-
9
-
10
-
11
-
12
-
13
-
14
-
15
-
16
-
17
-
18
-
19
-
20
-
21
-
22
-
23
-
24
-
25
-
26
-
27
-
28
-
29
-
30
-
31
-
32
-
33
-
34
-
35
-
36
-
37
-
38
-
39
-
40
-
41
-
42
-
43
-
44
-
45
-
46
-
47
-
48
-
49
-
50
-
51
-
52
-
53
-
54
-
55
-
56
-
57
-
58
-
59
-
60
-
61
-
62
-
63
-
64
-
65
-
66
-
67
-
68
-
69
-
70
-
71
-
72
-
73
-
74
-
75
-
76
-
77
-
78
-
79
-
80
 |
 |

EPSON
®
PowerLite
®
Cinema 200
Home Theater Projector
User’s Guide