Epson PowerLite Pro Cinema LS10000e Start Here and Warranty
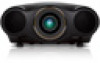
Epson PowerLite Pro Cinema LS10000e Manual
 |
View all Epson PowerLite Pro Cinema LS10000e manuals
Add to My Manuals
Save this manual to your list of manuals |
Epson PowerLite Pro Cinema LS10000e manual content summary:
- Epson PowerLite Pro Cinema LS10000e | Start Here and Warranty - Page 1
PowerLite® Pro Cinema LS10000 Quick Setup Before using the projector, make sure you read the safety instructions in the online User's Guide (see the "Where to get help" section). Choose a location Keep the projector level and place it at a height so its lens is even with the top or bottom of the - Epson PowerLite Pro Cinema LS10000e | Start Here and Warranty - Page 2
the 2D-to-3D Conversion option, press the Menu button on the projector or remote control. Select Signal and press Enter, then select 3D Setup setting, then press Enter. See the online User's Guide for more information on adjusting 3D images. Troubleshooting If you see a blank screen or the No - Epson PowerLite Pro Cinema LS10000e | Start Here and Warranty - Page 3
conditions: (1) this device may not cause harmful interference, and (2) this device must accept any interference received, including interference that may cause undesired operation. Trade Name: Epson Type of Product: Projector Model: H488A Marketing Name: PowerLite Pro Cinema LS10000 - Epson PowerLite Pro Cinema LS10000e | Start Here and Warranty - Page 4
applies only to the projector and not to the 3D glasses. The 3D glasses carry a limited warranty period of one (1) year from the date of original purchase. For warranty service, you must provide proof of the date of original purchase. What Epson Will Do To Correct Problems: If your product requires
-
 1
1 -
 2
2 -
 3
3 -
 4
4
 |
 |

Quick Setup
Before using the projector, make sure you read the safety instructions in the
online
User’s Guide
(see the ”Where to get help” section).
Choose a location
Keep the projector level and place it at a
height so its lens is even with the top or
bottom of the screen and is centered
horizontally. If this isn’t possible, use the
lens shift feature or the keystone correction
button on the projector to reposition the
image (see “Adjust the image”).
To view 3D images correctly, RF 3D glasses
must be worn within 32 feet (10 m) of the
projector. Use the image to determine the
viewing distance for 3D projection (the
shading represents the 3D viewing area):
See the online
User’s Guide
for more information on where to place your
projector.
Connect the projector
Choose from the following connections. For additional connection types, see
the online
User’s Guide.
Video device
1
Loosen the two screws at the bottom of the cable cover, then pull the
cover forward.
2
Lift the cable cover out of the grooves at the top.
3
Connect up to 4 video devices and use the Source
buttons on the remote
control or the
button on the projector to switch between them.
Component video cable
RCA video cable
HDMI cable
Turn on your equipment
1
Turn on your video source.
2
Plug in the projector.
3
Press the
power button on the projector or the
On
button on the
remote control. The shutter opens and the power
light flashes blue,
then stays on.
Note:
To shut down the projector, press the
power button on the
projector or the
Standby
button on the remote control.
4
The default language of the menu system is English. To select another
language, press the
Menu
button on the projector or remote control.
Select
Settings
and press
Enter
. Select
Language
and press
Enter
. Select
your language and press
Enter
. Press the
Menu
button to exit the menu
system.
Using the remote control
Make sure the batteries are installed as shown (two AA batteries).
Choose which source
to display
Turn projector on
Access projector
menus
Change the
3D format
Adjust zoom, focus
and lens shift
Turn off projector
display
Navigate projector
menus
Display test pattern
Turn projector off
Switch between
2D and 3D
Control connected
sources with
HDMI Link
For more information on using the remote control, see the online
User’s Guide
.
PowerLite
®
Pro Cinema LS10000