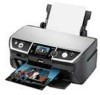
Epson R380 Printer Basics
Epson R380 - Stylus Photo Color Inkjet Printer Manual
 |
UPC - 010343859074
View all Epson R380 manuals
Add to My Manuals
Save this manual to your list of manuals |
Epson R380 manual content summary:
- Epson R380 | Printer Basics - Page 1
Printer Basics - Epson R380 | Printer Basics - Page 2
or alterations to this product, or (excluding the U.S.) failure to strictly comply with Seiko Epson Corporation's operating and maintenance instructions. Seiko Epson Corporation shall not be liable for any damages or problems arising from the use of any options or any consumable products other than - Epson R380 | Printer Basics - Page 3
Using the Printer's Control Panel 6 Loading Paper 7 Using Special Papers 10 Printing From a Memory Card 12 Compatible Cards and Image Formats 13 Inserting the Card 14 Printing From a USB Flash Drive 15 Viewing Photos 16 Printing Photos 16 Touching Up Your Photos 24 Cropping Your Photos 26 - Epson R380 | Printer Basics - Page 4
Maintaining Your Printer 48 Checking the Print Head Nozzles 48 Cleaning the Print Head 49 Aligning the Print Head 50 Replacing Ink Cartridges 51 Solving Problems 57 LCD Screen Messages 57 Problems and Solutions 59 Where To Get Help 62 Notices 63 Index 69 4 - Epson R380 | Printer Basics - Page 5
Of course your printer can do lots more when you connect it to your Windows® or Macintosh® computer. For additional instructions, see the on-screen User's Guide by selecting the icon for it on your desktop. Please follow these guidelines as you read your Epson Stylus Photo R380 instructions: Warning - Epson R380 | Printer Basics - Page 6
's Control Panel View and print photos and videos on card Display 1 to 16 photos; crop or zoom a photo Print on CD/DVDs Check ink status; maintain the printer; adjust CD/DVD print position; backup photos; restore defaults; make PictBridge® or Bluetooth® settings Stop printing; cancel settings - Epson R380 | Printer Basics - Page 7
the best results, use one of Epson's special ink jet papers designed for your printer. For example, photos look great printed on Epson® Ultra Premium Photo Paper Glossy. See page 10 for a list of Epson papers and ordering information. 1. Open the paper support, then pull up the extension. 2. Open - Epson R380 | Printer Basics - Page 8
front tray extensions and lift up the tray lever to reposition the front tray. Then slide out the front tray extensions. 3. Slide the left edge guide to the left. 4. Insert the paper, printable side up, against the right edge behind the tab. You can load up to 120 sheets of plain - Epson R380 | Printer Basics - Page 9
5. Slide the left edge guide against the left edge of the paper (but not too tightly). 4 × 6-inch, 5 × 7-inch Letter-size, 8 × 10-inch For additional information and instructions on loading envelopes, see your on-screen User's Guide. Loading Paper 9 - Epson R380 | Printer Basics - Page 10
can purchase genuine Epson ink and paper from an authorized Epson reseller. To find the nearest reseller, call 800-GO-EPSON (800-463-7766). Or you can also purchase online at www.epsonstore.com (U.S. sales) or www.epson.ca (Canadian sales). Paper name* Size Epson Ultra Premium Photo Paper Glossy - Epson R380 | Printer Basics - Page 11
Your Prints With proper care, photographs from your Epson Stylus Photo R380 will last for many years. The special Epson Claria™ inks designed for your printer provide the ultimate combination of photo quality and longevity when used with Epson papers for prints that are properly displayed or stored - Epson R380 | Printer Basics - Page 12
" on page 24 ■ "Cropping Your Photos" on page 26 ■ "Restoring Default Settings" on page 27 For instructions on copying memory card files between your printer and a computer or other device, or on printing from a Bluetooth-enabled device, see your on-screen User's Guide. To print directly from your - Epson R380 | Printer Basics - Page 13
Stick PRO Duo™* MultiMediaCard SD™ Card SDHC Card miniSD™ Card* miniSDHC Card* microSD Card* microSDHC Card* CompactFlash® Microdrive™ * Adapter required The printer supports image files that meet the following requirements: Media format File format Image size Number of files DCF version 1.0 or - Epson R380 | Printer Basics - Page 14
Inserting the Card 1. Make sure the printer is turned on. 2. Open the memory card cover. Caution: then stays on. Memory card access light 4. Close the memory card cover. See page 16 for printing instructions. When you want to remove the card, make sure the memory card access light is not flashing, - Epson R380 | Printer Basics - Page 15
EXT. I/F port on the front of the printer. 3. If you see a screen like this one, press u or d to select the folder to print from, then press OK. 4. You can view and print your photos the same way as from a memory card. See the following sections for instructions. Printing From a USB Flash Drive 15 - Epson R380 | Printer Basics - Page 16
one. ■ If you want to pause or replay the show, press u or d. ■ If you see a photo you want to print, press OK. Then, skip to step 5 on page 17. Printing Photos Before you begin, make sure the printer is in Memory Card mode and you have inserted your camera's memory card in the - Epson R380 | Printer Basics - Page 17
Memory Card mode button. 1. Press l or r to choose Print All Photos, then press OK. To print a copy of all your photos on 4 × 6 Premium Photo Paper Glossy, skip to step 4. 2. If you want more than one copy of all your photos, press the Copies + button. 3. Press the Print Settings button and choose - Epson R380 | Printer Basics - Page 18
. Note: If you need to cancel printing, press the y Stop/Clear Settings button. Printing Thumbnails of Your Photos You can print a proof sheet to see small "thumbnail" images of all the photos on your card. 1. Load paper as described on page 7. 2. Insert the memory card if it is not already in the - Epson R380 | Printer Basics - Page 19
button. View and Print Movies The Play Movie and Print Photos option lets you view and print images from MOV, AVI, setting supported by your camera. The resolution depends on your camera model and settings. See your camera's manual for printer begins playing the video on the memory card. Printing - Epson R380 | Printer Basics - Page 20
If your camera supports DPOF (Digital Print Order Format), you can use it to preselect photos and the number of copies to print while the memory card is still in your camera. See your camera's manual for details. 1. Load paper as described on page 7. 2. Insert the memory card containing DPOF data - Epson R380 | Printer Basics - Page 21
as necessary. See page 21 for instructions. 5. Press the x Start button Epson Premium Presentation Paper Matte Epson Matte Paper Heavyweight Epson Premium Presentation Paper Matte Double-Sided Epson Double-Sided Matte Paper Epson Presentation Paper Matte Epson Photo Quality Ink Jet Paper Epson Photo - Epson R380 | Printer Basics - Page 22
of paper (available only on letter-size paper). Prints two photos per sheet. 4-up Prints four photos per sheet. 8-up Prints eight photos per sheet. 20-up Prints 20 photos per sheet, along with the photo number and date for each photo. Note: Some layout settings are not available for all paper - Epson R380 | Printer Basics - Page 23
richer, while a lower saturation makes it appear paler. Prints the date your photo was taken in one of the following formats: yyyy.mm.dd (2006.04. F-stop (aperture), and ISO speed. Select On to automatically crop your photo to fit inside the space available for the layout you selected. Select Off - Epson R380 | Printer Basics - Page 24
to be red, you can fix them without using complicated software or your computer. First, select the photo or photos you want to print, then follow these steps: Note: The printer may not be able to correct all the red eyes in your photo. 1. Press the Print Settings button. 2. Press d to select Red-Eye - Epson R380 | Printer Basics - Page 25
, or PhotoEnhance. 4. Press OK again, then press the x Start button to print your photo or photos. Note: This setting remains in effect until you change it. To reset all settings to the defaults, see page 27. To make manual adjustments in addition to the automatic ones, follow the steps in the next - Epson R380 | Printer Basics - Page 26
remain in effect until you change them. To reset all settings to the defaults, see page 27. 4. Press OK again, then press the x Start button to print your photo or photos. Cropping Your Photos Your printer lets you decide how your photos fit on the page with cropping, expansion for borderless - Epson R380 | Printer Basics - Page 27
see a white edge on your photo, select Standard. 4. Press OK to save your setting. Fit to Frame If your photo is too long or wide to to Frame turned off Restoring Default Settings Follow these steps to return all the printer settings to the factory defaults: 1. Press the Setup button. 2. Press l - Epson R380 | Printer Basics - Page 28
printer and print your photos. ■ If your mobile phone, PDA, or other device supports infrared transmission, you can send your photos to the printer and print them wirelessly. ■ Using the optional Epson Bluetooth Photo To reset all settings to their defaults, see page 27. 28 Printing From a Camera - Epson R380 | Printer Basics - Page 29
print your photos. See your camera's or phone's manual for details. Note: If your camera is not compatible with PictBridge or USB Direct Print, you see a message saying the connected device cannot be used. Epson cannot guarantee the compatibility of any cameras. Depending on the printer settings and - Epson R380 | Printer Basics - Page 30
your phone or PDA. To reset all settings to their defaults, see page 27. 7. Hold your phone less than 8 inches away from the infrared port on the printer. Aim your phone's or PDA's infrared port at the printer's port, and send your photos. See your mobile phone manual for details. Less than 8 inches - Epson R380 | Printer Basics - Page 31
Epson Print CD software that came with your printer to add text and modify your designs with a variety of special effects. For instructions on using Epson Print CD on your computer, see your on-screen User's Guide. Caution: Use only ink jet page 32 ■ "Printing Memory Card Photos on a CD or DVD" on - Epson R380 | Printer Basics - Page 32
or video is burned on your ink jet-printable CDs or DVDs before you print. Otherwise, dirt or scratches on the surface may cause errors when you burn the data. you may damage the printer or tray. 1. Turn on the printer and open the front cover. Only insert a CD or DVD when the printer is turned on - Epson R380 | Printer Basics - Page 33
the next section to print photos on your CD or DVD from your memory card. Note: If you want to add text and modify your designs with a variety of special effects, you can use the Epson Print CD software on your computer. See your on-screen User's Guide for instructions. Inserting a CD or DVD 33 - Epson R380 | Printer Basics - Page 34
the printing position, select CD Inner-Outer, press r, and adjust the measurements. ■ Select other settings as necessary. For more information, see page 21. Note: All photos are printed in landscape orientation. 4. When you are finished selecting print settings, press OK. 5. Press l or r to choose - Epson R380 | Printer Basics - Page 35
are finished printing, remove the CD/DVD tray from the printer. To return the output tray to the paper position, see the CD or DVD carefully. To allow the ink to dry fully, wait at least 24 hours and direct sunlight. Adjusting the Print Position If your photo is not centered on the CD or DVD, you - Epson R380 | Printer Basics - Page 36
Returning the Output Tray to the Paper Position 1. Pull up the lever to lower the output tray to the paper position. 2. Pull out the front tray extensions. 36 Printing on CDs and DVDs - Epson R380 | Printer Basics - Page 37
and folding to fit a CD or DVD jewel case. If you choose to print an index, up to 24 photos will be printed on the insert. If you select more than 24 photos, multiple inserts will be printed. First, make sure you load letter-size paper, remove the CD/DVD tray, and - Epson R380 | Printer Basics - Page 38
page 44 Printing in Windows 1. Load paper (see page 7). 2. Open the photo or document in your application program. 3. Open the File menu and select Print. You see a window like this one: Select EPSON Stylus Photo R380 Series Click here to open your printer software 38 Printing From Your Computer - Epson R380 | Printer Basics - Page 39
4. Make sure EPSON Stylus Photo R380 Series is selected, then click the Preferences or Properties button. (If you see a Setup, Printer, or Options button, click it. Then click Preferences or Properties on the next screen.) 5. On the Main tab, select the basic print settings: Select the - Epson R380 | Printer Basics - Page 40
RPM (5760 × 1440) from the quality option pop-up menu (as shown above). When you select Photo RPM, printing will take longer. For more information about advanced settings, or instructions on saving them as a group so you can reuse them later, click ? or Help. 7. If you want to change the layout - Epson R380 | Printer Basics - Page 41
to buy ink Printing From a Macintosh If you're using a Mac OS® X-compatible application, follow the steps below to print. 1. Load paper (see page 7). 2. Open the photo or document in your application. 3. Open the File menu and select Page Setup. Make the following settings: Select Stylus Photo R380 - Epson R380 | Printer Basics - Page 42
like this one: Select Stylus Photo R380 Select Print Settings 6. Select Automatic mode Note: For more information about printer settings, click the ? button. 7. Depending on options. ■ Output Options (Mac OS X 10.2.8 or 10.3.9 only): save your print job as a PDF file. In Mac OS X 10.4.x, click the - Epson R380 | Printer Basics - Page 43
Print. 10. To monitor the progress of your print job, click the printer icon when it appears in the dock on the bottom of your desktop. If you're using Mac OS X 10.2.8, click the Print Center icon instead, then double-click Stylus Photo R380 in the Printer List window. Printing From a Macintosh 43 - Epson R380 | Printer Basics - Page 44
in your printer software: For this paper . . . Plain paper Epson Bright White Paper Epson Iron-on Cool Peel Transfer paper Epson Ultra Premium Photo Paper Glossy Epson Ultra Premium Glossy Photo Paper Epson Premium Photo Paper Glossy Epson Premium Glossy Photo Paper Epson Premium Photo Paper Semi - Epson R380 | Printer Basics - Page 45
Paper Premium Presentation Paper Matte Epson Presentation Paper Matte Epson Photo Quality Ink Jet Paper Epson Photo Quality Self Adhesive Sheets Presentation Paper Matte Epson Ultra Premium Photo Paper Luster Epson Premium Luster Photo Paper Ultra Premium Photo Paper Luster Envelopes Envelope - Epson R380 | Printer Basics - Page 46
more information, contact Epson as described on page 62. 1. If the printer is connected to your computer, unplug the USB cable or turn off your computer. 2. Make sure the printer is turned on and the memory card containing your photos is inserted. See page 14 for instructions on inserting a memory - Epson R380 | Printer Basics - Page 47
002, and so on. 7. When the backup is complete, press the Back button. Note: After you have backed up files on a USB flash drive, the printer will be able to print photos in the numbered folders. However, the printer will not be able to access photos outside of the folders. Backing Up Your - Epson R380 | Printer Basics - Page 48
Maintaining Your Printer If you notice a decline in print quality or your ink is expended, follow the instructions in this chapter for: ■ "Checking the Print Head Nozzles" (see below) ■ "Cleaning the Print Head" on page 49 ■ "Aligning the Print Head" on page 50 ■ "Replacing Ink Cartridges" on page - Epson R380 | Printer Basics - Page 49
: You can also check the nozzles with software when connected to a computer; see your on-screen User's Guide for details. Cleaning the Print Head If sure your printer is turned on but not printing, and the ink is not low in any cartridges. (If ink is low, you need to replace an ink cartridge before - Epson R380 | Printer Basics - Page 50
print head again. If you don't see any improvement after cleaning four or five times, see page 57. You can also turn the printer off and wait at least 6 hours or overnight. This lets any dried ink soften. Then try cleaning the print head again. Tip: If you do not use your - Epson R380 | Printer Basics - Page 51
(Light Magenta), M (Magenta), C (Cyan). 3. When you are done checking the ink cartridge status, press OK. If you want to replace an ink cartridge, press l or r to select Change Ink Cartridge, then press OK. See page 53 for instructions. 4. Press the Back button to return to the previous screen. When - Epson R380 | Printer Basics - Page 52
Purchasing Ink Cartridges Epson offers two different capacity cartridges for each color in your printer. Use these Epson ink cartridges within six months of installing them and before the expiration date on the package. Color Black Cyan Magenta Yellow Light cyan Light magenta High-Capacity - Epson R380 | Printer Basics - Page 53
remaining in the print head nozzles may dry out. To ensure good results, use genuine Epson ink cartridges and do not refill them. Other products may cause damage to your printer not covered by Epson's warranty. 1. Make sure the printer is turned on, the CD tray is not inserted, and the front tray is - Epson R380 | Printer Basics - Page 54
flush them immediately with water. If discomfort or vision problems continue after a thorough flushing, see a doctor immediately. 5. Remove the new ink cartridge from the package. Caution: Be careful not to break the hooks on the side of the ink cartridge when you remove it from the package. Always - Epson R380 | Printer Basics - Page 55
install it; otherwise, print quality may decline or you may not be able to print. If you have installed an ink cartridge without removing the yellow tape, take the cartridge out of the printer, remove the yellow tape, and then reinstall it. Do not remove the transparent seal from the bottom of the - Epson R380 | Printer Basics - Page 56
cannot continue printing with one ink cartridge expended, even if the other cartridges still contain ink. Before printing, replace the expended cartridge. The printer uses ink cartridges equipped with IC chips that monitor the amount of ink used by each cartridge. Cartridges are usable even if they - Epson R380 | Printer Basics - Page 57
material. Then turn the printer back on. If you still see this error message, contact Epson as described on page 62. Contact Epson as described on page 62. Make sure the ink cartridges are installed correctly. See page 53 for details. See your Bluetooth device's documentation. Solving Problems 57 - Epson R380 | Printer Basics - Page 58
again. Insert a new memory card or storage disk and try again. Try cleaning the print head again. If the error message reoccurs, contact Epson as described on page 62. A problem occurred and backup was cancelled. Make a note of the error code and contact Epson as described on page 62. 58 Solving - Epson R380 | Printer Basics - Page 59
and Solutions Check the solutions below if you're having trouble using your printer. Noise Problems ■ The first time you install ink cartridges, the printer must charge its print head for about 2 minutes. Wait until charging finishes (when you see the message "Initialization is complete") before - Epson R380 | Printer Basics - Page 60
many sheets at once (up to 20 sheets of photo paper or 120 sheets of plain paper). See your User's Guide for more information. ■ If paper is jammed, follow If the paper is stuck inside the printer, press the P On button to turn it off. Open the printer cover and remove any paper inside, including - Epson R380 | Printer Basics - Page 61
loaded matches the paper size and paper type settings on the control panel or in your printer software (see page 44). ■ For the best print quality, use Epson special paper (see page 44) and genuine Epson ink cartridges (see page 51). ■ Set the tray lever to the paper position for paper, then pull - Epson R380 | Printer Basics - Page 62
to common problems. You can download drivers and documentation, get FAQs and troubleshooting advice, or e-mail Epson with your questions. Speak to a Support Representative Before you call for support, please have the following information ready: ■ Product name (Epson Stylus Photo R380) ■ Product - Epson R380 | Printer Basics - Page 63
operate normally or exhibits a distinct change in performance. Adjust only those controls that are covered by the operating instructions. ■ When storing or transporting the printer, do not tilt it, stand it on its side, or turn it upside down; otherwise ink may leak from the cartridge. Notices 63 - Epson R380 | Printer Basics - Page 64
status, so that the card may be removed and reinserted freely. However, each time the cartridge is inserted, some ink is consumed because the printer automatically performs a reliability check. LCD Screen Safety Instructions ■ Only use a dry, soft cloth to clean the LCD panel. Do not use liquid or - Epson R380 | Printer Basics - Page 65
installation. This equipment generates, uses, and can radiate radio frequency energy and, if not installed and used in accordance with the instructions, may cause harmful interference to radio or television reception. However, there is no guarantee that interference will not occur in a particular - Epson R380 | Printer Basics - Page 66
or CPU Boards and Power Supplies used with Class B Personal Computers: We: Located at: Epson America, Inc. MS 3-13 3840 Kilroy Airport Way Long Beach, CA 90806 Telephone: ( that may cause undesired operation. Trade Name: Epson Type of Product: Inkjet Printer Model: B411A 66 Notices - Epson R380 | Printer Basics - Page 67
Will Do To Correct Problems: Should your Epson printer prove defective during the warranty period, please call the Epson ConnectionSM at (562) 276-7282 (U.S.) or (905) 709-2567 (Canada) for warranty repair instructions and return authorization. An Epson service technician will provide telephone - Epson R380 | Printer Basics - Page 68
shipping, damage caused by disasters such as fire, flood, and lightning, improper electrical current, software problems, interaction with nonEpson products, or service other than by an Epson Authorized Servicer. If a claimed defect cannot be identified or reproduced, you will be held responsible for - Epson R380 | Printer Basics - Page 69
printer, 29 printing from, 28 to 29 Cancelling printing with a computer, 41, 44 without a computer, 17 Cartridges, replacing, 51 to 56 CD Jacket setting, 37 CD-R/RW drive, backing up photos also CDs E Enhancing photos, 25 Epson Help, 62 ink, 52, 62 paper, 10 to 11, 62 Epson Print CD, 31 Exif Print, - Epson R380 | Printer Basics - Page 70
to Frame, 27 Front tray CD/DVD position, 32 paper position, 36 H Help, Epson, 62 I Image formats, 13 Image quality problems, 61 Image quality settings, 25 Infrared printing, 30 Ink cartridges replacing, 51 to 56 safety instructions, 64 Inserting CD/DVD, 32 to 33 memory card, 13 to 14 IrDA printing - Epson R380 | Printer Basics - Page 71
ink cartridges, 51 to 56 Resetting default settings, 27 S Safety instructions, 63 to 64 Saturation, 25 Screen error messages, 57 to 58 problems, 59 safety instructions, 64 using, 6 Sepia, 25 Setup button, 6 Sharpness, 25 Sizing photos, 26 to 27 Software ArcSoft PhotoImpression, 62 Epson Print - Epson R380 | Printer Basics - Page 72
USB Device printing from, 15 USB device backing up photos, 46 to 47 V Viewing photos, 16 W Warranty, 67 to 68 Windows color management settings, 40 page layout settings, 39 Paper Type setting, 44 to 45 printing with, 38 to 41 Type setting, 39 Z Zip drive, backing up photos, 46 to 47 72 Index
-
 1
1 -
 2
2 -
 3
3 -
 4
4 -
 5
5 -
 6
6 -
 7
7 -
8
-
9
-
10
-
11
-
12
-
13
-
14
-
15
-
16
-
17
-
18
-
19
-
20
-
21
-
22
-
23
-
24
-
25
-
26
-
27
-
28
-
29
-
30
-
31
-
32
-
33
-
34
-
35
-
36
-
37
-
38
-
39
-
40
-
41
-
42
-
43
-
44
-
45
-
46
-
47
-
48
-
49
-
50
-
51
-
52
-
53
-
54
-
55
-
56
-
57
-
58
-
59
-
60
-
61
-
62
-
63
-
64
-
65
-
66
-
67
-
68
-
69
-
70
-
71
-
72
 |
 |

Printer Basics