Epson Stylus COLOR 900N User Manual
Epson Stylus COLOR 900N - Ink Jet Printer Manual
 |
View all Epson Stylus COLOR 900N manuals
Add to My Manuals
Save this manual to your list of manuals |
Epson Stylus COLOR 900N manual content summary:
- Epson Stylus COLOR 900N | User Manual - Page 1
Epson America, Inc. Stylus COLOR 900N User's Guide - Epson Stylus COLOR 900N | User Manual - Page 2
instructions. SEIKO EPSON CORPORATION shall not be liable for any damages or problems arising from the use of any options or any consumable products other than those designated as Original EPSON Products or EPSON Approved Products by SEIKO EPSON CORPORATION. Trademarks EPSON and EPSON Stylus - Epson Stylus COLOR 900N | User Manual - Page 3
and, if not installed and used in accordance with the instructions, may cause harmful interference to radio or television reception. However cable to this equipment will invalidate the FCC Certification of this device and may cause interference levels which exceed the limits established by - Epson Stylus COLOR 900N | User Manual - Page 4
Instructions SETTING UP YOUR PRINTER Unpack the Printer Attach the Paper Support Install the Ink Cartridges Load Paper Connect the Printer to Your Network Printing a Status Sheet CONFIGURING THE PRINTER FOR THE NETWORK Install the Network Software Installing EPSON Net!2 Installing Status Monitor - Epson Stylus COLOR 900N | User Manual - Page 5
INSTALLING THE PRINTER DRIVER ON THE WORKSTATIONS 49 Installing the Printer Driver 49 Installing in Windows 98, Windows 95, or Windows NT 4.0 50 Installing in Windows 3.1x 51 Installing on a Macintosh 52 Printing a Test Page 53 INSTALLING AND USING YOUR ELECTRONIC MANUAL 55 Installing - Epson Stylus COLOR 900N | User Manual - Page 6
Control Panel Lights Running a Printer Check Problems and Solutions Problems Setting Up the Printer or Installing Its Software Problems Getting Good Print Quality Uninstalling Printer Software Uninstalling Your Printer Driver Uninstalling EPSON Status Monitor 2 Uninstalling EPSON Net!2 Where To Get - Epson Stylus COLOR 900N | User Manual - Page 7
Installing the Printer Driver in Windows 110 Installing the Printer Driver in Macintosh 111 INDEX 113 iv - Epson Stylus COLOR 900N | User Manual - Page 8
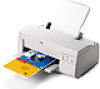
Introduction Your EPSON Stylus® COLOR 900N Professional Series printer/print server is the ideal output device for business graphics, digital photographs, and more. You can print anything from reports and resumes to photos and greeting cards with fabulous results. The printer comes with these - Epson Stylus COLOR 900N | User Manual - Page 9
electronic EPSON Stylus COLOR 900N Manual. Basic Printing covers the basics of printing with Windows® or Macintosh®. Maintaining Your Printer gives instructions for replacing ink cartridges, cleaning and aligning the print heads, and cleaning and transporting the printer. Problem Solving provides - Epson Stylus COLOR 900N | User Manual - Page 10
Warnings, Cautions, Notes, and Tips Please follow these guidelines: Warnings must be followed carefully to avoid bodily injury. Cautions must be observed to avoid damage to your equipment. Notes contain important information about your printer. Tips contain additional hints for better printing. 3 - Epson Stylus COLOR 900N | User Manual - Page 11
or 98, or 64MB for Windows NT 4.0) s At least 50MB of free hard disk space (100MB recommended) s VGA, Super VGA, or better display adapter and monitor s Double-speed (2x) CD-ROM drive (quad [4x] or faster recommended) for installing the printer software s Ethernet network connection s A twisted-pair - Epson Stylus COLOR 900N | User Manual - Page 12
Macintosh System Requirements To use your printer and its software with a Macintosh, your system should have: s One of the drive (quad [4x] or faster recommended) for installing the printer software s Network connection to Ethernet s A twisted-pair (10BaseT or 100BaseTX) cable to connect the - Epson Stylus COLOR 900N | User Manual - Page 13
other parts of your network and computer systems are also ready for the year 2000. Printer Parts sheet feeder left edge guide paper support right edge guide printer cover output tray output tray extensions Ethernet card thickness lever status sheet button 6 ink cartridge clamps control panel - Epson Stylus COLOR 900N | User Manual - Page 14
® NetWare®, TCP/IP, and AppleTalk®. s EPSON Status Monitor 2 for Windows allows you to monitor your printer over the network and use TCP/IP for printing in Windows 98/Windows 95 peer-to-peer networks. s Your printer driver (for Windows and Macintosh) runs your printer and lets you control how your - Epson Stylus COLOR 900N | User Manual - Page 15
into the extension cord does not exceed the cord's ampere rating. Also, make sure the total ampere rating of all devices plugged into the wall outlet does not exceed the wall outlet's ampere rating. s Except as specifically explained in this manual, do not attempt to service the printer yourself. 8 - Epson Stylus COLOR 900N | User Manual - Page 16
. Adjust only those controls that are covered by the operating instructions. Ink Cartridge Safety Instructions s Do not put your hand inside the printer or touch the cartridge during printing. s Under normal circumstances, ink will not come out of the cartridge. If it does get on your skin, wash it - Epson Stylus COLOR 900N | User Manual - Page 17
10 - Epson Stylus COLOR 900N | User Manual - Page 18
as described on the unpacking sheet in the printer box. Then make sure you have these items: paper support black ink cartridge color ink cartridge printer software CD-ROM printer EPSON Photo Paper Pack Administrator's Manual this Start Here book You'll also need a network cable to connect - Epson Stylus COLOR 900N | User Manual - Page 19
Attach the Paper Support Insert the paper support into the slots at the back of the printer's sheet feeder. Put the printer near an available grounded outlet, but avoid areas: s With high temperature or sure to check safety requirements and follow all the safety instructions in the Introduction. 12 - Epson Stylus COLOR 900N | User Manual - Page 20
off the blue portion or remove the clear seal underneath the cartridge. To ensure the print heads charge correctly, install the ink cartridges that came with your printer. You must remove the yellow tape from the top of the cartridge or you will permanently damage it. It's okay if a small corner - Epson Stylus COLOR 900N | User Manual - Page 21
the cover. 4. Press the P power button to turn on the printer. The P power light flashes and the B and A ink out lights come on. The black ink cartridge holder moves slightly left to the loading position. Always use the P power button to turn the printer on or off. Never use the external switch on - Epson Stylus COLOR 900N | User Manual - Page 22
water. 7. Now press the X color cleaning button to move the color ink cartridge holder into loading position. 8. Repeat steps 5 and 6 to install the color ink cartridge. 9. Press the R cleaning button to begin charging the ink delivery system and then close the printer cover. Charging takes about - Epson Stylus COLOR 900N | User Manual - Page 23
Paper 1. Open the output tray extensions. Slide the left edge guide right until it is a little wider than your paper. 2. Load a stack of plain paper with the printable side up and place it against the right edge guide. Then slide the left edge guide to the paper's left edge. Don't load paper higher - Epson Stylus COLOR 900N | User Manual - Page 24
10BaseT or 100BaseTX) 2. To initialize the card, turn on the printer while pressing down the status sheet button. Continue pressing the status sheet button for five seconds. Printing a Status Sheet To print a status sheet, press the status sheet button and hold it for about three seconds. This sheet - Epson Stylus COLOR 900N | User Manual - Page 25
18 - Epson Stylus COLOR 900N | User Manual - Page 26
(page 49) Novell NetWare 1. EPSON Net!2 (page 21 and page 33) 2. EPSON Status Monitor 2 (page 23) 3. Setup using NwAdmin (page 26) or PCONSOLE (Administrator's Manual, Chapter 4) 4. Printer driver on each workstation (page 49) Novell NetWare, Windows NT Server Windows 3.1x acts as a client only - Epson Stylus COLOR 900N | User Manual - Page 27
as a client only, you can't use a DOS workstation to monitor the printer. Windows NT 4.0 (Service Pack 3, or higher) TCP/IP 1. EPSON Net!2 (page 21) 2. EPSON Status Monitor 2 (page 23) 3. IP address for the Ethernet card (page 39) 4. Printer driver on each workstation** (page 49) NetBEUI (TCP/IP - Epson Stylus COLOR 900N | User Manual - Page 28
, you need to install the network software (EPSON Net!2) on only one workstation or on the server, depending on your network. If you have a TCP/IP network, you need to install EPSON Status Monitor 2 on all your Windows 98 and Windows 95 workstations to use the EPSON TCP/IP printing protocol. Log in - Epson Stylus COLOR 900N | User Manual - Page 29
!2 for Windows and click the right arrow button . 3. Follow the instructions on screen to install EPSON Net!2. When you are finished, you can install Status Monitor 2 to monitor information about your printer including ink levels and printer errors. See page 23 for instructions. Status Monitor 2 can - Epson Stylus COLOR 900N | User Manual - Page 30
EPSON Stylus COLOR 900N part of EPSON Status Monitor 2. These two parts work together to allow you to see your printer's status information over the network. Status Monitor 2 lets you monitor information from the server or from any of the workstations where you install it. It gives you ink levels - Epson Stylus COLOR 900N | User Manual - Page 31
steps to install Status Monitor 2: 1. Insert the printer software CD-ROM. You see the following screen: If the screen does not appear, type D:\EPSETUP (where D: is the drive letter of your CD-ROM) and click OK to start the EPSON Installation program. 2. Highlight Install Status Monitor 2 for Network - Epson Stylus COLOR 900N | User Manual - Page 32
in your electronic EPSON Stylus COLOR 900N Manual or Chapter 11 in your Administrator's Manual to turn on background monitoring later.) After you install the network software, configure the printer's Ethernet card for TCP/IP (page 39), or use EPSON Net!2 to configure your printer for NetWare (page - Epson Stylus COLOR 900N | User Manual - Page 33
the number of systems that monitor the printer, however, to prevent network traffic problems.) Configuring for NetWare You can configure the printer for NDS or bindery with NwAdmin and EPSON Net!2. (If you want to use PCONSOLE, see Chapter 4 in your Administrator's Manual.) Before you follow the - Epson Stylus COLOR 900N | User Manual - Page 34
: Click the directory context icon (or bindery context), and select Object, Create, and then Printer. Type the printer name and click Create. 4. Create a print server: Click the directory context icon (or bindery context), and select Object, Create, and then Print Server. Type the - Epson Stylus COLOR 900N | User Manual - Page 35
select the print queue volume. Then click Create. The objects you have just created are added to the NDS tree (or bindery). 6. Double-click the Printer Object icon on the NetWare Administrator screen. 28 - Epson Stylus COLOR 900N | User Manual - Page 36
7. The Printer dialog box appears. Click Assignments and then click Add. 8. From the print queue list, select the queue you want to assign and click OK. 9. For Print Server mode, go to step 11. For Remote Printer mode, click Configuration, select Other/Unknown for the Printer type box and click OK. - Epson Stylus COLOR 900N | User Manual - Page 37
10. Double-click the print server object icon on the NetWare Administrator screen. 11. The Print Server dialog box appears. Click Assignments and then click Add. 12. From the printer object list, select the printer object you want to assign and click OK. 30 - Epson Stylus COLOR 900N | User Manual - Page 38
13. For Print Server mode, go to step 14. For Remote Printer mode, go back to the screen in step 11 and click the Printer Number button to set up the printer number from 0 to 254. 14. Double-click the print queue object icon on the NetWare Administrator screen. 31 - Epson Stylus COLOR 900N | User Manual - Page 39
15. The Print Queue dialog box appears. Click Assignments. Check that the print server and the printer are assigned to the queue. You now need to use EPSON Net!2 to configure the card: s For Print Server mode, see the section below. s For Remote Printer mode, go to page 36. 32 - Epson Stylus COLOR 900N | User Manual - Page 40
seconds to print a status sheet with the MAC address of the card. If the IP address is set to the default IP address, the printer model might not appear. Follow these steps: 1. Start EPSON Net!2. The following screen appears: 2. Highlight your EPSON Stylus COLOR 900N printer and click Configuration - Epson Stylus COLOR 900N | User Manual - Page 41
3. Click the NetWare Basic tab and make the following settings: Frame type Select one of the following: Auto, Ethernet 802.2, Ethernet 802.3, Ethernet II, or SNAP. Mode Select Print Server. NDS Select Enable or Disable. NDS Tree name If you are using NDS mode, type the same name as you used in - Epson Stylus COLOR 900N | User Manual - Page 42
See your NetWare manual for the available characters and number of characters you can as "∗". Print server name Type any new name up to 47 characters. The default name consists of the printer name and the last six digits of the Ethernet card's serial number. Polling interval Set the polling time - Epson Stylus COLOR 900N | User Manual - Page 43
done" message appears) before you turn off the printer. Using EPSON Net!2 to Configure the Card in Remote Printer Mode If the Status Monitor 2 utility is running, or if background monitoring is turned on, it may interfere with EPSON Net!2. Close Status Monitor 2 if it is running and turn off - Epson Stylus COLOR 900N | User Manual - Page 44
Start EPSON Net!2. The following screen appears: 3. Highlight your printer and click Configuration. 4. Click the NetWare Basic tab and make the following settings: Frame type Select one of the following: Auto, Ethernet 802.2, Ethernet 802.3, Ethernet II, Ethernet SNAP. Mode Select Remote Printer. 37 - Epson Stylus COLOR 900N | User Manual - Page 45
255 characters) from the Object to the Root. Do not type the "." at the top. See your NetWare manual for the available characters and number of characters you can use. 5. Click the Remote Printer tab and make the following settings: Primary print server Select the print server name you have created - Epson Stylus COLOR 900N | User Manual - Page 46
to TCP/IP, you need to install the EPSON TCP/IP printing protocol included with Status Monitor 2. See page 23 for instructions. (See your Windows documentation or Help system to set up TCP/IP. If the Status Monitor 2 utility is running, or if background monitoring is turned on, it may interfere with - Epson Stylus COLOR 900N | User Manual - Page 47
these steps to assign an IP address: 1. Make sure Windows is running, the Ethernet card is connected to the network, and the printer is turned on. 2. Click Start, point to Programs, point to EPSON Net!2, then click EPSON Net!2. 3. Click the printer where you want to set the IP address, and then - Epson Stylus COLOR 900N | User Manual - Page 48
menu. 5. For The way of acquiring an IP address, select one of the following: Manual, RARP, BOOTP, or DHCP. To use RARP, BOOTP, or DHCP, a server for server. If you will use the card's internal home page, assign an IP address manually. The default IP address is 11.22.33.44. If you plan to use the - Epson Stylus COLOR 900N | User Manual - Page 49
card.) Before you can print using TCP/IP, you still need to do the following on each computer that will use the printer: s Install the printer driver (see page 49) s Add a printer port (see page 51) See page 46 if you need to enable NetBEUI on the Ethernet card. Using the arp Command Make - Epson Stylus COLOR 900N | User Manual - Page 50
address> For example: arp -s 192.1.1.6 00-00-48-92-BD-9A For Windows NT, substitute colons (:) for the hyphens (-) shown in the MAC address. 9. trouble getting the network to recognize the card, check Chapter 12, Troubleshooting, in the Administrator's Manual for solutions to possible problems. 43 - Epson Stylus COLOR 900N | User Manual - Page 51
that will use the printer: s Install the printer driver (see page 49) s Add a printer port (see page printer on an AppleTalk network, you need to configure the Ethernet card for AppleTalk. Follow these steps to configure your card using EPSON Net!2: 1. Open the EPSON Net!2 utility. You see a window - Epson Stylus COLOR 900N | User Manual - Page 52
Highlight Stylus COLOR 900 and click Configuration. The IP Address Configuration and AppleTalk Configuration dialog box appears. 3. Make the following settings in the AppleTalk Configuration box. Printer Name Type the printer name (up to 31 characters). The default name consists of the printer name - Epson Stylus COLOR 900N | User Manual - Page 53
You can use NetBEUI in Windows networks to print to your EPSON Stylus COLOR 900N. Configure the card for NetBEUI using the card's internal home page. Before you can configure the card for NetBEUI, you must: s Set up TCP/IP on all the workstations that will use the printer. s Set the IP address for - Epson Stylus COLOR 900N | User Manual - Page 54
to give the printer a unique name for the network. For the workgroup name, type the domain name or the workgroup name used in the Windows network. 4. Type the NetBIOS name (up to 15 characters), the workgroup name (up to 15 characters), and the device name (up to - Epson Stylus COLOR 900N | User Manual - Page 55
6. If the message "Configuration change is complete!" appears on your screen, the update is complete. Enable the changes by pressing RESET or turning your printer off and on. 48 - Epson Stylus COLOR 900N | User Manual - Page 56
, you must install EPSON Status Monitor 2 on each workstation. If your workstation does not have a CD-ROM drive, you can create diskettes from the CD-ROM using another computer. See page 103 for instructions. Installing the Printer Driver The printer driver is on the printer software CD-ROM that - Epson Stylus COLOR 900N | User Manual - Page 57
in Windows 98, Windows 95, or Windows NT 4.0 1. Insert the printer software CD-ROM. You see the EPSON Installation Program screen: If you do not see the screen, click Start, Run, and type D:\EPSETUP (where D: is the drive letter of your CD-ROM). Then click OK. 2. Highlight Install Printer Driver and - Epson Stylus COLOR 900N | User Manual - Page 58
make sure the TCP/IP Print Server service is running before you start. 1. Click Start, point to Settings, and click Printers. 2. Right-click the EPSON Stylus COLOR 900N printer icon. 3. Select Properties. 4. In Windows 98 or Windows 95, click the Details tab. In Windows NT 4.0, click the Ports tab - Epson Stylus COLOR 900N | User Manual - Page 59
Changing Your Port Setting Follow these steps to change the port setting under Windows 3.1x: 1. Open the Print Manager and select EPSON Stylus COLOR 900N from the list of printers. 2. Select Network Connections from the Options menu. 3. In the New Connection area, type the network path and port, or - Epson Stylus COLOR 900N | User Manual - Page 60
printer driver screen. 3. Click the General tab and click Print Test Page. The test page is printed and a screen asks you to confirm that it printed correctly. If the test page does not print, see page 93 or page 128 in your electronic EPSON Stylus COLOR 900N Manual and Chapter 12, Troubleshooting - Epson Stylus COLOR 900N | User Manual - Page 61
54 - Epson Stylus COLOR 900N | User Manual - Page 62
disk and how to view the manual using Adobe Acrobat Reader. Installing the Manual Follow the instructions below for your operating system to copy the electronic EPSON Stylus COLOR 900N Manual from the CD-ROM to your hard disk: s Windows 95, 98, and NT: Insert the printer software CD-ROM into your CD - Epson Stylus COLOR 900N | User Manual - Page 63
printer software CD-ROM in your CD-ROM drive. Double-click the Reader 3.01 Installer icon and follow the instructions on the screen to install Acrobat Reader. Opening Your Electronic Manual Follow the instructions below for your operating system to open your electronic EPSON Stylus COLOR 900N Manual - Epson Stylus COLOR 900N | User Manual - Page 64
manuals: s Click on hot topics, which are usually underlined or displayed in a different color . To find out if a topic is hot, move your cursor over it. If the cursor turns into a pointing hand, the topic is hot-you can jump to it by clicking once. s If the manual move through a manual. (The - Epson Stylus COLOR 900N | User Manual - Page 65
58 - Epson Stylus COLOR 900N | User Manual - Page 66
for your operating system in these sections: s "Printing with Windows" on page 60 s "Printing with a Macintosh" on page 64 For instructions on using special papers such as EPSON Photo Paper or envelopes, see page 73. For instructions on customizing your settings to fine-tune your printouts, see - Epson Stylus COLOR 900N | User Manual - Page 67
box for your application may look slightly different): Make sure your printer is selected here If you see a Properties button, click it If you see Setup, Printer, or Options, click that button instead; then click Properties in the next screen 5. Make sure EPSON Stylus COLOR 900N is selected. 60 - Epson Stylus COLOR 900N | User Manual - Page 68
a Properties button; just click Setup, Printer, or Options until you see the window in step 7. 7. Now you see the printer settings dialog box. If necessary, click the Main tab to display the settings shown below: Media Type setting Automatic mode setting Ink setting Quality/Speed slider Automatic - Epson Stylus COLOR 900N | User Manual - Page 69
page 76. For instructions on loading special paper, see page 73.) s Make sure Ink is set to Color if you want to print in color. s Set the Mode resolution on some papers on the Advanced [More Settings in Windows 3.1] dialog box; see page 70 for instructions.) 9. Click the Paper tab at the top of the - Epson Stylus COLOR 900N | User Manual - Page 70
(Despooler in Windows 3.1) appears and shows the progress of your print job. You can cancel , pause , or restart your print job as necessary. Windows 95, 98, NT Windows 3.1 For more information on printing, see the electronic EPSON Stylus COLOR 900N Manual. See page 55 for instructions on viewing - Epson Stylus COLOR 900N | User Manual - Page 71
If you are using letterhead or preprinted paper, be sure the top of the paper feeds into the printer first. load paper only up to this arrow slide paper against the right edge guide 3. Open a Macintosh application program and select a document to print. 4. Open the File menu and choose Page Setup - Epson Stylus COLOR 900N | User Manual - Page 72
and choose Print. You see the main printer settings dialog box: Media Type setting Automatic mode setting Ink setting Quality/Speed slider 7. Check the page 76. For instructions on loading special paper, see page 73.) s Make sure Ink is set to Color if you want to print in color. s Set the - Epson Stylus COLOR 900N | User Manual - Page 73
8. Click the Layout icon if you want to reduce or enlarge your printed image, print multiple pages on one sheet of paper, or add a watermark. 9. Click the Background Printing icon if you want to prioritize or schedule your print job for printing. 10. Click the Preview icon, then click the Preview - Epson Stylus COLOR 900N | User Manual - Page 74
EPSON Stylus COLOR 900N Manual. See page 55 for instructions on viewing the manual. Using Custom Project Types Your EPSON Stylus COLOR 900N printer software available, depending on your operating system and the Media Type and Ink settings you choose. You can also make detailed settings on the - Epson Stylus COLOR 900N | User Manual - Page 75
the printer settings dialog box as described in "Printing with Windows" on page 60 or "Printing with a Macintosh" on page 64. 3. Choose the Media Type you want to print on. (If you're not sure which setting to choose, see "Selecting the Correct Media Type" on page 76.) 4. Choose Color or Black ink - Epson Stylus COLOR 900N | User Manual - Page 76
documents like presentations with charts and graphs. s Economy: For printing rough drafts of text on plain paper. Saves ink. s ICM (Image Color Matching; Windows 95 and Windows 98 only): For printing documents created in an ICM compatible application. s sRGB (Standard Red Green Blue; not available - Epson Stylus COLOR 900N | User Manual - Page 77
you print a similar project. For more information, see your electronic EPSON Stylus COLOR 900N Manual. 1. Create your image or document in your application software. Then access the printer settings dialog box as described in "Printing with Windows" on page 60 or "Printing with a Macintosh" on page - Epson Stylus COLOR 900N | User Manual - Page 78
the Media Type and Ink settings you want to use. These settings are the same as the ones you selected on the main printer settings dialog box. You black text only. s Error Diffusion: For printing photographic images. Blends each color dot with the dots around it. s Fine Dithering: For printing graphs - Epson Stylus COLOR 900N | User Manual - Page 79
settings you need to change in the printer software. 9. Click OK (Windows), then click any other buttons that your application uses for printing or click Print (Macintosh). For complete instructions on using all your printer software's settings, see your electronic EPSON Stylus COLOR 900N Manual. 72 - Epson Stylus COLOR 900N | User Manual - Page 80
EPSON paper. For a list of EPSON special ink jet papers and ordering information, see the inside back cover. For complete instructions on using all EPSON special ink jet papers, see your electronic EPSON Stylus COLOR 900N Manual. EPSON Photo Paper Your EPSON paper. Use a support sheet if it is - Epson Stylus COLOR 900N | User Manual - Page 81
. 2. Slide the left edge guide against the left edge of the paper. 3. When you create the image in your application software, size it to 4.25 × 6.25 inches. You can also use your printer software's Reduce/Enlarge settings, as described in your EPSON Stylus COLOR 900N Manual. 0.67 in 0.24 in 0.12 - Epson Stylus COLOR 900N | User Manual - Page 82
the left edge guide as shown here. You may get better results if you press each envelope flat before loading it, or try loading one envelope at a time. Select Plain paper as the Media Type and choose the correct envelope size as the Paper Size setting in the printer software. Set the thickness - Epson Stylus COLOR 900N | User Manual - Page 83
Type setting in your printer software. Check the table below if you're not sure which setting to choose. For details on loading special media, see your electronic EPSON Stylus COLOR 900N Manual. For this media name . . . Plain paper sheets or envelopes EPSON 360 dpi Ink Jet Paper EPSON Iron-On Cool - Epson Stylus COLOR 900N | User Manual - Page 84
and to prepare it for moving. Just follow the instructions in this chapter for: s Cleaning the print head s Replacing an ink cartridge s Aligning the print head s Transporting the printer For more details, see your electronic EPSON Stylus COLOR 900N Manual as described on page 55. Cleaning the Print - Epson Stylus COLOR 900N | User Manual - Page 85
Follow these steps to run the Head Cleaning utility: 1. Make sure the printer is turned on but not printing, and both the B black and A color ink out lights are off. 2. Access the printer settings dialog box as described in "Printing with Windows" on page 60 or "Printing with a Macintosh" on page 64 - Epson Stylus COLOR 900N | User Manual - Page 86
sure the printer is turned on but not printing, and both the B black and A color ink out printer settings dialog box as described in "Printing with Windows" on page 60 or "Printing with a Macintosh" on page 64. 5. Click the Utility tab (Windows Problems Getting Good Print Quality" on page 93. 79 - Epson Stylus COLOR 900N | User Manual - Page 87
to replace it. You cannot print if either ink cartridge is empty. You can also check your ink levels using the EPSON status monitor (not available for Windows 3.1). See your electronic EPSON Stylus COLOR 900N Manual for details. Use these EPSON ink cartridges within six months of installing them and - Epson Stylus COLOR 900N | User Manual - Page 88
) follow the instructions in "Replacing an Outdated Ink Cartridge" on page 83. Removing and Installing Ink Cartridges You can replace a cartridge when the B black or A color ink out light is either flashing or on. (If you perform these steps when both ink out lights are off, the printer cleans the - Epson Stylus COLOR 900N | User Manual - Page 89
replace it with a new one. Once you remove a cartridge, you can't reuse it, even if it contains ink. 5. Pull up the ink cartridge clamp. The cartridge rises up from its holder. 6. Lift the cartridge out of the printer and dispose of it carefully. If ink gets on your hands, wash them thoroughly with - Epson Stylus COLOR 900N | User Manual - Page 90
and the Ppower light begins flashing. 5. If you need to replace only the color ink cartridge, press the E load/eject button again until the print head moves to the color ink cartridge replacement position. To avoid damaging the printer, never move the print head by hand. Don't open the clamp or - Epson Stylus COLOR 900N | User Manual - Page 91
up and toward the back of the printer. 9. Press down the ink cartridge clamp until it locks in place. 10. Press the E load/eject button. The print head moves to the color ink cartridge replacement position. If you need to replace the color ink cartridge, repeat steps 6 through 9. Then continue with - Epson Stylus COLOR 900N | User Manual - Page 92
, follow the instructions in your electronic EPSON Stylus COLOR 900N Manual instead. Follow these steps: 1. Make sure the printer is turned on and letter-size paper is loaded. Load paper that's at least 8.27 inches (210 mm) wide. This prevents ink from spraying inside the printer and smudging your - Epson Stylus COLOR 900N | User Manual - Page 93
the network cable. 2. Remove all the paper from the sheet feeder. 3. Clean the exterior of the printer with a soft, damp cloth. 4. Clean ink out of the printer's interior with a soft, damp cloth. Don't touch the gears inside the printer. Never use alcohol or thinner for cleaning; they can damage the - Epson Stylus COLOR 900N | User Manual - Page 94
outlet. Then disconnect the network cable from the printer. 3. Remove any paper from the printer and remove the paper support. 4. Open the printer cover. Secure the ink cartridge holder to the printer with tape as shown, then close the printer cover. 5. Push in the output tray extensions and - Epson Stylus COLOR 900N | User Manual - Page 95
88 - Epson Stylus COLOR 900N | User Manual - Page 96
and software problems. There are additional problem solving tips in the "Troubleshooting" section of your electronic EPSON Stylus COLOR 900N Manual. If none of the suggested solutions solve your problem, contact your EPSON dealer or see "Where To Get Help" on page 100. Diagnosing Printer Problems - Epson Stylus COLOR 900N | User Manual - Page 97
you need to replace the ink cartridge. See page 80 for instructions. P and S flash, and B and A are on When the P power and S paper out lights flash and the B black and A color ink out lights come on, jammed paper may be blocking movement of the print head. Turn off the printer, wait a few seconds - Epson Stylus COLOR 900N | User Manual - Page 98
flash, then release it. The printer prints one page showing its ROM version number, ink counter, and a nozzle check printer after it prints the check page. Then reconnect the interface cable and turn on your printer and computer. s If the results are satisfactory, the problem lies in your software - Epson Stylus COLOR 900N | User Manual - Page 99
and Solutions Here are some basic troubleshooting tips if you have any problems setting up your printer, installing software, or getting good print quality. Problems Setting Up the Printer or Installing Its Software If you installed the ink cartridges and the printer started making noise . . . s The - Epson Stylus COLOR 900N | User Manual - Page 100
your printer driver, following the instructions on page 49. Once you've installed Status Monitor 2, make sure background monitoring is turned on. See your electronic EPSON Stylus COLOR 900N Manual for details on Status Monitor 2. (Status Monitor 2 is not available for Windows 3.1.) Problems Getting - Epson Stylus COLOR 900N | User Manual - Page 101
the ink cartridges aren't low on ink. If either ink out light is flashing, replace the ink cartridge; see page 80. If your ink cartridge is more than six months old, you may need to replace it; see page 83. s Try using Automatic mode. See page 62 (Windows) or page 65 (Macintosh) for instructions - Epson Stylus COLOR 900N | User Manual - Page 102
paper or media meets the specifications listed in your electronic EPSON Stylus COLOR 900N Manual. s Run the Print Head Alignment utility. See page 85 for instructions. s Check the paper thickness lever position. If it's in the + position, your printer is set for thicker paper or envelopes and your - Epson Stylus COLOR 900N | User Manual - Page 103
65 (Macintosh) for instructions. s Your printed colors can never exactly match your on-screen colors. However, you can use a color management system to get as close as possible. For information on your printer software's color matching options, see your electronic EPSON Stylus COLOR 900N Manual. 96 - Epson Stylus COLOR 900N | User Manual - Page 104
, or as the Windows default printer, or as the current printer in the Macintosh Chooser. Be sure to select EPSON Stylus COLOR 900N in your application. For instructions on selecting the Windows default printer, see your Windows documentation or online help. To select your printer in the Macintosh - Epson Stylus COLOR 900N | User Manual - Page 105
then reinstall the printer driver software, you must either run the setup program as described in "Changing the Status Monitor 2 Setup" on page 103 in your electronic EPSON Stylus COLOR 900N Manual, or uninstall and reinstall Status Monitor 2, so it can recognize your printer. In Windows NT 4.0, you - Epson Stylus COLOR 900N | User Manual - Page 106
printing is enabled, disable it as described in "Changing the Status Monitor 2 Setup" on page 103 in your electronic EPSON Stylus COLOR 900N Manual. If you try to uninstall EPSON Status Monitor 2 when using IntranetWare Client for NT in Windows NT 4.0, and an error message appears and the uninstall - Epson Stylus COLOR 900N | User Manual - Page 107
software. To reinstall your software, see page 21. To remove EPSON Net!2 from a Macintosh system, find the EPSON Net!2 folder that you created and drag it to your Trash icon. Where To Get Help EPSON provides technical assistance through automated telephone services and electronic support services - Epson Stylus COLOR 900N | User Manual - Page 108
s Product name (EPSON Stylus COLOR 900N) s Product serial number (located on the back of the printer) s Computer configuration s A status sheet from the Ethernet card (see page 17) s Description of the problem You can purchase ink cartridges, paper, manuals, and accessories from EPSON Accessories at - Epson Stylus COLOR 900N | User Manual - Page 109
102 - Epson Stylus COLOR 900N | User Manual - Page 110
From Diskettes If you need to install the printer software on a system that doesn't have a CD-ROM drive (such as a workstation), use the instructions in this chapter to do one of the following: s For Windws, you can create the software diskettes on another computer that has a CD-ROM drive using - Epson Stylus COLOR 900N | User Manual - Page 111
Installation Program screen: If the screen does not appear, go to My Computer and double-click the Epson CD-ROM icon to start the EPSON Installation program. 2. Highlight Create Printer Driver/Utility diskettes and click the right arrow button . 3. Select which program you want and click OK. You - Epson Stylus COLOR 900N | User Manual - Page 112
in order as you create it: Status Monitor 2, network part, disk 1 of 2, etc. If you are making Status Monitor 2 diskettes, make sure you label the diskettes for both parts carefully, so you do not mix up the network diskettes and the EPSON Stylus COLOR 900N diskettes. 6. If you have to create - Epson Stylus COLOR 900N | User Manual - Page 113
drive to drag the following files from your CD-ROM onto diskettes (1 per file): s EPSON Installer (printer driver software) s EPSON Net!2 Ordering Printer Software Diskettes You can order software diskettes from EPSON by phone or fax for $19.95 shipping and handling (plus tax where applicable), or - Epson Stylus COLOR 900N | User Manual - Page 114
and expiration date Be sure to sign your fax; it is required for the credit card purchase s Printer name (EPSON Stylus COLOR 900N) s Operating system (Window 3.1, Windows 95, Windows 98, Windows NT 4.0, or Macintosh). Phone: Call (310) 533-8467 from 6 AM to 6 PM Pacific time, Monday through Friday - Epson Stylus COLOR 900N | User Manual - Page 115
part and the EPSON Stylus COLOR 900N part of EPSON Status Monitor 2. These two parts work together to allow you to see your printer's status information over the network. You may not see all the steps here, depending on your computer's configuration. If you are using Windows 98 or Windows 95, make - Epson Stylus COLOR 900N | User Manual - Page 116
. 10. Check the current settings and click Next to install the software. When the installer prompts you, insert the second diskette. 11. When you see the Setup Complete screen, select No and click Finish. 12. Insert the Status Monitor 2 for EPSON Stylus COLOR 900N, diskette 1, in your drive. 109 - Epson Stylus COLOR 900N | User Manual - Page 117
you configure the card. (See page 95 in your electronic EPSON Stylus COLOR 900N Manual or Chapter 11 in your Administrator's Manual to turn on background monitoring.) If you install Status Monitor 2 on additional workstations, or you are not using EPSON Net!2, you do not have to turn off background - Epson Stylus COLOR 900N | User Manual - Page 118
steps to install your printer driver: 1. Turn on your printer and your Macintosh and turn off any virus protection programs you may have. 2. Insert the diskette in your drive and double-click the diskette icon that appears. 3. Double-click the Installer icon. 4. Follow the instructions on the screen - Epson Stylus COLOR 900N | User Manual - Page 119
112 - Epson Stylus COLOR 900N | User Manual - Page 120
26 BOOTP, 41 C Cable, network, 4, 5 Cleaning print head, 77 to 79 printer, 86 sheets, 76, 77, 86 Color Adjustment mode, 72 Color management settings, 72 ColorSync setting, 69, 72 Custom project types, 67 to 69 D Despooler, Windows 3.1, 63 Device name, 47 DHCP, 41 Diffusion, error, 71 Digital Camera - Epson Stylus COLOR 900N | User Manual - Page 121
setting, 71 I ICM (Image Color Matching) setting, 69, 72 Incorrect colors in printout, 96 Ink cartridge replacing, 80 to 82 replacing outdated, 80, 83 to 84 safety instructions, 9 Ink Jet Transparencies, 76 Ink level gauge, 93 Ink setting, 68, 71 Installation, troubleshooting, 92 IP address, 41 Iron - Epson Stylus COLOR 900N | User Manual - Page 122
87 Troubleshooting, 100 to 101 R RARP, 41 Reader, see Adobe Acrobat Reader Resolution, see Print quality S Safety instructions, 8 to 9 Service, 100 to 101 Sharpness setting, 72 Smears, 75, 94, 95 U Uninstalling software, 97 to 100 Utilities aligning print head, 85 head cleaning, 78 Status Monitor - Epson Stylus COLOR 900N | User Manual - Page 123
Windows Progress Meter, 63 system requirements, 4 using diskettes, 103 to 110 Workgroup name, 47 World Wide Web, 101 Y Year 2000, 6 116 - Epson Stylus COLOR 900N | User Manual - Page 124
printer all of its awards! EPSON's papers are specially coated to work with EPSON's quick drying inks. You'll notice that when prints come out of your printer, weight glossy paper available in a variety of sizes. Perfect for color photo keepsakes of snapshots, framed art, banners, and panoramics. - Epson Stylus COLOR 900N | User Manual - Page 125
expiration date on the package: Black ink cartridge T003011 Color ink cartridge T005011 EPSON Papers Paper name EPSON 360 dpi Ink Jet Paper EPSON High Quality Ink Jet Paper EPSON Photo Quality Ink Jet Paper EPSON Photo Quality Ink Jet Cards EPSON Photo Paper EPSON Photo Stickers Kit (CD-ROM/paper
-
 1
1 -
 2
2 -
 3
3 -
 4
4 -
 5
5 -
 6
6 -
 7
7 -
8
-
9
-
10
-
11
-
12
-
13
-
14
-
15
-
16
-
17
-
18
-
19
-
20
-
21
-
22
-
23
-
24
-
25
-
26
-
27
-
28
-
29
-
30
-
31
-
32
-
33
-
34
-
35
-
36
-
37
-
38
-
39
-
40
-
41
-
42
-
43
-
44
-
45
-
46
-
47
-
48
-
49
-
50
-
51
-
52
-
53
-
54
-
55
-
56
-
57
-
58
-
59
-
60
-
61
-
62
-
63
-
64
-
65
-
66
-
67
-
68
-
69
-
70
-
71
-
72
-
73
-
74
-
75
-
76
-
77
-
78
-
79
-
80
-
81
-
82
-
83
-
84
-
85
-
86
-
87
-
88
-
89
-
90
-
91
-
92
-
93
-
94
-
95
-
96
-
97
-
98
-
99
-
100
-
101
-
102
-
103
-
104
-
105
-
106
-
107
-
108
-
109
-
110
-
111
-
112
-
113
-
114
-
115
-
116
-
117
-
118
-
119
-
120
-
121
-
122
-
123
-
124
-
125
 |
 |

Epson America, Inc.
Stylus COLOR 900N
User’s Guide