Epson Stylus NX330 Start Here
Epson Stylus NX330 Manual
 |
View all Epson Stylus NX330 manuals
Add to My Manuals
Save this manual to your list of manuals |
Epson Stylus NX330 manual content summary:
- Epson Stylus NX330 | Start Here - Page 1
can change the language using the product's control panel. For more information, see the online User's Guide. 4 Install ink cartridges Note: Don't load paper yet. 1 Lift up the scanner unit. 2 Turn on and adjust 1 Raise the paper support, then connect the power cord to the back of the printer and - Epson Stylus NX330 | Start Here - Page 2
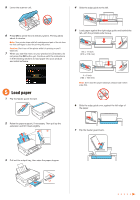
the printer while it is priming or you'll waste ink. 7 When you see this menu on your product's LCD screen, do not press the OK button yet. Continue with the instructions in the following sections to load paper into your product and install software. 5 Load paper against the right edge guide and - Epson Stylus NX330 | Start Here - Page 3
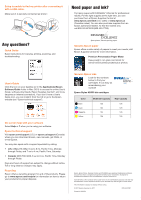
Account Control screen, click Yes or Continue. Mac OS® X: Double-click the Epson icon, if necessary. 4 Click Install (Windows) or Continue (Mac OS X) and follow the instructions on your computer screen. Any problems? If you experience problems during setup, see below: Network setup was unsuccessful - Epson Stylus NX330 | Start Here - Page 4
/Epson Software/Guide folder in Mac OS X) to access the online User's Guide, software downloads, Epson Supplies Central®, and more (requires an Internet connection). If you don't have a User's Guide icon, you can install it from the CD or go to the Epson website (see "Epson technical support
-
 1
1 -
 2
2 -
 3
3 -
 4
4
 |
 |
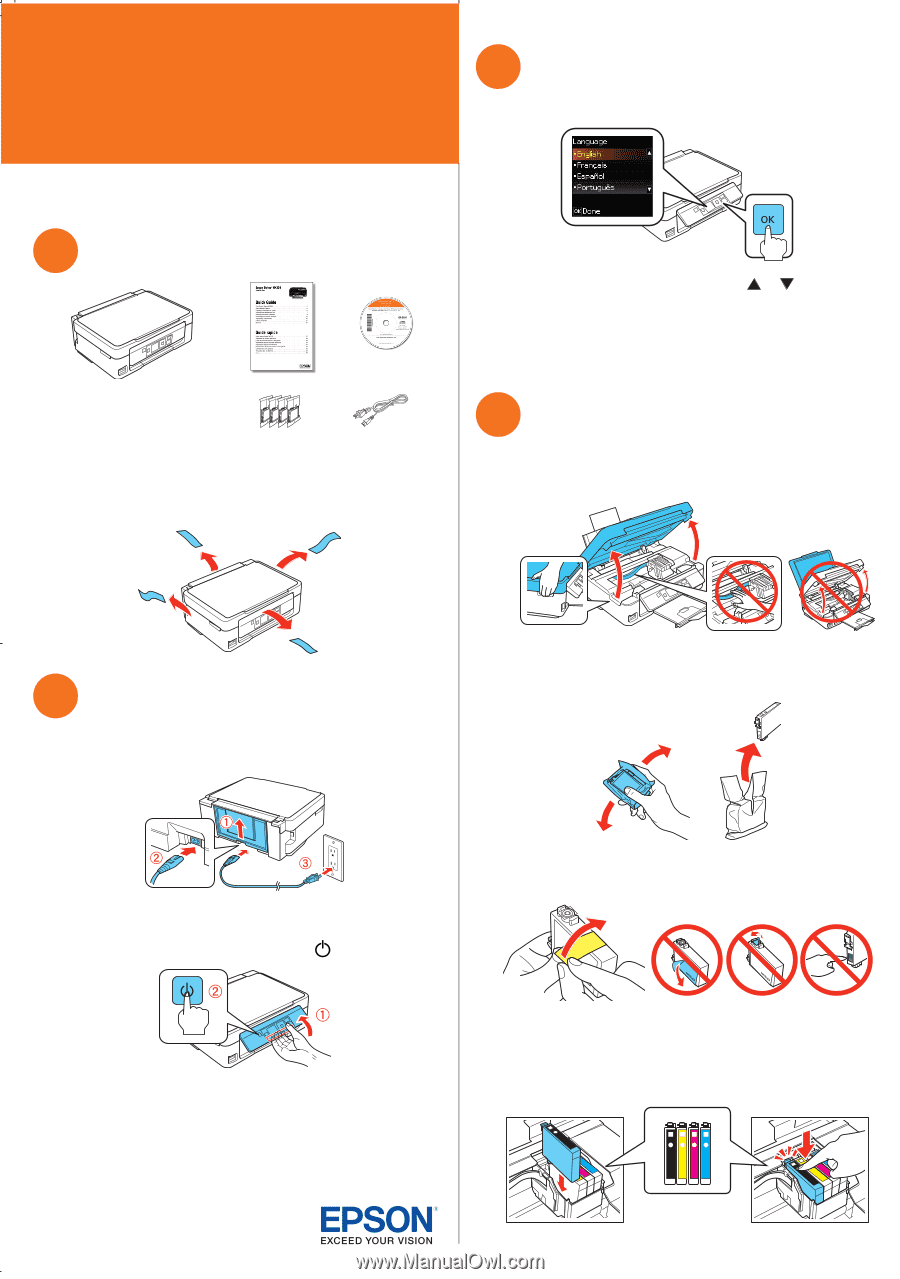
Read these instructions before using your product.
1
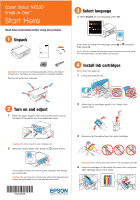
Unpack
Caution:
Do not open ink cartridge packages until you are ready to
install the ink. Cartridges are vacuum packed to maintain reliability.
Remove all protective materials.
2
Turn on and adjust
1
Raise the paper support, then connect the power cord to
the back of the printer and to an electrical outlet.
Caution:
Do not connect to your computer yet.
2
Raise the control panel, then press the
power button.
If you want to lower the control panel, squeeze the release
bar underneath.
Caution:
Do not lower the control panel without first squeezing the
release bar underneath or you may damage the product.
3
Select language
To select
English
as your language, press
OK
.
If you want to change the language, press
or
to select it,
then press
OK
.
Note:
You can change the language using the product’s control panel.
For more information, see the online
User’s Guide
.
4
Install ink cartridges
Note:
Don’t load paper yet.
1
Lift up the scanner unit.
2
Shake the ink cartridges gently 4 or 5 times, then
unpack them.
3
Remove only the yellow tape from each cartridge.
Caution:
Don’t remove any other seals or the cartridges may leak.
4
Insert the cartridges in the holder for each color, and press
each cartridge down until it clicks.
*412183500*
*412183500*
Epson Stylus
®
NX330
Small-in-One
™
Start Here