Epson Stylus Pro 10000 - Archival Ink Quick Reference Guide
Epson Stylus Pro 10000 - Archival Ink - Stylus Pro 10000 Print Engine Manual
 |
View all Epson Stylus Pro 10000 - Archival Ink manuals
Add to My Manuals
Save this manual to your list of manuals |
Epson Stylus Pro 10000 - Archival Ink manual content summary:
- Epson Stylus Pro 10000 - Archival Ink | Quick Reference Guide - Page 1
EPSON Stylus® Pro 10000 Quick Reference Guide - Epson Stylus Pro 10000 - Archival Ink | Quick Reference Guide - Page 2
spindle so it fits securely against the paper stop. 6 Place the black end of the spindle into the left mounting bracket inside the printer. paper stop Handle the roll carefully and avoid touching the printable side of the paper with bare hands. Fingerprints may affect print quality. 1 Continue - Epson Stylus Pro 10000 - Archival Ink | Quick Reference Guide - Page 3
lever out, to the released position. 5 Push the paper set lever all the way in, then close the roll paper cover. To avoid damaging the printer, never move the paper set lever while the Operate or Pause light is flashing. If you're using Roll Auto Cut and the leading edge - Epson Stylus Pro 10000 - Archival Ink | Quick Reference Guide - Page 4
the board with the scale on the roll paper cover. To avoid damaging the printer, never move the paper set lever while the Operate or Pause light is panel display. 6 Print your page. After printing, the sheet stays in the printer. 7 To remove the print, hold it while pressing the lower Paper Feed - Epson Stylus Pro 10000 - Archival Ink | Quick Reference Guide - Page 5
below, you need to run a cleaning cycle. 5 Make sure that all of the Ink Out lights on the printer's control panel are off. If an Ink Out light is flashing or on, you need to replace the corresponding ink cartridge instead. 6 Press the Cleaning button and hold it for at least 3 seconds. The Pause - Epson Stylus Pro 10000 - Archival Ink | Quick Reference Guide - Page 6
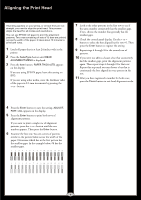
rows. 1 Load roll paper that is at least 24 inches wide in the printer. 2 Press the SelecType button until HEAD ALIGNMENT MENU is displayed. 3 Press the Item button. PAPER THICK=STD appears on the display. If you are using EPSON paper, leave this setting on STD. If you are using other media, enter - Epson Stylus Pro 10000 - Archival Ink | Quick Reference Guide - Page 7
is nearly empty. Make sure you have the correct replacement cartridge. 2 Locate the slot containing the empty ink cartridge corresponding to the Ink Out light. Press down on the top of the clamp and pull it forward. Photographic Dye ink: Black Yellow Magenta Cyan Light Magenta Light Cyan T499201 - Epson Stylus Pro 10000 - Archival Ink | Quick Reference Guide - Page 8
it from its package. If you're using Archival ink, shake the cartridge gently before installing it. 7 Close the ink compartment cover. 5 Hold the cartridge with the arrow mark on the left side and pointing to the rear of the printer. Then insert the cartridge into the slot. Don't force it. 7 - Epson Stylus Pro 10000 - Archival Ink | Quick Reference Guide - Page 9
Printer Guide. Message INK LOW Light Ink Out light(s) flashing INK OUT Ink Out light(s) on LOAD ROLL PAPER Paper Out light on LOAD SHEET PAPER MAINTENANCE REQ. Explanation Response Ink cartridge(s) nearly Replace ink cartridge need to be replaced soon. EPSON. Continue 8 L - Epson Stylus Pro 10000 - Archival Ink | Quick Reference Guide - Page 10
in. Turn the printer off and then support.epson.com and complete the form under the troubleshooting tab. Contact the RIP manufacturer. EPSON and EPSON Stylus are registered trademarks of SEIKO EPSON CORPORATION. EPSON Preferred is a service mark of Epson America, Inc. Copyright © 2001 by Epson - Epson Stylus Pro 10000 - Archival Ink | Quick Reference Guide - Page 11
EPSON Stylus® Pro 10000 Printed in USA CPD-12209
-
 1
1 -
 2
2 -
 3
3 -
 4
4 -
 5
5 -
 6
6 -
 7
7 -
8
-
9
-
10
-
11
 |
 |

EPSON
Stylus
®
Pro 10000
Quick Reference Guide