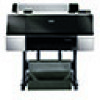
Epson Stylus Pro 7900 Computer To Plate System User's Guide
Epson Stylus Pro 7900 Computer To Plate System - Stylus Pro 7900 Computer Manual
 |
View all Epson Stylus Pro 7900 Computer To Plate System manuals
Add to My Manuals
Save this manual to your list of manuals |
Epson Stylus Pro 7900 Computer To Plate System manual content summary:
- Epson Stylus Pro 7900 Computer To Plate System | User's Guide - Page 1
Epson Stylus® Pro 7900CTP Computer to Plate System User's Guide - Epson Stylus Pro 7900 Computer To Plate System | User's Guide - Page 2
2| Contents Introduction 3 System Workflow 3 PCU Safety Instructions 4 Purchasing Supplies 5 System Requirements 6 Setting Up 7 Pre-installation Checklist 7 Setting Up the Printer 8 Setting Up the PCU 9 Calibrating the PCU 11 Installing the Plate Guide on the Printer 13 Setting Up the RIP - Epson Stylus Pro 7900 Computer To Plate System | User's Guide - Page 3
Introduction The Epson Stylus® Pro 7900CTP Computer to Plate System enables small business printers to print Epson DirectPlate Aluminum plates to run on their presses. To run a print job on the system: • Computer-separated images are produced with the RIP software • The images are printed on a plate - Epson Stylus Pro 7900 Computer To Plate System | User's Guide - Page 4
, turn off and unplug the PCU when maintaining the system. • Always turn off the PCU using the Heater switch on the control panel first. When safety mechanisms installed by the manufacturer in the PCU. See additional safety instructions for the printer in the Epson Stylus Pro 7900/9900 Printer Guide. - Epson Stylus Pro 7900 Computer To Plate System | User's Guide - Page 5
Purchasing Supplies | 5 Purchasing Supplies The Epson Stylus Pro 7900CTP Computer to Plate System was designed exclusively to use Epson DirectPlate Aluminium plate technology. Epson currently offers a complete lineup of plate sizes to work with the majority of printing presses available. If you do - Epson Stylus Pro 7900 Computer To Plate System | User's Guide - Page 6
6 | System Requirements System Requirements Your computer must meet these requirements to run the RIP software: Minimum • IBM®-compatible PC with a Pentium® 1 GHz CPU or equivalent • 1GB of RAM • 80GB hard drive ( - Epson Stylus Pro 7900 Computer To Plate System | User's Guide - Page 7
following components: • Epson Stylus Pro 7900 printer Setting Up | 7 • Plate curing unit (PCU) • Plate guide • Epson DirectPlate Aluminum sample pack (12 × 18 inches) • EFI™ eXpress CTP software RIP CD • Hexagonal (Allen) (2.5 mm/0.10 inch) wrench • Teflon® tape for use on plate guide • THERMAX - Epson Stylus Pro 7900 Computer To Plate System | User's Guide - Page 8
computer and printer (not included) • Metric ruler (with half-millimeter increments) (not included) Before you begin, make sure you have sufficient space to set up and use the system. Setting Up the Printer See the Epson Stylus Pro 7900/9900 Printer Guide for the printer's setup instructions - Epson Stylus Pro 7900 Computer To Plate System | User's Guide - Page 9
surface. WARNING: The PCU contains a heater and rises to high temperatures. Aluminum plates are very hot when they come out. Do not touch the plates or slots when hot to avoid burns. Use of gloves is recommended. Make sure the plates are dry when putting them through the PCU. Do not open the PCU - Epson Stylus Pro 7900 Computer To Plate System | User's Guide - Page 10
PCU. 5. To make adjustments if necessary, use the plastic nuts located underneath the tray to create single phase plug. 7. If you prefer to run a plate from the rear to the front, you can reverse the direction of the feed by pressing the feed direction switch on the side of the PCU. Feed direction - Epson Stylus Pro 7900 Computer To Plate System | User's Guide - Page 11
a speed of 1.5. To cure properly, the Epson DirectPlate Aluminum plate should reach an even surface temperature of 150 Use the included THERMAX temperature strips and run a plate through the PCU with the strips set across the plate. The THERMAX strips should read between 150 to 160 °C for the plate - Epson Stylus Pro 7900 Computer To Plate System | User's Guide - Page 12
Epson DirectPlate Aluminum test plate, one in the middle and one on each short end of the plate, 1/2 inch from the edge. WARNING: The plate edges are sharp. Use . The plate feeds through the PCU at the set speed. If the plate is not pulled in by the roller, check that the feed direction switch on - Epson Stylus Pro 7900 Computer To Plate System | User's Guide - Page 13
on the printer. 2. Remove the roll paper if installed, to have room to attach the screws on the plate guide. See the Epson Stylus Pro 7900/9900 Printer Guide for more information. 3. Slide the plate guide onto the right side of the roll paper cover, aligning it snugly with the black edge of the roll - Epson Stylus Pro 7900 Computer To Plate System | User's Guide - Page 14
included with the Epson Stylus Pro 7900CTP system and the one included with the printer are different sizes. You need both sizes. Aligning the Plate Guide The plate guide must be correctly aligned to remove any skew when printing on the plate. Otherwise, you will have registration problems on the - Epson Stylus Pro 7900 Computer To Plate System | User's Guide - Page 15
Installing the Plate Guide on the Printer | 15 4. When the plate prints out, use a metric ruler to measure the distance from the left edge of the plate to point A on the printed plate. Then measure the distance from the left edge of the plate to point B. If the distances to points A and B are equal, - Epson Stylus Pro 7900 Computer To Plate System | User's Guide - Page 16
16 | Installing the Plate Guide on the Printer 5. Use the hexagonal wrench included with the Epson Stylus Pro 7900CTP system to adjust the alignment of the plate guide. If distance A is greater than distance B, tighten the alignment screw; if distance B is greater than distance A, loosen the screw. - Epson Stylus Pro 7900 Computer To Plate System | User's Guide - Page 17
shown against the plate guide, and apply it from just above the top of the guide to the bottom edge of the roll paper cover. Teflon strip Note: You should cover the markings on the aluminum roll paper cover with clear packing tape. This is recommended because long-term use of the plates may wear - Epson Stylus Pro 7900 Computer To Plate System | User's Guide - Page 18
into your computer and follow the on-screen instructions to complete the software installation. Refer to the documentation included with the EFI software for setup and usage instructions. Also, see www.proimaging.epson.com for additional online videos and training tools on the EFI CTP software RIP - Epson Stylus Pro 7900 Computer To Plate System | User's Guide - Page 19
is dented or the corners or edges are bent, do not use it. Even the slightest bent corner can damage the printer. Use only Epson DirectPlate Aluminum plates. WARNING: The plate edges are sharp. Use caution to avoid injury. 1. Make sure the media catch bin (fabric bin) is positioned as shown. Media - Epson Stylus Pro 7900 Computer To Plate System | User's Guide - Page 20
two alignment points along the top and bottom of the plate guide. Lower the plate into the printer until you feel the suction holding the plate. Top alignment point Bottom alignment point 7. While gently holding the plate against the guide, press the Paper release (ePlaten) button again to close the - Epson Stylus Pro 7900 Computer To Plate System | User's Guide - Page 21
OK? on the LED display, be sure to select NO PAPER SELECTED. Note: Since you will use multiple plates consecutively on the printing press, it is best to load plates into the printer in the same direction each time. If this is not done, there is a slight possibility of minor differences in final - Epson Stylus Pro 7900 Computer To Plate System | User's Guide - Page 22
Using the settings unless you experience a problem on the press. 4. Wait for plate feeds through the oven at the set speed. If the plate is not pulled in by the roller assembly, check that the feed direction switch on the side of the PCU is set for the direction turn off the system, first turn off - Epson Stylus Pro 7900 Computer To Plate System | User's Guide - Page 23
on the control panel are 190 °C with a speed of 1.5. Punching the Plate Before printing, use an offline punch to create necessary guides on the plate for the press. See your press documentation or contact your Epson Authorized Reseller if you don't have a offline punch. Press Tips This section - Epson Stylus Pro 7900 Computer To Plate System | User's Guide - Page 24
CtP cleaner • POSCO Hit-'n-Run emulsion plate cleaner • Ultrachem POWA PLATE CLEANER • Ultrachem Speedclean EXP plate cleaner • Fujifilm PS Plate Multi Cleaner MC-E • Prisco® Velocity Plate Cleaner Caution: Handle the plate with care to avoid damaging its hydrophilic coating. The use of other plate - Epson Stylus Pro 7900 Computer To Plate System | User's Guide - Page 25
Plates Epson DirectPlate Aluminum plates can be reused if you would like to store them for use again to reprint the job. If you plan to reuse a plate on a plate to see if it removes the image. Maintenance • See the Epson Stylus Pro 7900/9900 Printer Guide for printer directly on the trays or the PCU. - Epson Stylus Pro 7900 Computer To Plate System | User's Guide - Page 26
Specifications PCU Specifications Specification Dimensions Electrical Plate size Plate type Temperature range Temperature accuracy Speed/ 0305 mm) thick 122 to 482 °F (50 to 250 °C) ±3.6 °F (2 °C) over the plate area 5 to 24 inches (127 to 610 mm) per minute 40 lb (18 kg) Heater ON/OFF - Epson Stylus Pro 7900 Computer To Plate System | User's Guide - Page 27
instructions. Seiko Epson Corporation shall not be liable for any damages or problems arising from the use of any options or any consumable products other than those designated as Original Epson Products or Epson Approved Products by Seiko Epson Corporation. Trademarks Epson and Epson Stylus - Epson Stylus Pro 7900 Computer To Plate System | User's Guide - Page 28
CPD-28133 Printed in USA
-
 1
1 -
 2
2 -
 3
3 -
 4
4 -
 5
5 -
 6
6 -
 7
7 -
8
-
9
-
10
-
11
-
12
-
13
-
14
-
15
-
16
-
17
-
18
-
19
-
20
-
21
-
22
-
23
-
24
-
25
-
26
-
27
-
28
 |
 |

Epson Stylus
Pro 7900CTP
Computer to Plate System
User’s Guide
®