Epson Stylus Pro 9000 User Manual - Color Calibration
Epson Stylus Pro 9000 - Print Engine Manual
 |
View all Epson Stylus Pro 9000 manuals
Add to My Manuals
Save this manual to your list of manuals |
Epson Stylus Pro 9000 manual content summary:
- Epson Stylus Pro 9000 | User Manual - Color Calibration - Page 1
EPSON Color Calibrator User's Guide CPD-8407 - Epson Stylus Pro 9000 | User Manual - Color Calibration - Page 2
against any damages or problems arising from the use of any options or any consumable products other than those designated as Original EPSON Products or EPSON Approved Products by SEIKO EPSON CORPORATION. EPSON and EPSON Stylus are registered trademarks of SEIKO EPSON CORPORATION. EFI, the EFI - Epson Stylus Pro 9000 | User Manual - Color Calibration - Page 3
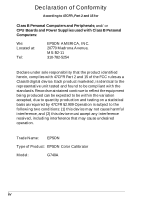
Declaration of Conformity According to ISO/IEC Guide 22 and EN 45014 Manufacturer: Address: SEIKO EPSON CORPORATION 3-5, Owa 3-chome, Suwa-shi, Nagano-ken 392-8502 Japan Representative: Address: EPSON EUROPE B.V. Prof. J. H. Bavincklaan 5 1183 AT Amstelveen The Netherlands Declares that the - Epson Stylus Pro 9000 | User Manual - Color Calibration - Page 4
a Class B digital device, pursuant to Part 15 of the FCC Rules. These limits are not installed and used in accordance with the instructions, may cause harmful interference to radio or not leave cables connected to unused interfaces. Changes or modifications not expressly approved by the manufacturer - Epson Stylus Pro 9000 | User Manual - Color Calibration - Page 5
and Power Supplies used with Class B Personal Computers: We: Located at: Tel: EPSON AMERICA, INC. 20770 Madrona Avenue, MS: B2-11 310-782-5254 Declare under sole responsibility that the product identified herein, complies with 47CFR Part 2 and 15 of the FCC rules as a Class B digital device. Each - Epson Stylus Pro 9000 | User Manual - Color Calibration - Page 6
Contents 1-1 Parts 1-2 Calibrator 1-2 Y-cable 1-2 Chapter 2 Setting up Your Color Calibrator Connecting the Calibrator to Your Computer 2-2 Installing the Utility Software 2-5 Chapter 3 Calibrating Your Printing System Calibrating the EPSON Color Calibrator 3-2 Printing a Calibration - Epson Stylus Pro 9000 | User Manual - Color Calibration - Page 7
Chapter 4 Calibrating Your System to Another Modifying the ICC Profile 4-1 Preparing to measure the standard color chart 4-1 Measuring the chart and updating the profile 4-4 Using a custom color chart to update your ICC profile . . 4-6 Applying the Modified ICC Profile 4-8 Index vi Contents - Epson Stylus Pro 9000 | User Manual - Color Calibration - Page 8
Introduction Features The EPSON Color Calibrator restores your EPSON Stylus® Pro 5000 or 9000 printer to its originally designed color settings. By creating a color profile for your printer and then implementing it on your EPSON RS-5000 Fiery® RIP version 1.3 or your EPSON RS-5100 Fiery X2 RIP, the - Epson Stylus Pro 9000 | User Manual - Color Calibration - Page 9
before using your Color Calibrator, and save them for later reference. Follow all warnings and instructions in this User's Guide. t Unplug the AC adapter before cleaning. Clean with a damp cloth only. Do not spill liquid on the calibrator. t Do not place the calibrator on an unstable surface - Epson Stylus Pro 9000 | User Manual - Color Calibration - Page 10
abgesichert ist. ENERGY STAR Compliance As an ENERGY STAR Partner, EPSON has determined that this product meets the ENERGY STAR guidelines for industry to promote the introduction of energy-efficient personal computers, monitors, printers, fax machines, copiers, and AC adapters, in an effort to - Epson Stylus Pro 9000 | User Manual - Color Calibration - Page 11
Before using this product, make sure that your system meets the following requirements. For Windows Users System: Display: CPU: Memory: Hard disk: Microsoft® Windows® 95, Windows 98, or Windows NT 4.0 Color monitor, 800 × 600 screen resolution (higher recommended), and 65,000 colors (higher - Epson Stylus Pro 9000 | User Manual - Color Calibration - Page 12
32 MB 50 MB free space Where to Get Help EPSON provides technical support and information on the installation, configuration, and operation of professional your Unit ID number, which is included with the EPSON Preferred Protection Plan information that came with your printer. Introduction 5 - Epson Stylus Pro 9000 | User Manual - Color Calibration - Page 13
6 Introduction - Epson Stylus Pro 9000 | User Manual - Color Calibration - Page 14
Calibrator 1 Contents When unpacking your EPSON Color Calibrator, make sure the following items are included: calibrator Y-cable AC adapter (110, 120 volts) AC adapter and AC cable (127, 220, 230, 240 volts) Mac-PC serial converter color pad black base paper software CD-ROM Unpacking the - Epson Stylus Pro 9000 | User Manual - Color Calibration - Page 15
Parts Calibrator Y-cable serial connector sensor tip measure button modular plug DC connector 1-2 Unpacking the Color Calibrator - Epson Stylus Pro 9000 | User Manual - Color Calibration - Page 16
RS-5000 version 1.3 or RS-5100 user software must be installed. See your RIP documentation for installation instructions. t The illustrations in this manual are taken from both Windows and Macintosh computers and may vary slightly from what appears on your screen. Setting up Your Color Calibrator - Epson Stylus Pro 9000 | User Manual - Color Calibration - Page 17
Follow the steps below to connect the calibrator to your computer: 1. Make sure your computer is turned off. 2. If you are using a PC, connect the Mac-PC serial converter to the Y-cable as shown below. Then connect the Y-cable to one of your serial ports and tighten the screws to stabilize - Epson Stylus Pro 9000 | User Manual - Color Calibration - Page 18
If you are using a Macintosh, connect the Y-cable to your modem port. 2 3. Connect the Y-cable's 8-pin connector to the back of the calibrator as shown below: Setting up Your Color Calibrator 2-3 - Epson Stylus Pro 9000 | User Manual - Color Calibration - Page 19
light, make sure the outlet you are using is working properly. You are now ready to install the utility software. See the next section for instructions. 2-4 Setting up Your Color Calibrator - Epson Stylus Pro 9000 | User Manual - Color Calibration - Page 20
2. Insert the software CD-ROM included with your Color Calibrator into your drive. 3. Start the installation program and follow the on-screen instructions. Note: Although you can install the utility software when the calibrator is not connected to your computer, you can't use the software unless - Epson Stylus Pro 9000 | User Manual - Color Calibration - Page 21
Calibrator to calibrate your EPSON Stylus Pro printing system at the following times: t When you set up the system for the first time 3 t After the system has been overhauled or repaired t Before using the system after a long period of inactivity Calibrating your printing system is a multi-step - Epson Stylus Pro 9000 | User Manual - Color Calibration - Page 22
Measure the included color pad to calibrate your Color Calibrator. Follow the steps below: 1. Double-click the EPSON Color Calibrator folder. 2. Double-click the Printer Calibrator utility icon. The following dialog box appears: 3. To begin calibrating your Color Calibrator, click the Calibration - Epson Stylus Pro 9000 | User Manual - Color Calibration - Page 23
4. Place the color pad included with your calibrator on a flat surface. Then place the sensor tip of the calibrator on the black circle in the pad. 3 Note: Make sure the sensor tip is placed flat and firmly on the pad. Calibrating Your Printing System 3-3 - Epson Stylus Pro 9000 | User Manual - Color Calibration - Page 24
the measurement inaccurate. After you finish measuring the black circle, the message in the window changes to Please calibrate white point. 6. Place the sensor tip on the color pad's Done button. Without closing the ColorWise Pro Tools utility, continue on to the next section. 3-4 Calibrating Your - Epson Stylus Pro 9000 | User Manual - Color Calibration - Page 25
Printing a Calibration Sheet Before you start, make sure you have coated or glossy paper loaded in your printer. Cut sheet paper is recommended if you're using the EPSON Stylus Pro 9000. Follow these steps: 1. If necessary, start the ColorWise Pro Tools application. Note: 3 The location and - Epson Stylus Pro 9000 | User Manual - Color Calibration - Page 26
Measurement Method. Then select a paper type from the Calibration Set list box. You can choose from the following paper types: PQ Ink Jet Paper PQ Glossy Paper Dupont EPSON Glossy Paper Dupont EPSON Matte Paper Dupont EPSON Publication Paper 5. Click the Print button under Generate Measurement Page - Epson Stylus Pro 9000 | User Manual - Color Calibration - Page 27
6. Choose the Paper Size and Input Tray (or Paper Source) for printing, then click the Print button to print the calibration sheet. 3 Following is a sample of the calibration sheet printed from your EPSON Stylus Pro 5000 or 9000: Calibrating Your Printing System 3-7 - Epson Stylus Pro 9000 | User Manual - Color Calibration - Page 28
section on a flat surface, with the included black base paper behind it. Note: Wait for at least 30 minutes after printing a calibration sheet before using it to create a color profile. 2. Select an empty block in the EPSON Printer Calibrator dialog box by clicking it with your mouse. 3. Place - Epson Stylus Pro 9000 | User Manual - Color Calibration - Page 29
measured. 6. Name the file and select a folder, then click Save. You can now use this file to implement your profile. See the next section for instructions. Calibrating Your Printing System 3-9 - Epson Stylus Pro 9000 | User Manual - Color Calibration - Page 30
the last section, follow the steps below: 1. Start the ColorWise Pro Tools application. Note: The location and type of file that you your computer, or refer to your EPSON RS-5000 or RS-5100 documentation. 2. In the dialog box that appears, click the name of the printer you want to calibrate, then - Epson Stylus Pro 9000 | User Manual - Color Calibration - Page 31
Measurements. 5. Select the file you saved in the last section, then click the Open button. A window appears confirming that the measurements were read successfully. 6. Click OK. 7. Click Apply to implement the OK to restore the factory default calibrations. Calibrating Your Printing System 3-11 - Epson Stylus Pro 9000 | User Manual - Color Calibration - Page 32
3-12 Calibrating Your Printing System - Epson Stylus Pro 9000 | User Manual - Color Calibration - Page 33
-5100 to the printer you will ultimately use for your final product, you need to obtain a 4 printout from your vendor. EPSON recommends using a printout of one the standard color charts. See the instructions below. If you want to use a printout of a color chart from your printing vendor, rather than - Epson Stylus Pro 9000 | User Manual - Color Calibration - Page 34
2. Start EPSON Profile Updater. You see a dialog box like the following: 3. Select the ICC profile that your printing vendor used from the Base Profile list. If you don't find the profile your vendor used in the list, use the profile that matches your - Epson Stylus Pro 9000 | User Manual - Color Calibration - Page 35
may render the measurement inaccurate. After you finish measuring the black circle, the message in the window changes to Please calibrate white point. 8. Place the sensor tip on the color pad's white the color chart. See the next section for instructions. Calibrating Your System to Another 4-3 - Epson Stylus Pro 9000 | User Manual - Color Calibration - Page 36
modification process: 1. Place the printout of the standard color chart you received from your printing vendor on a flat surface with the included black base paper behind it. 2. Select an empty block in the EPSON Profile Updater dialog box by clicking it. Place the sensor tip of the calibrator on - Epson Stylus Pro 9000 | User Manual - Color Calibration - Page 37
here 4 6. Click the Update Profile button. 7. Give a name to your new profile and select the appropriate folder, as indicated below. For Windows users: C:\WINDOWS\SYSTEM\Color Note: Substitute the letter of your disk drive if it is not drive C. For Macintosh users: System Folder\System\ColorSync - Epson Stylus Pro 9000 | User Manual - Color Calibration - Page 38
ICC profile You can modify your ICC profile using a printout from your printing vendor of a custom color chart. The printout of the custom color chart following requirements: t The chart must be printed by your vendor on the same type of paper as the final print. t The chart must show color density - Epson Stylus Pro 9000 | User Manual - Color Calibration - Page 39
The following dialog box appears: number of steps between 0% and 100% Before measuring the custom chart, you need to enter information about the chart in this dialog box. 4 3. Enter the number of color density steps between 0% and 100% in your chart. If there are four or more steps, type 4. 4. - Epson Stylus Pro 9000 | User Manual - Color Calibration - Page 40
below to implement your new profile: 1. Start the ColorWise Pro Tools application. Note: The location and type of file EPSON RS-5000 or RS-5100 documentation. 2. In the dialog box that appears, click the name of the printer you want to calibrate, then click the Select button. The following window - Epson Stylus Pro 9000 | User Manual - Color Calibration - Page 41
box on the left. 4 5. Click the green triangle at the center of the Profile Manager window. A message appears confirming that your custom profile was downloaded successfully. 6. Click OK. Your custom profile appears in the right window. 7. Click the name of your custom profile in the right - Epson Stylus Pro 9000 | User Manual - Color Calibration - Page 42
Driver as, then choose a setting from SIMULATION-1 to SIMULATION-10 and click Apply. If the same name is already assigned to another profile, a window appears asking you to confirm your command. 10. Click OK, then click Done to exit Profile Manager. Note: See your ColorWise Pro Tools - Epson Stylus Pro 9000 | User Manual - Color Calibration - Page 43
3-10, 4-8 to 4-10 Custom color chart, 4-6 to 4-7 E ENERGY STAR, 3 EPSON Preferred Protection Plan, 5 Profile Updater, 4-2 RS-5000 Fiery RIP version 1.3, 1, 4-1 RS-5100 Fiery X2 RIP, 1, 4-1 Stylus Pro 5000, 1, 3-7 Stylus Pro 9000, 1, 3-5, 3-7 EURO, 1, 4-2 I ICC profiles, 1 applying, 4-8 to 4-10 EURO - Epson Stylus Pro 9000 | User Manual - Color Calibration - Page 44
Serial converter, 1-1, 2-2 Software CD-ROM, 1-1, 2-5 Standard color chart, 4-1 to 4-6 SWOP, 1, 4-2 System requirements Macintosh, 5 Windows, 4 T Technical support, 5 U Unit ID number, 5 W Windows, system requirements, 4 Y Y-cable, 1-1, 1-2, 2-2 to 2-3 2 Index
-
 1
1 -
 2
2 -
 3
3 -
 4
4 -
 5
5 -
 6
6 -
 7
7 -
8
-
9
-
10
-
11
-
12
-
13
-
14
-
15
-
16
-
17
-
18
-
19
-
20
-
21
-
22
-
23
-
24
-
25
-
26
-
27
-
28
-
29
-
30
-
31
-
32
-
33
-
34
-
35
-
36
-
37
-
38
-
39
-
40
-
41
-
42
-
43
-
44
 |
 |

CPD-8407
EPSON Color Calibrator
User’s Guide