Fisher and Paykel DE60FA2 Dryers DE70FA* & DG70FA* User Guide (English, Sp
Fisher and Paykel DE60FA2 Manual
 |
View all Fisher and Paykel DE60FA2 manuals
Add to My Manuals
Save this manual to your list of manuals |
Fisher and Paykel DE60FA2 manual content summary:
- Fisher and Paykel DE60FA2 | Dryers DE70FA* & DG70FA* User Guide (English, Sp - Page 1
Dryer Installation Instructions and User Guide US CA Secadora Instrucciones de Instalación y Guía del Usuario ES New Zealand Australia USA Canada Europe Asia Pacific - Fisher and Paykel DE60FA2 | Dryers DE70FA* & DG70FA* User Guide (English, Sp - Page 2
WARNING: For your safety the information in this manual must be followed to minimize the risk of the gas supplier's instructions carefully. t If you cannot reach your gas supplier, call the fire department. - Installation and service must be performed by a qualified installer, service agency or the - Fisher and Paykel DE60FA2 | Dryers DE70FA* & DG70FA* User Guide (English, Sp - Page 3
Requirements Gas Requirements Level Machine, Final Installation Check List Features Operating Instructions Reversing the Door Quick Start / Using Your Dryer Care Labels Drying Special Items Other Features Cleaning Trouble Shooting Limited Warranty US CA 5 6 8 9 10 12 13 15 17 19 20 21 22 25 28 - Fisher and Paykel DE60FA2 | Dryers DE70FA* & DG70FA* User Guide (English, Sp - Page 4
you for buying a Fisher & Paykel dryer. We hope you enjoy using the dryer as much as we Guide carefully. It will help you operate and maintain your new dryer. Your safety, and the safety of others is very important. Located on your dryer and throughout this guide are safety messages and instructions - Fisher and Paykel DE60FA2 | Dryers DE70FA* & DG70FA* User Guide (English, Sp - Page 5
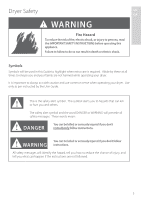
Dryer Safety US CA WARNING Fire Hazard To reduce the risk of fire, electric shock, or injury to persons, read the IMPORTANT SAFETY INSTRUCTIONS before operating this appliance. Failure to follow to do so can result in death or electric shock. Symbols Symbols will be used in this Guide to - Fisher and Paykel DE60FA2 | Dryers DE70FA* & DG70FA* User Guide (English, Sp - Page 6
electrical overload. ƒ Do not repair or replace any part of the appliance or attempt any servicing, unless specifically recommended in the published user repair instructions that you understand and have the skills to carry out. ƒ When disconnecting the dryer, pull by the plug rather than the cord or - Fisher and Paykel DE60FA2 | Dryers DE70FA* & DG70FA* User Guide (English, Sp - Page 7
Important Safety Instructions US CA WARNING Fire Hazard Only dry fabrics that have been washed with water. Do not use heat to dry articles containing foam rubber or similarly textured rubber-like materials. Dry on the Fluff cycle. A clothes dryer produces combustible lint and must be exhausted - Fisher and Paykel DE60FA2 | Dryers DE70FA* & DG70FA* User Guide (English, Sp - Page 8
the Limited Warranty section at the back of this Guide (refer to page 46). If you have a problem with your dryer refer to our troubleshooting section. If your problem is not referenced, please always contact your Fisher & Paykel Authorized Service Agent or our Customer Care Center (Toll Free 1 888 - Fisher and Paykel DE60FA2 | Dryers DE70FA* & DG70FA* User Guide (English, Sp - Page 9
Installation Instructions US CA WARNING - Risk of fire ƒ Clothes dryer installation must be performed by a qualified installer. ƒ Install the clothes dryer according to the manufacturer's instructions and local codes. ƒ Do not install a clothes dryer with flexible plastic venting materials. If fl - Fisher and Paykel DE60FA2 | Dryers DE70FA* & DG70FA* User Guide (English, Sp - Page 10
To the Installer The correct installation of the dryer is your responsibility. Be sure you read the following instructions carefully before you start to install the dryer. These instructions should be left with the home owner for future reference. It is Your Responsibility to: ƒ Observe all - Fisher and Paykel DE60FA2 | Dryers DE70FA* & DG70FA* User Guide (English, Sp - Page 11
Location Requirements US CA The area in which the dryer is located must be kept clear and free from combustible materials, gasoline and other flammable vapors and liquids. A dryer produces combustible lint so the area around the dryer must be cleaned regularly to keep it free of lint. Alcove - Fisher and Paykel DE60FA2 | Dryers DE70FA* & DG70FA* User Guide (English, Sp - Page 12
Codes or the Manufactured Home Construction & Safety Standard, title 24, part 32-80 or, when such standard is not applicable, with American exhaust vent. In addition to the above, for gas dryers: ƒ Kit 14-D346-33 MUST be used to attach the dryer securely to the structure. ƒ Provide an opening with - Fisher and Paykel DE60FA2 | Dryers DE70FA* & DG70FA* User Guide (English, Sp - Page 13
Exhausting US CA WARNING Fire Hazard The dryer must be vented to the outdoors. Use rigid or thick wall flexible metal exhaust duct. Do not use a plastic exhaust duct. Do not use a metal foil exhaust duct. Failure to follow these instructions can result in death or fire. The dryer must be - Fisher and Paykel DE60FA2 | Dryers DE70FA* & DG70FA* User Guide (English, Sp - Page 14
water and accumulate lint. Before using an existing exhaust duct system for a dryer ensure that: ƒ No plastic or other potentially combustible duct or flexible metal damper on the exhaust hood moves sufficiently and opens and shuts freely. Mobile Home Installations A Mobile Home Installation Kit is - Fisher and Paykel DE60FA2 | Dryers DE70FA* & DG70FA* User Guide (English, Sp - Page 15
Exhausting US CA Choose a route that will provide the straightest and most direct than specified will: ƒ Accumulate lint creating a potential fire hazard. ƒ Shorten the life of the dryer. ƒ Reduce performance, resulting in longer drying times and an increased energy usage. 2 Determine the number of - Fisher and Paykel DE60FA2 | Dryers DE70FA* & DG70FA* User Guide (English, Sp - Page 16
Maximum Length of Exhaust Duct Preferred 4" Hoods Number of 90° elbows/bends 0 1 2 3 4 When you have a 100mm (4") Hood Maximum length of 100mm (4") diameter metal duct. Rigid 27.4m 90ft 18.3m 60ft 13.7m 45ft 10.7m 35ft 7.6m 25ft Acceptable 2 1/2" Hoods Number of 90° elbows/bends 0 1 2 - Fisher and Paykel DE60FA2 | Dryers DE70FA* & DG70FA* User Guide (English, Sp - Page 17
Alternative Exhaust Directions US CA This dryer can be vented from the rear, right, left, and bottom side of the cabinet and must be exhausted to the outdoors. Note: The gas dryer can not be exhausted directly through the right side of the cabinet. Dryer Exhaust to Right , Left or Bottom of - Fisher and Paykel DE60FA2 | Dryers DE70FA* & DG70FA* User Guide (English, Sp - Page 18
ƒ Insert duct assembly, elbow first, through the side opening and connect the elbow to the dryer internal duct. Exhaust can be added to left or right side CAUTION! Be sure not to a plate (kit WE1M454) available from your local service provider. Place dryer in final location. Plate (kit WE1M454) 18 - Fisher and Paykel DE60FA2 | Dryers DE70FA* & DG70FA* User Guide (English, Sp - Page 19
Exhaust Venting US CA WARNING Fire Hazard Use metal exhaust duct. Do not use a to the center of the rear of the dryer. Make sure you join the exhaust duct to the dryer with duct tape only. This will prevent lint and dust from escaping from the dryer and exhaust system. Exhaust outlet 114mm (4 - Fisher and Paykel DE60FA2 | Dryers DE70FA* & DG70FA* User Guide (English, Sp - Page 20
Installation Parts and literature are packaged inside the dryer drum. WARNING Excess Weight Hazard Use two or more people to move and install the dryer. Failure to do so can result in back or other injury. Only remove the packaging at the customer's premises. This will ensure the appliance arrives - Fisher and Paykel DE60FA2 | Dryers DE70FA* & DG70FA* User Guide (English, Sp - Page 21
Dryers US CA WARNING Electric Shock Hazard Make sure appliance is wired or plugged into a grounded outlet. Do not use an adaptor. Do not use an extension cord. Failure to follow these instructions electric shock. Check with a qualified electrician or service representative if you are in doubt as to - Fisher and Paykel DE60FA2 | Dryers DE70FA* & DG70FA* User Guide (English, Sp - Page 22
220/240V or 208V, 60 Hz approved alternating current electrical service. The electrical service requirements can be found on the data label that is may be added by attaching to the green ground screw on the rear of the dryer, and to a grounded metal cold water pipe or other established ground. If - Fisher and Paykel DE60FA2 | Dryers DE70FA* & DG70FA* User Guide (English, Sp - Page 23
Electric Power Supply for Gas and Electric Dryers US CA Power Supply for Electric Dryers: (for Canada only) ƒ 120 / 240 V conforming to local codes and/or the current CSA C22.1 Canadian Electrical Code part 1. Power Supply Cord Requirements for U.S.A WARNING Electric Shock Hazard Never leave the - Fisher and Paykel DE60FA2 | Dryers DE70FA* & DG70FA* User Guide (English, Sp - Page 24
(white) /", UL recognized strain relief 4 #10 AWG minimum copper conductors or 120/240V 30A power supply cord kit marked for use with dryers & provided with closed loop or spade terminals with upturned ends (not supplied) 3-Wire Connections If required, by local code, install external ground - Fisher and Paykel DE60FA2 | Dryers DE70FA* & DG70FA* User Guide (English, Sp - Page 25
behind the door. If this information does not agree with the type of gas available in your home, contact your local Fisher & Paykel supplier or service center. Natural Gas This dryer is supplied ready for use with Natural Gas. It is design certified by CSA International for LP (Propane or Butane - Fisher and Paykel DE60FA2 | Dryers DE70FA* & DG70FA* User Guide (English, Sp - Page 26
to the Gas Supply 1 The gas supply line should be 12.7mm 2 An individual manual shut-off valve must be installed on the gas supply line within 1.8m (6ft) of the dryer, in accordance with the National Fuel Gas Code ANSI Z223.1/NFPA 54 for the United States or in accordance with the B149 - Fisher and Paykel DE60FA2 | Dryers DE70FA* & DG70FA* User Guide (English, Sp - Page 27
Connecting Gas to Your Dryer (Gas Models Only) US CA 4 A listed connector in compliance with ANSI Z21.24/CSA6.10 must be used to connect the dryer to the gas supply. 5 If flexible tubing is used, an elbow should be installed on the pipe at the back of the dryer for the flexible tube to be - Fisher and Paykel DE60FA2 | Dryers DE70FA* & DG70FA* User Guide (English, Sp - Page 28
is plugged or directly wired into an approved fitting and is properly grounded. ƒ Dryer starts, heats, cools and shuts off. Additionally for Gas Dryer Models Only, Check: ƒ Dryer is plugged into an approved fitting and is properly grounded. ƒ All fittings in the gas line are tested for leaks. ƒ Exhaust - Fisher and Paykel DE60FA2 | Dryers DE70FA* & DG70FA* User Guide (English, Sp - Page 29
Features US CA Extra Care ƒ Use this option to minimize the wrinkles in clothes. This option ed toys, pillows or washable sweaters. Hook the rack over the lint filter so the rack extends into the dryer drum. Note: The drying rack must be used with the Timed cycle. Do not use this drying rack when - Fisher and Paykel DE60FA2 | Dryers DE70FA* & DG70FA* User Guide (English, Sp - Page 30
Operating Instructions Control Panel Automatic Drying Cycles (Cycle automatically senses dryness) There are two automatic dryness levels: More Dry (+) and Less Dry (-). These two settings dry your - Fisher and Paykel DE60FA2 | Dryers DE70FA* & DG70FA* User Guide (English, Sp - Page 31
Operating Instructions Control Panel US CA Timed Dry Cycles (Cycles run for a selected time) The dryer has three timed cycles. These cycles have set drying times of either 40, 60 or 80 minutes and include a DAMP DRY and DEWRINKLE function. If selected, your dryer will dry for the specified - Fisher and Paykel DE60FA2 | Dryers DE70FA* & DG70FA* User Guide (English, Sp - Page 32
1 Open the door and remove the filler plugs opposite the hinges. 2 With the door completely open, remove the bottom screw from each hinge on the dryer face. 3 Insert these screws about half way into the top holes, for each hinge, on the opposite side (where you removed the filler plugs). Apply - Fisher and Paykel DE60FA2 | Dryers DE70FA* & DG70FA* User Guide (English, Sp - Page 33
Quick Start US CA WARNING To reduce the risk of fire, electric shock, or injury to persons, read the IMPORTANT SAFETY INSTRUCTIONS before these instructions can result in death or personal injury. WARNING Explosion Hazard Keep flammable materials and vapors, such as gasoline, away from dryer. - Fisher and Paykel DE60FA2 | Dryers DE70FA* & DG70FA* User Guide (English, Sp - Page 34
It is best that you sort your garments before placing them into the dryer. Sort into loads of similar types, and loads that take similar times to rather than when they are wet. The general rule is one wash load = one dryer load. It is a good idea to dry 'permanent press' type garments together in - Fisher and Paykel DE60FA2 | Dryers DE70FA* & DG70FA* User Guide (English, Sp - Page 35
Using Your Dryer US CA 4. Selecting a Cycle Your dryer has a number of FABRIC CARE CYCLES that can delicate items it is best you select the KNITS DELICATES cycle. Always follow manufacturer's care label instructions when drying. If you are unsure of the temperature to select for a load, it's best - Fisher and Paykel DE60FA2 | Dryers DE70FA* & DG70FA* User Guide (English, Sp - Page 36
time just adjust the dryness level on the timer to meet your personal preferences. 6. Selecting the Drying Process There are two ways in which your dryer is able to dry clothes; by using AUTOMATIC DRYING CYCLES or by using TIMED DRY. AUTOMATIC DRYING When AUTOMATIC DRYING is selected the - Fisher and Paykel DE60FA2 | Dryers DE70FA* & DG70FA* User Guide (English, Sp - Page 37
Using Your Dryer US CA 7. Beginning Drying Cycle Once you have chosen all your desired settings, close the dryer door and press START (located on the right-hand side of the control panel). Opening the door during the operation will stop the dryer. To restart the dryer, close the door and - Fisher and Paykel DE60FA2 | Dryers DE70FA* & DG70FA* User Guide (English, Sp - Page 38
the cycles and heat settings that we recommend you use in the dryer. By following our recommendations, you can ensure that your clothes will Any Cycle COTTON PERMANENT KNITS REGULAR PRESS DELICATES FLUFF Additional Drying Instructions Hang to Dry Drip Dry Dry in Shade Dry Flat Cycle - Fisher and Paykel DE60FA2 | Dryers DE70FA* & DG70FA* User Guide (English, Sp - Page 39
Special Items US CA There are some articles that need to be dried in a special way. Before you dry any item that is not described in the dryer's cycles (page 35), refer to the table below. Always remember to follow the manufacturer's instructions. Item Special Instructions Pillows Check - Fisher and Paykel DE60FA2 | Dryers DE70FA* & DG70FA* User Guide (English, Sp - Page 40
for a further 20 minutes. Ensure the dry-cleaning product is recommended for use in a domestic dryer. Follow the manufacturers instructions for how to prepare the load. Set the dryer to the PERMANENT PRESS cycle, this cycle uses a medium heat. Select TIMED DRY for 40 minutes. At the end of the cycle - Fisher and Paykel DE60FA2 | Dryers DE70FA* & DG70FA* User Guide (English, Sp - Page 41
Features US CA Drying Rack A drying rack Kit Part No WE1M396 is available as an optional accessory. This rack helps to dry items such as sports shoes, sweaters, hats, stuffed toys and pillows - all those delicate items that are best dried without tumbling. Contact your Fisher & Paykel Dealer - Fisher and Paykel DE60FA2 | Dryers DE70FA* & DG70FA* User Guide (English, Sp - Page 42
. Pre-Treatment Sprays Do not use pre-treatment sprays or liquids on or near your dryer as they can damage your machine's control panel as well as any of its plastic parts. Damage to your dryer caused by pretreatment products will not be covered by your warranty. Stains If stains appear inside the - Fisher and Paykel DE60FA2 | Dryers DE70FA* & DG70FA* User Guide (English, Sp - Page 43
Cleaning US CA Exhaust Duct Inspect and clean the dryer exhaust ducting at least once a year to prevent the details on Exhausting in the INSTALLATION INSTRUCTIONS. ƒ Use only rigid metal or flexible metal 100mm (4") diameter ductwork inside the dryer cabinet or for exhausting to the outside. - Fisher and Paykel DE60FA2 | Dryers DE70FA* & DG70FA* User Guide (English, Sp - Page 44
Trouble Shooting If there is a problem with your appliance, please check the following points before contacting your local Fisher & Paykel Appliances Authorized Service Centre Dealer or Customer Care Centre. Problem Dryer Doesn't Start Possible causes Dryer is unplugged Fuse is blown/circuit - Fisher and Paykel DE60FA2 | Dryers DE70FA* & DG70FA* User Guide (English, Sp - Page 45
Trouble Shooting US CA Problem Possible causes What to do Clothes Take Improper sorting Too Long to Dry Separate heavy items from light-weight items (generally, a well-sorted washer load is a well-sorted dryer or obstructed ducting Check INSTALLATION INSTRUCTIONS for proper ducting/venting. - Fisher and Paykel DE60FA2 | Dryers DE70FA* & DG70FA* User Guide (English, Sp - Page 46
, boat or mobile facility containing the Product to the service shop at your expense or pay the service technician's travel to the location of the Product. Fisher & Paykel Undertakes to: Repair without cost to the owner either for material or labor any part of the Product, the serial number of which - Fisher and Paykel DE60FA2 | Dryers DE70FA* & DG70FA* User Guide (English, Sp - Page 47
US CA This Warranty Does Not Cover: A Service calls that are not related to any defect in the Product. The cost of a service call will be charged if the problem is not found to be a defect of the Product. For example: 1. Correct faulty installation of the Product. 2. Instruct 's User Guide. C - Fisher and Paykel DE60FA2 | Dryers DE70FA* & DG70FA* User Guide (English, Sp - Page 48
Please read your User Guide. If you then have any questions about operating the Product, need the name of your local Fisher & Paykel Authorized Service Agent, or believe the Product is defective and wish service under this Limited Warranty, please contact your dealer or call us at: TOLL FREE 1 888 - Fisher and Paykel DE60FA2 | Dryers DE70FA* & DG70FA* User Guide (English, Sp - Page 49
ADVERTENCIA: por su seguridad y para prevenir riesgos de incendio, explosión, daños personales o muerte, siga al pie de la letra la información contenida en este instructivo. - No almacene o utilice gasolina u otros vapores y líquidos combustibles cerca de este o cualquier otro electrodoméstico. - - Fisher and Paykel DE60FA2 | Dryers DE70FA* & DG70FA* User Guide (English, Sp - Page 50
Contenido Seguridad de la Secadora 52 Instrucciones de Seguridad Importantes 53 Garantía 55 Instrucciones de Instalación 56 Responsabilidades del Técnico Instalador, Especificaciones de Colocación 57 Dimensiones 60 Escape 61 Longitud Máxima del Conducto de Escape 63 Opciones de - Fisher and Paykel DE60FA2 | Dryers DE70FA* & DG70FA* User Guide (English, Sp - Page 51
Gracias por comprar una secadora Fisher & Paykel. Esperamos que disfrute al utilizar la secadora tanto como nosotros disfrutamos diseñándola. Hemos creado esta secadora para tratar sus prendas con el mayor cuidado, - Fisher and Paykel DE60FA2 | Dryers DE70FA* & DG70FA* User Guide (English, Sp - Page 52
Seguridad de la Secadora ADVERTENCIA Peligro de Incendio Para reducir el riesgo de incendio, choque eléctrico y lesiones personales, lea las INSTRUCCIONES DE SEGURIDAD IMPORTANTES antes de poner en funcionamiento este aparato. El no seguir estas indicaciones puede causarle la muerte o - Fisher and Paykel DE60FA2 | Dryers DE70FA* & DG70FA* User Guide (English, Sp - Page 53
suministro eléctrico. ƒ No opere el electrodoméstico si está averiado, si no funciona bien, si está parcialmente desensamblado o si tiene partes rotas o faltantes, incluyendo un cordón o enchufe dañados. ƒ Esta secadora debe conectarse directamente a un tomacorriente eléctrico aprobado y fijo. No - Fisher and Paykel DE60FA2 | Dryers DE70FA* & DG70FA* User Guide (English, Sp - Page 54
Instrucciones de Seguridad Importantes ADVERTENCIA Peligro de Incendio Seque sólo telas que hayan sido lavadas con agua. No utilice calor para secar artículos que contengan espuma de caucho o algún material de textura de hule similar. Seque únicamente en el ciclo FLUFF. Cualquier secadora de ropa - Fisher and Paykel DE60FA2 | Dryers DE70FA* & DG70FA* User Guide (English, Sp - Page 55
en la parte posterior de esta Guía. (Véase página 96). Si tuviera algún problema con su secadora, remítase a la sección de resolución de problemas. Si el problema o desperfecto no apareciera en la lista, sea tan amable de ponerse en contacto en todo momento con su agente autorizado Fisher & Paykel - Fisher and Paykel DE60FA2 | Dryers DE70FA* & DG70FA* User Guide (English, Sp - Page 56
Accesorios ƒ Juego de instalación para casa móvil o campers, pieza No. 14-D346-33 ƒ Juego de Rejilla de Secado, pieza No. WE1M296 ƒ Juego de Cubierta para Parte Trasera del Gabinete, pieza No. WE1M454 ƒ Vea la etiqueta de identificación en la abertura de la puerta para identificar el número de juego - Fisher and Paykel DE60FA2 | Dryers DE70FA* & DG70FA* User Guide (English, Sp - Page 57
Para el Técnico Instalador Calificado La instalación correcta de la secadora será responsabilidad suya. Asegúrese de leer las siguientes instrucciones detalladamente antes de comenzar a instalar la secadora. Estas instrucciones deben quedar en manos del dueño de la casa para referencia en el futuro. - Fisher and Paykel DE60FA2 | Dryers DE70FA* & DG70FA* User Guide (English, Sp - Page 58
permita la libre circulación de aire. Asigne espacio suficiente detrás de la secadora para el escape. La toma de aire se encuentra en la parte posterior de la secadora. Asegúrese de que exista suficiente espacio a cada lado de la secadora para la circulación de aire. La zona donde - Fisher and Paykel DE60FA2 | Dryers DE70FA* & DG70FA* User Guide (English, Sp - Page 59
Requisitos de Colocación Instalación en un armario o gabinete ADVERTENCIA Al instalar una secadora en un armario o gabinete debe contar con un conducto de escape hacia el exterior. No deberá instalar en el mismo armario o gabinete ningún otro electrodoméstico que queme combustible. El área mínima - Fisher and Paykel DE60FA2 | Dryers DE70FA* & DG70FA* User Guide (English, Sp - Page 60
instalación debe cumplir con la norma "CAN/CSA Z240 MH series Mobile Home Installation Codes" o la "Manufactured Home Construction & Safety Standard, title 24, part 32-80" o cuando la norma no es aplicable, con la norma "American National Standard for Mobile Home, AINSI/NFPA NO. 501B". ƒ La secadora - Fisher and Paykel DE60FA2 | Dryers DE70FA* & DG70FA* User Guide (English, Sp - Page 61
campanas de escape con un amortiguador de corriente magnético. La campana debe tener por lo menos 305mm (12 pulgadas) de separación entre la parte inferior de la campana y el piso o cualquier otra obstrucción. La apertura de la campana debe apuntar hacia abajo. Nunca instale una pantalla por delante - Fisher and Paykel DE60FA2 | Dryers DE70FA* & DG70FA* User Guide (English, Sp - Page 62
Escape Para reducir la condensación, aísle todos los conductos que pasen por áreas que no emitan calor. Coloque el conducto con una inclinación suave hacia la campana, para drenar la posible condensación y reducir la acumulación de pelusa. Evite pandeos o bucles en el conducto, ya que éstos pueden - Fisher and Paykel DE60FA2 | Dryers DE70FA* & DG70FA* User Guide (English, Sp - Page 63
Escape Elija una ruta que sea el camino más derecho y directo hacia el exterior. Planee la instalación de manera que utilice la menor cantidad de codos y vueltas. Al utilizar codos (conductos rígidos) o al realizar vueltas (conducto de metal flexible de pared ancha), deje la mayor cantidad de espacio - Fisher and Paykel DE60FA2 | Dryers DE70FA* & DG70FA* User Guide (English, Sp - Page 64
Longitud Máxima del Conducto de Escape De preferencia utilice campanas de 4 pulgadas Cantidad de codos o curvas de 90° 0 1 2 3 4 Si utiliza una campana de 100mm (4") Longitud máxima del conducto de metal de 100mm (4") de diámetro Rígidos 27.4m 18.3m 13.7m 10.7m 7.6m 90pies 60pies 45pies 35pies - Fisher and Paykel DE60FA2 | Dryers DE70FA* & DG70FA* User Guide (English, Sp - Page 65
el lado derecho del gabinete. Descarga hacia la derecha, izquierda o parte inferior de la secadora ƒ Retire la placa desprendible inferior, derecha o a través de la abertura trasera. La lengüeta se ubica en la parte media de la base del aparato. Usando un destornillador de punta plana, levante la - Fisher and Paykel DE60FA2 | Dryers DE70FA* & DG70FA* User Guide (English, Sp - Page 66
cinta, de lo contrario podrían separarse generando un riesgo de seguridad. Cinta para conducto Agregando un codo para escape a través de la parte inferior del gabinete ƒ Inserte el codo a través de la abertura trasera y conéctelo al conducto interior de la secadora. ƒ Aplique cinta para conducto - Fisher and Paykel DE60FA2 | Dryers DE70FA* & DG70FA* User Guide (English, Sp - Page 67
utilice material de escape flexible de plástico o de metal delgado. 2 El orificio de escape se encuentra ubicado cerca del centro de la parte trasera de la secadora. Asegúrese de conectar el conducto de escape a la secadora solamente con cinta adhesiva industrial. Esto evitará que la pelusa y el - Fisher and Paykel DE60FA2 | Dryers DE70FA* & DG70FA* User Guide (English, Sp - Page 68
Instalación Encontrará las piezas y el material de lectura empacados dentro del tambor de la secadora. ADVERTENCIA Peligro por Exceso de Peso Se necesitan dos o más personas para mover e instalar la secadora. El no hacerlo así puede ocasionarle daños en la espalda o de otro tipo. Quite el embalaje - Fisher and Paykel DE60FA2 | Dryers DE70FA* & DG70FA* User Guide (English, Sp - Page 69
Instrucciones de Conexión a Tierra para Secadoras a Gas y Eléctricas ADVERTENCIA Peligro de Electrocutamiento Asegúrese de que este electrodoméstico esté conectado a un tomacorrientes aterrizado a tierra. No utilice un adaptador. No utilice una extensión. Si no sigue al pie de la letra estas - Fisher and Paykel DE60FA2 | Dryers DE70FA* & DG70FA* User Guide (English, Sp - Page 70
cable externo de conexión a tierra (no incluido), el cual cumpla con los códigos locales conectándolo al tornillo color verde de tierra en la parte trasera de la secadora, y a una tubería de agua fría aterrizada y metálico o a otra tierra establecida. Si utiliza un cable de alimentación, el cable - Fisher and Paykel DE60FA2 | Dryers DE70FA* & DG70FA* User Guide (English, Sp - Page 71
de pared como muestra la figura ES ƒ La instalación debe cumplir con las normas locales o la norma "CSA C22.1 Canadian Electrical Code part 1". Especificaciones del Cable de Alimentación en los Estados Unidos ADVERTENCIA Peligro de Electrocutamiento Nunca deje de colocar la cubierta del bloque de - Fisher and Paykel DE60FA2 | Dryers DE70FA* & DG70FA* User Guide (English, Sp - Page 72
del circuito de la secadora. 2 Asegurase que el cordón de alimentación esta desconectado. 3 Retire la cubierta del cordón de alimentación en la parte trasera inferior. 4 Instale la abrazadera sujetadora de cables de /" UL reconocida en el orificio de entrada del suministro de energía. Inserte el - Fisher and Paykel DE60FA2 | Dryers DE70FA* & DG70FA* User Guide (English, Sp - Page 73
parte delantera al abrir la puerta. Si esta información no coincide con el tipo de gas disponible en su hogar, póngase en contacto con su proveedor o centro de servicio técnico Fisher & Paykel conversión aprobado por Fisher & Paykel que se encuentra local de Fisher & Paykel cuenta con juegos - Fisher and Paykel DE60FA2 | Dryers DE70FA* & DG70FA* User Guide (English, Sp - Page 74
la secadora. Cómo conectarla al suministro de gas 1 La línea de suministro de gas debe ser de 12.7mm 2 Hay que instalar una válvula individual manual de paso en la línea de suministro de gas a no más de 1.8m (6pies) de la secadora, de acuerdo con el "National Fuel Gas Code ANSI - Fisher and Paykel DE60FA2 | Dryers DE70FA* & DG70FA* User Guide (English, Sp - Page 75
deseche la tubería flexible vieja. 8 El tubo de gas que sale en la parte trasera de su secadora tiene una rosca de /" NPT. Retire la tapa protectora y vaya a utilizar. Aplique sellador de rosca Retire la tapa Rosca de cañería de /" NPT Codos requerido para tubería flexible Cómo completar - Fisher and Paykel DE60FA2 | Dryers DE70FA* & DG70FA* User Guide (English, Sp - Page 76
para ajustar con la altura de la lavadora. La secadora DEBE ESTAR NIVELADA y permanecer firme sobre sus 4 patas niveladoras. Nivele del frente hacia la parte trasera Nivele lado a lado 4 patas niveladoras Lista Final de Comprobación de la Instalación Verifique que: ƒ No se utilice plástico o metal - Fisher and Paykel DE60FA2 | Dryers DE70FA* & DG70FA* User Guide (English, Sp - Page 77
Características Extra Care ƒ Use esta opción para reducir las arrugas en la ropa. Esta opción provee aproximadamente 15 minutos de rotación sin calor después que la ropa esta seca. Esta opción solo puede ser utilizada con Ciclos Automáticos. Nota: Si la opción de Signal es seleccionada, la señal - Fisher and Paykel DE60FA2 | Dryers DE70FA* & DG70FA* User Guide (English, Sp - Page 78
Instrucciones de Operación del Panel de Control Ciclos de Secado Automáticos (El ciclo detecta el secado automáticamente) Hay dos niveles de secado automático: More Dry (+) y Less Dry (-). Estas dos selecciones secan su ropa a diferentes grados dependiendo del nivel de secado que usted desee. - Fisher and Paykel DE60FA2 | Dryers DE70FA* & DG70FA* User Guide (English, Sp - Page 79
Instrucciones de Operación del Panel de Control Ciclos de Tiempo de Secado (Ciclos funcionan por un tiempo seleccionado) La secadora tiene tres ciclos de tiempo, estos ciclos pueden ser tiempos de secado de 40, 60 o 80 minutos e incluyen funciones de DAMP DRY y DEWRINKLE. Si son seleccionadas, su - Fisher and Paykel DE60FA2 | Dryers DE70FA* & DG70FA* User Guide (English, Sp - Page 80
Afloje hasta la mitad el tornillo superior de cada bisagra sobre el frente de la secadora. 5 Con una mano sosteniendo la parte superior de la puerta y la otra deteniendo la parte inferior, retire la puerta de la secadora levantándola hacia arriba y hacia afuera. 6 Gire la puerta 180 grados. Insértela - Fisher and Paykel DE60FA2 | Dryers DE70FA* & DG70FA* User Guide (English, Sp - Page 81
Inicio Rápido Para reducir el riesgo de incendio, electrocutamiento o ADVERTENCIA daños personales, lea las INTRUCCIONES DE SEGURIDAD IMPORTANTES, antes de operar este electrodoméstico. ADVERTENCIA Peligro de Incendio Seque sólo telas que hayan sido lavadas con agua. No utilice calor para secar - Fisher and Paykel DE60FA2 | Dryers DE70FA* & DG70FA* User Guide (English, Sp - Page 82
recomienda el secado de éstas en una secadora de tambor. (Véase la sección de etiquetas de cuidado de telas). 1. Clasificar Es mejor si clasifica sus prendas antes de meterlas a la secadora. Separe la ropa en tipos de prendas similares y cargas que tengan tiempos de secado similares. Los artículos - Fisher and Paykel DE60FA2 | Dryers DE70FA* & DG70FA* User Guide (English, Sp - Page 83
artículos delicados, en mejor que selecciones el ciclo KNITS DELICATES. ES Siga siempre las instrucciones de las etiquetas de cuidado de telas por parte del fabricante cuando vaya a secar la ropa. Si no está seguro de qué temperatura seleccionar para la carga, lo mejor será seleccionar un calor - Fisher and Paykel DE60FA2 | Dryers DE70FA* & DG70FA* User Guide (English, Sp - Page 84
Cómo Utilizar Su Secadora 5. Seleccionar el Nivel de Secado Se puede modificar el nivel de secado deseado. Existen dos niveles de secado para elegir: ƒ MORE DRY (+) ƒ LESS DRY (-) Remítase a la página 78 para ver las descripciones de los Niveles de Secado. Al final del ciclo, si la ropa se encuentra - Fisher and Paykel DE60FA2 | Dryers DE70FA* & DG70FA* User Guide (English, Sp - Page 85
Su Secadora 7. Iniciar el Ciclo de Secado Tan pronto como haya elegido todas las configuraciones que desee, presione START (ubicado en la parte derecha del panel de control). Abrir la puerta durante el funcionamiento, la secadora dejará de funcionar. Para volver a poner en funcionamiento la secadora - Fisher and Paykel DE60FA2 | Dryers DE70FA* & DG70FA* User Guide (English, Sp - Page 86
Etiquetas del Cuidado de las Prendas A continuación incluimos una selección de símbolos de etiquetas de cuidado que los fabricantes de prendas utilizan para mostrar cómo se deben secar las prendas. Hemos convertido estos símbolos en los ciclos y opciones de calor que le recomendamos que utilice en - Fisher and Paykel DE60FA2 | Dryers DE70FA* & DG70FA* User Guide (English, Sp - Page 87
Cómo Secar Artículos Especiales Estos son algunos artículos que deben secarse de manera especial. Antes de secar cualquier artículo que no esté descrito en secadora los ciclo (página 83), remítase a la siguiente tabla. Recuerde siempre de seguir las instrucciones del fabricante. Artículo Almohadas - Fisher and Paykel DE60FA2 | Dryers DE70FA* & DG70FA* User Guide (English, Sp - Page 88
Cómo Secar Artículos Especiales Artículo Artículos extra grandes (incluyendo colchas y edredones) Zapatos Deportivos Productos de Lavado en Seco para Secadoras Instrucciones Especiales Deberá verificar la etiqueta de cuidado para asegurarse de que el artículo se pueda secar en secadora. Utilice una - Fisher and Paykel DE60FA2 | Dryers DE70FA* & DG70FA* User Guide (English, Sp - Page 89
Numero de Parte WE1M396 esta disponible como accesorio opcional. Esta rejilla ayuda a secar artículos como zapatos deportivos, suéteres, sombreros, peluches y almohadas, todos los artículos delicados que es mejor secarlos sin rótalos. Contacte su Concesionario Fisher & Paykel. Siempre seleccione - Fisher and Paykel DE60FA2 | Dryers DE70FA* & DG70FA* User Guide (English, Sp - Page 90
Limpieza Limpie su secadora con un paño suave húmedo y frótela hasta secarla. No utilice limpiadores abrasivos porque pueden dañar la pintura y las superficies de plástico. El interior La tina de la secadora es resistente al óxido. Sin embargo, las telas de color pueden desteñirse pudiendo provocar - Fisher and Paykel DE60FA2 | Dryers DE70FA* & DG70FA* User Guide (English, Sp - Page 91
Limpieza El filtro para pelusa Antes de cada uso de su secadora, limpie el Filtro para Pelusa. Es más fácil retirar la pelusa cuando sus dedos están húmedos. Para mantener a su secadora en funcionamiento óptimo, asegúrese de proporcionar cada tres años un servicio técnico para aspirar la pelusa. - Fisher and Paykel DE60FA2 | Dryers DE70FA* & DG70FA* User Guide (English, Sp - Page 92
Limpieza Campana de ventilación ƒ Asegúrese de que las rejillas o pestañas de la Campana de Ventilación tengan libre movimiento (usted puede revisarlo con un espejo). ƒ Asegúrese de que las rejillas estén completamente abiertas cuando la secadora esté en funcionamiento. ƒ Asegúrese de que no aniden - Fisher and Paykel DE60FA2 | Dryers DE70FA* & DG70FA* User Guide (English, Sp - Page 93
Resolución de Problemas Si hay un problema con su electrodoméstico, por favor chequee los siguientes puntos antes de contactar su Concesionario Fisher & Paykel Appliances o el Centro de Atención al Cliente. Problema Causa Qué Hacer La secadora no La secadora está desconectada Asegúrese de que la - Fisher and Paykel DE60FA2 | Dryers DE70FA* & DG70FA* User Guide (English, Sp - Page 94
Resolución de Problemas Problema Las prendas tardan mucho en secarse Causa Clasificación inapropiada de las prendas Cargas grandes de artículos pesados (como toallas de playa) Los controles no están bien programados El filtro para pelusa esté lleno La tubería es inadecuada o está tapada Fusibles - Fisher and Paykel DE60FA2 | Dryers DE70FA* & DG70FA* User Guide (English, Sp - Page 95
Resolución de Problemas Problema Causa Qué Hacer Pelusa en la ropa El filtro para pelusa está lleno Limpie el filtro antes de cada carga nueva. Separación incorrecta de las prendas Algunos productos generan pelusa y otros la retienen. Asegúrese de no mezclar ambas en su secadora. La estática - Fisher and Paykel DE60FA2 | Dryers DE70FA* & DG70FA* User Guide (English, Sp - Page 96
, o pagar el viaje del técnico de reparaciones hasta la ubicación donde está el Producto. Fisher & Paykel se compromete a: Reparar sin costo para el dueño tanto en cuanto a materiales como mano de obra cualquier parte del Producto, cuyo número de serie aparece en el Producto, que este defectuosa. En - Fisher and Paykel DE60FA2 | Dryers DE70FA* & DG70FA* User Guide (English, Sp - Page 97
cuando el producto es instalado en una ubicación con acceso limitado o restringido (es decir, vuelos de aviones, tarifas de ferry, áreas geográficas aisladas). F Mantenimiento normal recomendado según se establece en la Guía del Usuario del Producto. Si tiene un problema de instalación contáctese - Fisher and Paykel DE60FA2 | Dryers DE70FA* & DG70FA* User Guide (English, Sp - Page 98
parte o el Producto, o podemos devolverle la totalidad del precio de compra del Producto (sin incluir costos de instalación u otros costos). Todo servicio bajo esta Garantía Limitada debe ser suministrado por Fisher & Paykel Fisher and Paykel Appliances, Inc 5900 Skylab Road Huntington Beach CA - Fisher and Paykel DE60FA2 | Dryers DE70FA* & DG70FA* User Guide (English, Sp - Page 99
- Fisher and Paykel DE60FA2 | Dryers DE70FA* & DG70FA* User Guide (English, Sp - Page 100
correctly describes the product currently available. Derechos de autor © Fisher & Paykel 2005. Todos los derechos reservados. Las especificaciones del producto . www.usa.fisherpaykel.com US CA Dryer Installation Instructions and User Guide Published: 12/2005 Translated: 12/2005 Part No. 500A277P065
-
 1
1 -
 2
2 -
 3
3 -
 4
4 -
 5
5 -
 6
6 -
 7
7 -
8
-
9
-
10
-
11
-
12
-
13
-
14
-
15
-
16
-
17
-
18
-
19
-
20
-
21
-
22
-
23
-
24
-
25
-
26
-
27
-
28
-
29
-
30
-
31
-
32
-
33
-
34
-
35
-
36
-
37
-
38
-
39
-
40
-
41
-
42
-
43
-
44
-
45
-
46
-
47
-
48
-
49
-
50
-
51
-
52
-
53
-
54
-
55
-
56
-
57
-
58
-
59
-
60
-
61
-
62
-
63
-
64
-
65
-
66
-
67
-
68
-
69
-
70
-
71
-
72
-
73
-
74
-
75
-
76
-
77
-
78
-
79
-
80
-
81
-
82
-
83
-
84
-
85
-
86
-
87
-
88
-
89
-
90
-
91
-
92
-
93
-
94
-
95
-
96
-
97
-
98
-
99
-
100
 |
 |
New Zealand
Australia
USA
Canada
Europe
Asia
Pacific
Dryer
Installation Instructions and
User Guide
US
CA
Secadora
Instrucciones de Instalación y
Guía del Usuario
ES