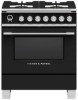
Fisher and Paykel OR30SCG6B1 User Guide Freestanding Range
Fisher and Paykel OR30SCG6B1 Manual
 |
View all Fisher and Paykel OR30SCG6B1 manuals
Add to My Manuals
Save this manual to your list of manuals |
Fisher and Paykel OR30SCG6B1 manual content summary:
- Fisher and Paykel OR30SCG6B1 | User Guide Freestanding Range - Page 1
FREESTANDING RANGE OR30SCG6, OR30SDG6, OR36SCG6 & OR36SDG6 models USER GUIDE US CA - Fisher and Paykel OR30SCG6B1 | User Guide Freestanding Range - Page 2
! WARNING! If the information in this manual is not followed exactly, a fire or explosion may Follow the gas supplier's instructions. y If you cannot reach your gas supplier, call the fire department. Installation and service must be performed by a qualified installer, service agency or the gas - Fisher and Paykel OR30SCG6B1 | User Guide Freestanding Range - Page 3
and warnings 4 Introduction 8 First use 10 Cooking guide 16 Oven functions 18 Cooking Charts 22 Setting the Care and cleaning 46 Using the Self Clean function 57 Troubleshooting 60 Alert codes 65 Warranty and service 67 Registration To register your product visit our website: - Fisher and Paykel OR30SCG6B1 | User Guide Freestanding Range - Page 4
AND WARNINGS To reduce the risk of fire, electrical shock, injury to persons, or damage when using the appliance, follow the important safety instructions listed below: ! WARNING! Electrical Shock Hazard Before removing a faulty oven light bulb, make sure you turn the power to the range off at - Fisher and Paykel OR30SCG6B1 | User Guide Freestanding Range - Page 5
Hazard If you smell gas, do not use the appliance. Open a window or door to let the gas escape, then follow the instructions on the inside front cover of this manual. Do not use water on grease fires. A violent steam explosion may result. Turn all burners off, then smother fire or flame - Fisher and Paykel OR30SCG6B1 | User Guide Freestanding Range - Page 6
over exists when the appliance is not installed in accordance with the installation instructions. y Do not operate the appliance if it is damaged or not User servicing - do not repair or replace any part of the appliance unless specifically recommended in the manual. All other servicing should be - Fisher and Paykel OR30SCG6B1 | User Guide Freestanding Range - Page 7
INSTRUCTIONS! y Safe food handling: leave food in the oven for as short a time as possible before and after cooking. This is to avoid contamination by organisms which may cause food poisoning. Take particular care during warmer weather. y Clean only the parts listed in this manual cooktop service - Fisher and Paykel OR30SCG6B1 | User Guide Freestanding Range - Page 8
30" MODELS INTRODUCTION Features may vary OR30SCG6 OR30SDG6 36" MODELS OR36SCG6 OR36SDG6 8 - Fisher and Paykel OR30SCG6B1 | User Guide Freestanding Range - Page 9
rear of the range has been properly installed. 2 Make sure that the installer has completed the 'Final checklist' in the Installation instructions. 3 Read this guide, taking special note of the 'Safety and warnings' section. 4 Remove all accessories and packaging from the oven and cooktop. Recycle - Fisher and Paykel OR30SCG6B1 | User Guide Freestanding Range - Page 10
Control panel layout 1 FIRST USE Dials may vary 8 23 4 5 1 Oven display 2 Cancel/back button 3 Select/Scroll control 4 Function dial 5 Temperature dial 6 Cooktop control dials Clock display and controls Timer (see 'Setting the timer') Auto cook (see 'Auto cook') NOV 25 Lock NOV 25 (see ' - Fisher and Paykel OR30SCG6B1 | User Guide Freestanding Range - Page 11
NOV 25NOV 25 FIRST USE Setting the clock When your oven CANCECLANCEL REMOTREEMOTE is first turned on, or after a power cut, the display will flash. You will need to set the clock in order to use the oven. NOV 25NOV 25 NOV 25NOV 25 Set Time of day am pm Set Time of day am pm CANCECLANCEL - Fisher and Paykel OR30SCG6B1 | User Guide Freestanding Range - Page 12
FIRST USE Positioning the shelves y Shelf positions are numbered from the bottom. y Position the shelves you will need before turning the oven on. y For advice on which shelf position to use, see sections 'Oven functions', 'Oven cooking guidelines', and 'Cooking charts'. IMPORTANT! Always position - Fisher and Paykel OR30SCG6B1 | User Guide Freestanding Range - Page 13
To insert the shelves Guard rail FIRST USE 1 Make sure the guard rail is at the back, facing up and the slides are not extended. 2 Hold the shelf firmly with both hands, making sure you grip the wire shelf too to stop it sliding forward. 3 4 3 Hook the rear tags over the wires of the desired - Fisher and Paykel OR30SCG6B1 | User Guide Freestanding Range - Page 14
CANCEL REMOTE CANCEL REMOTE FIRST USE ConditioNnOVin25g the oven NOV 25 NOV 25 NOV 25 It is important to condition your oven before using it for cooking and baking. Conditioning will burn off any manufacturing residues and ensure that you get the best results right from the start. CANCEL - Fisher and Paykel OR30SCG6B1 | User Guide Freestanding Range - Page 15
FIRST USE FUNCTION TEMPERATURE 5 After 20 minutes turn both the function and temperature dials to 0 (OFF). The halos will go out. y There will be a distinctive smell and a small amount of smoke during the conditioning process as manufacturing residue is burnt off. This is normal, but make sure - Fisher and Paykel OR30SCG6B1 | User Guide Freestanding Range - Page 16
more quickly than reflective pans; glass cookware may require a lower temperature. y Multi-shelf baking may also require a slight increase in cooking time. Shelf Position Guide y Single shelf: place your baking on a shelf that will have the top of your pan near the center of the oven cavity. y Multi - Fisher and Paykel OR30SCG6B1 | User Guide Freestanding Range - Page 17
for roasting bags. Use Aero Bake or True Aero and follow the manufacturer's instructions. y When using the Roast function, do not cover your roast, as continue to cook for a few minutes after removing it from the oven. Shelf Position Guide Place the meat on a shelf so that is is in the center of the - Fisher and Paykel OR30SCG6B1 | User Guide Freestanding Range - Page 18
OVEN FUNCTIONS IMPORTANT! y Use all the functions with the oven door closed. FAN GRILL BAKE ROAST VENT BAKE FAN BA BAKE ROAyST y y upper outer and lower elements Heat comes from both the upper and lower elemenFAtNsF.OTRhCEeD fan is not used in this PASTRY BAKE function. Ideal for cakes and - Fisher and Paykel OR30SCG6B1 | User Guide Freestanding Range - Page 19
VENT BAKE OVEN FUNCTIONS FAN BAKE GRILL MAXI BROIL upper inner PaAnSTdRYoBAuKEter elements y Intense radiant heat is delivered from both top elements. You can use Maxi Broil on Low OR High (100% power). y For best results allow 5 minutes of preheat before placing food in the oven. y The - Fisher and Paykel OR30SCG6B1 | User Guide Freestanding Range - Page 20
OVEN FUNCTIONS FAN FORCED PASTRY BAKE AERO PASTRY + PIZZA fan plus lower elemenTtRUEAERO CLASSIC BAKE y The fan circulates heat from the lower element throughout the oven. y Excellent for cooking pizza and flatbreads as it crisps the base beautifully without FAN GRILL overcooking the top. y - Fisher and Paykel OR30SCG6B1 | User Guide Freestanding Range - Page 21
OVEN FUNCTIONS RAPID PROOF this is not a cooking function y Gentle heat is generated from the upper and lower elements. y Provides the optimum warm and draft-free environment for proving yeast dough. y This method provides a faster proof time than at room temperature. y To prevent overproofing we - Fisher and Paykel OR30SCG6B1 | User Guide Freestanding Range - Page 22
COOKING CHARTS y Shelf positions are counted from the base up (1 is the lowest, 7 is the highest). Position shelves before you turn the oven on. y For best results preheat the oven. y Multi-shelf cooking may need the shelves rotating midway through cooking. y Oven accessories may temporarily deform - Fisher and Paykel OR30SCG6B1 | User Guide Freestanding Range - Page 23
COOKING CHARTS The information in these charts are guidelines only. Refer to your recipe or the packaging and be prepared to adjust the cooking times and settings accordingly. FUNCTION Aero Bake True Aero Aero Bake True Aero Aero Bake True Aero Bake Bake Bake Bake Bake Bake Aero Bake True Aero Aero - Fisher and Paykel OR30SCG6B1 | User Guide Freestanding Range - Page 24
COOKING CHARTS SAVOURY FOOD Cornbread Vegetables Lasagne Casserole Pizza Quiche (blind bake, then add filling) Potatoes (whole, baked) Frittata (shallow) Oven Meals SHELVES Single Single Single Single Single Single Single Single Single ROASTING FOOD Beef (Boneless) Prime Rib Roast Lamb Rack - Fisher and Paykel OR30SCG6B1 | User Guide Freestanding Range - Page 25
COOKING CHARTS FUNCTION Aero Bake Aero Bake Aero Bake Bake Pizza Aero pastry Bake Aero Pastry True Aero SHELF POSITIONS 3 3 3 2 or 3 2 3 3 3 3 TEMP (°F) 400 - 425 350 - 375 350 - 375 250 - 350 550 (pizza) 350 TEMP (°C) 210 - 215 175 - 190 175 - 190 120 - 175 220 175 TIME (MINS) 20 - 25 30 - 50 - Fisher and Paykel OR30SCG6B1 | User Guide Freestanding Range - Page 26
BROILING FOOD Beef Lamb Chops Pork Chicken Fish Vegetables COOKING CHARTS Steak Rare Medium Hamburger (ground - patties) Meatballs (ground) Medium Well done Chops (well done) Ham steak Bacon Sausages Boneless pieces Bone In Pieces Fillets Whole Sliced SHELVES Single Single Single - Fisher and Paykel OR30SCG6B1 | User Guide Freestanding Range - Page 27
FUNCTION Maxi Broil Maxi Broil Maxi Broil Maxi Broil Maxi Broil Maxi Broil Maxi Broil Maxi Broil Maxi Broil Maxi Broil Aero Broil Aero Broil Aero Broil Aero Broil Maxi Broil COOKING CHARTS SHELF POSITIONS 6 or 7 6 or 7 6 or 7 6 or 7 6 or 7 6 or 7 6 or 7 6 or 7 6 or 7 6 or 7 4 or 5 4 or 5 5 or 6 5 - Fisher and Paykel OR30SCG6B1 | User Guide Freestanding Range - Page 28
CANCEL REMOTE SETTING CANCEL THERTEMIOMTE ER CANCEL REMOTE CANC RRememotoete Remote OONN y You can use the Enabled timer at any time, even if you are noOtK using the oven. y If the time is more than an hour, the display will count down in minutes (h:m). If it is less than an - Fisher and Paykel OR30SCG6B1 | User Guide Freestanding Range - Page 29
Remote ON CANCEL CANCELREMOTE REMOTE Remote CANCEL CANCELREMOTE REOMONTE 4m 59s EndCsA7N:0C0ELpmCANCELREMOTE REMOTE SETTING THE TIMER Cook time 4 CANCEL CANCELREMOTE REMOETnE Cook time CTAoNCEeL dit thREeMOCtTAiENmCEeL r REMOTE CANCEL Auto Cook REMOTE CANCEL REMCOATNECEL 00 h 00m REMOTE - Fisher and Paykel OR30SCG6B1 | User Guide Freestanding Range - Page 30
4 m45m95s9 s EndsE7n:d0s07p:m00pm Use Auto Cook to AUTO COOK Timer 00h 25m alarm sounds Remote ON Timer 00h 25m alarm sounds y Turn off the oven automatically after a set period of time.CANCEL L y REMORTEEMOTE Set the oCAvNeCCEnALNCfEoLr food to REMORTEEMOTE be ready at a specific time. - Fisher and Paykel OR30SCG6B1 | User Guide Freestanding Range - Page 31
er 25mTimer 00 25 ounds h m Timer Timer 24.59m Timer 03h 25 m Timer 24.59m Timer 03AhU2T5Om COOTKimer 03 25 alarm sounds h malarm sounds 03h 25 m CANCEL 00 REMOTE m CANCEL Timer NOW SET 25m REMOTE EMaOlTaErm soundCsANCEL REMOTE alarmCAsNoCEuLnds REMOTE aClAaNrCmEL soundRsEMOTE - Fisher and Paykel OR30SCG6B1 | User Guide Freestanding Range - Page 32
AUTO COOK When Auto Cook is set 4m 59s Timer Timer Auto Cook Complete y tTohgeo oven and the lightsCwoimllpsletatey off, the halos Cwoimllpbleeteunlit, but your oven is now set for automatic cooking. It will automatically turn on at the required time. y YouOcvaennmodify the function and - Fisher and Paykel OR30SCG6B1 | User Guide Freestanding Range - Page 33
NCEL CANCEL CANCEL REMOTE REMOTE REMOTE CANCEL AUTO COOK REMOTE CANCEL CANCEL REMOTE To cancel Auto Cook CANCEL REMOTE Temp REMOTE CANCEL CANRCEEMLOTE End CON REMOTECANCEL CANCEL REMOTE CANCEL Set End time 1 2 :00pm minutes 4m 59s 4m 59s to go Ends 7:00pm 4m 59s to go Tim - Fisher and Paykel OR30SCG6B1 | User Guide Freestanding Range - Page 34
LOCKING THE OVEN CONTROLS This function is to prevent accidental use of the oven (eg by children). When locked, the controls are unresponsive and the oven will not turn on. IMPORTANT! y This does not lock the cooktop controls. y For safety reasons it is not possible to lock the oven controls while - Fisher and Paykel OR30SCG6B1 | User Guide Freestanding Range - Page 35
CANCELCCAANNCCEELL REMOTERREEMMOOTTEE CANCELCCAANNCCEELL REMOTERREEMMOOTTEE CANCELCCAANNCCEELL REMOTERREEMMOOTTEE LOCKING THE OVEN CONTROLS LLoocckk O OOOnNN OveOnOvveenn LocLkLeoodcckkeedd CANCELCCAANNCCEELL REMOTERREEMMOOTTEE CANCELCCAANNCCEELL REMOTERREEMMOOTTEE CANCELCCAANNCCEELL - Fisher and Paykel OR30SCG6B1 | User Guide Freestanding Range - Page 36
USER PREFERENCE SETTINGS Adjust the user settings to suit your personal setup preferences. You can set your oven to: y display the temperature in degrees Celsius or Fahrenheit y give audio feedback (tones and beeps) or operate quietly y display time as 12-hr or 24-hr y operate with the display off y - Fisher and Paykel OR30SCG6B1 | User Guide Freestanding Range - Page 37
to clear all changes to settings and reset to the factory settings. Reset LIGHTS OFF DURING COOKING Lights Off See 'Sabbath Mode' for instructions US ENGLISH SPANISH US English Espanol FRENCH Francaise Select this option and accept to reset all user settings * The timer tone and alert beeps - Fisher and Paykel OR30SCG6B1 | User Guide Freestanding Range - Page 38
SABBATH MODE This setting is designed for religious faiths that observe a 'no work' requirement on the Sabbath. While your oven is in Sabbath Mode y The display, dial halos and indicators will be unlit, the controls will be unresponsive. y No tones or beeps will sound. y No alert codes or - Fisher and Paykel OR30SCG6B1 | User Guide Freestanding Range - Page 39
SABBATH MODE abbath Mode SaSbabbabtahth MoMdoedOe FOFFFSet Bake and Temperature REMOTECANCCAENLCEL REMRCOEATMNEOCTEEL RCEAMNOCCATEENLCEL REMROETMEOTE StaSrttarNt oNwow RuRnun222h2h EnEdnd 5:250:20 CONCOFINRFMIRM CANCCAENLCEL REMROETMEOTE SaSbabbabtahth MoMdoede SetS TemT CANCCAENLCEL - Fisher and Paykel OR30SCG6B1 | User Guide Freestanding Range - Page 40
OR36 models 1 4 3 OR30 models USING YOUR GAS COOKTOP Cooktop features 1 Semi-rapid burner 1 2 Dual wok burner 2 3 Triple-ring burner 4 Burner grates 3 5 Burner dials 5 1 1 4 2 2 Using the dual wok burners Inner and outer burners Inner burner only 40 5 When using a dual wok - Fisher and Paykel OR30SCG6B1 | User Guide Freestanding Range - Page 41
USING YOUR GAS COOKTOP Burner Controls The dials control the flow of gas through the valve. Using the single burners 1 Identify the knob of the burner you want to use. 2 Starting from the O (OFF) position, push the knob in and turn it counterclockwise to HI. y Keep holding the knob in until the - Fisher and Paykel OR30SCG6B1 | User Guide Freestanding Range - Page 42
methylated spirits, as shown below. See 'Care and cleaning' for instructions on removing and replacing the burner parts. If the flame is irregular For further advice, see sections 'Care and cleaning' and 'Troubleshooting'. Burner cap Ignitor Flame spreader Burner parts 42 Correct assembly of - Fisher and Paykel OR30SCG6B1 | User Guide Freestanding Range - Page 43
this can deflect heat onto your benchtop and damage its surface. y Always make sure saucepans are stable. Using very heavy saucepans may bend the pan supports or deflect the flame. y Make sure the size of the pan matches the size of the burner. A small pot on a large burner is not efficient - Fisher and Paykel OR30SCG6B1 | User Guide Freestanding Range - Page 44
COOKING GUIDELINES AND COOKWARE Wok stand The wok stand fits over the triple-ring wok or dual burner trivet. IMPORTANT! y Using a wok without the stand may cause the wok to tip or the wok or dual burner to operate incorrectly. y Do not use the stand for ordinary, flat-bottomed saucepans. y The wok - Fisher and Paykel OR30SCG6B1 | User Guide Freestanding Range - Page 45
USING THE WARMING DRAWER Use the warming drawer to keep food warm after you have finished cooking and to warm plates before serving. The warming drawer will keep hot cooked foods at serving temperature. y Allow time for the drawer to preheat y Place hot food in a heatproof pan or serving dish. y - Fisher and Paykel OR30SCG6B1 | User Guide Freestanding Range - Page 46
ensure it doesn't stain. y See the pages following this chart for instructions on removing and replacing different parts of the range for cleaning or maintenance the chart below. If in doubt, contact Customer Care. y Only an service technician can take apart the door. y Do not attempt to take the - Fisher and Paykel OR30SCG6B1 | User Guide Freestanding Range - Page 47
CARE AND CLEANING Manual cleaning chart WHAT? HOW OFTEN? HOW? IMPORTANT! RANGE EXTERIOR and polish, the kickstrip grate. These are following manufacturer's not stainless steel parts and instructions. Always rub their surface may be damaged the stainless steel in the by stainless steel - Fisher and Paykel OR30SCG6B1 | User Guide Freestanding Range - Page 48
CARE AND CLEANING WHAT? HOW OFTEN? HOW? IMPORTANT! OVEN PARTS Side racks For light soiling: y Clean with a solution of mild detergent and hot water. For heavy soiling: y Run a Self Clean cycle. Oven shelves Wipe with a damp cloth and mild detergent. Do not wipe off or wash away the white - Fisher and Paykel OR30SCG6B1 | User Guide Freestanding Range - Page 49
tarnish use a suitable brass y cleaner and polish, following manufacturer's instructions. 1 Check that the burner is turned y OFF. 2 Clean of the flame spreaders clear. Soiling may clog these and cause ignition problems. Before replacing the burner parts, check that they are dry. Wet - Fisher and Paykel OR30SCG6B1 | User Guide Freestanding Range - Page 50
CARE AND CLEANING Removing and replacing the oven door IMPORTANT! y Do not lift the oven door by its handle. Doing so may damage the door. y Make sure the oven and the door are cool before you begin to remove the door. y Before removing the door, make sure there is a large enough clear, protected - Fisher and Paykel OR30SCG6B1 | User Guide Freestanding Range - Page 51
CARE AND CLEANING To replace the oven door Notch 1 Hold the door firmly in an approximately halfway open position. 2 Insert the hinge tongues into the slots, making sure that the notches on both sides drop into place as shown. 3 Open the door fully. 4 Fully close the levers on the left and - Fisher and Paykel OR30SCG6B1 | User Guide Freestanding Range - Page 52
CARE AND CLEANING Removing and replacing the oven side racks IMPORTANT! Always turn off the range at the wall first. Ensure the oven has cooled down completely before starting. Remove all shelves 1 Slide out all shelves and remove. For easier access we recommend removing the oven door. See ' - Fisher and Paykel OR30SCG6B1 | User Guide Freestanding Range - Page 53
down y On the right side push the lever up 3 Remove the drawer while holding the levers in position. Fitting the warming drawer 1 Insert the drawer guides onto the sliding runners on either side of the range interior. y Make sure they are correctly lined up on both sides of the drawer. 2 Gently - Fisher and Paykel OR30SCG6B1 | User Guide Freestanding Range - Page 54
that the burner flame spreader and the cap have been correctly positioned. Failure to do so can cause serious problems. y Check that the ignitor is always clean to ensure trouble free sparking. It must be cleaned very carefully using a toothbrush and methylated spirits. y Note: to avoid damage to - Fisher and Paykel OR30SCG6B1 | User Guide Freestanding Range - Page 55
CARE AND CLEANING Replacing the triple-ring wok and dual burners Ignitor Correct positioning of flame spreader - triple-ring wok burner SIgnitor Correct positioning of flame spreader - dual burner ACap BRing Correct positioning of cap and ring - triple-ring wok and dual burner Incorrect and - Fisher and Paykel OR30SCG6B1 | User Guide Freestanding Range - Page 56
CARE AND CLEANING Replacing an oven light bulb IMPORTANT! Use a 25W, 120V 60HZ G9 halogen bulb for replacement. Do not use a standard light bulb in any oven, the heat will break it. 1 Allow the oven (including the lamp cover and the bulb) to cool completely. 2 Remove any shelves that may get in the - Fisher and Paykel OR30SCG6B1 | User Guide Freestanding Range - Page 57
start a Self Clean cycle. Call your Fisher & Paykel trained and supported service technician. Before you start 1 Remove all oven shelves and any from greasy splatter), you will need to clean it manually before starting a Self Clean cycle. For instructions, see 'Care and cleaning'. IMPORTANT! y If - Fisher and Paykel OR30SCG6B1 | User Guide Freestanding Range - Page 58
USING THE SELF CLEAN FUNCTION To set Self Clean CRleomseove DSoheolrves Remove Shelves StSatnadnadradrd 440000 ClCelaenaCnlose h h Domomr Standard Clean 4h 00m 3h 59m to go 33h 5h totog CACNACNECLEL RERMEOMTOETE CACNACNECLCEALNCEL RERMEOMTOERTEEMOTE CACNACNECLELCAN CANCEL REMOTE CANCEL - Fisher and Paykel OR30SCG6B1 | User Guide Freestanding Range - Page 59
USING THE SELF CLEAN FUNCTION When Self Clean is finished y Removye Shelveys y A tone will sounSdta. ndard Self Clean ComplCelteeanwill show in the display. 4 00 The display will flah sh. m 3h 59m The door will unlock. to go 1 Press any button to stop the display flashing. 2 Wait for the - Fisher and Paykel OR30SCG6B1 | User Guide Freestanding Range - Page 60
TROUBLESHOOTING Troubleshooting chart If there is a problem, check the chart below to see if you can fix it. If the problem cannot be fixed or persists, call your Fisher & Paykel trained and supported service technician or Customer Care. PROBLEM 'Automatic cooking' for instructions. The oven is in - Fisher and Paykel OR30SCG6B1 | User Guide Freestanding Range - Page 61
TROUBLESHOOTING PROBLEM General I can feel hot air blowing out of the vents after I have turned the oven off. POSSIBLE CAUSES This is normal. The oven fan comes - Fisher and Paykel OR30SCG6B1 | User Guide Freestanding Range - Page 62
TROUBLESHOOTING PROBLEM Self Clean function During a Self Clean cycle, the oven is louder cycle was cancelled, the cool-down phase may take up to 45 minutes. See section 'Alert codes' for instructions. Power cut. The door will remain locked. Once the power is turned back on, the door will remain - Fisher and Paykel OR30SCG6B1 | User Guide Freestanding Range - Page 63
TROUBLESHOOTING PROBLEM OVEN Condensation around oven (eg on control panel or top of oven door.) Condensation building up in the oven while cooking on Maxi turn a burner on. If you are using bottled gas, check that it is not empty. Clean the ignitor(s). See 'Care and cleaning' for instructions. 63 - Fisher and Paykel OR30SCG6B1 | User Guide Freestanding Range - Page 64
TROUBLESHOOTING PROBLEM COOKTOP BURNERS Some burners are clean and dry. See 'Care and cleaning' for instructions. Clean the ignitor(s). See 'Care and cleaning' for instructions. The cooktop burners can still be used. To light & Paykel trained and supported service technician or Customer Care. 64 - Fisher and Paykel OR30SCG6B1 | User Guide Freestanding Range - Page 65
code, unless the instructions in the chart following specifically instruct you to. There problem persists: wait until the cooling fans have stopped and the oven has completely cooled down, then turn the power to the range off at the wall and call your Fisher & Paykel trained and supported service - Fisher and Paykel OR30SCG6B1 | User Guide Freestanding Range - Page 66
position. 3 Set the clock. See 'Setting the clock and first use' for instructions. 4 Try starting a Self Clean cycle again, making sure that you close and the alert code reappears, call your Fisher & Paykel trained and supported service technician or Customer Care. 1 Note down the alert code. 2 Wait - Fisher and Paykel OR30SCG6B1 | User Guide Freestanding Range - Page 67
Before you call for service or assistance Check the things you can do yourself. Refer to the installation instructions and your user guide and check that: 1 Your product is correctly installed. 2 You are familiar with its normal operation. If after checking these points you still need assistance - Fisher and Paykel OR30SCG6B1 | User Guide Freestanding Range - Page 68
may not be available in all markets and are subject to change at any time. The product specifications in this guide apply to the specific products and models described at the date of issue. Under our policy of continuous product improvement, these specifications may change at
-
 1
1 -
 2
2 -
 3
3 -
 4
4 -
 5
5 -
 6
6 -
 7
7 -
8
-
9
-
10
-
11
-
12
-
13
-
14
-
15
-
16
-
17
-
18
-
19
-
20
-
21
-
22
-
23
-
24
-
25
-
26
-
27
-
28
-
29
-
30
-
31
-
32
-
33
-
34
-
35
-
36
-
37
-
38
-
39
-
40
-
41
-
42
-
43
-
44
-
45
-
46
-
47
-
48
-
49
-
50
-
51
-
52
-
53
-
54
-
55
-
56
-
57
-
58
-
59
-
60
-
61
-
62
-
63
-
64
-
65
-
66
-
67
-
68
 |
 |

USER GUIDE
US CA
FREESTANDING RANGE
OR30SCG6, OR30SDG6, OR36SCG6 &
OR36SDG6 models