Fisher and Paykel OR30SDBMX1 User Guide
Fisher and Paykel OR30SDBMX1 Manual
 |
View all Fisher and Paykel OR30SDBMX1 manuals
Add to My Manuals
Save this manual to your list of manuals |
Fisher and Paykel OR30SDBMX1 manual content summary:
- Fisher and Paykel OR30SDBMX1 | User Guide - Page 1
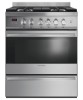
Freestanding range OR30SDBMX model Cuiseur indépendant OR30SDBMX model User guide Guide d'utilisation US CA - Fisher and Paykel OR30SDBMX1 | User Guide - Page 2
-TIP DEVICE PACKED WITH RANGE • SEE INSTALLATION INSTRUCTIONS WARNING ! If the information in this manual is not followed exactly, gas supplier from a neighbor's phone. Follow the gas supplier's instructions. • lf you cannot reach your gas supplier, call the fire department. - Installation and service - Fisher and Paykel OR30SDBMX1 | User Guide - Page 3
GAS RANGE for residential use only R USERS OPERATING INSTRUCTIONS IMPORTANT - PLEASE READ AND FOLLOW • Before beginning, please read these instructions completely and carefully. • Do not remove permanently affixed labels, warnings, or plates from the product. This may void the warranty. • Please - Fisher and Paykel OR30SDBMX1 | User Guide - Page 4
- Fisher and Paykel OR30SDBMX1 | User Guide - Page 5
potential exposures to such substances. WARNING!: Gas appliances contain or produce substances which can and maintained according to the manufacturer's instructions. This appliance is designed and manufactured used in a commercial environment. The appliance warranty will be void if the appliance is - Fisher and Paykel OR30SDBMX1 | User Guide - Page 6
!! ELECTRICAL GROUNDING INSTRUCTIONS The range must be electrically cleaning and/or service; A. Shut off gas at main supply gas line to the inlet pipe. D. Carefully remove the range by pulling outward. CAUTION: Range is heavy; use care in handling. 8. Electrical Requirement REPLACEMENT PARTS - Fisher and Paykel OR30SDBMX1 | User Guide - Page 7
work should be carried out by qualified service personnel only. • Danger of burns! The and gloves when handling hot parts or utensils. • Stand away from the range when opening oven door. Hot be used with no restriction. In that case follow the instructions in the chapter "How to use the top burners". - Fisher and Paykel OR30SDBMX1 | User Guide - Page 8
Dual burner (D) - 17000 BTU/hr 4. Front left Dual burner (D) - 17000 BTU/hr Note: • The electric gas-ignition device is incorporated into the dials. • The appliance has a safety valve system fitted. The flow of gas will stop if and when the flame should accidentally go out. CAUTION: If the burner is - Fisher and Paykel OR30SDBMX1 | User Guide - Page 9
5 6 1 2 3 4 7 Fig. 1.2 CONTROLS DESCRIPTION Gas cooking hob controls: 1. Front left burner (4) control knob 2. operating. Operate the cooking hob burners and the oven or broil as per instruction manual. When the cooling fan failure warning light is lit this indicates the malfunctioning - Fisher and Paykel OR30SDBMX1 | User Guide - Page 10
simmer warming of food or maintaining boiling conditions of liquids. To reduce the gas flow to minimum, rotate the dial further counter-clockwise to point the indicator and OFF position. Fig. 2.2 N.B. When the range is not being used, set the gas dials to their OFF positions and also close the - Fisher and Paykel OR30SDBMX1 | User Guide - Page 11
GAS the local gas supply conditions gas burner has been lit before letting go the dial (safety device activation delay). 3. Adjust the gas the local gas supply conditions gas burner has been lit before letting go the dial (safety device activation delay). 4. Adjust the gas gas your local gas supply - Fisher and Paykel OR30SDBMX1 | User Guide - Page 12
and OFF position. • As a small burner (flame produced only by the inner crown) which can be adjusted from the maximum ( ) to the minimum ( ) position. Gas flow to the burners is adjusted by turning the dials (illustrated in fig. 2.3) which control the valves. Turning the dial so that the symbols - Fisher and Paykel OR30SDBMX1 | User Guide - Page 13
, set the dial to minimum and repeat the operation. N.B. When the range is not being used, set the gas dials to their OFF positions and also close the gas shut-off valve placed on the main gas supply line. Caution! The range becomes very hot during operation. Keep children well out of reach. 2 13 - Fisher and Paykel OR30SDBMX1 | User Guide - Page 14
of the burners, bringing about a waste of gas fuel. A small diameter pot or pan placed placed directly onto the pan-support. When using a WOK you need to place the supplied wok support on the pan supports for the burner to avoid over the edge of the range, to avoid them being knocked over by accident - Fisher and Paykel OR30SDBMX1 | User Guide - Page 15
radiation Radiant heat is delivered by the infra red broil burner. NOTE: When the range is not being used, set the gas knobs to their OFF positions and also close the gas shut-off valve placed on the main gas supply line. VERY IMPORTANT The oven/broil shall be always used with the oven - Fisher and Paykel OR30SDBMX1 | User Guide - Page 16
cause an alteration in the control of the temperature. Fig. 3.1 FAN GAS OVEN °F °C 200 93 240 116 285 141 330 166 375 191 420 215 475 246 530 277 KNOB SETTING 1 2 3 4 5 6 7 8 GAS OVEN °F °C 200 93 245 118 270 132 345 174 380 193 455 235 505 263 555 291 - Fisher and Paykel OR30SDBMX1 | User Guide - Page 17
power failure. The thermostat allows the automatic control of the temperature. The gas delivery to the oven burner is controlled by a two way thermostatic tap ame extinguishes for any reason, the safety valve will automatically shut off the gas supply to the burner. To re-light the burner, first turn - Fisher and Paykel OR30SDBMX1 | User Guide - Page 18
3 CONVECTION BAKING WITH VENTILATION (OVEN BURNER WITH FAN MOTOR) After lighting the oven burner switch on the fan motor by turning the LIGHT & FAN control knob (fig. 3.2) on "LIGHT & FAN" position. Before introducing the food, preheat the oven to the desired temperature. For a correct preheating - Fisher and Paykel OR30SDBMX1 | User Guide - Page 19
with the broil burner. A safety device switches off the fan motor when the gas oven/broil control knob is turned on "BROIL" position. ■ Do not the flame extinguishes for any reason, the safety valve will automatically shut off the gas supply to the burner. To re-light the burner, first turn the oven - Fisher and Paykel OR30SDBMX1 | User Guide - Page 20
3 1st STEP Do not use 2nd STEP Broiling level 3rd STEP Broiling/Oven cooking level 4th STEP Oven cooking level 5th STEP Oven cooking level Fig. 3.5 It is advisable to handle the oven accessories using oven gloves. Fig. 3.6 WRONG BROILING Very important: The broil burner must always be used with - Fisher and Paykel OR30SDBMX1 | User Guide - Page 21
hours clock with illuminated display and 10 hours alarm. Upon immediate connection of the range or after a blackout, 12•00 will flash on the display. To set IS ONLY AN ELECTRONIC ALARM. REMEMBER TO TURN OFF THE OVEN OR BROIL MANUALLY AT THE END OF COUNTDOWN. SETTING THE FREQUENCY OF THE ALARM SOUND - Fisher and Paykel OR30SDBMX1 | User Guide - Page 22
that may cause injury. ENAMELLED PARTS • All the enamelled parts must be cleaned with a sponge correctly positioned - failure to do so can cause serious problems. • Check that the probe "T" (figs. 5.1, "S" (figs. 5.1, 5.3) is always clean to ensure trouble-free sparking. • Note: To avoid damage to the - Fisher and Paykel OR30SDBMX1 | User Guide - Page 23
(see figs. 5.1 and 5.2 ). Failure to do so can cause serious problems. CORRECT POSITION OF THE DUAL BURNERS The Dual burner must be correctly positio- The inner flame spreader can be removed ONLY by an authorised service agent. Damage to the appliance will occur if not observing this condition - Fisher and Paykel OR30SDBMX1 | User Guide - Page 24
at-head screwdriver, loosen and remove the front and rear fixing screws. 4. Remove the side rack. FITTING AND REMOVING THE SLIDING SHELF SUPPORTS When fitting the sliding shelf supports, make sure that you fit: - the side racks the slides to the top wire of a shelf position - both sides of each pair of - Fisher and Paykel OR30SDBMX1 | User Guide - Page 25
. 6.9 Stop notch REPLACING THE OVEN LIGHT (fig. 6.10) Before any maintenance is started involving electrical parts of the appliance, it must be disconnected from the power supply. • Let the oven cavity and cover. NOTE: Oven bulb replacement is not covered by your warranty. AB BA Fig. 6.10 25 - Fisher and Paykel OR30SDBMX1 | User Guide - Page 26
3. Remove the drawer; holding the levers in position (fig. 6.11). 2 3 2 Fig. 6.13 Fig. 6.12 Fig. 6.11 FITTING THE STORAGE DRAWER 1. Insert the drawer guides into the range guides (fig. 6.14) 2. Gently close the drawer completely; the safety catches will automatically hook into place. Fig. 6.14 26 - Fisher and Paykel OR30SDBMX1 | User Guide - Page 27
(fig. 6.15b). • Hold the door as shown in fig. 6.15. • Gently close the door (fig. 6.15c) until left and right hinge levers "A" are hooked to part "B" of the door (fig. 6.15b) • Withdraw the hinge hooks from their location following arrow "C" (fig. 6.15d). • Rest the door on a soft surface. REFITTING THE - Fisher and Paykel OR30SDBMX1 | User Guide - Page 28
to the installation instructions and your user guide and check that: 1 Your product is correctly installed. 2 You are familiar with its normal operation. If after checking these points you still need assistance or parts, please refer to the Service & Warranty book for warranty details and your - Fisher and Paykel OR30SDBMX1 | User Guide - Page 29
installateur doit confier ces instructions au consommateur qui les conservera la dernière édition du National Fuel Gas Code ANSI Z223.1/NFPA 54. L'installation et/ou aux codes locaux. AU CANADA: L'installation doit être conforme au de sécurité et pour faciliter le service, un robinet d'arrêt de gaz - Fisher and Paykel OR30SDBMX1 | User Guide - Page 30
CUISINIÈRE • CONSULTEZ LES INSTRUCTIONS D'INSTALLATION MISE EN GARDE ! Le fait de ne pas suivre toutes les instructions de ce manuel peut S'il vous est impossible de joindre votre fournisseur de gaz, appelez le service d'incendie. - L'installation et l'entretien doivent être effectués par un - Fisher and Paykel OR30SDBMX1 | User Guide - Page 31
Cher client, Nous vous remercions d'avoir acheté et préféré notre produit. Les mesures de sécurité et les recommandations ci-dessous sont pour votre propre sécurité et pour celle des autres. Elles permettront également de profiter au maximum des fonctions offertes par votre appareil. Veuillez ranger - Fisher and Paykel OR30SDBMX1 | User Guide - Page 32
lectrique doit être conforme aux codes nationaux et locaux. AVERTISSEMENT!! INSTRUCTIONS DE MISE À LA TERRE La cuisinière doit être mise l'électricité, ANSI/NFPA n° 70 ou au Code canadien de l'électricité au Canada. L'installation doit être effectuée par un électricien qualifié. POUR VOTRE SÉCURIT - Fisher and Paykel OR30SDBMX1 | User Guide - Page 33
CONSIGNES ET RECOMMANDATIONS IMPORTANTES Après avoir déballé l'appareil, assurez-vous qu'il n'est pas endommagé. Si vous n'êtes pas certain, ne l'utilisez pas et consultez votre fournisseur ou un technicien professionnel qualifié. Les éléments d'emballage (sacs de plastique, mousse de polystyrène, - Fisher and Paykel OR30SDBMX1 | User Guide - Page 34
1 caractéristiques 1 4 2 3 Fig. 1.1 SURFACE DE CUISSON 1. Brûleur semi-rapide (SR) arrière gauche - 8 000 BTU/h 2. Brûleur semi-rapide (SR) arrière droit - 8 000 BTU/h 3. Brûleur double (D) avant droit - 17 000 BTU/h 4. Brûleur double (D) avant gauche - 17 000 BTU/h Remarque : • Le dispositif - Fisher and Paykel OR30SDBMX1 | User Guide - Page 35
ûleurs de la surface de cuisson et le four ou gril comme l'indique le manuel d'instructions. Si le voyant avertisseur de défaillance du ventilateur de refroidissement est allumé, le moteur du les brûleurs de la surface de cuisson seulement. Communiquez avec le Service après-vente. SERVICE 35 - Fisher and Paykel OR30SDBMX1 | User Guide - Page 36
2 comment utiliser les brûleurs supérieurs BRÛLEURS À GAZ (Semi-rapide) Vous pouvez ajuster l'alimentation en gaz des brûleurs en tournant les boutons (fig. 2.1) qui contrôlent les soupapes. En tournant le bouton de façon à ce que les symboles qui y sont imprimés pointent vers ceux imprimés sur la - Fisher and Paykel OR30SDBMX1 | User Guide - Page 37
ALLUMAGE DES BRÛLEURS À GAZ MUNIS D'UN DISPOSITIF DE SÉCURITÉ EN CAS D'EXTINCTION DES FLAMMES (Brûleurs semi-rapides) Pour allumer le brûleur, vous devez procéder de la façon suivante : 1. Poussez et tournez le bouton dans le sens antihoraire jusqu'à la position HI (ou- verture maximale). Enfoncez - Fisher and Paykel OR30SDBMX1 | User Guide - Page 38
2 38 BRÛLEURS À GAZ (Double) Le brûleur double est un brûleur très flexible qui comporte différents réglages et permet une cuisson optimale. Il est composé d'une couronne intérieure et d'une couronne extérieure; les flammes de la couronne intérieure peuvent être réglées indépendamment des flammes de - Fisher and Paykel OR30SDBMX1 | User Guide - Page 39
ALLUMAGE DES BRÛLEURS À GAZ MUNIS D'UN DISPOSI- TIF DE SÉCURITÉ EN CAS D'EXTINCTION DES FLAMMES (Brûleurs doubles) Pour allumer le brûleur, vous devez procéder de la façon suivante : 1. Poussez et tournez le bouton dans le sens antihoraire jusqu'à la position (ouverture maximale). Enfoncez et - Fisher and Paykel OR30SDBMX1 | User Guide - Page 40
éviter d'endommager le brûleur double (fig. 2.6a, 2.6b). IMPORTANT: La grille spéciale conçue pour les woks (fig. 2.6b) DOIT ÊTRE PLACÉE SEULEMENT sur le support de plat conçu pour le brûleur double. Fig. 2.6b 40 Assurez-vous que la poignée des ustensiles ne dépasse pas du rebord de la - Fisher and Paykel OR30SDBMX1 | User Guide - Page 41
devez toujours fermer la porte du four lorsque vous utilisez le four/ gril. PREMIÈRE UTILISATION DU FOUR Il est recommandé de suivre ces instructions : ■ Équipez l'intérieur du four tel que décrit au chapitre "Nettoyage et entretien". ■ Réglez le four à la température maximale (position "8") pour - Fisher and Paykel OR30SDBMX1 | User Guide - Page 42
3 OFF BRÛLEUR DU FOUR Il effectue de la « cuisson au four » normale. L'alimentation en gaz du brûleur est réglée par un thermostat qui permet de maintenir la température du four constante. Le contrôle de la température est assuré par une sonde thermostatique située à l'intérieur du four. La sonde - Fisher and Paykel OR30SDBMX1 | User Guide - Page 43
ALLUMAGE DU BRÛLEUR DU FOUR Important ! ■ Lors de l'allumage du brûleur du four, le moteur de ventilateur doit être à la position d'arrêt (bouton de commande de la lampe et du ventilateur à la position "OFF" - Fig. 3.2). ■ Ne tentez pas d'allumer le brûleur du four pendant les pannes d'électricité. - Fisher and Paykel OR30SDBMX1 | User Guide - Page 44
3 CUISSON À CONVECTION AVEC VENTILATION (BRÛLEUR DU FOUR AVEC MOTEUR DE VENTILATEUR) Après avoir allumé le brûleur du four, allumez le moteur de ventilateur en tournant le bouton de commande de "lampe du four et moteur du ventilateur" (fig. 3.2) à la position "LIGHT & FAN" (lampe et ventilateur). - Fisher and Paykel OR30SDBMX1 | User Guide - Page 45
ALLUMAGE DU BRÛLEUR DU GRIL Important ! ■ Le moteur de ventilateur ne peut pas être combiné avec le brûleur du gril. Un dispositif de sécurité met le moteur de ventilateur à la position d'arrêt lorsque le bouton de commande du four/gril à gaz est à la position "BROIL" (gril). ■ Ne tentez pas d' - Fisher and Paykel OR30SDBMX1 | User Guide - Page 46
3 NIVEAU 1 Ne pas utiliser NIVEAU 2 Gril NIVEAU 3 Gril/Cuisson NIVEAU 4 Cuisson NIVEAU 5 Cuisson Fig. 3.5 Il est recommandé d'utiliser des gants de cuisine pour manipuler les accessoires du four. Fig. 3.6 INWCROORNRGECT CUISSON AU GRIL Très important: Vous devez toujours fermer la porte du four - Fisher and Paykel OR30SDBMX1 | User Guide - Page 47
horloge électronique/alarme électronique HORLOGE ÉLECTRONIQUE (fig. 4.1) L'alarme électronique est un dispositif qui regroupe les fonctions d'une horloge de 12 heures avec affichage lumineux et d'une alarme de 10 heures. Immédiatement après le branchement du four ou après une panne d'électricité, 12 - Fisher and Paykel OR30SDBMX1 | User Guide - Page 48
5 nettoyage et entretien AVERTISSEMENT TRÈS IMPORTANT Avant toute opération d'entretien, déconnectez l'appareil de l'alimentation électrique. Prise polarisée à 3 alvéoles et mise à la terre Broche de mise à la terre N'utilisez pas de nettoyants à jet de vapeur. L'humidité pourrait s'infiltrer à l' - Fisher and Paykel OR30SDBMX1 | User Guide - Page 49
pas correctement et s'il n'est pas possible de libérer les 2 fentes d'éventuelles incrustations ou saletés, il faut contacter le service Après-Vente. C D E S T Fig. 5.3 A B S Fig. 5.1 Fig. 5.4 Fig. 5.5 Fig. 5.7 Fig. 5.8 H Vis de fixage Répartiteur de flammes intérieur 5 Fig. 5.2 Fig. 5.6 49 - Fisher and Paykel OR30SDBMX1 | User Guide - Page 50
les vis de fixation avant et arrière. 4. Enlever la grille latérale. MONTAGE ET DÉMONTAGE DES ÉTAGÈRES SUPPORTS COULISSANTS TÉLESCOPIQUES. Lors du montage de la étagère coulissante supporte, assurez-vous que vous vous situez: - Les rails latéraux glisse sur le dessus d'une position des grilles lat - Fisher and Paykel OR30SDBMX1 | User Guide - Page 51
four est munie d'un système de blocage (dispositif de sécurité) qui permet d'éviter qu'elle ne sorte accidentellement du four. - Faire glisser sur les guides la grille (fig. 6.9); mettre la grille de façon que le barrage de protection (le plus grand) soit tourné vers l'intérieur du four. - Assurez - Fisher and Paykel OR30SDBMX1 | User Guide - Page 52
5 AVERTISSEMENT : • Ne retirez pas le tiroir lorsqu'il est chaud. • Ne retirez pas le tiroir lorsqu'il est en marche. • Assurez-vous que le tiroir est vide avant de le retirer. RETRAIT DU TIROIR 1. Ouvrez le tiroir complètement (fig. 6.11). 2. Abaissez le levier de la glissière gauche (fig. 6.12) et - Fisher and Paykel OR30SDBMX1 | User Guide - Page 53
5 Fig. 6.15 DÉPOSE DE LA PORTE DU FOUR Vous pouvez facilement enlever la porte du four en procédant comme suit : • Ouvrez complètement la porte du four (fig. 6.15a). • Ouvrez complètement le levier "A" sur les charnières gauche et droite (fig. 6.15b). • Tenez la porte tel qu'indiqué à la fig. 6.15. • - Fisher and Paykel OR30SDBMX1 | User Guide - Page 54
les instructions d'installation et le guide de guide sommaire d'entretien est fixé à la face inférieure du produit. Pour obtenir des pièces de remplacement ou de l'aide au sujet de cet appareil, composez ce numéro : Sans frais : 1-888-9 FNP USA (1-888-936-7872) ou écrivez à : Fisher & Paykel - Fisher and Paykel OR30SDBMX1 | User Guide - Page 55
- Fisher and Paykel OR30SDBMX1 | User Guide - Page 56
any time. You should therefore check with your Dealer to ensure this booklet correctly describes the product currently available. Droits réservés © Fisher & Paykel 2013. Les spécifications du produit contenues dans ce manuel s'appliquent aux modèles et produits spécifiques comme décrits à la date
-
 1
1 -
 2
2 -
 3
3 -
 4
4 -
 5
5 -
 6
6 -
 7
7 -
8
-
9
-
10
-
11
-
12
-
13
-
14
-
15
-
16
-
17
-
18
-
19
-
20
-
21
-
22
-
23
-
24
-
25
-
26
-
27
-
28
-
29
-
30
-
31
-
32
-
33
-
34
-
35
-
36
-
37
-
38
-
39
-
40
-
41
-
42
-
43
-
44
-
45
-
46
-
47
-
48
-
49
-
50
-
51
-
52
-
53
-
54
-
55
-
56
 |
 |

US CA
User guide
Guide d’utilisation
Freestanding range
Cuiseur indépendant
OR30SDBMX model
OR30SDBMX model