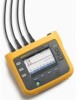
Fluke 1736 User Manual
Fluke 1736 Manual
 |
View all Fluke 1736 manuals
Add to My Manuals
Save this manual to your list of manuals |
Fluke 1736 manual content summary:
- Fluke 1736 | User Manual - Page 1
1736/1738 Power Logger Users Manual September 2015 © 2015 Fluke Corporation. All rights reserved. Specifications are subject to change without notice. All product names are trademarks of their respective companies. - Fluke 1736 | User Manual - Page 2
not warrant that software will be error free or operate without interruption. Fluke authorized resellers shall extend this warranty on new and unused products to end-user customers only but have no authority to extend a greater or different warranty on behalf of Fluke. Warranty support is available - Fluke 1736 | User Manual - Page 3
Fluke ...2 Safety Information...2 Before You Start ...5 WiFi and WiFi/BLE-to-USB Adapter 6 Magnet Hanger Kit ...7 Voltage Test Leads 7 Thin-Flexi Current Probe 8 Kensington Lock ...9 Accessories ...10 Storage ...11 Tilt Stand ...11 Power Supply ...11 How to Charge Battery 12 Navigation and User - Fluke 1736 | User Manual - Page 4
1736/1738 Users Manual Function Selection Buttons 19 Meter ...19 Live Trend ...19 Scope ...19 Harmonics ...19 Measurement Configuration 20 Connection Verification and Correction 30 Power...31 Logger ...32 Memory/Settings Button 42 Logging Sessions 42 Screen Capture ...43 Instrument Settings - Fluke 1736 | User Manual - Page 5
PC Connections ...57 WiFi Support ...57 WiFi Setup ...57 WiFi Direct Connection 58 WiFi-Infrastructure ...58 Remote Control...59 Wireless Access to PC Software 59 Fluke Connect™ Wireless System 60 Fluke Connect App 60 Wiring Configurations ...61 V, A, Hz, +...61 Power...63 Glossary ...64 General - Fluke 1736 | User Manual - Page 6
1736/1738 Users Manual iv - Fluke 1736 | User Manual - Page 7
List of Tables Table Title Page 1. Symbols ...4 2. Accessories ...10 3. Front Panel ...13 4. Connector Panel ...14 5. Power/Battery Status ...17 6. Optional License Features ...51 7. Replacement Parts ...54 8. VNC Clients ...59 9. i40s-EL Setup ...75 v - Fluke 1736 | User Manual - Page 8
1736/1738 Users Manual vi - Fluke 1736 | User Manual - Page 9
Kit ...7 4. R-Coil Operation Principle ...8 5. Test Leads with Color Coding 9 6. Power Supply and Battery ...11 7. Decal for Connector Panel ...15 8. Characteristics of a Voltage with Start Menu 42 12. Replacement Parts ...55 13. Power Logger to PC Connections 57 14. iFlex Probe Window ...74 vii - Fluke 1736 | User Manual - Page 10
1736/1738 Users Manual viii - Fluke 1736 | User Manual - Page 11
this manual show the 1738. The Logger makes these measurements: • Basic Measurements: Voltage (V), Current (A), Frequency (Hz), Phase rotation indication, 2 dc channels (supports user-supplied external sensor for other measurements such as temperature, humidity, and air speed) • Power: Active Power - Fluke 1736 | User Manual - Page 12
manual supplement, visit http://us.fluke.com/usen/support/manuals. Safety Information A Warning identifies hazardous conditions and procedures that are dangerous to the user around the terminals. • Replace the mains power cord if the insulation is damaged or if the insulation shows signs of wear. - Fluke 1736 | User Manual - Page 13
of a Product, probe, or accessory. • Keep fingers behind the finger guards on the probes. • Do not use a current measurement as an indication that a circuit is safe to touch. A voltage measurement is necessary to know if a circuit is hazardous. Power Logger Safety Information • Do not touch - Fluke 1736 | User Manual - Page 14
1736/1738 Users Manual Table 1 is a list of symbols used on the Product or in this manual. Table 1. Symbols Symbol Description Symbol Description Consult user handler per local regulations. Contact your authorized Fluke Service Center for recycling information. This product complies - Fluke 1736 | User Manual - Page 15
(includes Users Manual and PC application software, Fluke Energy Analyze Plus) Power Logger Before You Start The 1738 Power Logger also 1736 Power Logger as optional accessories. Note The WiFi/BLE adapter is included only when the radio certification is available for your country. Check www.fluke - Fluke 1736 | User Manual - Page 16
1736/1738 Users Manual WiFi and WiFi/BLE-to-USB Adapter The USB adapter enables the wireless connectivity of the Logger: • Connection to the Fluke Connect™ smartphone app for easy asset management and data sharing. • Data transfer to "Energy Analyze Plus" PC software. • Remote control via Virtual - Fluke 1736 | User Manual - Page 17
accessory shown in Figure 3 is used to: • Hang the Logger with power supply attached (use two magnets) • Hang the Logger separately (use two magnets) • Hang the power . For single phase measurements use the red and black test leads. Power Logger Before You Start Figure 3. Magnet Hanger Kit hcf058. - Fluke 1736 | User Manual - Page 18
1736/1738 Users Manual Thin-Flexi Current Probe The Thin-Flexi Current Probe works on the it is highly linear even when subjected to large currents, such as those used in electric power transmission or pulsedpower applications. A correctly formed R-coil, with equally spaced windings, is largely - Fluke 1736 | User Manual - Page 19
four current probes. Apply the clips that are appropriate for your local wiring codes on both ends of the current probe cable. See Figure 5. Power Logger Before You Start Kensington Lock A Kensington Security Slot (also called a K-Slot or Kensington lock) is part of a built-in anti-theft system. It - Fluke 1736 | User Manual - Page 20
1736/1738 Users Manual Accessories Table 2 is a list of the accessories that are available and sold separately for the Logger. The warranty on included accessories is 1 year. For the most up-to-date information on accessories, go to www.fluke.com. Table 2. Accessories Part ID Description i17xx- - Fluke 1736 | User Manual - Page 21
. The bag/case has sufficient space for the Logger and all the accessories. If the Logger is stored for an extended period of time or is not in use for a long time, you should charge the battery at least once every six months. Tilt Stand The power supply includes a tilt stand. When used, the - Fluke 1736 | User Manual - Page 22
1736/1738 Users Manual How to Charge Battery The Logger also operates on an internal rechargeable Lithium-ion battery. After you unpack and inspect the Logger, fully charge the battery before first use. Afterwards, charge the battery when the battery icon on the screen indicates that power is low. - Fluke 1736 | User Manual - Page 23
Navigation and User Interface See Table 3 for a list of the front panel controls and their functions. See Table 4 for a list of the connectors and their functions. Table 3. Front Panel 3 4 2 5 Item Control Description Power on/off and status Meter, Power, or Logger function selection - Fluke 1736 | User Manual - Page 24
1736/1738 Users Manual 5 3 2 1 4 9 Table 4. Connector Panel Item Description Current measurement inputs (3 phases + N) Voltage measurement inputs (3 phases + N) Power Cord/Measurement Line Slide-Cover Power Cord AC Input 100-240 V 50/60 Hz 15 VA Measurement Line AC Input 100- - Fluke 1736 | User Manual - Page 25
for your local wiring codes around the current and voltage inputs on the connector panel as shown in Figure 7. USA (4275029) Power Logger Navigation and User Interface Canada (4280546) Europe/UK (New STD 4280531) UK (4280554) China (4280568) Figure 7. Decal for Connector Panel hcf022.eps 15 - Fluke 1736 | User Manual - Page 26
1736/1738 Users Manual Power ON/OFF The Logger has several options for power: mains, measurement line, and battery. The front panel LED shows the status. See Table 5 for more information. Mains Power Source 1. Attach the power supply to the Logger or use the dc power cord to connect the power supply - Fluke 1736 | User Manual - Page 27
in the status bar and the power LED indicate the battery status. See Table 5. Power Logger Navigation and User Interface Table 5. Power/Battery Status Logger On Power Source Battery Symbol Power LED Color Mains Battery Battery Battery Battery Battery Power Source Mains Mains not logging logging - Fluke 1736 | User Manual - Page 28
1736/1738 Users Manual Touch Screen The touch screen lets you interact directly with off the display. The brightness is set to 100 % when the Logger is powered from mains. When powered from battery, the default brightness is set to the power-save level of 30 %. Push to toggle between the two - Fluke 1736 | User Manual - Page 29
of shown periods depends on the input frequency. Power Logger Function Selection Buttons The scope screen is helpful to: • identify the maximum peak value on current channels as a guide for the selection of the current sensor and range • identify the phase sequence of voltage and current • visually - Fluke 1736 | User Manual - Page 30
1736/1738 Users Manual to select the parameter of interest. Push (Trend only) to expand the trend chart to full screen. Harmonics Spectrum Relative to Harmonic Limits This feature is available on 1738 or 1736 with 1736 to Power Quality standards phase selection. The number of available phases - Fluke 1736 | User Manual - Page 31
Power Logger Function Selection Buttons Power Quality Select the power quality standard (available on 1738 or 1736 with 1736/Upgrade or IEEE 519/Report license) for compliance evaluation. EN 50160: voltage characteristics of electricity supplied by public distribution networks. The Logger supports - Fluke 1736 | User Manual - Page 32
1736/1738 Users Manual Topology (Distribution System) Select the appropriate system. A connection diagram for the voltage test leads and current sensors is shown on the Logger. A diagram is also available with (Connection diagram) from the Change Configuration menu. Examples of these diagrams are - Fluke 1736 | User Manual - Page 33
in Norway and in some hospitals. This would be the connection at a branch circuit. Power Logger Function Selection Buttons Split Phase Example: A North American residential installation at the service entrance. Energy Study hcf042.eps Energy Study hcf043.eps hcf042-2.eps Load Study (no voltage - Fluke 1736 | User Manual - Page 34
1736/1738 Users Manual 3-Ф Wye Example: Also called "Star" or four-wire connection. Typical commercial building power. 3-Ф Wye IT The logger has a galvanic isolation between the voltage inputs and ground based signals like USB and mains input. Example: Industrial power in countries that use the IT - Fluke 1736 | User Manual - Page 35
motors the connection can be simplified by measuring only one phase and assuming the same voltages/currents on the other phases. As an option, you can measure harmonics with a current probe on the neutral line. Power Logger Function Selection Buttons 3-Ф Delta Example: Often found in industrial - Fluke 1736 | User Manual - Page 36
1736/1738 Users Manual 2 Element Delta (Aron/Blondel) Example: Blondel or Aron connection, simplifies the connection by the use of only two current sensors. 3-Ф Delta Open Leg Example: A variant of power transformer winding type. Energy Study hcf055.eps Energy Study hcf053.eps hcf056.eps Load - Fluke 1736 | User Manual - Page 37
is used to provide an additional voltage that is half the phase to phase voltage. Power Logger Function Selection Buttons 3-Ф Delta Balanced Example: For symmetrical loads like motors, the connection is simplified with only one phase measurement and assuming the same voltages/currents on the other - Fluke 1736 | User Manual - Page 38
1736/1738 Users Manual the nominal frequency to be the same as the power line frequency, 50 Hz or 60 Hz. Use Configure the current range of the attached sensor. Three ranges are available: • Auto • Low Range stepdown transformer that has a built-in metering current transformer. The current ratio can - Fluke 1736 | User Manual - Page 39
value of 50 Ω is recommended. Resistor values >500 Ω are not supported. The resistor value is entered in the sensor configuration dialog and is a convenient method for configuration of the sensor measurement range. Power Logger Function Selection Buttons • Use up to 8 characters to configure the - Fluke 1736 | User Manual - Page 40
1736/1738 Users Manual Example 2: Fluke 80TK Thermocouple Module Output: 0.1 V/°C, 0.1 V/°F Settings in sensor configuration test, go back to the Meter mode and use the Verify Connection touch button low signal • Phase rotation for voltage and current • Inverted current probes • Wrong phase map In the - Fluke 1736 | User Manual - Page 41
virtually swap phases and invert the current inputs instead of a manual correction. 3. If the Logger is able to determine a better phase map or that creates in three phase systems a sequence with a clockwise phase rotation. Power Logger Function Selection Buttons Power - In the Power mode you can - Fluke 1736 | User Manual - Page 42
1736/1738 Users Manual The menu also provides the access to live values of Energy as: • Active Energy (Ep) Wh • Reactive Energy (EQr) in varh • Apparent Energy (Es) in VAh To display a trend chart of the last 7 minutes of Power values: 1. Push (Live-Trend). 2. Use or the cursor keys to show the - Fluke 1736 | User Manual - Page 43
Study: 1. Go to Meter > Change Configuration. This a custom file name with up to 31 characters. Power Logger Function Selection Buttons Duration and Recording Start/Stop Date and when the time duration has elapsed. Also, you can manually stop the logging session at any time. A logging session - Fluke 1736 | User Manual - Page 44
1736/1738 Users Manual Options to configure the logging session: • Duration and manual confirm the selection, the Logger will adjust the averaging production steps The Logger recommends an interval selection but the Logger will adjust the maximum demand value (average power measured over a demand - Fluke 1736 | User Manual - Page 45
inputs to support line breaks and an unlimited number of characters. Logging Session Review When a logging session is started, or when you review a completed session, the Logging home screen is shown. During active recording, this screen can be accessed when you push . Power Logger Function - Fluke 1736 | User Manual - Page 46
1736/1738 Users Manual In the "V, A, Hz, +", "Power" and "Energy" screens, use (Show Menu) or the available with the Logger and the PC software 0 available with the PC software The algorithm to calculate Voltage min/max values is in accordance to established power quality standards to detect - Fluke 1736 | User Manual - Page 47
See page 45 for more information. Power Logger Function Selection Buttons PQ Health Overview The PQ Health Overview is available on 1738 or 1736 with 1736/Upgrade or IEEE 519/Report license. % limit. For more information go to www.fluke.com and search for the white paper, Measurement Methods. 37 - Fluke 1736 | User Manual - Page 48
Users Manual The screen updates with each new average calculation interval of 10 minutes. From the PQ Health Home screen you have access to: • PQ Graphs • Harmonics • Events Quality Overview The Quality Overview screen shows an average of voltage THD and the first 25 voltage harmonics of up to three - Fluke 1736 | User Manual - Page 49
4-30: Testing and measurement techniques - Power quality measurement methods". According to this standard the Logger applies the polyphase event detection on split phase and three phase systems with the exception of the topologies 3-phase Delta balanced and the 3-phase Wye balanced. The events are - Fluke 1736 | User Manual - Page 50
1736/1738 Users Manual Supply Voltage Swells On single-phase systems, a swell begins when the voltage rises above the Time Magnitude Duration hcf071.eps Figure 8. Characteristics of a Voltage Swell On single-phase systems, a voltage dip begins when the voltage falls below the dip threshold, and - Fluke 1736 | User Manual - Page 51
.eps Figure 10. Characteristics of a Voltage Interruption Power Logger Function Selection Buttons On polyphase systems, a voltage is still classified as a dip when the voltage of only one or two phases falls below the interruption limit. Inrush Current Inrush currents are surge currents that - Fluke 1736 | User Manual - Page 52
1736/1738 Users Manual Threshold (=Trigger) } Hysteresis Duration hcf073a.eps Figure 11. Inrush Characteristics and Relation with Start Menu Details The details screen provides an overview of the logging - Fluke 1736 | User Manual - Page 53
, date and time, phase information, currency, firmware version and update, WiFi configuration, and touch screen calibration. To change the settings: 1. Push . 2. Push (Instrument Settings). Power Logger Function Selection Buttons Language The user interface of the Logger is available in Czech - Fluke 1736 | User Manual - Page 54
1736/1738 Users Manual Phase Color/Phase Labels The phase colors are configurable to match with the the time stamps of the measurement data correctly, it is required to set the time zone. The Logger adjusts automatically to DST. For example, a 1-week measurement started on 2-Nov-2013 8:00 am - Fluke 1736 | User Manual - Page 55
each field. 5. Push to confirm the change and exit the screen. Power Logger Function Selection Buttons Currency The currency symbol used for energy cost values is touch Edit Custom target. 6. Enter a three-letter currency code with the keyboard and accept with . 7. Push to confirm the - Fluke 1736 | User Manual - Page 56
1736/1738 Users Manual Status Information The screen provides information and status about the Logger, such as the serial number, attached current probes, To configure the first-time WiFi connection of a PC/smartphone/tablet to the Logger, setup the WiFi details in the Tools screen. To view the WiFi - Fluke 1736 | User Manual - Page 57
Push (Tools). 5. Push to highlight the Copy service data to USB target and push or touch Copy service data to USB target to start the copy process. Power Logger Function Selection Buttons Reset to Factory Defaults The reset function deletes all user data, such as logging sessions and screen - Fluke 1736 | User Manual - Page 58
1736/1738 Users Manual 2. Copy the firmware file (*.bin) into this folder. 3. Make sure the Logger is powered from mains and operating. 4. Plug the flash drive into the Logger appropriate voltage test lead and current probe for the different phases and neutral. 8. Attach the color clips to the - Fluke 1736 | User Manual - Page 59
delivers the sum of each phase when the phase rotation is clockwise. It is zero when the phase rotation is counter-clockwise. For more information, see the white paper, Measurement Theory Formulas, at www.fluke.com for a list of formulas. Power Logger First Measurements First Measurements At the - Fluke 1736 | User Manual - Page 60
1736/1738 Users Manual 5. Use the Thin-Flexi current probes and plug the phase A current probe into the phase A/L1 input jack on the logger, the phase B/L2 current probe into the phase B/L2 input jack on the logger, and the phase C/L3 current probe into the phase C/L3 input jack on the logger. 6. - Fluke 1736 | User Manual - Page 61
to use the Energy Analyze, see the online help for the software. Power Logger Licensed Features Licensed Features License keys are available as optional accessories to extend the functionality of the Logger with licensed features. Table 6 shows the available licensed features: Table 6. Optional - Fluke 1736 | User Manual - Page 62
1736/1738 Users Manual parameters and the detailed harmonic limits validation in firmware and software. See page 21 fluke.com. 2. Select Brand > Fluke Industrial. 3. Select Product Family > Power Quality Tools. 4. Select Model Name > Fluke 1736 or Fluke 1738. 5. Enter the serial number of the Logger - Fluke 1736 | User Manual - Page 63
Logger is used appropriately it does not require special maintenance or repair. Maintenance work may be executed only by trained and qualified personnel. This work may only be done at a company related service center within the guarantee period. See www.fluke Product. Power Logger Maintenance How - Fluke 1736 | User Manual - Page 64
1736/1738 Users Manual Calibration As an additional service we offer the regular examination and calibration of your Logger. The recommended calibration cycle is 2 years. More information about how to contact Fluke is on page 2. Service and Parts Replacement parts and accessories are listed in - Fluke 1736 | User Manual - Page 65
1 2 3 4 9 6 Power Logger Service and Parts 5 7 9 8 Figure 12. Replacement Parts hcf060.eps 55 - Fluke 1736 | User Manual - Page 66
1736/1738 Users Manual Energy Analyze Plus Software The Power Logger includes the Fluke Energy Analyze Plus software that lets you do tasks from a computer. You can: • Download campaign results for 8.x, and Windows 10 (32/64-bit) Note Windows 7 Starter edition and Windows 8 RT are not supported. 56 - Fluke 1736 | User Manual - Page 67
Power Logger to PC Connections See the Energy Analyze Plus Online Help for information about how to use the software. WiFi Support With the USB WiFi dongle you can use the Fluke WiFi/BLE adapter. Make sure the Logger is turned on and in the range of 5 to 10 meters (depends on the connection mode) to - Fluke 1736 | User Manual - Page 68
1736/1738 Users Manual WiFi Direct Connection The WiFi connection uses WPA2-PSK (pre-shared since the Logger is not a gateway to the Internet. WiFi-Infrastructure The WiFi connection requires the WiFi-Infrastructure license and supports WPA2-PSK. This connection requires a DHCP service running in - Fluke 1736 | User Manual - Page 69
. Power Logger Remote Control Configuration IP Address Direct Connection 10.10.10.1 WiFi Infrastructure use IP address shown in WiFi configuration screen Port 5900 (default) The VPN user name and password fields are not configured and can be left blank. Wireless Access to PC Software No - Fluke 1736 | User Manual - Page 70
1736/1738 Users Manual hcf61.jpg Fluke Connect™ Wireless System The Logger supports the Fluke Connect™ Wireless System (may not be available in all regions). Fluke Connect™ is a system that wirelessly connects your Fluke test tools with an app on your smartphone or tablet. It can show measurements - Fluke 1736 | User Manual - Page 71
Wiring Configurations V, A, Hz, + Power Logger Wiring Configurations Single Phase Single Phase IT Split Phase (2P-3W ) 3-Ф Wye 3-Ф Wye ● ● ● ● ● ● ● ● ◦ ● ● ◦ ● ● ● ● X f Hz ● ● ● ● ● ● Aux 1, 2 mV, user defined ● ● ● ● ● ● h01-50[3] THD VA[3] h01-50[3] THD VB - Fluke 1736 | User Manual - Page 72
Single Phase Single Phase IT Split Phase (2P-3W ) 3-Ф Wye 3-Ф Wye IT (3P-4W ) 3-Ф Wye Balance d 3-Ф Delta (3P-3W ) 2 Element Delta Aron/ Blondel 3-Ф Delta Open Leg (3P-3W ) 3-Ф High Leg Delta Balance d 3-Ф Delta 1736/1738 Users Manual V, A, Hz, + (cont.) h01-50[3] THD VCA[3] V, % % ● ● h01-50 - Fluke 1736 | User Manual - Page 73
Power Power Logger Wiring Configurations Single Phase Single Phase IT Split Phase (2P-3W ) 3-Ф Wye 3-Ф Wye IT (3P-4W ) 3-Ф Wye [1] Simulated in load studies if Unom is specified [2] Secondary displayed values [3] Not available in load studies ○ = Simulated values (derived from phase 1) 63 - Fluke 1736 | User Manual - Page 74
1736/1738 Users Manual Glossary Unbalance (u2) Supply Voltage Unbalance Condition in a three phase system in which the RMS. values of the line-to-line voltages (fundamental component), or the phase angles between consecutive line voltages, are not all equal. The unbalance value is the ratio of - Fluke 1736 | User Manual - Page 75
Power Logger General Specifications General Specifications Color LCD Display 4.3-inch active matrix color TFT, 480 pixels x 272 pixels, resistive touch panel Power/Charging/LED Indicator Warranty 1736/1738 and Power Supply 2 years (battery not included) Accessories 1 year Calibration Cycle 2 - Fluke 1736 | User Manual - Page 76
1736/1738 Users Manual Safety IEC 61010-1 IEC Mains Input Overvoltage Category II, Pollution Degree 2 Voltage all establishments other than domestic and those directly connected to a low-voltage power supply network that supplies buildings used for domestic purposes. There may be potential - Fluke 1736 | User Manual - Page 77
Power Logger Electrical Specifications Electrical Specifications Power Supply Voltage Range nominal 100 V to 500 V (85 V min to 550 V max) using safety plug input Mains Power nominal 100 V to 240 V (85 V min to 265 V max) using IEC 60320 C7 input (figure 8 power cord) Power consumption Maximum 50 - Fluke 1736 | User Manual - Page 78
1736/1738 Users Manual Auxiliary Inputs Wired Connection Number of Inputs 2 Input Range 0 V dc to ± 10 V dc Wireless Connection (requires WiFi/BLE adapter USB1 FC) Number of Inputs 2 Supported Modules Fluke Connect 3000 series Acquisition 1 reading/s Scale factor Format: mx + b (Gain and - Fluke 1736 | User Manual - Page 79
-4-30 Class S, IEC62586-1 (PQI-S device) Power IEEE 1459 Power Quality Compliance 1738 or 1736 with 1736/Upgrade license EN50160 (for measured parameters) Interfaces USB-A File transfer via USB Flash Drive, Firmware updates, max. supply current: 120 mA WiFi Supported modes Direct connection and - Fluke 1736 | User Manual - Page 80
1736/1738 Users Manual Accuracy at Reference Conditions Parameter Range Current mV 150 A 1500 A 300 A 3000 A 600 A 6000 A 4 A 40 A 42.5 Hz to 69 Hz ±10 Vdc 1000 V defined by accessory 1000 % 1000 % 1000 % 100 % Max. Resolution 0.1 V 0.01 mV 0.1 mV 0.01 mV 0.1 mV 0.01 A 0.1 A 1 A 10 A 1 - Fluke 1736 | User Manual - Page 81
Max. Resolution PF, DPF Phase (Voltage to Current) [1] [1] Only for calibration laboratories ±0.2 ° Power/Energy iFlex1500-12 iFlex3000-24 150 A/1500 A 150 kW/1.5 MW 0.01 kW/0.10 kW 300 A/3000 A 300 kW/3 MW 1 kW/10 kW 0.01 ±0.28 ° Power Logger Electrical Specifications iFlex6000-36 600/6000 - Fluke 1736 | User Manual - Page 82
1736/1738 Users Manual Parameter Active Power P Active Energy Ea Influence Quantity PF ≥0.99 0.1≤ PF - Fluke 1736 | User Manual - Page 83
% × 120 × 16 + 7.5 ) = ±30.54 VA Reactive/non-active power uncertainty : = ±(2.5 2.5 % × 120 × 16 ) = ±48 In case of a measured voltage that is >250 V, the additional error is calculated with: = 0.015 % × = 0.015 % × 1000 × 1500 = 225 W / VA / var Power Logger Electrical Specifications 73 - Fluke 1736 | User Manual - Page 84
1736/1738 Users Manual iFlex Probe Specifications Measuring range iFlex 1500-12 1 to 150 A ac / 10 to in reference to external current (with cable >100 mm from the head-coupling and r-coil 40 dB Phase shift 0.5° C B A iFlex1500-12: 88mm iFlex3000-24: 185mm iFlex6000-36: 282mm hcf057.eps Figure - Fluke 1736 | User Manual - Page 85
III/ 300 V CAT IV Storage Altitude 12 km (40,000 ft) Warranty 1 year Power Logger Electrical Specifications i40s-EL Current Clamp Specifications See Table 9 for setup instructions. Table 9. i40s-EL Setup 1 12 13 AC C6U00RVRECNASTTERICIIIALLANMUMPBER 14 hcf027.eps Single Insulated current - Fluke 1736 | User Manual - Page 86
1736/1738 Users Manual Phase shift
-
 1
1 -
 2
2 -
 3
3 -
 4
4 -
 5
5 -
 6
6 -
 7
7 -
8
-
9
-
10
-
11
-
12
-
13
-
14
-
15
-
16
-
17
-
18
-
19
-
20
-
21
-
22
-
23
-
24
-
25
-
26
-
27
-
28
-
29
-
30
-
31
-
32
-
33
-
34
-
35
-
36
-
37
-
38
-
39
-
40
-
41
-
42
-
43
-
44
-
45
-
46
-
47
-
48
-
49
-
50
-
51
-
52
-
53
-
54
-
55
-
56
-
57
-
58
-
59
-
60
-
61
-
62
-
63
-
64
-
65
-
66
-
67
-
68
-
69
-
70
-
71
-
72
-
73
-
74
-
75
-
76
-
77
-
78
-
79
-
80
-
81
-
82
-
83
-
84
-
85
-
86
 |
 |

September 2015
© 2015 Fluke Corporation. All rights reserved. Specifications are subject to change without notice.
All product names are trademarks of their respective companies.
1736/1738
Power Logger
Users Manual