Fluke 810 User Manual
Fluke 810 Manual
 |
View all Fluke 810 manuals
Add to My Manuals
Save this manual to your list of manuals |
Fluke 810 manual content summary:
- Fluke 810 | User Manual - Page 1
810 Vibration Tester Users Manual January 2010, Rev. 2, 5/15 © 2010-2015 Fluke Corporation. All rights reserved. Specifications are subject to change without notice. All product names are trademarks of their respective companies. - Fluke 810 | User Manual - Page 2
to you. The same warranty applies to the Tachometer and the Sensor but for one year from the date of shipment. Parts, product repairs, and services are warranted for 90 days. This warranty extends only to the original buyer or end-user customer of a Fluke authorized reseller, and does not apply to - Fluke 810 | User Manual - Page 3
Table of Contents Chapter Title Page 1 Overview ...1-1 Introduction ...1-3 Features ...1-3 How to Contact Fluke ...1-4 Safety ...1-4 Rotating Equipment 1-5 Tachometer ...1-5 Heat Sink ...1-6 Symbols ...1-6 Unpack and Inspect...1-7 Storage...1-9 Battery...1-9 Accessories ...1-11 i - Fluke 810 | User Manual - Page 4
810 Users Manual 2 Specifications ...2-1 Vibration Tester Specifications 2-3 Diagnostic Specifications 2-3 Electrical Specifications 2-3 General Specifications 2-4 Sensor Specifications ...2-5 Tachometer Specifications 2-6 Viewer Software Requirements 2-7 3 Getting Started...3-1 - Fluke 810 | User Manual - Page 5
Contents (continued) 4 Operation ...4-1 Start the Tester ...4-3 Create a New Machine Setup 4-3 Machine Setup ...4-4 Motor Input (Driver) Information 4-5 RPM Entry ...4-7 Coupling Information 4-7 Transmission with Closed Coupling 4-8 Transmission without Closed Coupling 4-9 Driven - Fluke 810 | User Manual - Page 6
810 Users Manual Overall Vibration ...Severity Scale ...Fault Details and Vibration Spectrum How to Access the Memory View by Machine Setup View by Measurement Date View by Last - Fluke 810 | User Manual - Page 7
...5-34 Spectra ...5-35 6 Maintenance ...6-1 Introduction ...6-3 How to Clean...6-3 Sensor Care ...6-3 Battery Replacement...6-3 Vibration Tester Upgrades 6-5 How to Troubleshoot ...6-6 Appendices A Frequently Asked Questions A-1 B Warning and Error Messages B-1 C Glossary ...C-1 v - Fluke 810 | User Manual - Page 8
810 Users Manual vi - Fluke 810 | User Manual - Page 9
List of Tables Table Title Page 1-1. Symbols...1-6 1-2. Accessories ...1-11 3-1. Front Panel ...3-4 3-2. Navigation Softkey Functions 3-5 3-3. Accessory Connectors ...3-6 3-4. Tester Settings ...3-12 4-1. New Machine Setup Functions 4-4 4-2. Motor Input Options ...4-6 4-3. Closed Coupling - Fluke 810 | User Manual - Page 10
810 Users Manual 4-9. Gearbox Options for the Transmission 4-14 4-10. Driven Component Options 4-15 4-11. Drive Options for Date Functions 4-40 5-1. Viewer Software Navigation Menus 5-7 5-2. Application Settings ...5-10 5-3. View Machine Setup Utilities 5-28 6-1. Troubleshooting ...6-6 viii - Fluke 810 | User Manual - Page 11
Tester 1-8 1-2. How to Charge the Battery ...1-10 3-1. Front Panel ...3-3 3-2. Accessory Connectors ...3-6 3-3. Sensor Setup and Connection 3-8 3-4. Tachometer Setup and Connection 3-10 4-1. Sensor Location ...4-21 4-2. Axes Orientation ...4-22 4-3. Sensor Mounting Options ...4-23 5-1. Tester to - Fluke 810 | User Manual - Page 12
810 Users Manual x - Fluke 810 | User Manual - Page 13
Chapter 1 Overview Title Page Introduction ...1-3 Features ...1-3 How to Contact Fluke ...1-4 Safety ...1-4 Rotating Equipment 1-5 Tachometer ...1-5 Heat Sink ...1-6 Symbols ...1-6 Unpack and Inspect...1-7 Storage...1-9 Battery ...1-9 Accessories ...1-11 1-1 - Fluke 810 | User Manual - Page 14
810 Users Manual 1-2 - Fluke 810 | User Manual - Page 15
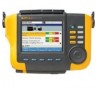
Fluke 810 Vibration Tester with diagnostic technology (the Tester) helps you quickly identify and prioritize mechanical problems troubleshooting problem Fluke recommends you take the self-paced training program on the Fluke website, www.fluke.com. The site also has additional training programs, guides - Fluke 810 | User Manual - Page 16
world: +1-425-446-5500 Or, visit Fluke's website at www.fluke.com. To register your product, visit http://register.fluke.com. To view, print, or download the latest manual supplement, visit http://us.fluke.com/usen/support/manuals. Safety In this manual, a Warning identifies hazardous conditions and - Fluke 810 | User Manual - Page 17
for the Tester: • Use only as specified in this manual or the protection provided by the Tester might be impaired. Tachometer: • Do not point laser beam directly at eyes. • Do not operate around explosive gas, vapor or dust. • Do not open. The Tachometer does not contain any user-serviceable - Fluke 810 | User Manual - Page 18
; refer to manual Battery condition This product contains a Lithium-ion battery. Do not mix with the solid waste stream. Spent batteries should be disposed of by a qualified recycler or hazardous materials handler per local regulations. Contact your authorized Fluke Service Center for - Fluke 810 | User Manual - Page 19
in your purchase of the Tester: Vibration Tester Storage Case Smart Battery Pack Smart Battery Pack Charger and Adapters Shoulder Strap Tachometer and Pouch Sensor Sensor Magnet Mount Sensor Quick Disconnect Cable Sensor Mounting Pads (10-pack) Adhesive Mini USB to USB Cable - Fluke 810 | User Manual - Page 20
810 Users Manual 1 F1 F2 F3 F4 F5 SAVE SETUP MEMORY MEASURE INFO DIAGNOSE INSTRUMENT SETUP ENTER 2 3 4 5 7 8 1-8 10 6 9 12 Figure 1-1. Items Included with the Tester 11 13 14 15 gbk10.eps - Fluke 810 | User Manual - Page 21
Storage When not in use, keep the Tester in the protective storage case. The case has sufficient space for the Tester and all accessories. Battery The Tester operates on an internal rechargeable Lithium-ion battery. After you unpack and inspect the Tester, fully charge the battery before the first - Fluke 810 | User Manual - Page 22
810 Users Manual 1-10 Figure 1-2. How to Charge the Battery gbk03.eps - Fluke 810 | User Manual - Page 23
lists the accessories that are available and sold separately for the Tester. Table 1-2. Accessories Model Description Part Number 810T Tachometer 3530819 810S Sensor 3530828 810QDC Quick Disconnect Cable 3530837 SBP810 Smart Battery Pack 3530843 810SMM Sensor Magnet Mount 3530862 - Fluke 810 | User Manual - Page 24
810 Users Manual 1-12 - Fluke 810 | User Manual - Page 25
Chapter 2 Specifications Title Page Vibration Tester Specifications 2-3 Diagnostic Specifications 2-3 Electrical Specifications 2-3 General Specifications 2-4 Sensor Specifications...2-5 Tachometer Specifications 2-6 Viewer Software Requirements 2-7 2-1 - Fluke 810 | User Manual - Page 26
810 Users Manual 2-2 - Fluke 810 | User Manual - Page 27
2 Specifications Vibration Tester Specifications Vibration Tester Specifications Specifications are subject to change without notice. Diagnostic Specifications Standard Fault Detection Unbalance, Looseness, Misalignment and Bearing Failures Analysis for Motors, Fans, Blowers, Belts and Chain - Fluke 810 | User Manual - Page 28
810 Users Manual General Specifications Size 7.30 in × 2.76 in × 10.52 in (18.56 cm x 7. Connections Triaxial sensor connection 4 pin M12 Connector Single axis sensor connection BNC Connector Tachometer connection Mini DIN 6 pin Connector PC connection Mini 'B' USB (2.0) Connector Battery - Fluke 810 | User Manual - Page 29
2 Specifications Sensor Specifications Electromagnetic Compatibility International IEC 61326-1: Portable; CISPR 11: Group 1, Class A Group 1: Equipment has intentionally generated and/or uses conductively-coupled radio frequency energy that is necessary for the internal function of the equipment - Fluke 810 | User Manual - Page 30
810 Users Manual Case Material 316L stainless steel Mounting 10-32 capacitive socket head screw, 2- g.......... 100 μg/gauss Sealing Hermetic Temperature Range 58 °F to 248 °F (-50 °C to 120 °C) ±7 % Tachometer Specifications Dimensions 1.125 in x 4.80 in (2.86 cm x 12.19 cm) Weight 3.4 oz (96 - Fluke 810 | User Manual - Page 31
2 Specifications Viewer Software Requirements Interface 6 Pin Mini DIN Cable Length 19.586 in (50 cm) Tachometer Accessories Reflective tape 0.59 in × 20.67 in (1.5 cm x 52.5 cm) Viewer Software Requirements Minimum Hardware 1 GB RAM Operating System Windows XP, Vista, Windows 7, Windows 8.1 - Fluke 810 | User Manual - Page 32
810 Users Manual 2-8 - Fluke 810 | User Manual - Page 33
Connectors 3-6 Start the Tester ...3-7 Sensor Setup ...3-7 Compatible Sensors 3-7 How to Connect the Fluke Sensor 3-8 Sensor Care and Handling 3-9 Tachometer Setup...3-9 How to Measure RPM with the Tachometer 3-9 Laser Safety Precautions 3-10 How to Access Help ...3-11 Instrument Setup ...3-11 - Fluke 810 | User Manual - Page 34
810 Users Manual 3-2 - Fluke 810 | User Manual - Page 35
Introduction This chapter helps you to understand and become familiar with the user interface, connections, and accessories. Navigation and User Interface Figure 3-1 shows the front panel of the Vibration Tester. Table 3-1 lists the front-panel controls and their functions. 3 Getting Started - Fluke 810 | User Manual - Page 36
810 Users Manual Item Table 3-1. Front Panel Control Description Turns the Tester on or off. Shows the Machine Setup options: Set up new Machine, Copy Machine Setup, Change a - Fluke 810 | User Manual - Page 37
How to Use the Dial The Dial has multiple functions. Turn the Dial clockwise or counterclockwise to move the cursor or highlight. Push the Dial to make a selection. How to Use the Function Softkeys Along the bottom of the display, a row of labels shows the available functions. Push a softkey, - Fluke 810 | User Manual - Page 38
810 Users Manual Accessory Connectors Figure 3-2 shows the connector panel of the Tester. Table 3-3 is a list of descriptions for each connector on the Tester. 1 2 3 4 Figure 3-2. Accessory Connectors gbk01.eps Item Table 3-3. Accessory Connectors Connector Description Tachometer - Fluke 810 | User Manual - Page 39
results from detailed calibration information • Reduced configuration time without manual data entry • Sensor calibration tracking with the last is highly recommended to use a Fluke Triaxial Sensor with the Tester. Using a Sensor other than a Fluke Triaxial Sensor will result in misleading - Fluke 810 | User Manual - Page 40
810 Users Manual How to Connect the Fluke Sensor To connect and set up a triaxial Sensor: 1. Attach the cable to the Sensor and tighten the threaded cable sleeve. See Figure 3-3. 2. Connect the cable - Fluke 810 | User Manual - Page 41
) of the rotating machine under test. If the RPM is unknown, you can use the non-contact type laser Tachometer to measure the RPM. Note Fluke recommends the use of a Tachometer for variable-frequency drives (VFD) to determine the running speed under varying load conditions. How to Measure RPM with - Fluke 810 | User Manual - Page 42
810 Users Manual gbk06.eps Figure 3-4. Tachometer Setup and Connection 4. When the RPM entry screen appears on the display, the power button on the Tachometer lights to indicate that the Tester is ready for RPM measurement. 3-10 5. Push and hold the trigger button of the Tachometer to start - Fluke 810 | User Manual - Page 43
not open the Tachometer. The Tachometer has no user serviceable parts. • When not in use, always place the Tachometer in its protective Asked Questions) • Measurement FAQ • Diagnosis FAQ • Glossary • Troubleshooting 3 Getting Started How to Access Help Instrument Setup Push or Fluke Service. 3-11 - Fluke 810 | User Manual - Page 44
810 Users Manual Settings To edit the Tester settings in Table 3-4, select the Settings option. Push Next Page (F2) to move down the screen and edit the additional - Fluke 810 | User Manual - Page 45
3 Getting Started Instrument Setup Option Table 3-4. Tester Settings (cont.) Description Backlight duration Scroll and select to set the delay time for the display backlight. If no key is pushed during the set time, the backlight turns off to save battery power. The backlight turns on when any - Fluke 810 | User Manual - Page 46
810 Users Manual Clear Memory Select the Clear Memory option on the Instrument Setup screen to erase all measurement and diagnosis data. The Tester prompts you to clear - Fluke 810 | User Manual - Page 47
Chapter 4 Operation Title Page Start the Tester ...4-3 Create a New Machine Setup 4-3 Machine Setup ...4-4 Motor Input (Driver) Information 4-5 RPM Entry ...4-7 Coupling Information 4-7 Transmission with Closed Coupling 4-8 Transmission without Closed Coupling 4-9 Driven Component...4-10 - Fluke 810 | User Manual - Page 48
810 Users Manual Before You Measure...4-20 Select Measurement Locations 4-20 Total Number of Measurement Locations 4-21 Sensor Orientation ...4-22 Sensor Mounting...4-23 How to Measure Vibration 4-25 - Fluke 810 | User Manual - Page 49
Start the Tester Note • Before using the Tester for the first time, charge the battery for at least 3 hours. For charging procedure, see Battery. • Before using the Tester, make sure that there is sufficient battery charge and free memory. Push to turn on the Tester. At power up, the Tester - Fluke 810 | User Manual - Page 50
810 Users Manual 3. Use the Dial to highlight characters. 4. Push the Dial to select a character. the Tester has to understand the layout and components of the machine. The Machine Setup wizard guides you through several questions about the profile of the machine. These machine setup values must be - Fluke 810 | User Manual - Page 51
in the Tester discern different fault conditions. The motor nameplate or manual also lists the running speed. If an ac motor uses a ) due to variable loads. To obtain an accurate RPM value, use the Tachometer provided with the Tester or obtain the frequency value from the drive controller itself - Fluke 810 | User Manual - Page 52
810 Users Manual Selection Table 4-2. Motor Input Options Option Description AC Select Enter Speed in RPM RPM Entry screen RPM Entry screen appears. Use the Tachometer to get the RPM. Or, if you know the RPM, enter the value manually. See RPM Entry. Enter nominal HP (US) or Enter nominal kW - Fluke 810 | User Manual - Page 53
RPM entry screen opens. Use the Tachometer to measure the RPM. See Tachometer Setup to set up the Tachometer and measure the RPM. After you set the RPM value, the Tester goes back to the Machine Setup wizard. To manually enter the RPM value: 1. Push Manual Entry (F2). The Tester displays a numeric - Fluke 810 | User Manual - Page 54
810 Users Manual Transmission with Closed Coupling Table 4-3 is a list of the options for a transmission with a closed coupling. Selection Option Table 4-3. Closed Coupling Transmission Options Action Option Action - Fluke 810 | User Manual - Page 55
4 Operation Machine Setup Transmission without Closed Coupling Table 4-4 is a list of the options for a transmission without a closed coupling. Selection Table 4-4. Transmission without Closed Coupling Options Option Description Coupling between motor Yes and next component No Is there a - Fluke 810 | User Manual - Page 56
810 Users Manual Driven Component Depending on the component selection, the options for the details through 13 Description Select the bearing type in the pump. Scroll and identify the impeller support. This is optional information. Push Keyboard to access the numeric keyboard. Enter the number for - Fluke 810 | User Manual - Page 57
Selection Description Driven component bearing type Roller Journal Select the bearing type in the fan. Fan is supported by Two bearings Overhung Scroll to identify the fan support. Number of fan blades (optional) Numeric keyboard entry This is optional information. Push Keyboard to access - Fluke 810 | User Manual - Page 58
810 Users Manual Compressor Table 4-7 is a list of the compressor options. Different setup options are available based on the compressor selection. Table 4-7. Compressor Options for Driven Components Selection - Fluke 810 | User Manual - Page 59
, gear tooth counts, or gear ratios. If selecting the shaft speed method for single speed changers, it is critical to use the same method (manual or tachometer) on both input and output shafts. Table 4-9 is a list of the gearbox options. Depending on the known components, more options appear for the - Fluke 810 | User Manual - Page 60
810 Users Manual Table 4-9. Gearbox Options for the Transmission Selection Option Action Option Description Gearbox Roller bearing type Journal Select the gearbox bearing type Number of 1 Scroll and - Fluke 810 | User Manual - Page 61
4 Operation Machine Setup Next, the options for the Driven components show on the Tester screen. See Table 4-10. Table 4-10. Driven Component Options Option Selection Description Is there a flexible coupling between Yes gearbox and next component: No Configure the setup with or without a - Fluke 810 | User Manual - Page 62
810 Users Manual Belt Drive Obtaining the RPM value using the laser tachometer is the preferred method for determining running speed Output shaft speed Tooth count (optional) Pump RPM entry screen appears Use the Tachometer to set the RPM. Fan Compressor Or, you can enter the speed with the - Fluke 810 | User Manual - Page 63
After you enter all the machine information, the Change Machine Name screen appears. Table 4-12 is a list of the softkey functions for the Change Machine Name screen. Table 4-12. Change Machine Name Softkey Function Previous Page Go back to the previous screen. Review Summary Go to the first - Fluke 810 | User Manual - Page 64
810 Users Manual Copy an Existing Machine Setup When you have multiple machines to test that are identical to one another, you can create one Machine Setup and - Fluke 810 | User Manual - Page 65
Edit the Saved Machine Setup To change a Machine Setup: 1. Push to view the New Machine Setup screen options: • Set up new machine • Copy Machine Setup • Change a machine setup 2. Select the Change a Machine Setup option. The screen shows a list of the saved Machine Setups. 3. Or, push Saved - Fluke 810 | User Manual - Page 66
810 Users Manual Before You Measure Sensor orientation is critical to ensure repeatable data and consistent diagnoses over time. Once you have mounted the Sensor onto the machine - Fluke 810 | User Manual - Page 67
to the end of the drivetrain. Take measurements in this same order, beginning with the free end of the motor and working downstream. See Figure 4-1. Fluke recommends that you make two measurements for each component in the drivetrain (unless the bearings are less than 36 in (1 m) apart). For optimum - Fluke 810 | User Manual - Page 68
810 Users Manual Sensor Orientation Consistent Sensor orientation is critical to ensure repeatable data and consistent diagnoses over time. The Tester uses a triaxial Sensor that combines three transducers - Fluke 810 | User Manual - Page 69
Sensor Mounting The Tester's diagnoses are largely dependent upon the quality of vibration signal it receives from the machinery under test. The method used to mount a Sensor to the machine directly affects the quality, accuracy, and range of the signal, see Figure 4-3. In general, permanent mounts, - Fluke 810 | User Manual - Page 70
810 Users Manual Stud Mounting Stud mounting is typical for permanently mounted applications. Next to a stud mount, best diagnostic quality. Disadvantages: Less practical for "walkaround" troubleshooting due to time needed to screw/unscrew the Sensor from mounting pad. The advantages and - Fluke 810 | User Manual - Page 71
machine is running in a steady state and at normal operating temperature. Fluke recommends that you make two measurements for each component in the drivetrain RPM, choose a method: • Retake the RPM measurement. • Manually enter the RPM. • Push Skip to skip the RPM Entry screen. The Tester configures the - Fluke 810 | User Manual - Page 72
810 Users Manual Note Because the current running speed is so critical for correct diagnosis, it is a best practice to use a Tachometer on VFD motor controllers. Or, refer to the frequency on the motor controller label before you take a measurement. If a single axis Sensor is detected, the - Fluke 810 | User Manual - Page 73
Note The vibration from a drivetrain may change depending on the load and ambient temperature of the motor. You must finish a measurement within 30 minutes. If not, the "Measurement Timeout" message appears and redirects you to select the Sensor orientation and location. 8. Push Enter (F3) to select - Fluke 810 | User Manual - Page 74
810 Users Manual 9. Push Enter (F3) to select the Sensor orientation. Depending on the Sensor orientation selection, another screen appears. The Tester uses the driveshaft (depicted as a thick - Fluke 810 | User Manual - Page 75
11. Use the Dial and select the alignment of the Sensor cable as it relates to the machine driveshaft. The red line (or dot) on the screen graphic represents the driveshaft. After you select the orientation, the measurement screen appears. gbk60.bmp Note The vibration from a drivetrain may change - Fluke 810 | User Manual - Page 76
810 Users Manual 12. Push Measure (F3) to measure from the selected location. The Tester checks for the Sensor cable connection. If the connection is good, the Tester - Fluke 810 | User Manual - Page 77
16. Select the placement of the Sensor. 17. In the next screen, select the orientation of the Sensor. gbk63.bmp Table 4-19 is a list of the softkey functions for the Sensor placement. 4 Operation How to Measure Vibration Table 4-19. Sensor Placement Functions Softkey Function Change Go back to - Fluke 810 | User Manual - Page 78
810 Users Manual How to Diagnose Once the Machine Setup is complete and measurement information is for the machine. Fault Types The Tester can identify four of the most common mechanical problems: • Bearing Failures • Misalignment • Unbalance • Looseness The diagnostic engine can identify other - Fluke 810 | User Manual - Page 79
2. Push Diagnose (F3). Or, push the Dial to start the Diagnosis. The Tester analyses the measurement data and displays the diagnostic results. gbk265.bmp Table 4-20 is a list of the softkey functions for the Diagnosis: Faults screen. 4 Operation How to Diagnose Table 4-20. Diagnosis Faults - Fluke 810 | User Manual - Page 80
810 Users Manual Severity Scale The scale is an indication of severity for any particular fault machine condition. Slight Moderate Serious Extreme gbk13.eps Note The severity scale - Fluke 810 | User Manual - Page 81
• Extreme (Days) - Consider shutting down the equipment and taking repair action now to avoid catastrophic failure. There is likely other physical evidence of the fault in terms of noise, higher bearing temperatures or visible movement. Retest the machine within a short period to confirm finds. To - Fluke 810 | User Manual - Page 82
810 Users Manual To view fault information: 1. In the fault list, use the Dial to highlight the fault. 2. Push Details (F3). The Tester displays a table of cited peaks - Fluke 810 | User Manual - Page 83
Table 4-21. Cited Peak Details Label Description Location of fault. Bearing locations are Loc numbered 1 to n, from free end of motor (1) to end of drivetrain (n). Axis Direction of vibration signal: Axial, Radial, or Tangential. Amplitude Vibration signal amplitude cited from this - Fluke 810 | User Manual - Page 84
810 Users Manual Table 4-22. Diagnosis Spectra Functions Softkey Function Back Go to the previous screen. Zoom In Zoom into the spectra. Push Zoom Out to expand the - Fluke 810 | User Manual - Page 85
View by Machine Setup Select View by machine setup, to view records sorted by the Machine Setup. Use the Dial to highlight a specific setup and push View (F4) to see the records for that setup. Table 4-23 is a list of the softkey functions for the Existing Machine Setup screen. Table 4-23. Existing - Fluke 810 | User Manual - Page 86
810 Users Manual Table 4-25 is a list of the softkey functions of View by Measurement Date and Time screen. Table 4-25. View by Measurement Date Functions Softkey Function - Fluke 810 | User Manual - Page 87
Chapter 5 Viewer Software Title Page Introduction ...5-3 System Requirements ...5-3 PC Connections ...5-3 Install the Viewer Software 5-5 Uninstall the Viewer Software 5-5 Navigation ...5-6 Preferences ...5-9 Application Settings 5-10 Upgrades ...5-11 Data Transfer ...5-11 Import Machine Setup - Fluke 810 | User Manual - Page 88
810 Users Manual View Machine Setups 5-26 View Diagnosis ...5-29 View Other Data Files 5-33 Time Waveform...5-34 Spectra ...5-35 5-2 - Fluke 810 | User Manual - Page 89
and the Tester as shown in Figure 5-1. See the marking on the ends of the cable for identifying the Type-A and Mini-B ends. 3. Install the supporting software and Viewer software (if not installed already). See Install the Viewer Software. 5-3 - Fluke 810 | User Manual - Page 90
810 Users Manual Figure 5-1. Tester to PC Connections gbk05.eps 5-4 - Fluke 810 | User Manual - Page 91
display. 3. Click Install to start the installation and then follow the instructions on the screen to install the software. You can accept the installation the Viewer software: 1. Go to Start > All Programs > Fluke 810. 2. Click Uninstall Viewer Software. To uninstall Microsoft .Net Framework - Fluke 810 | User Manual - Page 92
810 Users Manual Navigation To start the Viewer software: 1. Start the computer. 2. Click Start on the task bar. 3. Click All Programs. 4. Click Fluke 810 and then Viewer Software. Or, double-click the Viewer Software icon on the Desktop. The startup screen shows on the display. 5-6 gbk85.bmp - Fluke 810 | User Manual - Page 93
5 Viewer Software Navigation Table 5-1 is a list of the menu options and descriptions for the Viewer software. Menu Option Transfer Machine Setup Table 5-1. Viewer Software Navigation Menus Description • Download the Machine Setup data from the Tester to the computer • Upload the Machine Setup - Fluke 810 | User Manual - Page 94
810 Users Manual Menu Option View Diagnosis Preferences Help Table 5-1. Viewer Software Navigation Menus (cont.) Description • View diagnosis • View faults, recommendations, and cited peaks of a measurement • View spectra - Fluke 810 | User Manual - Page 95
Preferences Click the Preferences menu to open the submenus. 5 Viewer Software Preferences gbk121c.jpg 5-9 - Fluke 810 | User Manual - Page 96
810 Users Manual Application Settings You can change the display language, date format, and time format with the Application Settings. To open the Application Settings pane: click Application - Fluke 810 | User Manual - Page 97
Upgrades Periodically, upgrades are available for the Tester. Contact Fluke for upgrade availability. If you have registered your Tester purchase, Fluke automatically sends you an upgrade notice. For complete instructions on how to do an upgrade, see Maintenance. Data Transfer The Viewer software - Fluke 810 | User Manual - Page 98
810 Users Manual 5-12 gbk88.bmp - Fluke 810 | User Manual - Page 99
Import Machine Setup You can import the Machine Setups from the Tester to the Viewer software with the Import Machine Setup submenu. To import the Machine Setups: 1. Click Import Machine Setup. The Import Machine Setup pane shows on the right side of the window. By default, the Import Machine - Fluke 810 | User Manual - Page 100
810 Users Manual 5-14 gbk89.bmp - Fluke 810 | User Manual - Page 101
Export Machine Setup You can export the Machine Setups from the Viewer software to the Tester with the Export Machine Setup submenu. To export the Machine Setups from the Viewer software: 1. Click Export Machine Setup. The Export Machine Setup pane shows on the right side of the window. The - Fluke 810 | User Manual - Page 102
810 Users Manual 5-16 gbk91.bmp - Fluke 810 | User Manual - Page 103
Import Diagnostic Data You can import the machine diagnosis data from the Tester to the Viewer software for enhanced views of the data. For example, you can magnify the spectra data to see more detail. To import the diagnosis data: 1. Click Import Diagnostic Data. The Import Diagnostic Data pane - Fluke 810 | User Manual - Page 104
810 Users Manual 5-18 gbk93.bmp - Fluke 810 | User Manual - Page 105
the export is done. 7. Click OK. In the destination folder, data is saved in the .mdf database file format. See View Other Data Files for instructions about how to open the .mdf database files. 5-19 - Fluke 810 | User Manual - Page 106
810 Users Manual 5-20 gbk95.bmp - Fluke 810 | User Manual - Page 107
Export Faults Data You can export the severity score for each fault and view the files in PDF or Excel format. These formats are easy to read, send to a printer, and send by email. In addition, you can track data in Excel to see faults over time. Note Adobe Reader software must be installed on the - Fluke 810 | User Manual - Page 108
810 Users Manual 5-22 gbk122.jpg - Fluke 810 | User Manual - Page 109
3. To save as a PDF: a. Click . b. Browse to a location and save PDF file. 4. To save as an Excel spreadsheet: a. Click . b. Browse to a location and save the Excel file. c. You can export multiple machines and dates, then cut and paste cells into a customized Excel chart to show trends over time. - Fluke 810 | User Manual - Page 110
810 Users Manual 5-24 gbk126.bmp - Fluke 810 | User Manual - Page 111
and then export to the Tester. The setup sequence in the Viewer software closely follows that of the Tester. Note See "Operation" for complete instructions about Machine Setup. Set Up a New Machine You can make a new Machine Setup with the Viewer software. The Machine Setup wizard walks you through - Fluke 810 | User Manual - Page 112
810 Users Manual View Machine Setups You can see all the Machine Setups you make with the Viewer software in one window. The Viewer software also shows if - Fluke 810 | User Manual - Page 113
Table 5-3 is a list of the utilities for the View Machine Setup window. 5 Viewer Software Machine Setup gbk103.bmp 5-27 - Fluke 810 | User Manual - Page 114
810 Users Manual Utility (Edit) (Copy) (Delete) (Export) Table 5-3. View Machine Setup Utilities Function Click to open the Machine Setup wizard and change the Machine Setup. Click Finish - Fluke 810 | User Manual - Page 115
more about how to review the diagnostic reports and how to use the Viewer software with the training programs, guides, and videos on the Fluke website, www.fluke.com. 5 Viewer Software View Diagnosis To view diagnosis data: 1. Import the diagnosis data, see Import Diagnostic Data. 2. Click View - Fluke 810 | User Manual - Page 116
810 Users Manual 5-30 gbk104.bmp - Fluke 810 | User Manual - Page 117
The left side of the pane is a list of the available diagnosis data. This list is set up by the Tester name: • Top level shows the Tester name • Click + beside the Tester name to show the tests (Test ID) that use that Tester • Click + beside the Test ID to show the Measurement ID • Under the - Fluke 810 | User Manual - Page 118
810 Users Manual 6. In the Select the severity field, click the severity level as Extreme, Serious, Moderate, or Slight. This filter shows a list of the faults with that - Fluke 810 | User Manual - Page 119
a cited peak in the list to see its graph. The Recommendations field shows a prioritized list of troubleshooting tips for the faults. gbk108.bmp 5 Viewer Software View Diagnosis To make a PDF of the diagnosis data. See View Diagnosis for more instructions. 4. Click Restore Main Database. 5-33 - Fluke 810 | User Manual - Page 120
810 Users Manual Time Waveform A time waveform is available for each test location. You must configure the system to save the raw time waveform. With advanced wave form analysis training, you can use pattern recognition in the time waveform to detect different problems. To open the time waveform - Fluke 810 | User Manual - Page 121
To zoom in and zoom out the time waveform: 1. Click on the waveform image. 2. Rotate the scroll button of the mouse. To change the units: 1. Click the X-axis label. 2. Click the Y-axis label. To go back to the View Diagnosis menu, click . Spectra A 2-dimensional frequency plot, or spectra, is - Fluke 810 | User Manual - Page 122
810 Users Manual 5-36 gbk109.bmp - Fluke 810 | User Manual - Page 123
Chapter 6 Maintenance Title Page Introduction ...6-3 How to Clean...6-3 Sensor Care ...6-3 Battery Replacement...6-3 Vibration Tester Upgrades 6-5 How to Troubleshoot ...6-6 6-1 - Fluke 810 | User Manual - Page 124
810 Users Manual 6-2 - Fluke 810 | User Manual - Page 125
. Do not hit, shake, or let the Tester fall as this can cause the setup parameters to change. Caution No part of the Tester is serviceable by the user. Do not attempt to open the Tester. Caution To prevent damage to the Tester or any performance loss, do not put the - Fluke 810 | User Manual - Page 126
810 Users Manual Figure 6-1. Battery Replacement gbk12.eps 6-4 - Fluke 810 | User Manual - Page 127
notice to you automatically. To upgrade the Tester: 1. Download the .CAB file for the Tester or diagnostic engine from the Fluke website www.fluke.com. 2. Launch the Viewer software application. 3. Click Preferences. The Preferences screen and submenus show on the display. 4. Click Vibration Tester - Fluke 810 | User Manual - Page 128
Table 6-1. Troubleshooting Symptom Cause Corrective Action Tester does not turn on. The battery is fully discharged. Connect the Tester battery to the ac adapter, connect to a power source, and charge the battery. If the problem continues, contact the Fluke Service Center for technical support - Fluke 810 | User Manual - Page 129
questions about the Vibration Tester. More information about the Tester is available at www.fluke.com. FAQs - Setup 1. Can I estimate values (RPM, hp, gear accurate RPM value on a variable speed drive use the laser tachometer and reflective tape provided with the Tester or obtain the frequency - Fluke 810 | User Manual - Page 130
810 Users Manual 4. On belt or chain driven components, how can I estimate output RPM when I am unable to obtain a tachometer reading? Obtaining the RPM value using the laser tachometer is the preferred method for determining running speed. However, the output RPM value can be calculated using - Fluke 810 | User Manual - Page 131
FAQs - Measurement 1. What are the effects of machine load and condition? The vibration from a drive train may change depending on the load and the ambient temperature of the motor. The one exception to this rule is machines with misaligned driveshafts. It is recommended to take vibration - Fluke 810 | User Manual - Page 132
810 Users Manual 3. Which mounting option is the best? The Tester's diagnoses are largely dependent upon the quality of vibration signal it receives from the tested machinery. The - Fluke 810 | User Manual - Page 133
foundation or fabricated base. • Do not mistake seal locations for a bearing measurement location on pumps. Note Refer to the Quick Reference Guide for further guidance on sensor locations. 6. Why is sensor orientation important? The tri-axial sensor (provided with the Tester) can collect vibration - Fluke 810 | User Manual - Page 134
810 Users Manual . 9. When should I use the tachometer? Using a tachometer is highly recommended for Variable Frequency Drives problem, first eliminate bad cables and improper sensor mountings. If the problem is still not resolved after eliminating these issues, please contact your Fluke service - Fluke 810 | User Manual - Page 135
FAQs - Diagnosis 1. How does the Tester diagnose the problems and how accurate are the diagnoses? Once the setup and measurement information is collected, the onboard diagnostic system analyzes the data using a set of powerful - Fluke 810 | User Manual - Page 136
810 Users Manual • Slight • Moderate No repair action is recommended. Monitor the machine and retest after regular machine planned maintenance to verify maintenance was performed correctly. (Months, even - Fluke 810 | User Manual - Page 137
3. The Tester says "serious" or "extreme" but there is no indication of failure, what should I do? For extreme faults, users should be able to sense impending failure through excessive temperature, noise or visible movement. If there are no physical indications of failure, it is recommended to check - Fluke 810 | User Manual - Page 138
810 Users Manual 6. What should I do when the Tester diagnoses more tachometer or view the drive control panel). Retake the measurement and reanalyze the data. 7. I would like to learn more about advanced vibration consulting services. Any recommendations? Fluke has partnered with a premier service - Fluke 810 | User Manual - Page 139
. Tachometer laser not ON Tachometer laser is off. Push the Tachometer power button to on. Failed to POWER ON Tachometer Power from the Tester is necessary for the Tachometer to operate. Make sure that the cable connection is good. If the problem continues, contact Fluke for technical support - Fluke 810 | User Manual - Page 140
810 Users Manual Table B-1. Vibration Tester Warning and Error Messages (cont.) Display Message Description Failed to read RPM from Tachometer Tachometer Cable or Sensor is bad. Change the cable or Sensor. Contact Fluke for a new Sensor. Data acquisition failed The Sensor mount method or - Fluke 810 | User Manual - Page 141
data. Make the measurement again. If the problem continues, contact the Fluke Service Center for technical support. Failed to perform self test This message Sensor is defective. Contact the Fluke Service Center for technical support. Tachometer failure This message shows during the self-test. The - Fluke 810 | User Manual - Page 142
810 Users Manual Table B-1. Vibration Tester Warning and Error Messages (cont.) Display Message Description Failed to perform self test This message shows during the self-test. The Tester is defective. Contact the Fluke Service Center for technical support. Data transfer not successful This - Fluke 810 | User Manual - Page 143
Appendix C Glossary Acceleration. The rate of change of velocity, often depicted as "g's" or in "mm/s2" in the metric system or "in/sec2" in the English system. Acceleration is not constant but will vary through the vibration cycle, reaching maximum levels as velocity reaches its minimum. This is - Fluke 810 | User Manual - Page 144
810 Users Manual Balancing Resonance Speed(s). A rotating speed that corresponds to a natural resonance " a machine. Cited Peak. An abnormal vibration magnitude/level identified (or cited) by the Fluke 810 diagnostic engine. Cited Peaks are marked with red in the Tester and in the Viewer Software. - Fluke 810 | User Manual - Page 145
Misalignment. In machines, perfect alignment occurs when the centerline of two coupled shafts coincide. When they do not coincide, misalignment exists. Angular misalignment is when the centerline of the two shafts intersect but are not parallel. Parallel misalignment is when the centerline of the - Fluke 810 | User Manual - Page 146
810 Users Manual amplitudes can be closely related to the running speed of the machinery. The diagnostic technology in the Tester identifies the mechanical problems depicted in the spectra and cites the abnormal magnitudes. Tachometer . TEDS. A Transducer Electronic Datasheet (TEDS) is a technology
-
 1
1 -
 2
2 -
 3
3 -
 4
4 -
 5
5 -
 6
6 -
 7
7 -
8
-
9
-
10
-
11
-
12
-
13
-
14
-
15
-
16
-
17
-
18
-
19
-
20
-
21
-
22
-
23
-
24
-
25
-
26
-
27
-
28
-
29
-
30
-
31
-
32
-
33
-
34
-
35
-
36
-
37
-
38
-
39
-
40
-
41
-
42
-
43
-
44
-
45
-
46
-
47
-
48
-
49
-
50
-
51
-
52
-
53
-
54
-
55
-
56
-
57
-
58
-
59
-
60
-
61
-
62
-
63
-
64
-
65
-
66
-
67
-
68
-
69
-
70
-
71
-
72
-
73
-
74
-
75
-
76
-
77
-
78
-
79
-
80
-
81
-
82
-
83
-
84
-
85
-
86
-
87
-
88
-
89
-
90
-
91
-
92
-
93
-
94
-
95
-
96
-
97
-
98
-
99
-
100
-
101
-
102
-
103
-
104
-
105
-
106
-
107
-
108
-
109
-
110
-
111
-
112
-
113
-
114
-
115
-
116
-
117
-
118
-
119
-
120
-
121
-
122
-
123
-
124
-
125
-
126
-
127
-
128
-
129
-
130
-
131
-
132
-
133
-
134
-
135
-
136
-
137
-
138
-
139
-
140
-
141
-
142
-
143
-
144
-
145
-
146
 |
 |

January 2010, Rev. 2, 5/15
© 2010-2015 Fluke Corporation. All rights reserved. Specifications are subject to change without notice.
All product names are trademarks of their respective companies.
810
Vibration Tester
Users Manual