Foxconn M61PMV RAID Manual.
Foxconn M61PMV Manual
 |
View all Foxconn M61PMV manuals
Add to My Manuals
Save this manual to your list of manuals |
Foxconn M61PMV manual content summary:
- Foxconn M61PMV | RAID Manual. - Page 1
M61PMV Series Motherboard User's RAID Manual - Foxconn M61PMV | RAID Manual. - Page 2
be changed or modified at any time, Foxconn does not obligate itself to inform the user of these changes. Trademark: All trademarks are the property of their respective owners. Version: User's RAID Manual for M61PMV Series motherboard. Symbol description: ! WARNING! Caution : refers to important - Foxconn M61PMV | RAID Manual. - Page 3
TAIWAN, R.O.C. declares that the product Motherboard M61PMV/M61PMV-E is in conformity with (reference to the specification under which conformity is declared in accordance - Foxconn M61PMV | RAID Manual. - Page 4
: FOXCONN Model Name: M61PMV/M61PMV-E Responsible Party: PCE Industry Inc. Address: 458 E. Lambert Rd. Fullerton, CA 92835 Telephone: 714-738-8868 Facsimile: 714-738-8838 Equipment Classification: Type of Product: Manufacturer: Address: FCC Class B Subassembly Motherboard - Foxconn M61PMV | RAID Manual. - Page 5
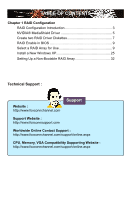
a New Windows XP 25 Setting Up a Non-Bootable RAID Array 32 Technical Support : Website : http://www.foxconnchannel.com Support Support Website : http://www.foxconnsupport.com Worldwide Online Contact Support : http://www.foxconnchannel.com/support/online.aspx CPU, Memory, VGA Compatibility - Foxconn M61PMV | RAID Manual. - Page 6
the following information : ■ RAID Configuration Introduction ■ NVIDIA® MediaShield Driver ■ Create two RAID Driver Diskettes ■ RAID Enable in BIOS ■ Select a RAID Array for Use ■ Install a New Windows XP ■ Setting Up a Non-Bootable RAID Array The RAID BIOS Setup pictures shown in this chapter are - Foxconn M61PMV | RAID Manual. - Page 7
the processes to build a new RAID array in your existing Windows XP system, it includes : 1. Set RAID enabled in BIOS. 2. Follow 5-3 to select a RAID array for use. 3. Run setup program to install NVIDIA RAID driver into your current Windows XP system. 4. Use Administrative Tools in Control Panel to - Foxconn M61PMV | RAID Manual. - Page 8
output) performance, or both. The following RAID configurations are provided for users. There are three major key concepts in RAID: 1. Mirroring : viewers. The configuration affects reliability and performance in different ways. The problem with using more disks is that it is more likely that one - Foxconn M61PMV | RAID Manual. - Page 9
entire array. The disk array data capacity is equal to the number of drive members times the capacity of the smallest member. RAID 0 does not support fault tolerance. RAID 1 (Mirroring) RAID 1 writes duplicate data onto a pair of drives and reads both sets of data in parallel. If one of the - Foxconn M61PMV | RAID Manual. - Page 10
Driver The NVIDIA® MediaShield driver supports RAID 0, RAID 1, RAID 5, and RAID 0+1 functions. It allows you to get high performance with fault tolerance, big capacity, or data safety provided by different RAID functions. Here, we will use four SATA hard disks as an example to guide you - Foxconn M61PMV | RAID Manual. - Page 11
New Array - RAID Mode: SMtirrirpoinregd Stripe Block: Optimal Free Disks Port Disk Model Capacity Array Disks Port Disk Model Capacity Array - Installing a new Windows XP in a brand new RAID system. 2). Creating a Non-Bootable Array - Existing Windows XP system with new RAID built - Foxconn M61PMV | RAID Manual. - Page 12
floppy drive A:, this diskette will be formatted later. Put the driver CD into its DVD-ROM drive. 2. Depending on which platform your XP system is, normally, it is a 32-bit system. Use Windows explorer, and go to CD:\ Driver\NVIDIA\MCP61\Chipset\WinXP\ 32bit\IDE\WinXP\sataraid\Floppy\ Disk1, click - Foxconn M61PMV | RAID Manual. - Page 13
this warning message. 8. Format finished. Click "OK", then click "Close" to continue copying of RAID driver into this diskette. 9. Check if the first diskette contains the driver files. 10. Go to CD:\Driver\NVIDIA\MCP61\ Chipset\WinXP\32bit\IDE\WinXP\ sataraid\Floppy\Disk2, click on RaidTool icon to - Foxconn M61PMV | RAID Manual. - Page 14
screen displayed, there is one line listing each key's function, such as [Tab], [Enter], [ESC]...etc. It is helpful to make your choice easier. MediaShield BIOS Apr 26 2007 - Define a New Array - RAID Mode: Mirroriendg Stripe Block: Optimal Free Disks Port Disk Model Capacity Array - Foxconn M61PMV | RAID Manual. - Page 15
" from the RAID Mode. The menu appears : 5 MediaShield Utillity Apr 26 2007 - Define a New Array - RAID Mode: SMtirrirpoinregd Stripe Block: Optimal Free Disks Port Disk Model Capacity Array Disks Port Disk Model Capacity 01.0 WDC WD1200JD-9 111.79GB 1.1 Hitachi HDT725 232.88GB - Foxconn M61PMV | RAID Manual. - Page 16
: OOppttiimmaall Free Disks Port Windows XP) in this RAID system, please press [B] to select it as bootable. You can then press [Ctrl]+[X] keys to exit the setup program, and restart your PC. MediaShield Utility Apr 26 2007 - Array List - Boot Status Vendor Array Model Name No Healthy NVIDIA - Foxconn M61PMV | RAID Manual. - Page 17
RAID system. Press [D] here allow you to delete previous settings, and go back to the first time when MediaShield was started. Array 4 : NVIDIA STRIPE 153.38G - Array Detail - RAID Mode: Striping Striping Width : 2 Striping Block: 64K Port Index Disk Model Capacity 1.0 0 2.0 1 WDC WD1200JD - Foxconn M61PMV | RAID Manual. - Page 18
disks to the right drive panel. 5 MediaShield Utility Apr 26 2007 - Define a New Array - RAID Mode: Mirroriendg Stripe Block: OOppttiimmaall Free Disks Port Disk Model Capacity Array Disks Port Disk Model Capacity 1.0 WDC WD1200JD-9 111.79GB 2.0 HDS728080PLA38 76.69GB 01.01 - Foxconn M61PMV | RAID Manual. - Page 19
: OOppttiimmaall Free Disks Port Windows XP) in this RAID system, please press [B] to select it as bootable. You can then press [Ctrl]+[X] keys to exit the setup program, and restart your PC. MediaShield Utility Apr 26 2007 - Array List - Boot Status Vendor Array Model Name No Healthy NVIDIA - Foxconn M61PMV | RAID Manual. - Page 20
. Press [D] here allow you to delete previous settings, and go back to the first time when MediaShield was started. Array 4 : NVIDIA MIRROR 232.88G - Array Detail - RAID Mode: Mirroring Stripe Width : 1 Stripe Block: 64K Port Index Disk Model Capacity 1.1 0 2.1 1 Hitachi HDT725025VLA380 - Foxconn M61PMV | RAID Manual. - Page 21
the RAID Mode. The menu appears : 5 MediaShield Utillity Apr 26 2007 - Define a New Array - RAID Mode: SMtirrirpoereMdi rroring Stripe Block: Optimal Free Disks Port Disk Model Capacity Array Disks Port Disk Model Capacity 01.0 WDC WD1200JD-9 111.79GB 1.1 Hitachi HDT725 232.88GB - Foxconn M61PMV | RAID Manual. - Page 22
Stripe Block: Optimal Free Disks Port Disk Windows XP) in this RAID system, please press [B] to select it as bootable. You can then press [Ctrl]+[X] keys to exit the setup program, and restart your PC. MediaShield BIOS Apr 26 2007 - Array List - Boot Status Vendor Array Size No Healthy NVIDIA - Foxconn M61PMV | RAID Manual. - Page 23
. Press [D] here allow you to delete previous settings, and go back to the first time when MediaShield was started. Array 4 : NVIDIA RAID 0+1 153.38G - Array Detail - RAID Mode: Striped Mirror Stripe Width : 2 Stripe Block: 64K Port Index Disk Model Capacity 1.1 0 2.0 1 2.1 2 1.0 3 Hitachi - Foxconn M61PMV | RAID Manual. - Page 24
, then use [→] and [↓] keys to add the hard disks to the right drive panel. MediaShield BIOS Apr 26 2007 - Define a New Array - RAID Mode: RMAirIrDor5ed Stripe Block: Optimal Free Disks Port Disk Model Capacity Array Disks Port Disk Model Capacity 2.1 ST3320620AS 298.09GB 01 - Foxconn M61PMV | RAID Manual. - Page 25
a new Operating System (such as Windows XP) in this RAID system, please press [B] to select it as bootable. You can then press [Ctrl]+[X] keys to exit the setup program, and restart your PC. MediaShield BIOS Apr 26 2007 - Array List - Boot Status Vendor No Healthy NVIDIA Array RAID5 Size 153.38G - Foxconn M61PMV | RAID Manual. - Page 26
system. Press [D] here allow you to delete previous settings, and go back to the first time when MediaShield was started. Array 4 : NVIDIA RAID5 153.38G - Array Detail - RAID Mode: RAID5 Stripe Width : 2 Stripe Block: 64K Port Index Disk Model Capacity 1.0 0 1.1 1 2.0 2 WDC WD1200JD-98HBB0 - Foxconn M61PMV | RAID Manual. - Page 27
a New Array - RAID Mode: SMpirarnonreindg Stripe Block: Optimal Free Disks Port Disk Model Capacity Array Disks Port Disk Model Capacity New Array - RAID Mode: SMpirarnonreindg Stripe Block: Optimal Free Disks Port Disk Model Capacity Array Disks Port Disk Model - Foxconn M61PMV | RAID Manual. - Page 28
New Array - RAID Mode: SMpirarnonreindg Stripe Block: Optimal Free Disks Port Disk Model Capacity Array Disks Port Disk setup program, and restart your PC. MediaShield BIOS Apr 26 2007 - Array List - Boot Status Vendor Array No Healthy NVIDIA JBOD Size 421.36G [Ctrl-X] Exit [↑↓] - Foxconn M61PMV | RAID Manual. - Page 29
RAID system. Press [D] here allow you to delete previous settings, and go back to the first time when MediaShield was started. Array 4 : NVIDIA JBOD 421.36G - Array Detail - RAID Mode: Spanning Stripe Width : 3 Stripe Block: 64K Port Index Disk Model Capacity 1.0 0 1.1 1 2.0 2 WDC WD1200JD - Foxconn M61PMV | RAID Manual. - Page 30
Windows XP Assume a Mirrored array (232.88GB) was created as introduced in section 5-3, after the system restarts : 1. Press [DEL] to enter BIOS Setup during POST. 2. Insert the Windows will start installing Windows Operating System. Windows Setup 5 Press F6 if you need to install a 3rd party SCSI - Foxconn M61PMV | RAID Manual. - Page 31
appears, press [S] to continue the specific driver installation. Windows Setup Setup could not determine the type of one or more mass storage devices installed in your system, or you have chosen to manually specify an adapter. Currently, Setup will load support for the following mass storage device - Foxconn M61PMV | RAID Manual. - Page 32
[Enter] to select the first driver - "NVIDIA RAID Driver (required)". Windows Setup You have chosen to configure a SCSI Adapter for use with Windows, using a device support disk provided by an adapter manufacturer. Select the SCSI Adapter you want from the following list, or press ESC to return to - Foxconn M61PMV | RAID Manual. - Page 33
you want from the following list, or press ESC to return to the previous screen. NVIDIA RAID Driver (required) NVIDIA nForce Storage Controller (required) ENTER=Select F3=Exit 10. Two drivers are displayed. Press [Enter] to continue. Windows Setup Setup will load support for the following mass - Foxconn M61PMV | RAID Manual. - Page 34
the UP ad DOWN ARROW keys to select an item in the list. ● To set up Windows XP on the selected item, press ENTER. ● To create a partition Partition2 [New (Raw)] Unpartitioned space 29996 MB ( 29996 MB free) 208468 MB ( 208468 MB free) 8 MB ENTER=Install D=Delete Partition F3=Quit 29 - Foxconn M61PMV | RAID Manual. - Page 35
. If you want to select a different partition for Windows XP, press ESC. Format the partition using the NTFS file Windows installation folders, then ask you to insert the second RAID diskette. Press [Enter] to continue when it is done. Windows Setup Insert the disk labeled : NVIDIA RAID DRIVER - Foxconn M61PMV | RAID Manual. - Page 36
Setup Insert the disk labeled : NVIDIA RAID DRIVER (SCSI) disk 2 into drive A: * Press ENTER when ready. F3=Quit Enter=Continue 17. Setup will be coping files to the RAID disk array to create your new Windows XP system. You can follow the normal procedures to complete the installations - Foxconn M61PMV | RAID Manual. - Page 37
This section assumes the following setup : ■ Boot Disk with Windows XP installed : One hard disk HDS728080PLAT20 (80GB) is connected to they are : Hitachi HDT725025VLA, (232.88GB) connected to SATA port2 of the motherboard. Segate ST3320620AS, (298.09GB) connected to SATA port4. ■ A SATA DVD Drive - Foxconn M61PMV | RAID Manual. - Page 38
keys to exit and go to Windows. 4. In Windows, click "Cancel" to skip any "Found New Hardware Wizard". Use driver CD and click on "NVIDIA MCP61 Chipset Driver" to install the NVIDIA RAID driver. The RAID driver can be installed only when you select [Enable] in BIOS "RAID Enable" setting. If you do - Foxconn M61PMV | RAID Manual. - Page 39
5 5. The installation of driver may take a while, after the NVIDIA driver is installed, it will ask you to click "Finish" to restart your computer. 6. When Windows starts, a "Found New Hardware Wizard" appears. Click on "Cancel" to ignore it. 34 - Foxconn M61PMV | RAID Manual. - Page 40
"Next" to continue. The RAID array is named as Disk1 and its status is unknown and not Initialized. 8. A "Select Disks to Initialize" window will appear. The disks listed depend on how many arrays you have configured. Select "Disk1" and click "Next" to continue. 9. When "Select Disks to Convert - Foxconn M61PMV | RAID Manual. - Page 41
window appears. The actual disks listed will depend on your system. In below figure, you can see there is a 232.88 GB unallocated partition. You must format the unallocated disk space before using it. Right click "Unallocated space", select "New Partition..." and follow the Wizard instructions - Foxconn M61PMV | RAID Manual. - Page 42
5 17. The format of disk array (Disk1) is in processing. 18. Format completed, now you can start using your RAID array. 37
-
 1
1 -
 2
2 -
 3
3 -
 4
4 -
 5
5 -
 6
6 -
 7
7 -
8
-
9
-
10
-
11
-
12
-
13
-
14
-
15
-
16
-
17
-
18
-
19
-
20
-
21
-
22
-
23
-
24
-
25
-
26
-
27
-
28
-
29
-
30
-
31
-
32
-
33
-
34
-
35
-
36
-
37
-
38
-
39
-
40
-
41
-
42
 |
 |

M61PMV Series Motherboard
User’s RAID Manual