Frigidaire FHPC3660LS Complete Owner's Guide (English) - Page 6
 |
View all Frigidaire FHPC3660LS manuals
Add to My Manuals
Save this manual to your list of manuals |
Page 6 highlights
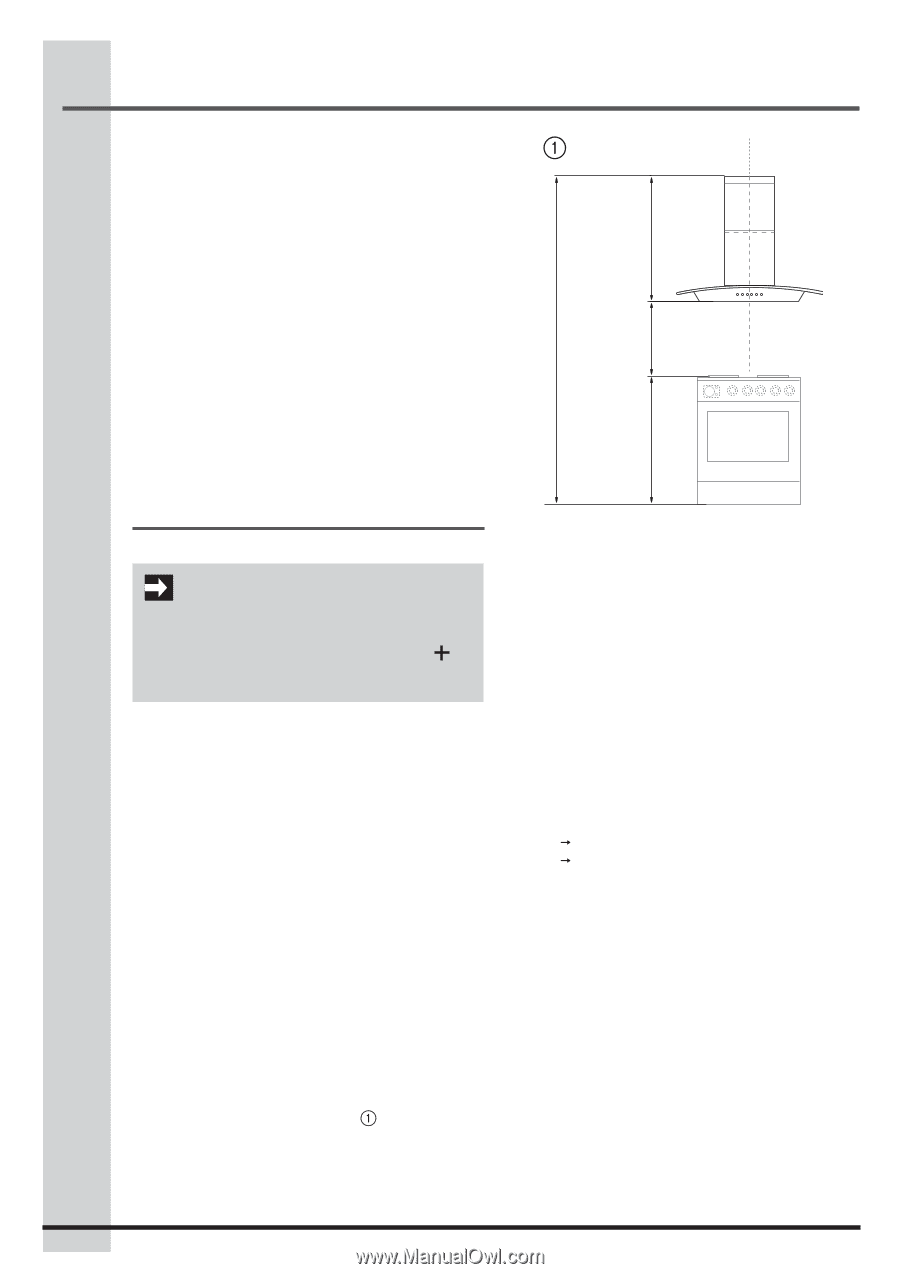
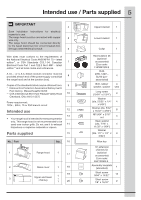
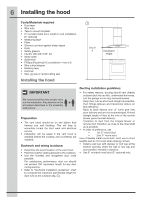
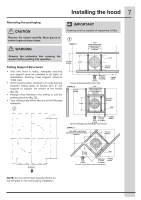
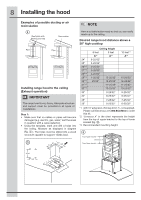
6 Installing the hood Tools/Materials required • Duct tape • Wire nuts • Tape to mount template • 6" rounded metal duct, length to suit installation (5" optional) • Measuring tape • Pliers • Gloves to protect against sharp edges • Knife • Safety glasses • Electric drill with 5/32" bit • Strain relief • Spirit level • Phillips (Pozidrive) # 2 screwdriver + torx # 2 • Wire cutter/stripper • Masking tape • Hammer • Saw, jig saw or reciprocating saw Installing the hood 8 to 9 ft Installation height Ducting installation guidelines IMPORTANT We recommend that two people carry out the installation. Pay attention to the procedure described in the assembly instructions. Preparation • The vent hood should be on site before final framing and wall finishing. This will help to accurately locate the duct work and electrical service. • Installation will be easier if the vent hood is installed before the cooktop and countertop are installed. Ductwork and wiring locations: • Determine the exact location of the vent hood. • Plan the route for venting exhaust to the outdoors. • Use the shortest and straightest duct route possible. For satisfactory performance duct run should not exceed 100' equivalent length for any duct configurations. • Refer to "Ductwork installation guidelines" chart to compute the maximum permissible length for duct runs to the outdoors (fig. ). • For safety reasons, ducting should vent directly outdoors (not into an attic, underneath the house, into the garage or into any enclosed space). Keep duct runs as short and straight as possible. Duct fittings (elbows and transitions) reduce air flow efficiency. Back to back elbows and „S" turns give very poor delivery and are not recommended. A short straight length of duct at the inlet of the remote blower gives the best delivery. Transition to duct from the integral blower or remote duct transition as close to the downdraft as is possible. • In order of preference, use 1st. 6" round duct 2nd. 5" round duct Use of flexible metal round duct: Limit use to short lengths and do not crush when making corners. • Install a wall cap with damper or roof cap at the exterior opening. Order the wall or roof cap and any transition needed in advance. • Use 6" rounded metal duct (5" optional) only.
-
 1
1 -
 2
2 -
 3
3 -
 4
4 -
 5
5 -
 6
6 -
 7
7 -
 8
8 -
 9
9 -
 10
10 -
 11
11 -
 12
12 -
13
-
14
-
15
 |
 |