Frigidaire FPGF3081KF Complete Owner's Guide (English) - Page 11
Setting Surface Controls, Important - electric range
 |
UPC - 012505500800
View all Frigidaire FPGF3081KF manuals
Add to My Manuals
Save this manual to your list of manuals |
Page 11 highlights
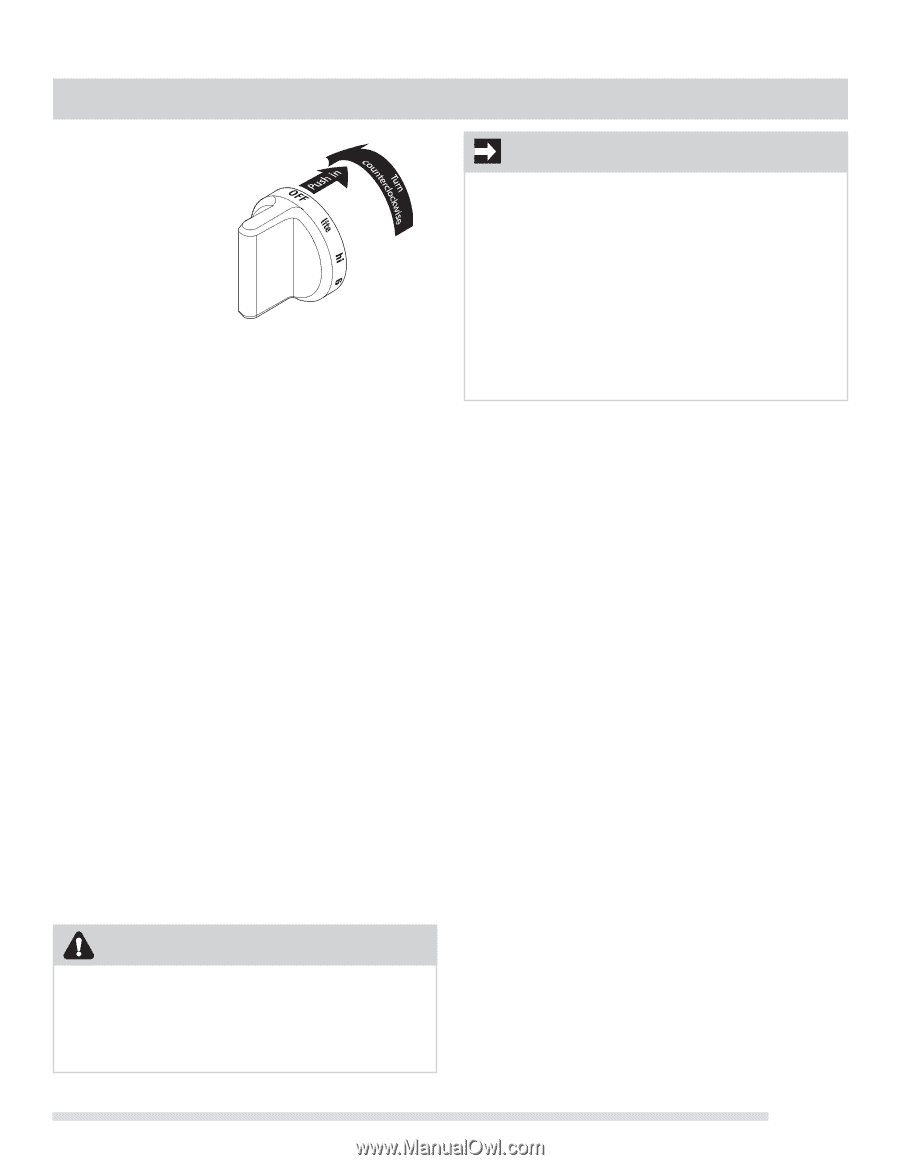
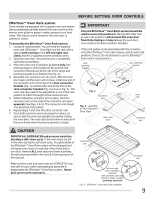
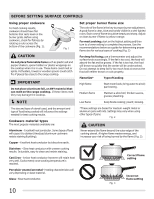
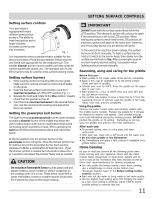
SETTING SURFACE CONTROLS Setting surface controls Your gas range is equipped with many different sized surface burners. The ability to heat food quicker and in larger volumes increases as the burner size increases. Fig. 1 It is important to select cookware that is suitable for the amount and type of food being prepared. Select a burner and flame size appropriate for the cookware size. The smaller simmer burners (some models) are best suited for simmering delicate sauces, etc. The standard size (9,500 BTU) burners may be used for most surface cooking needs. Setting surface burners 1. Place cooking utensil on top of surface burner grate. Make sure the cooking untensil is centered and stable on the grate. 2. Push the desired surface control knob in and turn counterclockwise out of the OFF position (Fig. 1). 3. Release the knob and rotate to the lite position. Visually check that the gas burner has lit. 4. Turn the knob counterclockwise to the desired flame size. Use the control knob markings and adjust the flame as needed. Setting the powerplus boil burner The right front large powerplus boil burner (some models) provides a simmer burner in the middle and allows the user to add a larger outer burner combination best suited for heating larger quantities of food. When operating the twin burner follow the procedure above and read notes below. At the lite position only the simmer portion of the powerplus burner will ignite. Once the simmer portion has lit continue to turn the powerplus burner knob counterclockwise to hi for a combination of both burners. If just the simmer portion is needed turn the knob to about the 2 or 3 position and adjust the simmer flame size as needed. CAUTION Do not place flammable items such as plastic salt and pepper shakers, spoon holders or plastic wrappings on the cooktop when it is in use. These items could melt or ignite. Potholders, towels or wooden spoons could catch fire if placed too close to the range cooktop. IMPORTANT DO NOT cook with the surface control knob left in the LITE position. The electronic ignitor will continue to spark if the control knob is left in the LITE position. When setting any surface control knob to the LITE position, all electronic ignitors will spark at the same time. However, only the surface burner you are setting will ignite. In the event of an electrical power outage, the surface burners can be lit manually. To light a surface burner, hold a lit match to the burner head, then slowly turn the surface control knob to lite. After burner lights push in and turn knob to desired setting. Use caution when lighting surface burners manually. Seasoning, using and caring for the griddle Before first use: • Wash griddle in hot soapy water. Rinse and dry completely. • Apply a thin coat of vegetable oil to the entire surface (front and back of griddle). • Preheat your oven to 350°F. Place the griddle on the upper rack in your oven. • Bake griddle for 1 hour at 350°F, then turn oven OFF and let cool before removing. • The surface may appear to have a tacky feel to it from the seasoning process. If desired, wash the griddle in hot soapy water, rinse well, and dry completely. Using the griddle: Remove the center burner grate and carefully replace with the griddle (some models). Preheat the griddle for 5 minutes on medium to medium low setting. Slow preheat ensures even heat distribution during the cooking process. DO NOT preheat the griddle on HI setting. Preheating on HI may warp the griddle and prevent even heat distribution. After each use: • To prevent rusting, store in a dry place and keep uncovered. • After each use, clean with a stiff brush and hot water only. • Do not clean griddle in the dishwasher. • Dry Immediately and apply a light coating of vegetable oil to griddle before storing. Home Canning Be sure to read and observe all the following points when home canning with your appliance. Check with the USDA (United States Department of Agriculture) website and be sure to read all the information they have available as well as follow their recommendations for canning procedures. • Use only quality flat bottom canners when home canning. Use a straight-edge to check canner bottom (see "Cookware material types" in the Before setting surface controls section). • Start with hot tap water to bring water to boil more quickly. • Use the highest heat seating when first bringing the water to a boil. Once boiling is achieved, reduce heat to lowest possible setting to maintain that boil. 11
-
 1
1 -
2
-
3
-
4
-
5
-
 6
6 -
 7
7 -
 8
8 -
 9
9 -
 10
10 -
 11
11 -
 12
12 -
 13
13 -
 14
14 -
 15
15 -
 16
16 -
17
-
18
-
19
-
20
-
21
-
22
-
23
-
24
-
25
-
26
-
27
-
28
-
29
-
30
-
31
-
32
-
33
-
34
-
35
-
36
 |
 |