Frigidaire FPGH3077RF Installation Instructions
Frigidaire FPGH3077RF Manual
 |
View all Frigidaire FPGH3077RF manuals
Add to My Manuals
Save this manual to your list of manuals |
Frigidaire FPGH3077RF manual content summary:
- Frigidaire FPGH3077RF | Installation Instructions - Page 1
in the OFF Position 10 LP/Propane Gas Conversion 10 Care, Cleaning and Maintenance 10 Before You Call for Service 10 Serial Plate Location 10 Important Notes to the Installer 1. Read all instructions contained in these installation instructions before installing range. 2. Remove all packing - Frigidaire FPGH3077RF | Installation Instructions - Page 2
30" GAS RANGE INSTALLATION INSTRUCTIONS Clearances and Dimensions 1. Location-Check location where the range will be installed. Check for proper electrical and gas supply, and the stability of floor. 2. Dimensions that are shown must be used. Given dimensions provide minimum clearance. Contact - Frigidaire FPGH3077RF | Installation Instructions - Page 3
. 70-latest edition in United Sates or with CSA standard C22.1, Canadian Electrical Code, Part 1 in Canada. See Grounding Instructions in the Electrical Requirements section of these Installation Instructions. • Before installing the range in an area covered with linoleum or any other synthetic floor - Frigidaire FPGH3077RF | Installation Instructions - Page 4
30" GAS RANGE INSTALLATION INSTRUCTIONS Tools you will need For leveling legs and anti-tip brackets: ● Adjustable wrench or channel lock pliers ● 5/16" Nutdriver or Flat Head Screw Driver ● Electric Drill & 1/8 Diameter Drill Bit (5/32" Masonry Drill Bit if installing in concrete) ● Level & - Frigidaire FPGH3077RF | Installation Instructions - Page 5
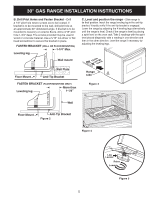
30" GAS RANGE INSTALLATION INSTRUCTIONS B. Drill Pilot Holes and Fasten Bracket - Drill a head screwdriver to secure the bracket in place. C. Level and position the range - Slide range to its final position. Insert the range leveling leg in the anti-tip bracket. Visually verify if the anti-tip - Frigidaire FPGH3077RF | Installation Instructions - Page 6
manifold and MUST be connected in series with the gas supply line. If LP/Propane conversion kit has been used, follow instructions provided with the kit for converting the pressure regulator to LP/Propane use. Care must be taken during installation of range not to obstruct the flow of combustion and - Frigidaire FPGH3077RF | Installation Instructions - Page 7
30" GAS RANGE INSTALLATION INSTRUCTIONS 4 Connect the range to the gas supply Important: Remove all packing material and literature from range before connecting gas and electrical supply. Note: To prevent leaks, put pipe joint sealant on all external pipe threads. Do not allow regulator to rotate - Frigidaire FPGH3077RF | Installation Instructions - Page 8
30" GAS RANGE INSTALLATION INSTRUCTIONS 5 Electrical Requirements 120 volt, 60 Hertz, properly grounded dedicated circuit protected by a 15 amp circuit breaker or time delay fuse. Note: Not recommended to be installed with a Ground Fault Interrupt (GFI). Do not use an extension cord with this range - Frigidaire FPGH3077RF | Installation Instructions - Page 9
GAS RANGE INSTALLATION INSTRUCTIONS 7 Electric Ignition Surface Burner Operation of electric igniters should be checked after range and supply line connectors have been carefully checked for leaks, and range has been connected to electric Adjust the "LOW" Setting Guide for operating instructions. - Frigidaire FPGH3077RF | Installation Instructions - Page 10
the range by adjusting the leveling legs. 12 After installation is completed, make sure all controls are left in the OFF position. Before You Call for Service Read the Before You Call for Service Checklist and operating instructions in your Use and Care Guide. It may save you time and expense - Frigidaire FPGH3077RF | Installation Instructions - Page 11
Si la información contenida en este manual no es seguida exactamente, puede ocurrir trasero de la parte trasera de la estufa gas 17 5. Requisitos eléctricos 18 6. Montaje de las cabezas y de las tapas de los quemadores 18 7. Comprobación de los encendedores 19 8. Ajuste de la posición LOW - Frigidaire FPGH3077RF | Installation Instructions - Page 12
Typical cabinet installation FROvNieTwAL top and at rear of range * Un mínimo de 33" de espacio entre la parte superior de la superficie gas licenciado de Massachusetts. Este aparato se debe instalar con un largo conector flexible de gas de tres (3) pies/36 pulgadas. Una válvula manual de gas - Frigidaire FPGH3077RF | Installation Instructions - Page 13
por el estándar de CSA, C22.1, Canadian Electrical Code, Part 1 en el Canada. Vea las instrucciones para la puesta a tierra. encogimiento, deformación o decoloración. No instale la estufa sobre una alfombra al menos en el Manual del Usuario. • A diferencia de la gama estándar cocinas de gas, ESTA - Frigidaire FPGH3077RF | Installation Instructions - Page 14
a gas (LP/Propano o gas natural): • Llave de boca de 1/2" Material adicional que va a necesitar: • Válvula de desconexión de la línea de gas • Sellador ón está instalado correctamente, sostenga el borde trasero de la parte trasera de la estufa usando ambos brazos. Intente inclinar la estufa - Frigidaire FPGH3077RF | Installation Instructions - Page 15
INSTRUCCIONES PARA INSTALACIÓN DE LA ESTUFA ELÉCTRICA DE 30" B. Perforación de agujeros piloto y montura de sujeción - Perfore un agujero piloto de 1/8" en el lugar en el que se vayan a instalar los tornillos. Si la montura se va a instalar a en la pared, practique un agujero piloto con una - Frigidaire FPGH3077RF | Installation Instructions - Page 16
de piso de gas, remover la protección de la línea de la parte de abajo de la unidad para permitir el acceso para la tubería de gas (Fig 5b). debe ser por lo menos 5" (12,7 cm); si el regulador se ha convertido para gas LP/Propano 10" (25,4 cm) la presión de entrada al regulador debe ser por lo - Frigidaire FPGH3077RF | Installation Instructions - Page 17
cómo se cierra el suministro de gas hacia la cocina. B. Instale un adaptador para unión de campana de ½" hacia el válvula manual del unidad usado NO MAS DE 15pies la pared como usted desea, revise que los tubos de gas que se encuentran en la parte posterior no interfieran, verifique que al colocar la - Frigidaire FPGH3077RF | Installation Instructions - Page 18
a la plancha de cocina. 6 Montaje de las Cabezas, de las Tapas de los Quemadores y de las Rejillas de los Quemadores Refiera al Manual del Usuario que viene con la plancha de cocinar para las instrucciones de funcionamiento y el mantenimiento y la limpieza de su plancha de cocinar. Instalaci - Frigidaire FPGH3077RF | Installation Instructions - Page 19
todas las válvulas hayan sido controladas. 8 Ajuste de la Posición LOW (BAJA) Para la Válvula del Quemador Superior Figura 7 A. Gire de luz. Cuando el encendedor a alcanzado una temperatura suficiente para encender el gas, la válvula del horno controlada eléctricamente se abrirá y el fuego aparecer - Frigidaire FPGH3077RF | Installation Instructions - Page 20
soporte para hornos. Revise diagonalmente desde la parte anterior hacia atrás, luego nivele la contiene la literatura titulada "FOR LP/PROPANE GAS CONVERSION." Siga las instrucciones que vienen garantía y la información sobre el servicio en su Manual del Usuario para obtener el número de teléfono - Frigidaire FPGH3077RF | Installation Instructions - Page 21
installateur 21 Note importante au consommateur 21 Espace prévu et dimensions 22 Instructions de sécurité importantes 23 Outils requis 24 Étapes pour l'installation normale: 1. Instructions pour l'installation du support anti- bascule 24-25 2. Alimentation en gaz 26 3. Scellez les ouvertures - Frigidaire FPGH3077RF | Installation Instructions - Page 22
INSTRUCTIONS D'INSTALLATION POUR CUISINIÈRE À GAZ DE 30" MUNIE DE DEUX FOURS Espace prévu et dimensions 1. Emplacement- Vérifiez l'endroit où la cuisinière sera installée. Assurez-vous qu'il y a une source d'alimentation électrique adéquate et une sortie de gaz que le plancher est solide. 2. Les - Frigidaire FPGH3077RF | Installation Instructions - Page 23
Electrical Code aux États-Unis ou au Canada à la norme CSA C22.1, code électrique Canadien, partie 1. Voir les instructions de mise à la terre. • Avant d'installer Essuyez tous les renversements excessifs. Suivez les instructions pour le pré-nettoyage dans le Guide de l'utilisateur. • Comme sur les - Frigidaire FPGH3077RF | Installation Instructions - Page 24
conversion du gaz (LP/Propane ou Naturel): • Clé à fourches - 1/2" Matériel supplémentaire: • Valve d'arrêt pour la ligne de gaz Les instructions fournies sont prévues pour l'installation installant un support anti-bascule à l'aide des vis fournies avec la cuisinière. Si le support n'est pas install - Frigidaire FPGH3077RF | Installation Instructions - Page 25
INSTRUCTIONS D'INSTALLATION POUR CUISINIÈRE À GAZ DE 30" MUNIE DE DEUX FOURS B. Percez des avant-trous et fixez le support Percez un avant-trou de 1/8 po (3,2 mm) là où seront situées les vis. Si le support doit être monté au mur, percez un avant-trou à une inclinaison d'environ 20° vers le bas. Si - Frigidaire FPGH3077RF | Installation Instructions - Page 26
l'installation. 30 (76.2) 2 (5.1) 2 (5.1) 7½ 4.5 5 6 3 12 (30.5) 3 4 2½ 2½ 11 5 Position recommandée Note: Tous les dimensions sont tuyau d'alimentation. Si un kit de conversion au gaz propane est utilisé, suivez les instructions de conversion comprises dans le feuillet fourni pour - Frigidaire FPGH3077RF | Installation Instructions - Page 27
INSTRUCTIONS D'INSTALLATION POUR CUISINIÈRE À GAZ DE 30" MUNIE DE DEUX FOURS 4 Branchez le régulateur glisser sur le tuyau lors du branchement. Branchement du régulateur de pression Le régulateur est installé à l'appareil. Ne serrez pas trop les raccords. Le régulateur est moulé sous pression. Un - Frigidaire FPGH3077RF | Installation Instructions - Page 28
INSTRUCTIONS D'INSTALLATION POUR CUISINIÈRE À GAZ DE 30" MUNIE DE DEUX FOURS 5 Requis é de fuite à la terre (GFI). N'utilisez pas de cordon de rallonge pour brancher l'appareil. Instructions de mise à la terre IMPORTANT Veuillez lire attentivement. Pour votre propre sécurité, cet appareil doit - Frigidaire FPGH3077RF | Installation Instructions - Page 29
INSTRUCTIONS D'INSTALLATION rapidement le bouton à la position la plus basse (LOW). C. Si le brûleur s'éteint, remettez le aiguilles d'une montre. Dimension de la flamme Dessus Ajustez la érieur pour griller. Voir le Guide d'utilisation et d'entretien pour les instructions d'opération. E. Le br - Frigidaire FPGH3077RF | Installation Instructions - Page 30
fournis dans l'enveloppe portant l'inscription "POUR CONVERSION AU GAZ PROPANE". Suivez les instructions d'installation se trouvant dans l'enveloppe. Un installateur qualifié doit effectuer la conversion conformément aux instructions du fabricant et à tous les codes et règlements applicables. Si ces - Frigidaire FPGH3077RF | Installation Instructions - Page 31
NOTES - NOTAS - Frigidaire FPGH3077RF | Installation Instructions - Page 32
NOTES - NOTAS
-
 1
1 -
 2
2 -
 3
3 -
 4
4 -
 5
5 -
 6
6 -
 7
7 -
8
-
9
-
10
-
11
-
12
-
13
-
14
-
15
-
16
-
17
-
18
-
19
-
20
-
21
-
22
-
23
-
24
-
25
-
26
-
27
-
28
-
29
-
30
-
31
-
32
 |
 |
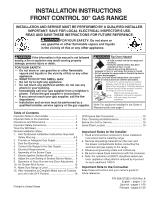
INSTALLATION INSTRUCTIONS
FRONT CONTROL 30" GAS RANGE
Printed in United States
Table of Contents
Important Notes to the Installer
......................................
1
Important Note to the Customer
....................................
1
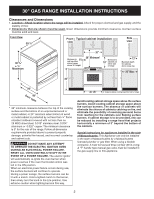
Clearances and Dimensions
...........................................
2
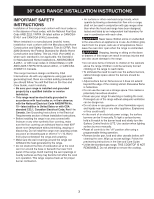
Important Safety Instructions
..........................................
3
Tools You Will Need
........................................................
4
Normal Installation Steps:
1.
Anti-Tip Bracket Installation Instructions Important
Safety Warning
......................................................
4-5
2.
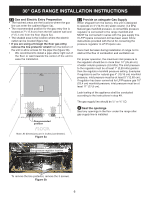
Provide an Adequate Gas Supply
............................
6
3.
Seal the Openings
...................................................
6
4.
Connect the Range to the Gas Supply
....................
7
5.
Electrical Requirements
...........................................
8
6.
Assembly of the Burner Caps
..................................
8
7.
Electric Ignition Surface Burner
...............................
9
8.
Adjust the Low Setting of Surface Burner Valves
.....
9
9.
Operation of Oven Burners and Oven Adjustment... 9
10. Air Shutter-Broil Burner
..........................................
10
11. Make Sure Range is Level
.....................................
10
12. After Installation is Complete Make sure all Controls
are Left in the OFF Position
...................................
10
LP/Propane Gas Conversion
........................................
10
Care, Cleaning and Maintenance
.................................
10
Before You Call for Service
...........................................
10
Serial Plate Location
....................................................
10
Important Notes to the Installer
1. Read all instructions contained in these installation
instructions before installing range.
2. Remove all packing material from the oven and
the drawer compartments before connecting the
electrical and gas supply to the range.
3. Observe all governing codes and ordinances.
4. Be sure to leave these instructions with the consumer.
5. Note: For operation at 2000 ft. elevations above sea
level, appliance rating shall be reduced by 4 percent
for each additional 1000 ft.
Important Note to the Consumer
Keep these instructions with your owner's guide for
future reference.
INSTALLATION AND SERVICE MUST BE PERFORMED BY A QUALIFIED INSTALLER.
IMPORTANT: SAVE FOR LOCAL ELECTRICAL INSPECTOR'S USE.
READ AND SAVE THESE INSTRUCTIONS FOR FUTURE REFERENCE.
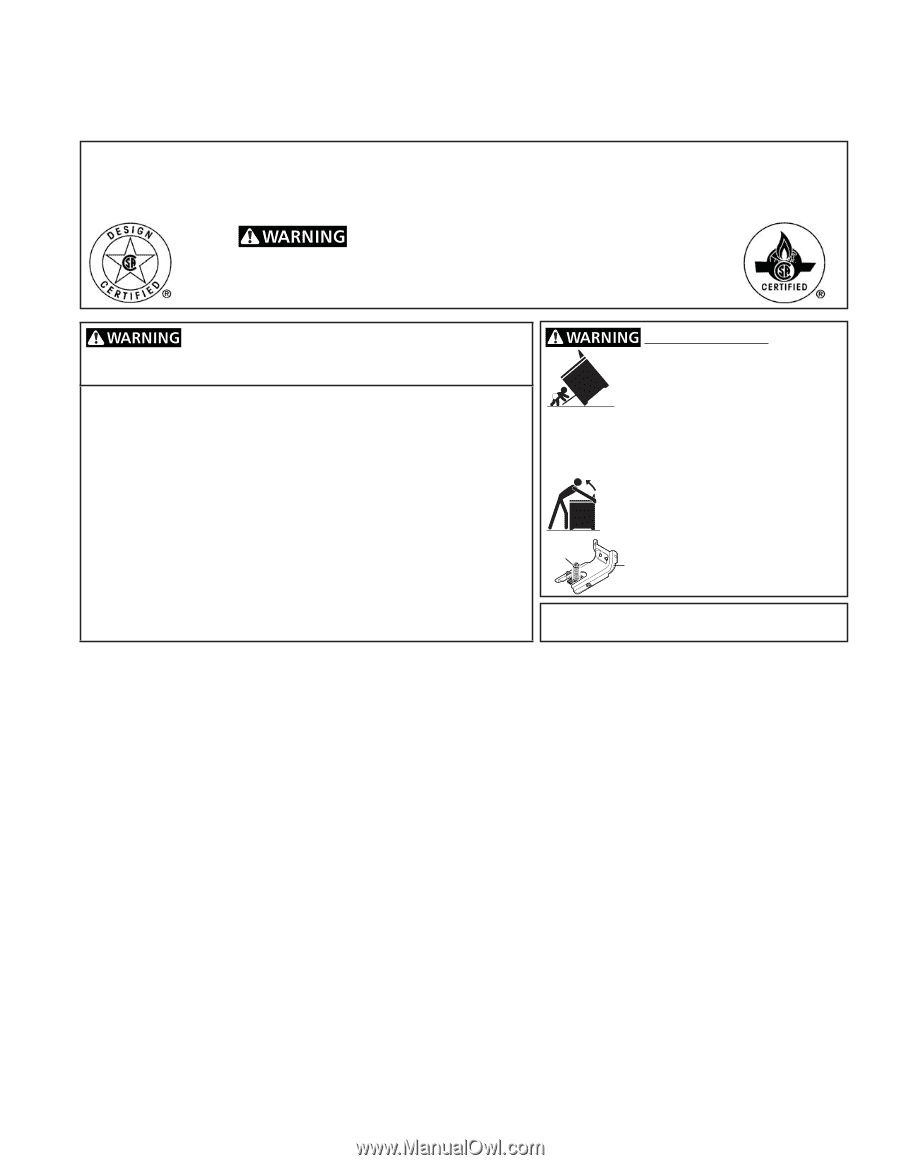
FOR YOUR SAFETY: Do not store or
use gasoline or other flammable vapors and liquids
in the vicinity of this or any other appliance.
If the information in this manual is not followed
exactly, a fire or explosion may result causing property
damage, personal injury or death.
FOR YOUR SAFETY:
— Do not store or use gasoline or other flammable
vapors and liquids in the vicinity of this or any other
appliance.
— WHAT TO DO IF YOU SMELL GAS:
•
Do not try to light any appliance.
•
Do not touch any electrical switch; do not use any
phone in your building.
•
Immediately call your gas supplier from a neighbor's
phone.
Follow the gas supplier's instructions.
•
If you cannot reach your gas supplier, call the fire
department.
— Installation and service must be performed by a
qualified installer, service agency or the gas supplier.
Note: For appliance installed in the State of
Massachusetts see page 2.
Tip Over Hazard
•
A child or adult can tip the range and
be killed.
•
Verify the anti-tip device has been
installed to floor or wall.
•
Ensure the anti-tip device is re-
engaged to floor or wall when the range is moved.
•
Do not operate the range without the anti-tip device
in place and engaged.
•
Failure to follow these instructions can result in
death or serious burns to children and adults.
Range
leveling
leg
Anti-tip
bracket
To check if the anti-tip bracket is installed
properly, use both arms to grasp the rear
edge of the range back. Carefully attempt to
tilt range forward. When properly installed,
the range should not tilt forward.
Refer to the anti-tip bracket
installation instructions supplied
with your range for proper
installation.
P/N 809127202 (1503) Rev. A
English – pages 1-10
Spanish - pages 11-20
Français - pages 21-30