Frigidaire GLGC30S9EQ Installation Instructions
Frigidaire GLGC30S9EQ - 30" Sealed Gas Cooktop Manual
 |
View all Frigidaire GLGC30S9EQ manuals
Add to My Manuals
Save this manual to your list of manuals |
Frigidaire GLGC30S9EQ manual content summary:
- Frigidaire GLGC30S9EQ | Installation Instructions - Page 1
SERVICE MUST BE PERFORMED BY A QUALIFIED INSTALLER. IMPORTANT: SAVE FOR LOCAL ELECTRICAL INSPECTOR'S USE. READ AND SAVE THESE INSTRUCTIONS FOR FUTURE REFERENCE. If the information in this manual this or any other appliance. - WHAT TO DO IF YOU SMELL GAS: • Do not try to light any appliance. • Do not - Frigidaire GLGC30S9EQ | Installation Instructions - Page 2
appliance rating shall be reduced by 4 percent for each additional 1000 ft. Important Note to the Consumer Keep these instructions with your Use and Care Guide for future reference. IMPORTANT SAFETY INSTRUCTIONS C22.1 Part 1. • The burners can be lit manually during an of the cooking utensil. - Frigidaire GLGC30S9EQ | Installation Instructions - Page 3
(3.8 cm)Minimum Distance Between Rear Edge of Cutout and Nearest Combustible Surface Above Countertop. Clearance 30" (76.2 cm) Min. Clearance Between the Top of the Cooking Platform and Unprotected Wood or Metal Cabinet B C 24" (61 cm) To eliminate the risk of burns or fire from reaching over - Frigidaire GLGC30S9EQ | Installation Instructions - Page 4
the built-in oven installation instructions. Junction box must be runners, flush with toe plate. Must be capable of supporting 150 lbs. Cut an opening in wood base minimum maximum is allowed. ** 32" (81.3 cm) min. from top of cabinet to top of runners must be maintained. OVEN SIZE 30" (76.2 cm) - Frigidaire GLGC30S9EQ | Installation Instructions - Page 5
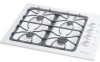
GAS COOKTOP INSTALLATION INSTRUCTIONS (For 30" & 36" Models) Typical Gas Cooktop Installation Over an cm) Min. Union Flare Union Figure 4 4" (10.2 cm) 120V/60Hz Grounded Outlet Pressure Regulator Right Side of Cabinet Manual Shutoff Valve (To be accessible for shut-off valve opera- tion) 5 - Frigidaire GLGC30S9EQ | Installation Instructions - Page 6
be no more than 14" of water column (W.C.) pressure. For checking the the countertop cutout. LP/Propane Gas Conversion This appliance can be used with Natural gas or LP service technician in accordance with the kit instructions and all local codes and requirements. Failure to follow instructions - Frigidaire GLGC30S9EQ | Installation Instructions - Page 7
INSTALLATION INSTRUCTIONS (For valve is for turning on or shutting off gas to the appliance. to appliance Shutoff Valve Open position Figure 8 to gas supply line Once kPa or 14"water column). Isolate the cooktop from the gas supply piping system by closing its individual manual shutoff valve - Frigidaire GLGC30S9EQ | Installation Instructions - Page 8
Guide packaged with the cooktop for operating instructions and for care and cleaning of your cooktop. Grounding Instructions IMPORTANT Please read carefully. For personal safety, this appliance the consumer to have it replaced by a properly grounded wall receptacle before servicing cooktop. Burner - Frigidaire GLGC30S9EQ | Installation Instructions - Page 9
of the cooktop. When ordering parts for or making inquires about your Service Checklist and operating instructions in your Use and Care Guide. It may save you time and expense. The list includes common occurrences that are not the result of defective workmanship or materials in this appliance - Frigidaire GLGC30S9EQ | Installation Instructions - Page 10
ESTAS INSTRUCCIONES PARA USO DEL INSPECTOR ELÉCTRICO LOCAL. LEA Y GUARDE ESTAS INSTRUCCIONES PARA FUTURAS REFERENCIAS Si todas las instrucciones de éste manual no son observadas a la letra, se puede ocurrir incendios o explosiones que pueden causar daños materiales, lesiones o la muerte. PARA SU - Frigidaire GLGC30S9EQ | Installation Instructions - Page 11
Unidos, or in Canada, con el Canadian Electrical Code, CSA C22.1 Parte 1. • Los quemadores pueden encenderse manualmente durante una interrupción del suministro perilla hasta LITE (encendido). Tenga cuidado al encender los quemadores en forma manual. • No deje artículos que interesan los niños en los - Frigidaire GLGC30S9EQ | Installation Instructions - Page 12
con este espacio, se puede disminuir el peligro instalando una cubierta de cocina que se extienda horizontalmente en 5" (12.7 cm) mínimo por sobre la parte inferior delantera en los armarios. No es posible utilisar cajones con esta parrilla de cocinar porqué la caja de empalme se extiende de 35/32 - Frigidaire GLGC30S9EQ | Installation Instructions - Page 13
) Máx. 6½" 5" (13.5 cm) (12.7 cm) Mín. Unión Unión Unión 120V/60Hz Toma de corriente a tierra regulador de presión 4" (10.2cm) Lado derecho del armario Válvula de cierre manual (Debe de ser accessible para el funciona-miento de la válvula de cierre) Figura 3 13 - Frigidaire GLGC30S9EQ | Installation Instructions - Page 14
de cocinar instalada directamente sobre el aparato, un máximo de 5" (12.7 cm) está permitido) ** Un minimo de 32" (81.3 cm) desde la parte superior del armario hasta la parte superior de las ruedas debe de ser mantenido. Tamaño del horno 30" (76.2 cm) 27" (68.6 cm) DIMENSIONES DEL HUECO (pulgadas - Frigidaire GLGC30S9EQ | Installation Instructions - Page 15
de orejas debe entonces de pasar a través del soporte y hasta la parte de abajo del mostrador. Apriételo hasta que el aparato se quede ajustado. propano, use las piezas con orificios fijados provitos en el paquete del manual de instrucciones para la instalación en el paquete escrito "PARA LA - Frigidaire GLGC30S9EQ | Installation Instructions - Page 16
psig (3.5 kPa o 14" colomna de agua). Aparte la cocina del sistema de tubería del suministro de gas cierrando su válvula de cierre individual manual, durante cualquier ensayo de presión del systema de suministro de gas en ensayos iguales o inferiores a 1/2 psig (3.5 kPa o 14" colomna de agua). 16 - Frigidaire GLGC30S9EQ | Installation Instructions - Page 17
debe verificar el enchufe de pared y el circuito para asegurar que el enchufe está conectado a tierra correctamente. Verifique la operación Refiera al Manual del Usuario que viene con la plancha de cocinar para las instrucciones de funcionamiento y el mantenimiento y la limpieza de su plancha de - Frigidaire GLGC30S9EQ | Installation Instructions - Page 18
mero o letra del lote que se encuentran en la placa, en todo pedido de partes o solicitud de información acerca de su plancha de cocinar. La placa de nú llamar al servicio Lea la sección Lista de Control de Averías en su Manual del Usuario. Esto le podrá ahorrar tiempo y gastos. Esta lista incluye - Frigidaire GLGC30S9EQ | Installation Instructions - Page 19
sous le comptoir) UN INSTALLATEUR QUALIFIÉ DOIT EFFECTUER L'INSTALLATION ET LE SERVICE IMPORTANT: CONSERVEZ CES INSTRUCTIONS POUR LES INSPECTEURS LOCAUX. LISEZ CES INSTRUCTIONS ET CONSERVEZ-LES POUR RÉFÉRENCES ULTÉRIEURES. Si les instructions de ce manuel ne sont pas suivies à la lettre, il pourrait - Frigidaire GLGC30S9EQ | Installation Instructions - Page 20
appareil devrait être réduite de 4% pour chaque 1000 pieds additionnel. Note importante au consommateur Conservez ces instructions avec le guide de l'utilisateur pour référence ultérieure. INSTRUCTIONS DE SÉCURITÉ IMPORTANTES Cet appareil doit être installé conformément aux règlements locaux, ou en - Frigidaire GLGC30S9EQ | Installation Instructions - Page 21
INSTRUCTIONS D'INSTALLATION POUR PLAQUE DE CUISSON À GAZ (Modèle pouvant être combiné à un four encastré électrique installé sous le comptoir) L'armoire supérieure ne doit pas - Frigidaire GLGC30S9EQ | Installation Instructions - Page 22
INSTRUCTIONS D'INSTALLATION POUR PLAQUE DE CUISSON À GAZ (Modèle pouvant être é de ¾" (1.9 cm) monté sur deux solives, dont l'arête est à égalité avec le coup-de-pied. Il doit supporter une charge de 150 livres (68 kg). Découper une ouverture dans le plancher en bois de 9" x 9" (22.9 cm X 22 - Frigidaire GLGC30S9EQ | Installation Instructions - Page 23
pouvoir être enlevée du comptoir pour réparation si nécessaire. Instructions de fixation Une fois l'appareil installé dans l'ouverture du Figure 5 CL de l'appareil Plaque de cuisson Joint d'étanchéité Comptoir Support de retenu Vis Figure 6 Pour la fixation, insérez l'équerre de fixation - Frigidaire GLGC30S9EQ | Installation Instructions - Page 24
l'enveloppe qui contient les orifices. Un installateur qualifié doit effectuer l'installation et le service, conformément aux instructions du fabricant et à tous les codes et règlements applicables. Si ces instructions ne sont pas suivies à la lettre, il pourrait en résulter de sérieuses blessures - Frigidaire GLGC30S9EQ | Installation Instructions - Page 25
pas de fuites. La vérification pour les fuites doit être faite selon les instructions du manufacturier. Après avoir raccordé l'alimentation en gaz à la plaque de la plaque de cuisson. Vérification du fonctionnement Référez-vous au Guide de l'utilisateur fourni avec votre appareil pour le mode de - Frigidaire GLGC30S9EQ | Installation Instructions - Page 26
du lot de la plaque signalétique de votre plaque de cuisson. Avant d'appeler le service d'entretien Consultez la liste des vérifications préventives et les instructions d'opération dans votre Guide de l'utilisateur. Vous sauverez probablement du temps et de l'argent. La liste contient les incidents - Frigidaire GLGC30S9EQ | Installation Instructions - Page 27
WIRING DIAGRAM - SCHÉMA DE CÂBLAGE - DIAGRAMA DE LA INSTALACIÓN ALÁMBRICA (30" Gas Cooktop - Table de cuisson à gaz 30" - Plancha de cocinar a gas modelos de 30 pulgadas) 27 - Frigidaire GLGC30S9EQ | Installation Instructions - Page 28
WIRING DIAGRAM - SCHÉMA DE CÂBLAGE - DIAGRAMA DE LA INSTALACIÓN ALÁMBRICA (36" Gas Cooktop - Table de cuisson à gaz 36" - Plancha de cocinar a gas modelos de 36 pulgadas) 28
-
 1
1 -
 2
2 -
 3
3 -
 4
4 -
 5
5 -
 6
6 -
 7
7 -
8
-
9
-
10
-
11
-
12
-
13
-
14
-
15
-
16
-
17
-
18
-
19
-
20
-
21
-
22
-
23
-
24
-
25
-
26
-
27
-
28
 |
 |

GAS COOKTOP INSTALLATION INSTRUCTIONS
(For 30" & 36" Models)
Gas Cooktop
Cutout Dimensions
Gas Cooktop
Dimensions
2½”
(6.4 cm)
2½”
(6.4 cm)
G
30”
(76.2 cm)
Min. *
H
A
B
C
D
E
F
INSTALLATION AND SERVICE MUST BE PERFORMED BY A QUALIFIED INSTALLER.
IMPORTANT: SAVE FOR LOCAL ELECTRICAL INSPECTOR'S USE.
READ AND SAVE THESE INSTRUCTIONS FOR FUTURE REFERENCE.
318201464 (0607) Rev. C
English - pages 1-9
Español - páginas 10-18
Français - pages 19-26
Wiring Diagram 27-28
If the information in this manual is not followed exactly, a fire or explosion may result
causing property damage, personal injury or death.
FOR YOUR SAFETY:
—
Do not store or use gasoline or other flammable vapors and liquids in
the vicinity of this or any other appliance.
—
WHAT TO DO IF YOU SMELL GAS:
•
Do not try to light any appliance.
•
Do not touch any electrical switch; do not use any phone in your building.
•
Immediately call your gas supplier from a neighbor's phone.
Follow the gas supplier's instructions.
•
If you cannot reach your gas supplier, call the fire department.
—
Installation and service must be performed by a qualified installer,
service agency or the gas supplier.
All dimensions are stated in inches and (cm).
Dimension
H
includes a 5" (12.7 cm) space underneath the cooktop for connection to gas supply line.
NOTE: Wiring diagrams for this cooktop are enclosed in this booklet
Figure 1
Printed in United States
PRODUCT DIMENSIONS
MODEL
A
. WIDTH
B
. DEPTH
C
. HEIGHT
D
. BOX WIDTH
E
. BOX DEPTH
30" Gas Cooktop
30
(76.2)
21¾ (55.2)
4¼
(10.8)
27 (68.6)
19
(48.3)
36" Gas Cooktop
36
(91.4)
21¾ (55.2)
4¼
(10.8)
33¼ (84.5)
19 (48.3)
CUTOUT DIMENSIONS
F
. WIDTH
G
. DEPTH
H
. HEIGHT BELOW
MODEL
MINIMUM
MAXIMUM
MINIMUM
MAXIMUM
COOKTOP
30" Gas Cooktop
27¼ (69.2)
28½ (72.4)
19
1
/
8
(48.6)
19¾
(50.2)
8 (20.3)
36" Gas Cooktop
33
7
/
8
(86.1)
34¼ (87)
19
1
/
8
(48.6)
19¾
(50.2)
8 (20.3)